
Lee has made numerous upgrades to our Open Range 386-FLR Fifth Wheel and I wanted him to share them here. Some are simple and others are more complicated but they have all resulted in an easier, more comfortable living environment. Of course your mileage may vary and as with all repairs proceed with caution.
In the cases where there are posts I have linked them here. If you don’t want to read the whole post just scroll to the pictures.
Replacing Slide Floor
Mor-Ryde Suspension and Disc Brakes
Furnace Repair
Replacing AC Units
Replacing Front Jacks
Tires and TPMS (Tire Pressure Monitoring System)
Getting the RV Structure Welded
Replacing Truck Back Seat
Broken Shackle
Replacing the Belly Pan
Fresh Water Tank Siphoning
Why You Shouldn’t Leave your Tanks Open
Holding Tanks Treatments
Using Blueboy for Black and Grey Tasks
See Level System
Laptop Mount in Truck
Getting the RV Weighed
Winegard Cellular and WiFi booster
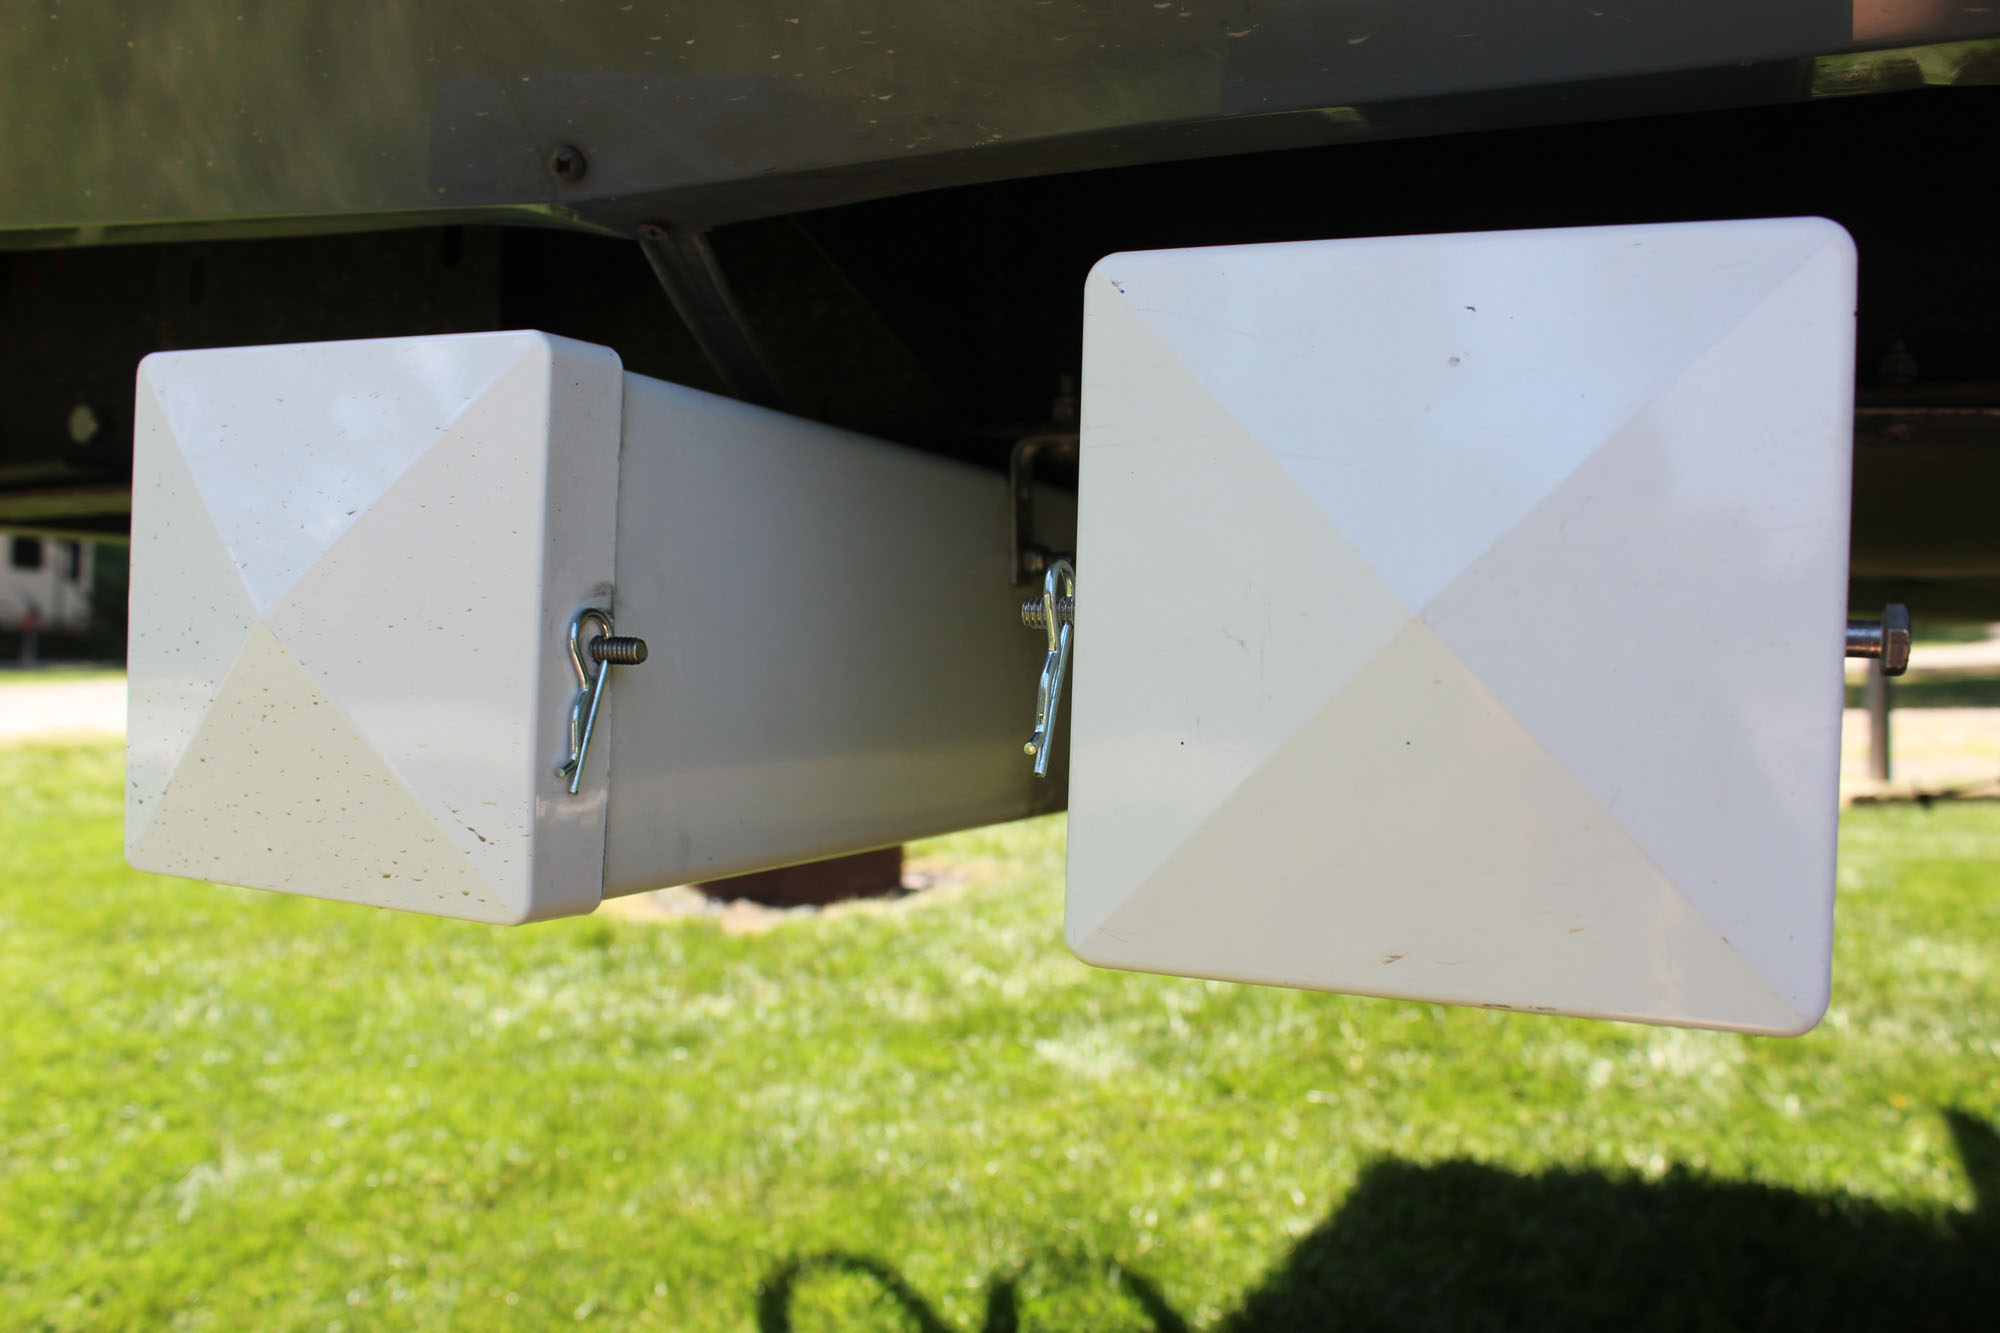
Sewer Hose Storage
What to do with sewer hose is a major problem in all fifth wheels. They take up a lot of space and are kind of gross. I really hated the smell that was always present in the basement as a result, even if I rinsed the hoses. Our rig does not have a rear bumper, which can be used to hold the hoses, and there really isn’t a way to attach a rear bumper, so I came up with another solution.
I bought an 8′ vinyl fence post sleeve and mounted that underneath the rig. (I used 5″ sleeves, which allow for plenty of room for the ears and tabs and other bits that stick out from the sewer fittings. They are available at Lowe’s and Home Depot. In the store they have white, but other colors can be ordered. Or you can sand off the glossy finish and prime it and paint it any color you want. I just went with white because it blends pretty well with our rig colors and didn’t require a special order or any extra work. I went with 8′ length because mounting it to the frame was easiest that way. It was incredibly easy to do, and didn’t cost very much at all. I did need to drill through the frame, and I used “L” brackets to hang it, and stainless steel hardware. Be careful when you’re laying underneath and drilling. The little curls of metal that come off the drill bit are really hot, and will burn you when they fall on your skin. Ask me how I know.


I also purchased the caps they sell for the fence posts. To hold the caps on I used 1/4 x 6″ stainless steel bolts and since I don’t travel with a drill press I had a machine shop drill holes so I could use hairpin cotter pins to keep the bolts on. This makes it really quick and easy to put on and take off the covers.

To allow for the sewer elbow fitting I cut a little section of the sleeve on the rear side to allow it to stick out. I accidentally cut it a tad large so I use a ball bungee cord just in case the hose wants to slide out and escape on the highway.

I liked this solution so much that I added a second sleeve, for my hose extension. That didn’t fill the tube, so I also store a LOT of other stuff in there. You’d be surprised at how much you can fit in a 5″ x 5″ tube. Tiki torch poles, fire poker, solar panel lift rods, all kinds of stuff.
Speaking of Poop…
I am a big fan of the Flush King

More About Poop…
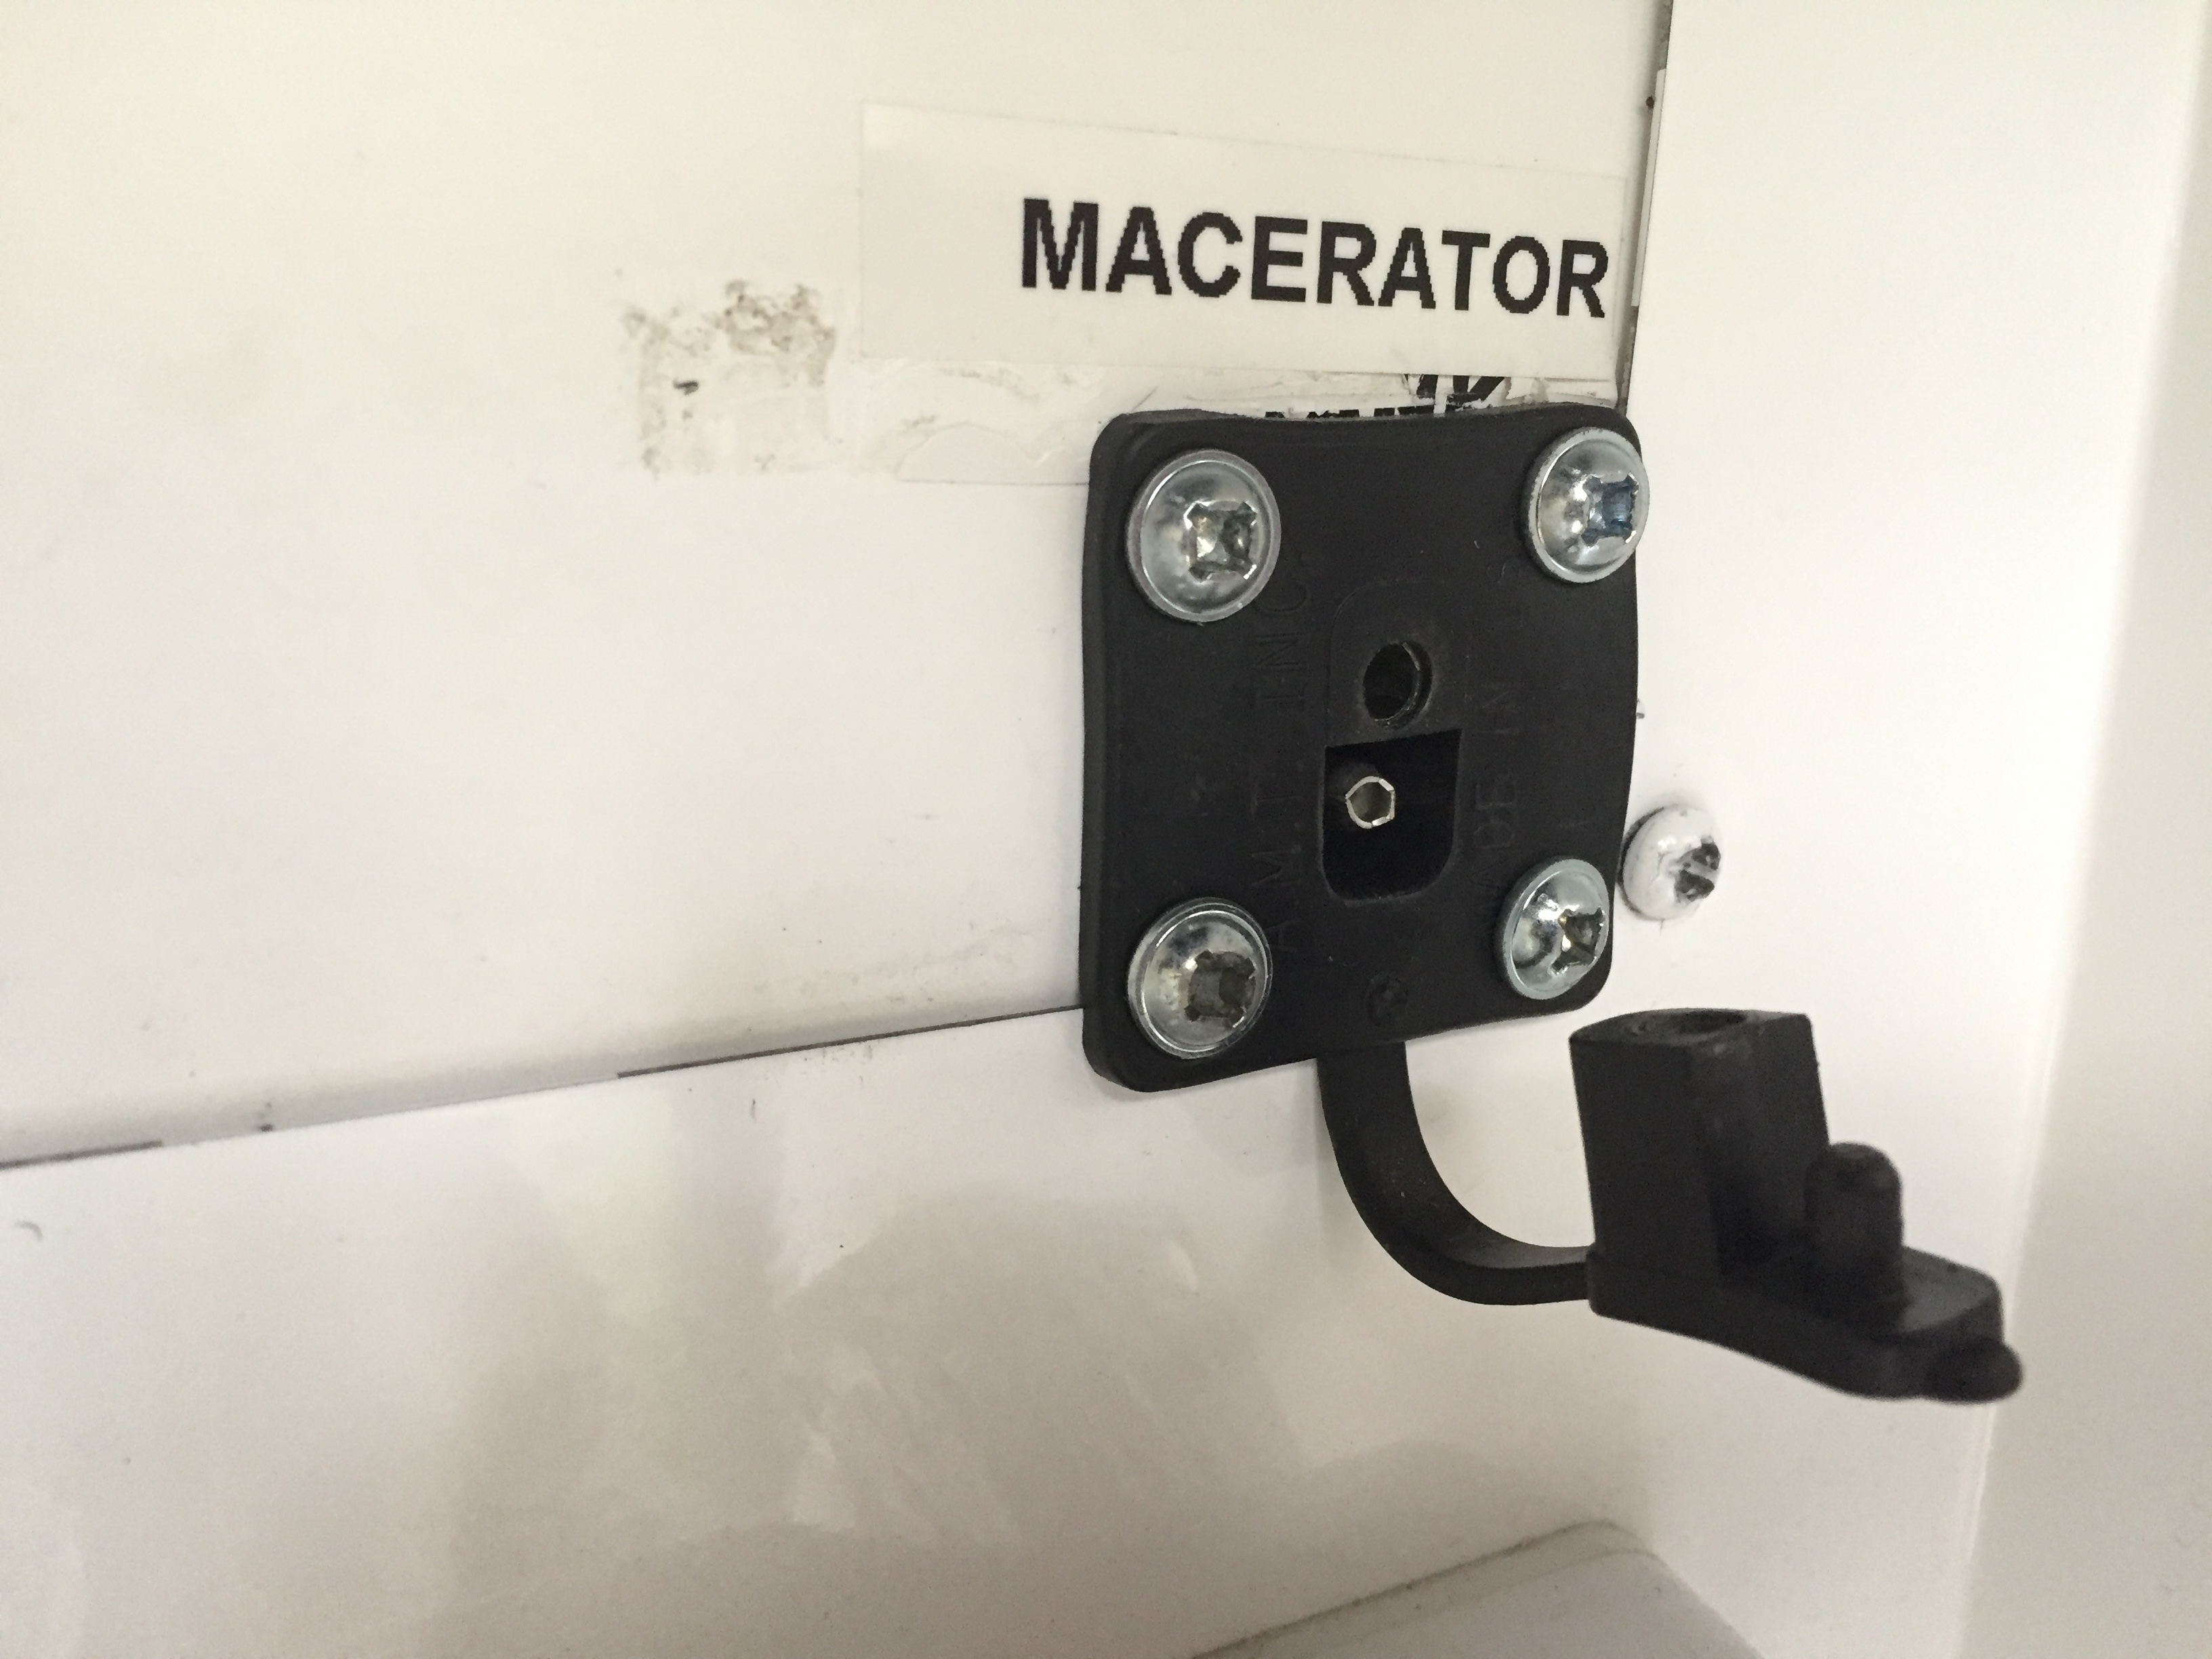
Our rig originally had long cable remote valve handles in the convenience center for the gray and black tanks.

The cables were too long and not routed properly, and kept binding up. Eventually they both broke. After the second one broke, I replaced both with 12 volt electric waste valves

And rinse….
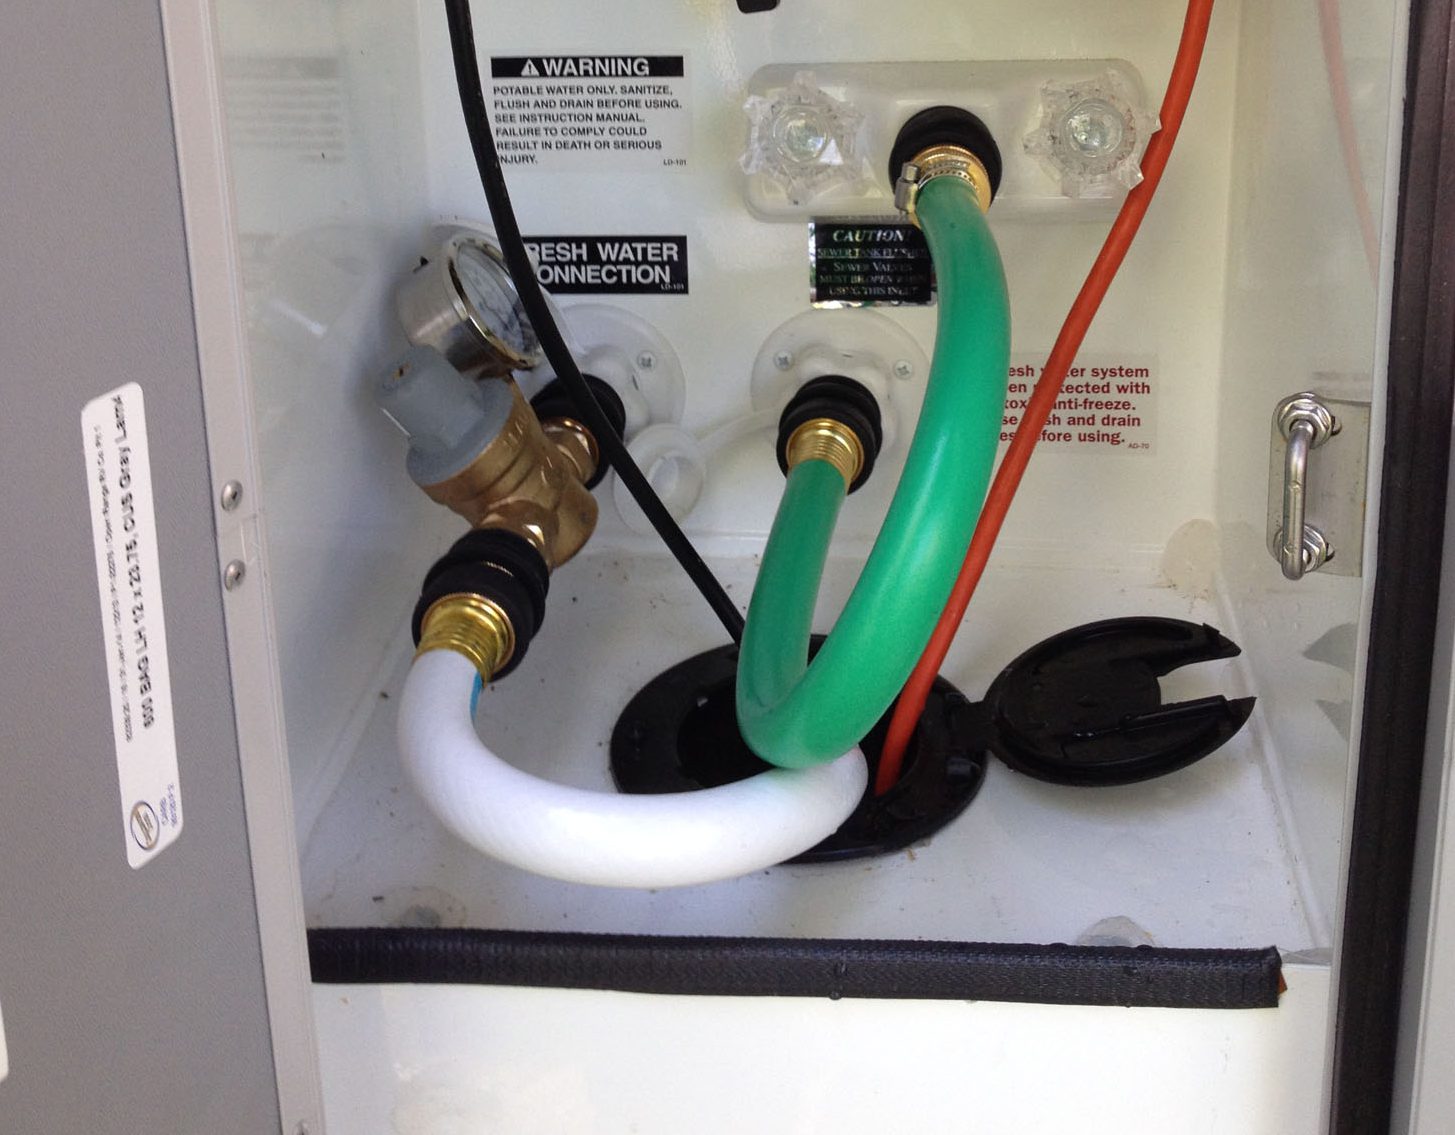
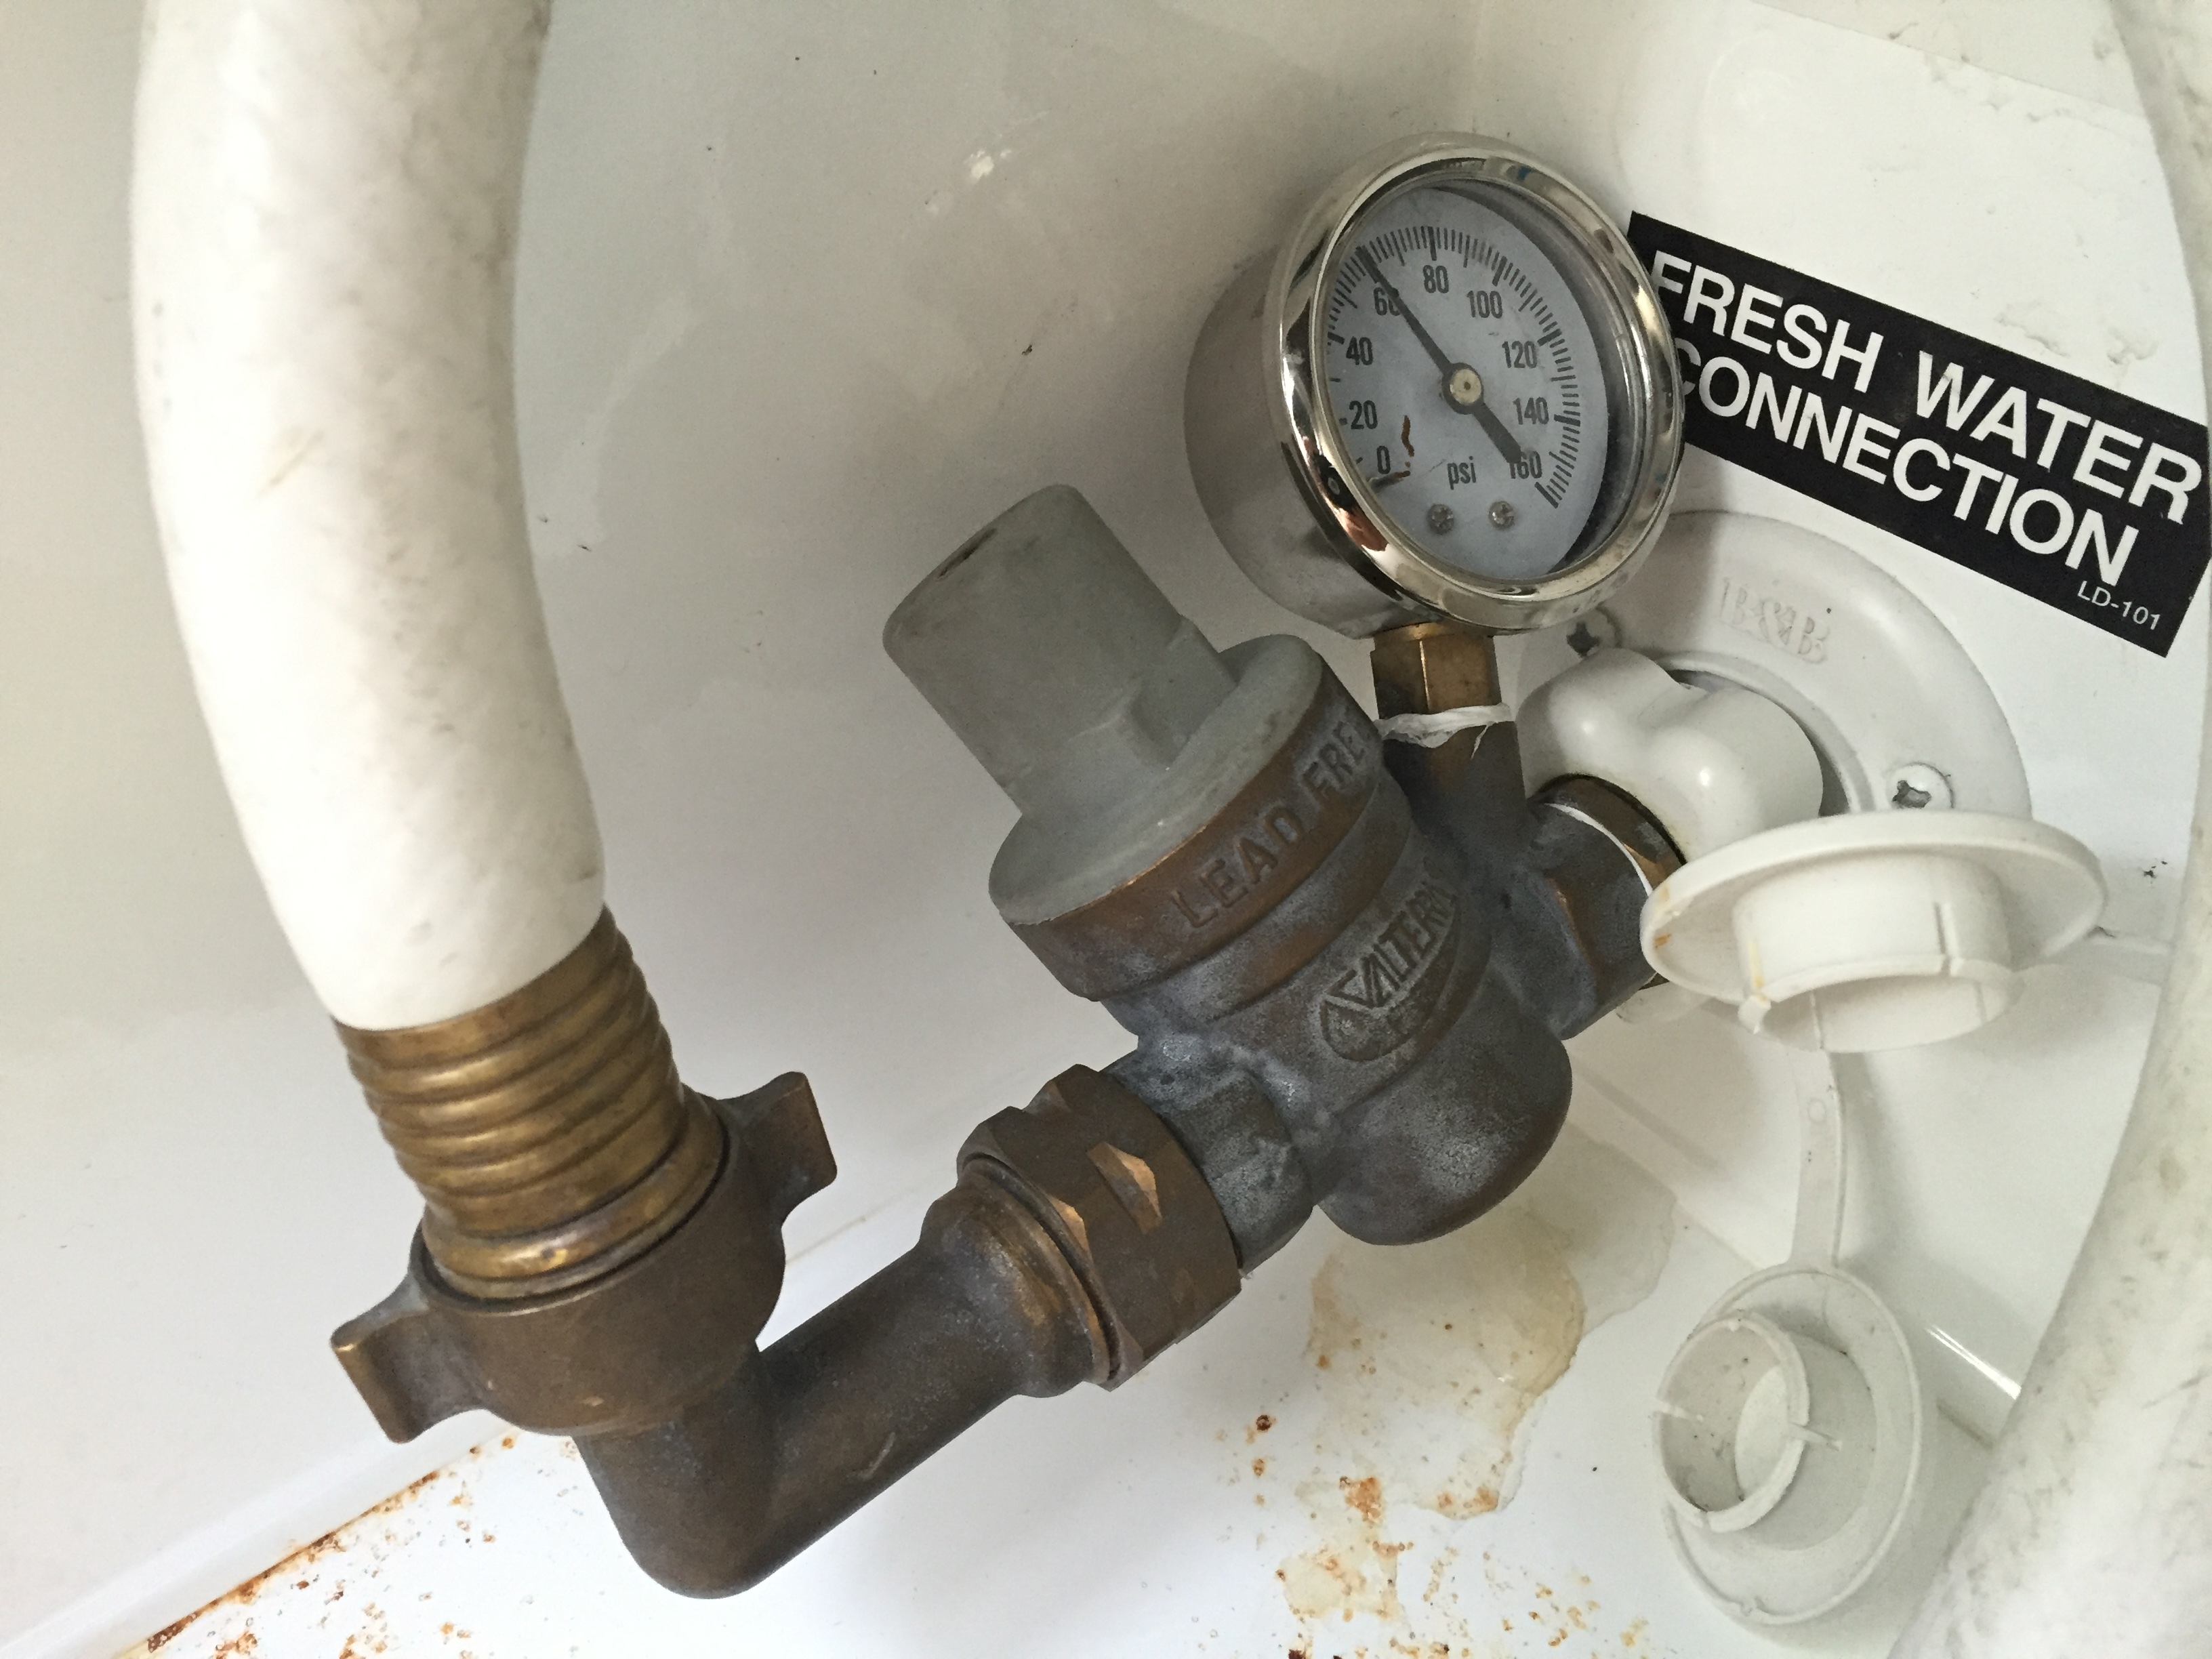
Like most people we have what is referred to as an “outdoor shower” on our rig, but in reality it’s just a hot and cold tap and a place to hook up a hose. The hose outlet is directly above the hose inlet for our black tank rinse connection, and since we never ever use the “outdoor shower” I made a short hose turnaround and just leave it permanently connected. Now when I want to rinse the black tank, all I have to do is turn on the water valve. As an added bonus, I have both hot and cold water to use. Hot water is much better for rinsing the black tank than cold. I also use an adjustable water pressure regulator
The Last Thing I Have To Say About Poop…
When we’re boondocking we use a 35 gallon Smart Tote
That worked well, but created a problem of it’s own. There’s a little pop-up indicator, sort of like what’s on a turkey, that floats and lets you know when the tank is full. Of course, at 12 GPM, once that thing pops up, by the time I would get back to the power connector there was already some waste water bubbling up out of the portable tank. I found the perfect solution, a Fimco 12v remote switch

Bike Rack
Our rig did not come with any type of hitch receiver or bumper and there was no way to mount a standard bike rack on the back of it. I had a friend who owns a machine shop fabricate a solution. First they bolted a cross beam between the two frame beams and welded a small receiver to it.
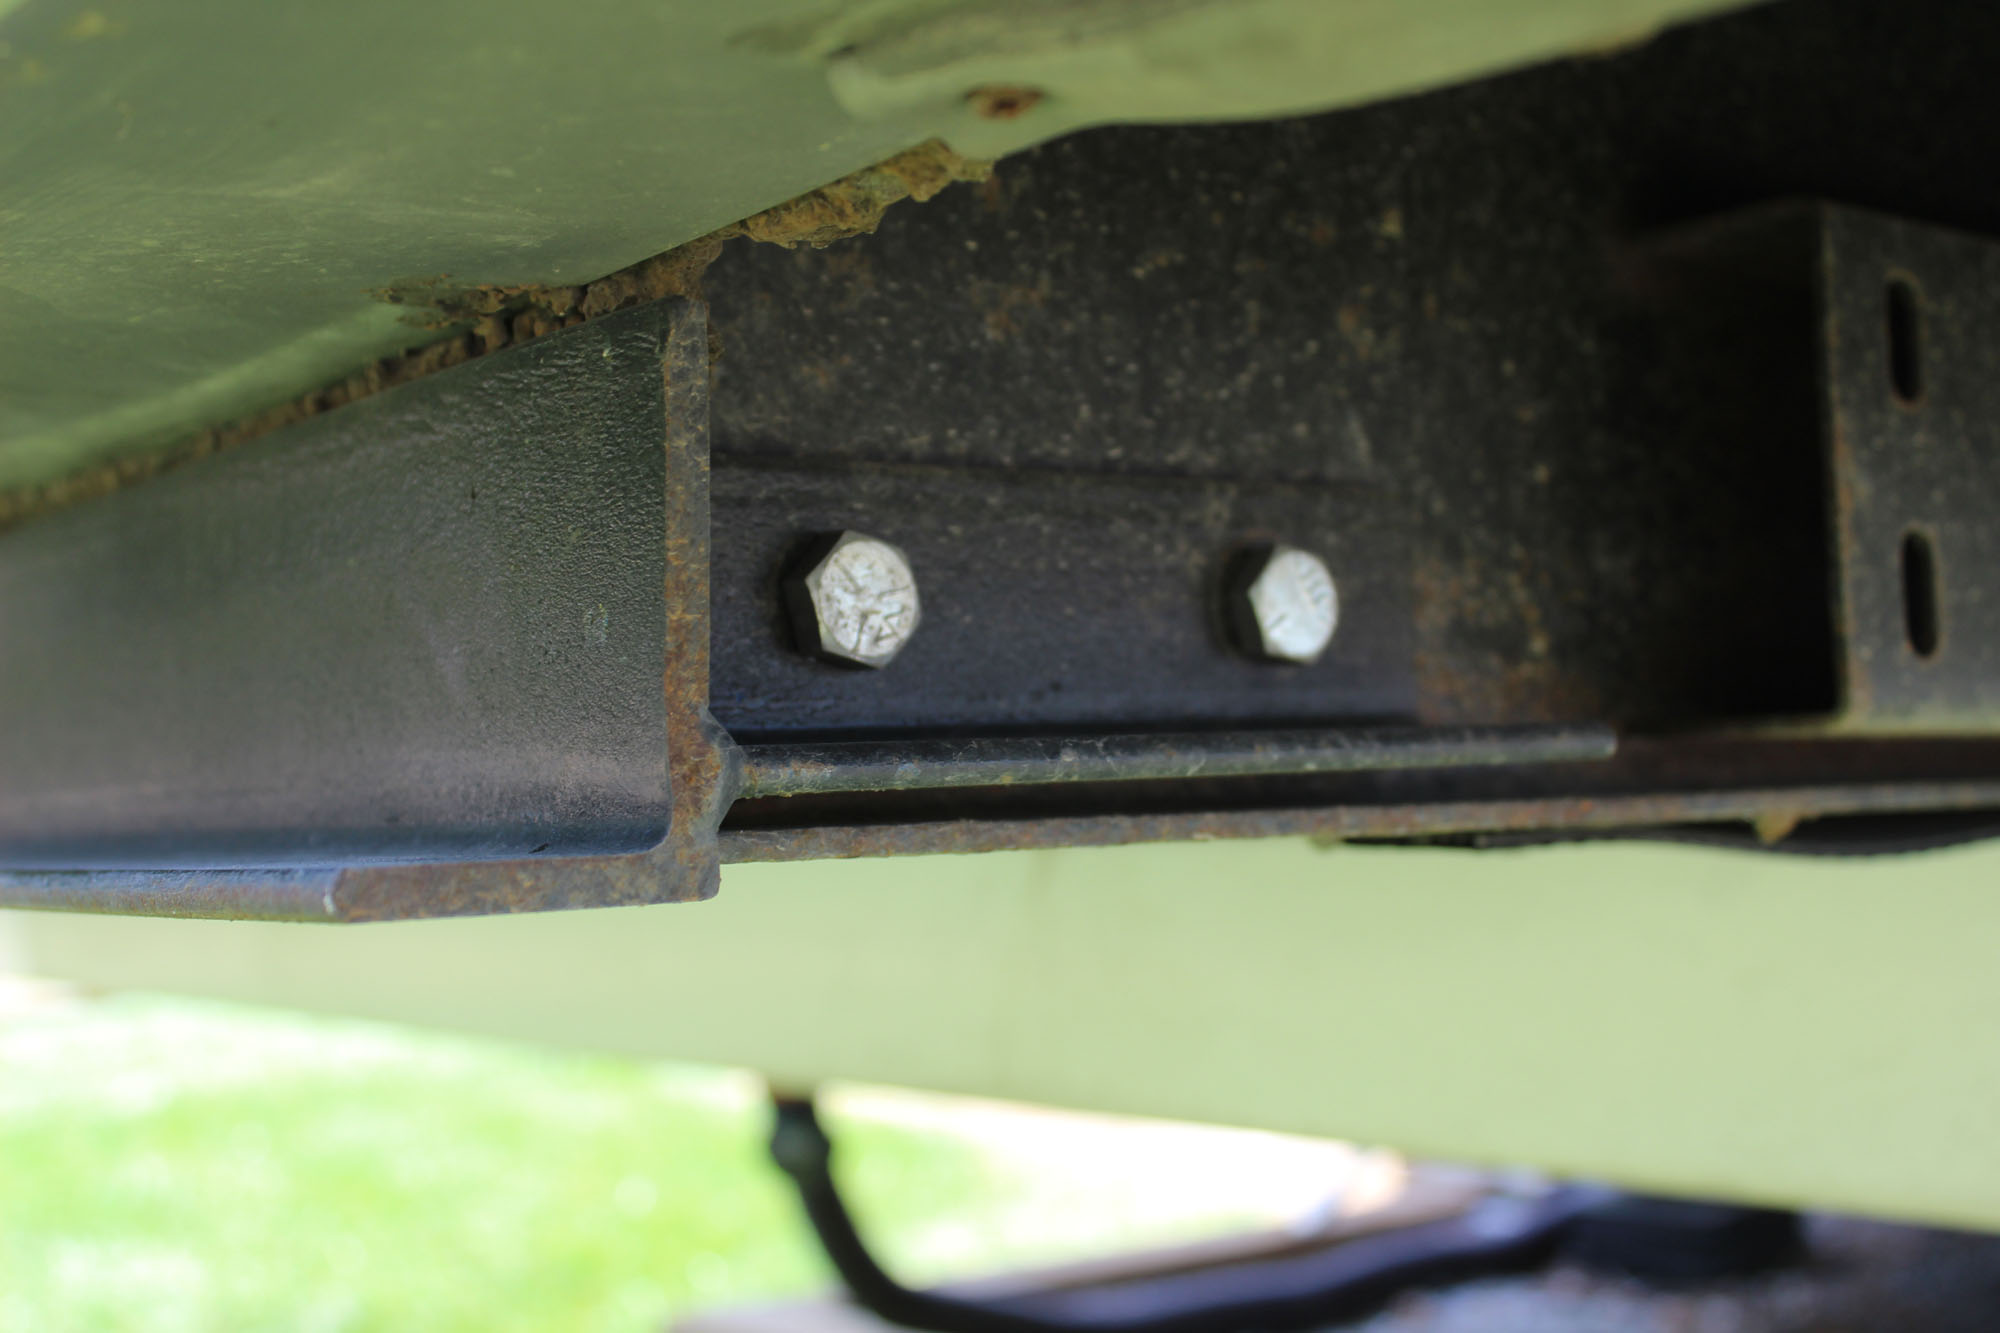
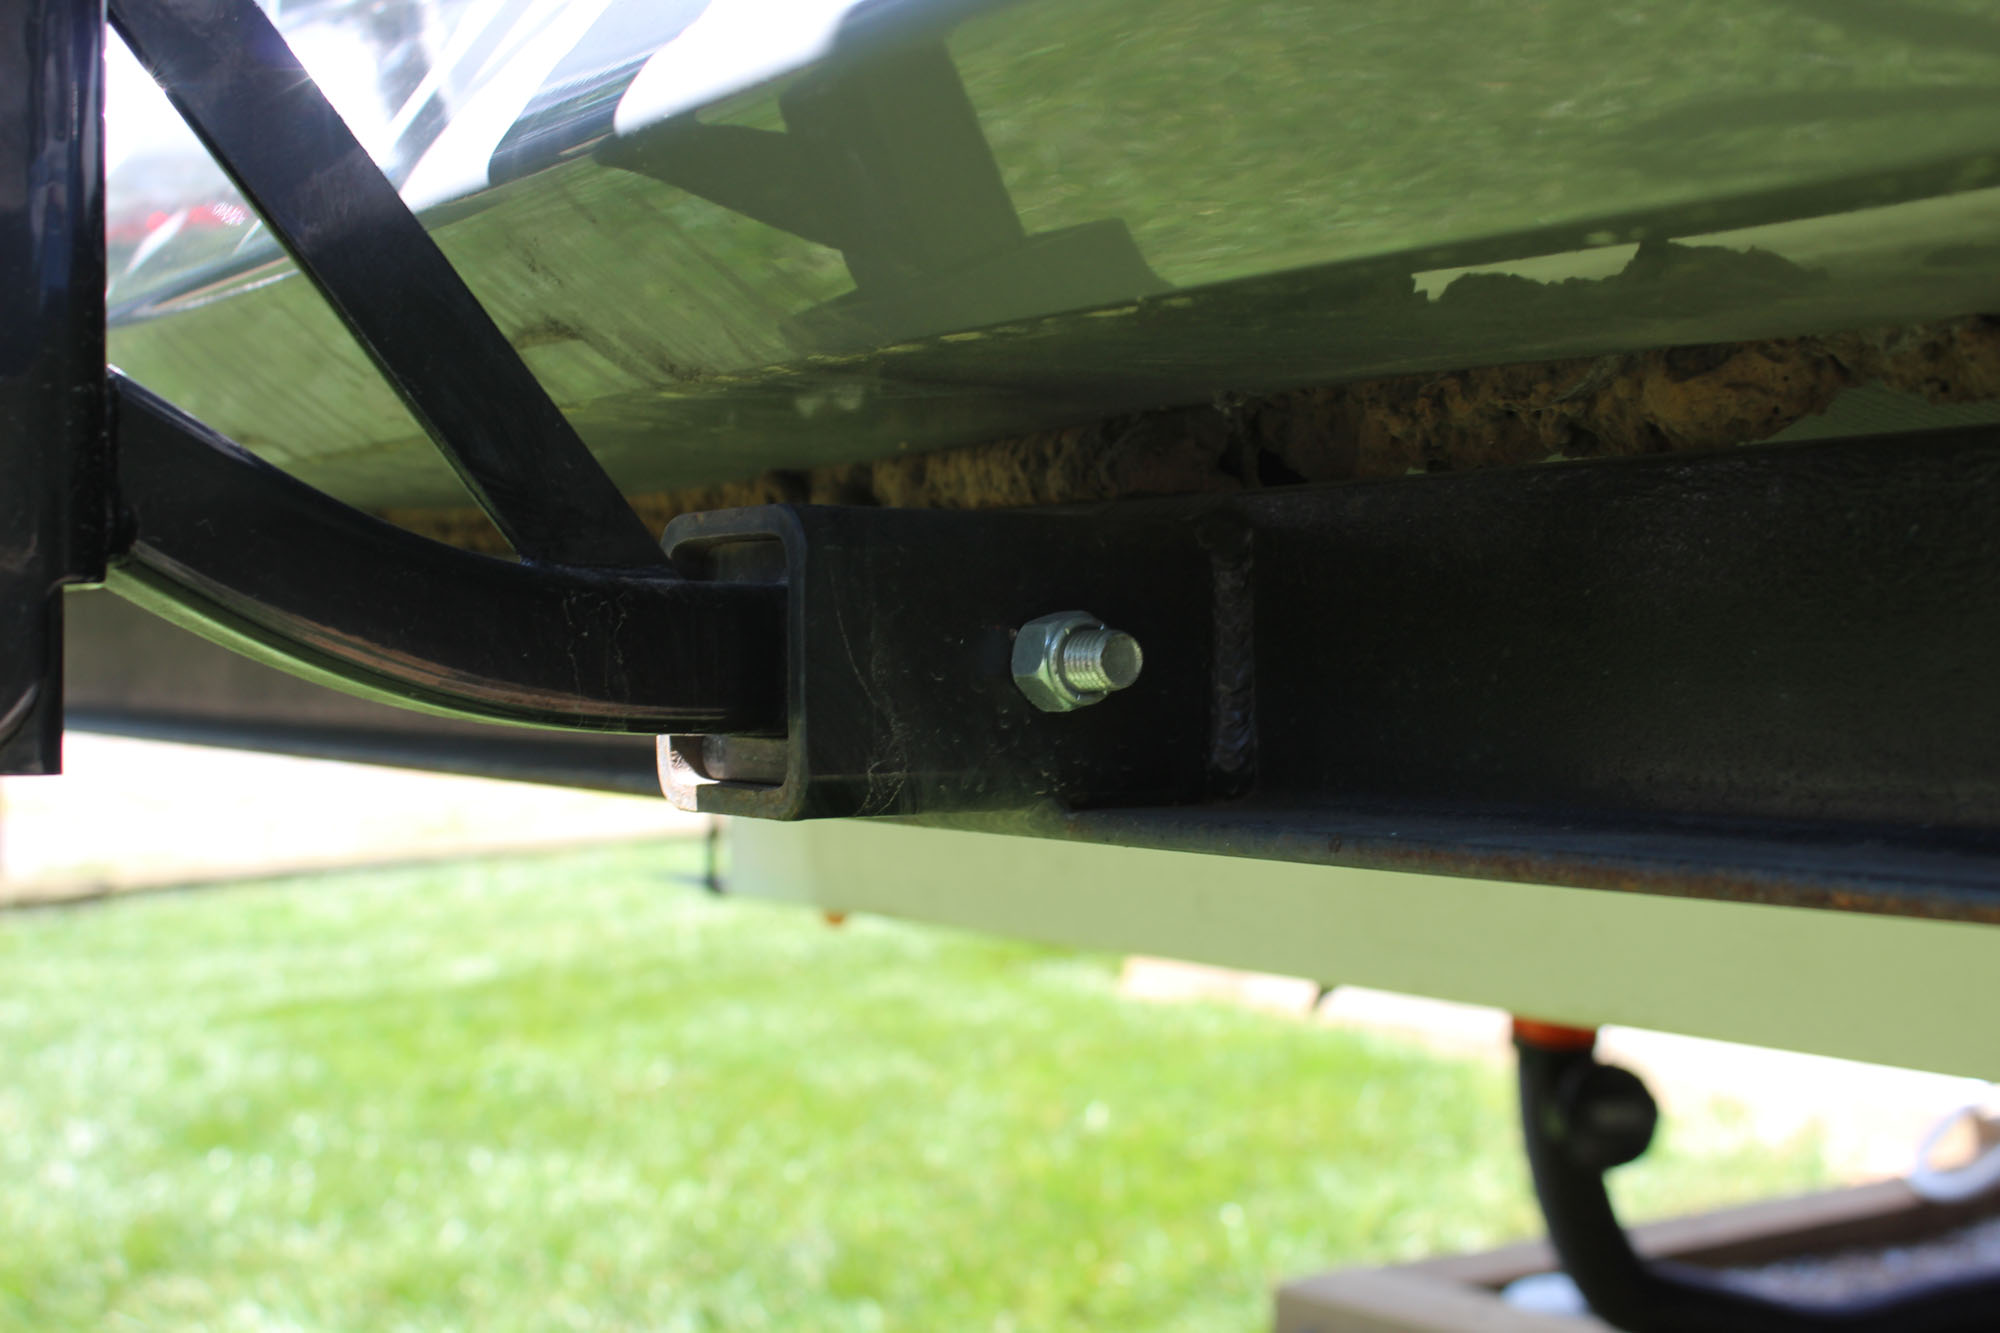
Once the receiver was there they were able to mount a standard double bike rack to it. It had a lot of “play” so they stabilized it by through-bolting it to the back of the rig, along with a thick rubber seal and cushion.
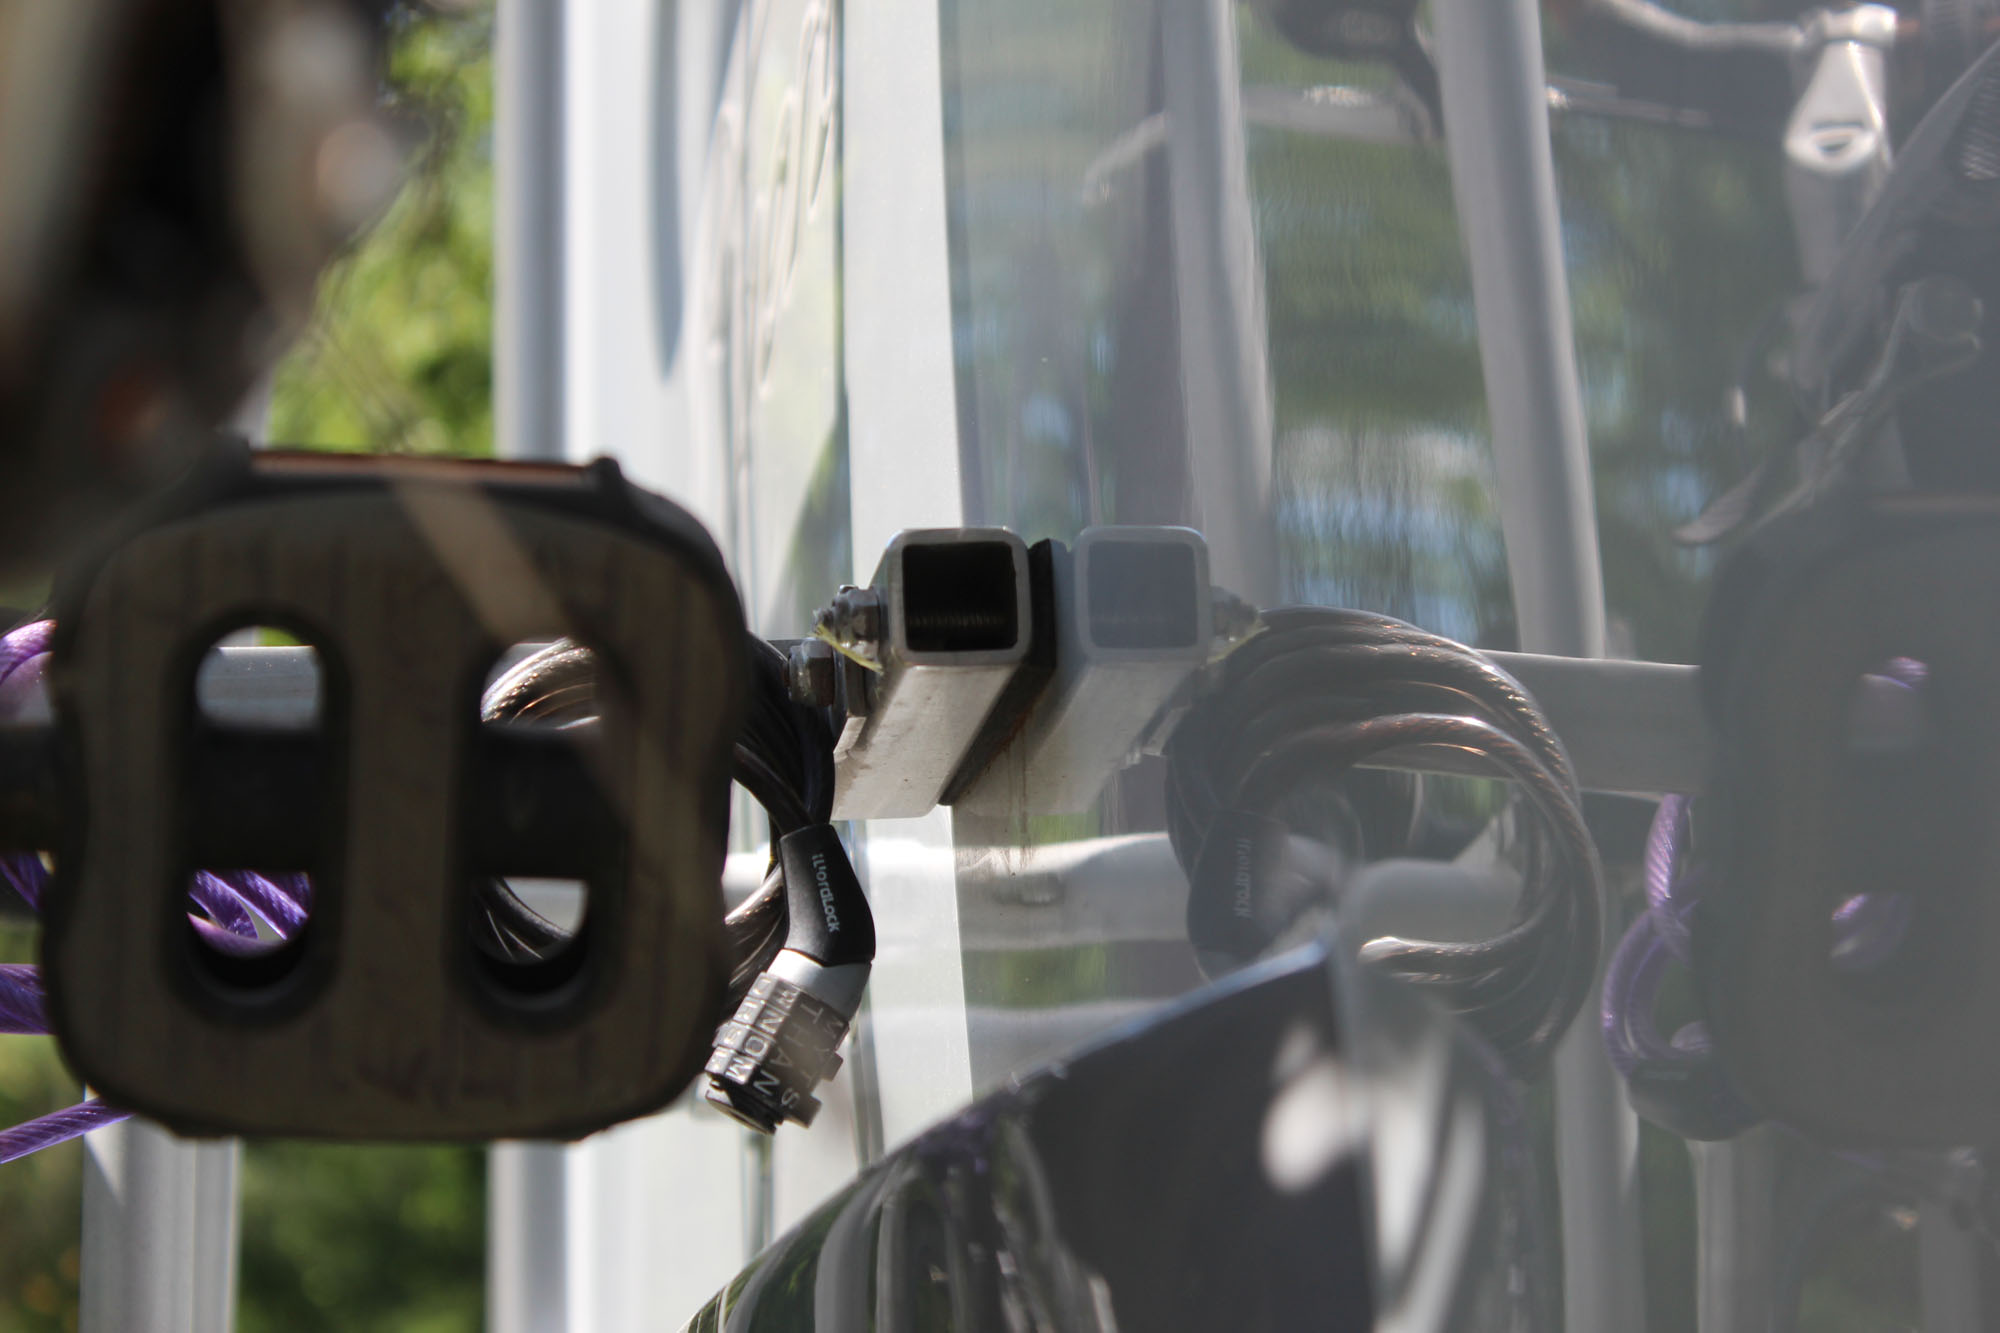
As an added bonus, when the bikes aren’t on it, the arms fold down flat so I don’t smack myself in the head when I walk past it.

Vinyl Lettering
I added vinyl lettering to the outside of our rig with our favorite song quote on one slideout and the name of our website on the front and the back of the rig. I ordered the vinyl lettering from a local sign company and then carefully applied it. Tracy loves having the blog name right on the rig.

Wasted Space On Storage Doors
I hate wasted space, and our storage compartments each have a little trough in front of the doors, which is nice, but it means that you can’t really have things on the storage area floor that goes right to the door. When the doors are closed, there’s a LOT of space that can’t be used.
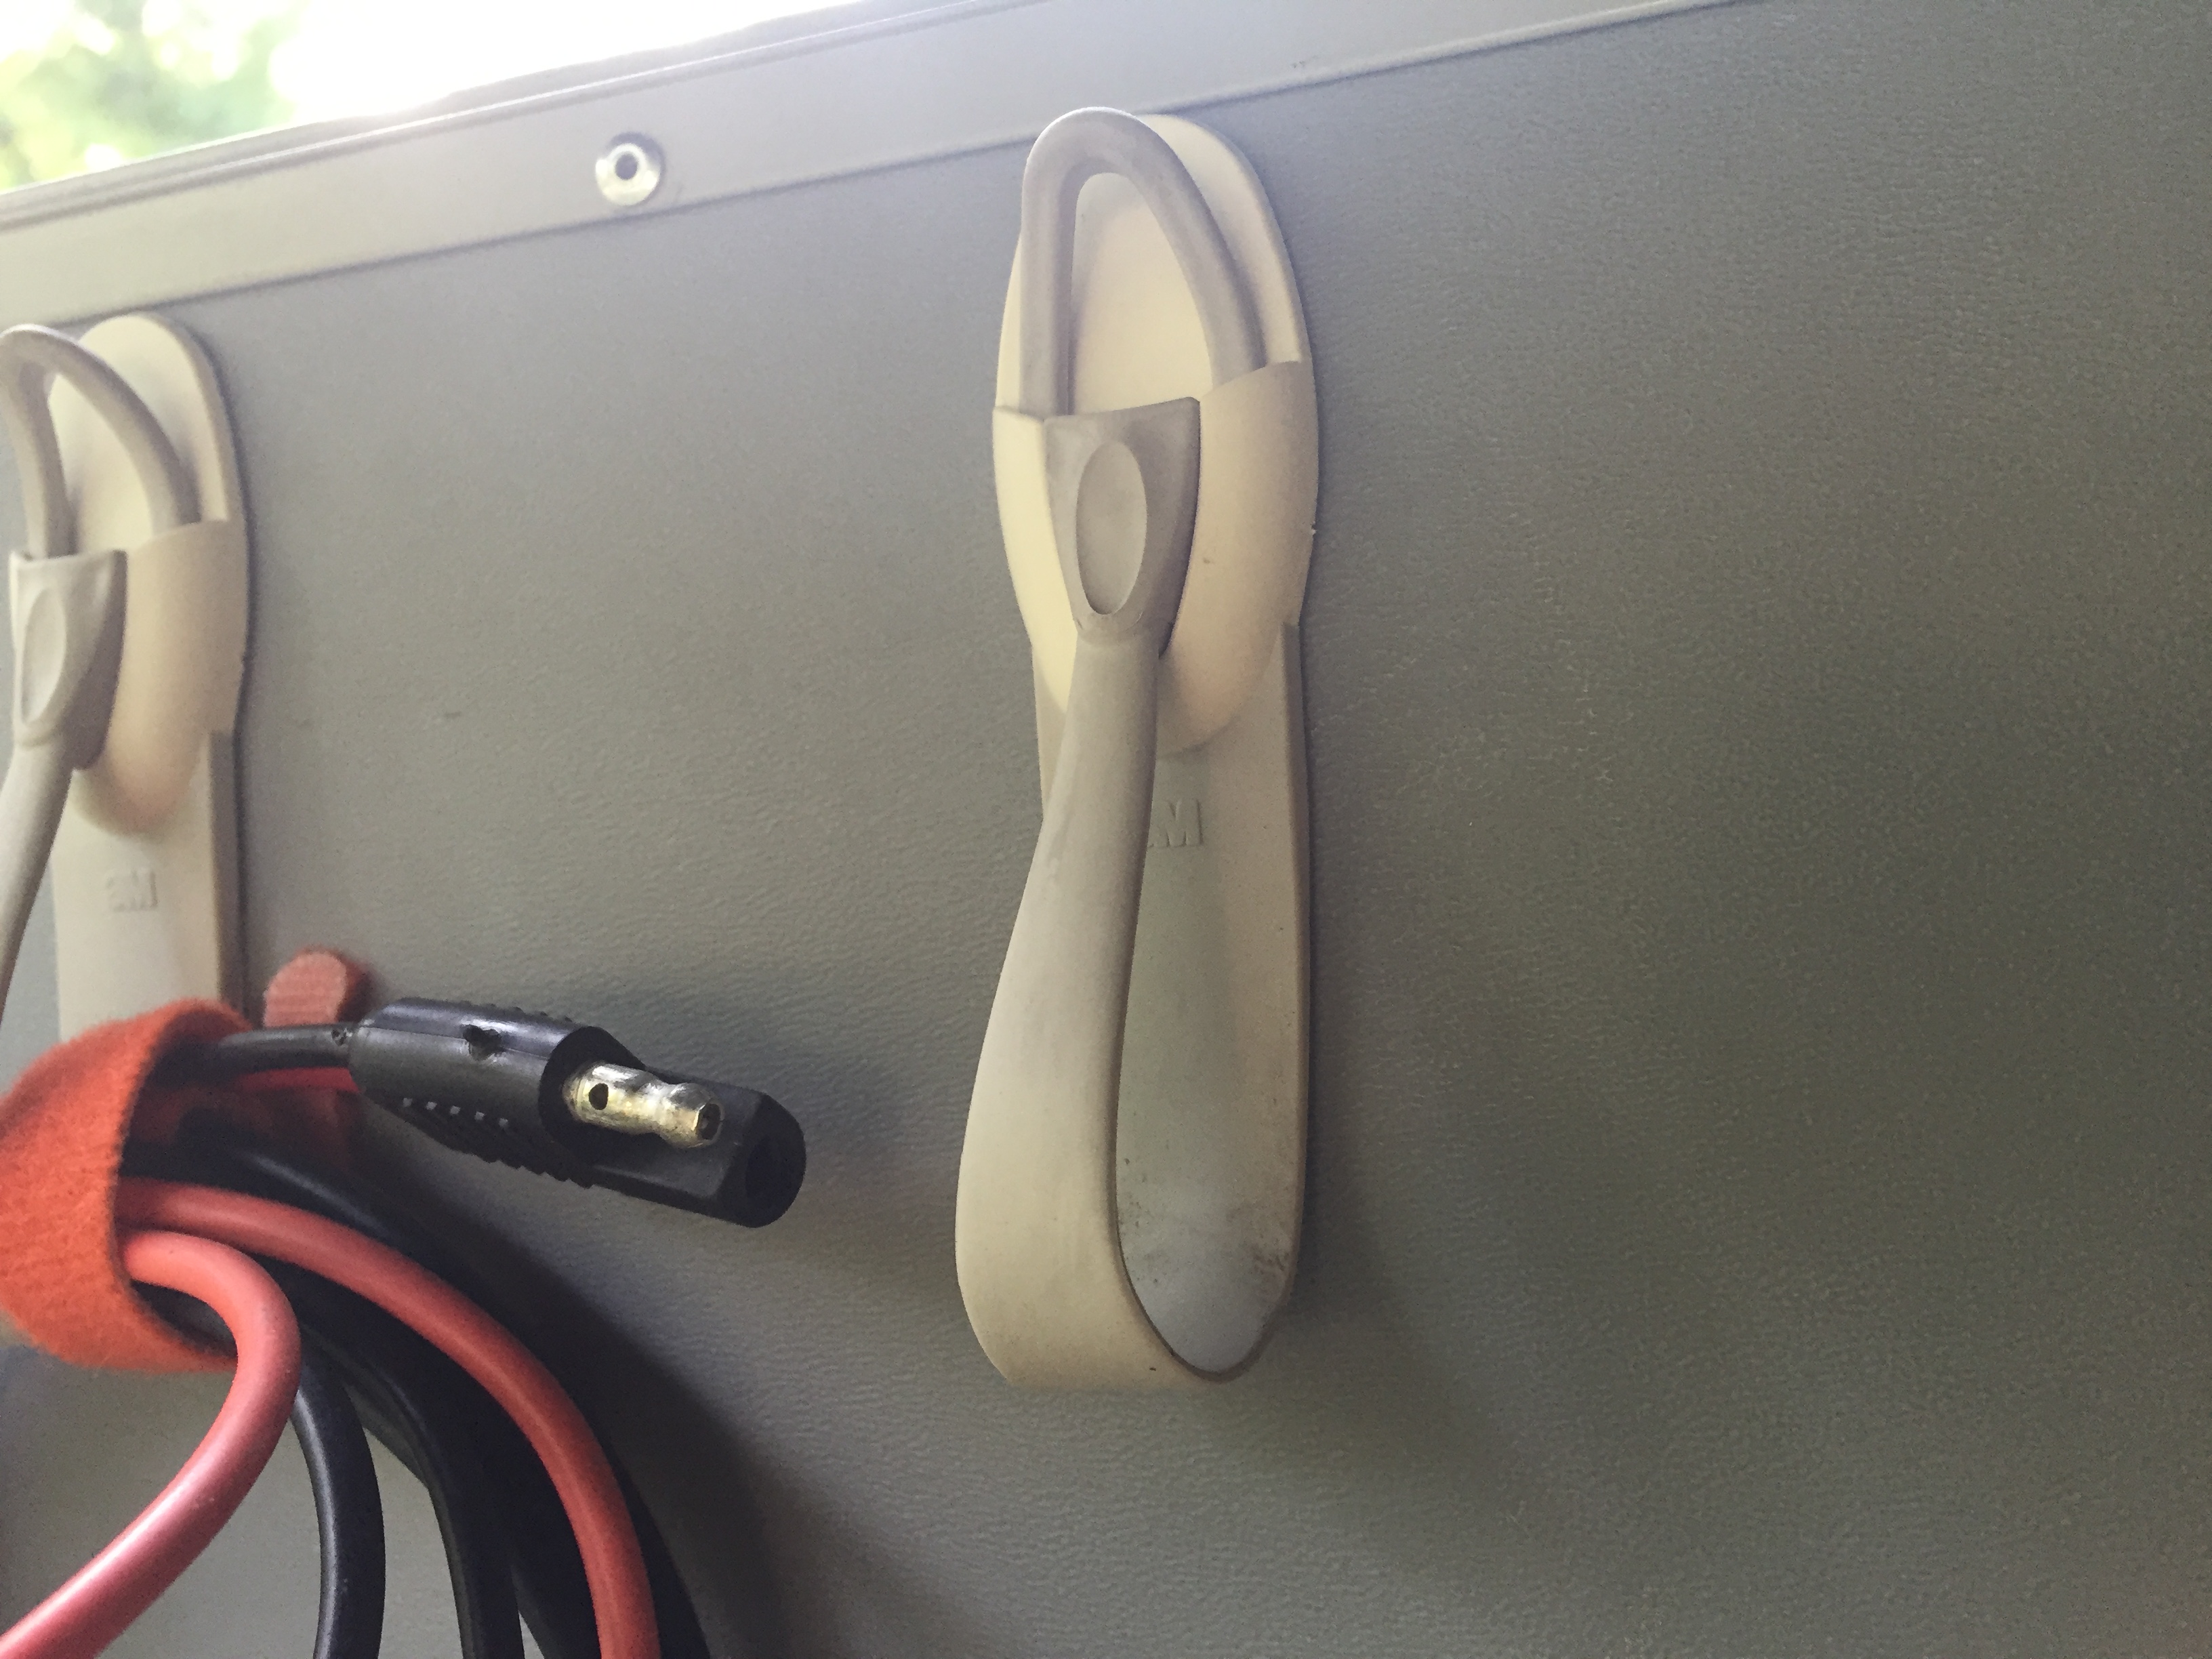
I thought about adding some shallow shelves or boxes to the inside of our compartment doors, but they are just styrofoam sandwiched between plastic sheets and surrounded with a “U channel” edge. At some point I will want to replace them with plywood doors, so I can hang shelves and/or caddies, but for now I still want to use that space. I used 3M Command hangers for a variety of purposes. Plus this is the first door that I open when we arrive somewhere, so everything I need to get power, water, and sewer hooked up in less than 10 minutes is right here. I’ve got an alcohol sprayer to clean off water connections, hand sanitizer, heavy duty hand cleaner, all of my power adaptors, sewer fitting wrenches

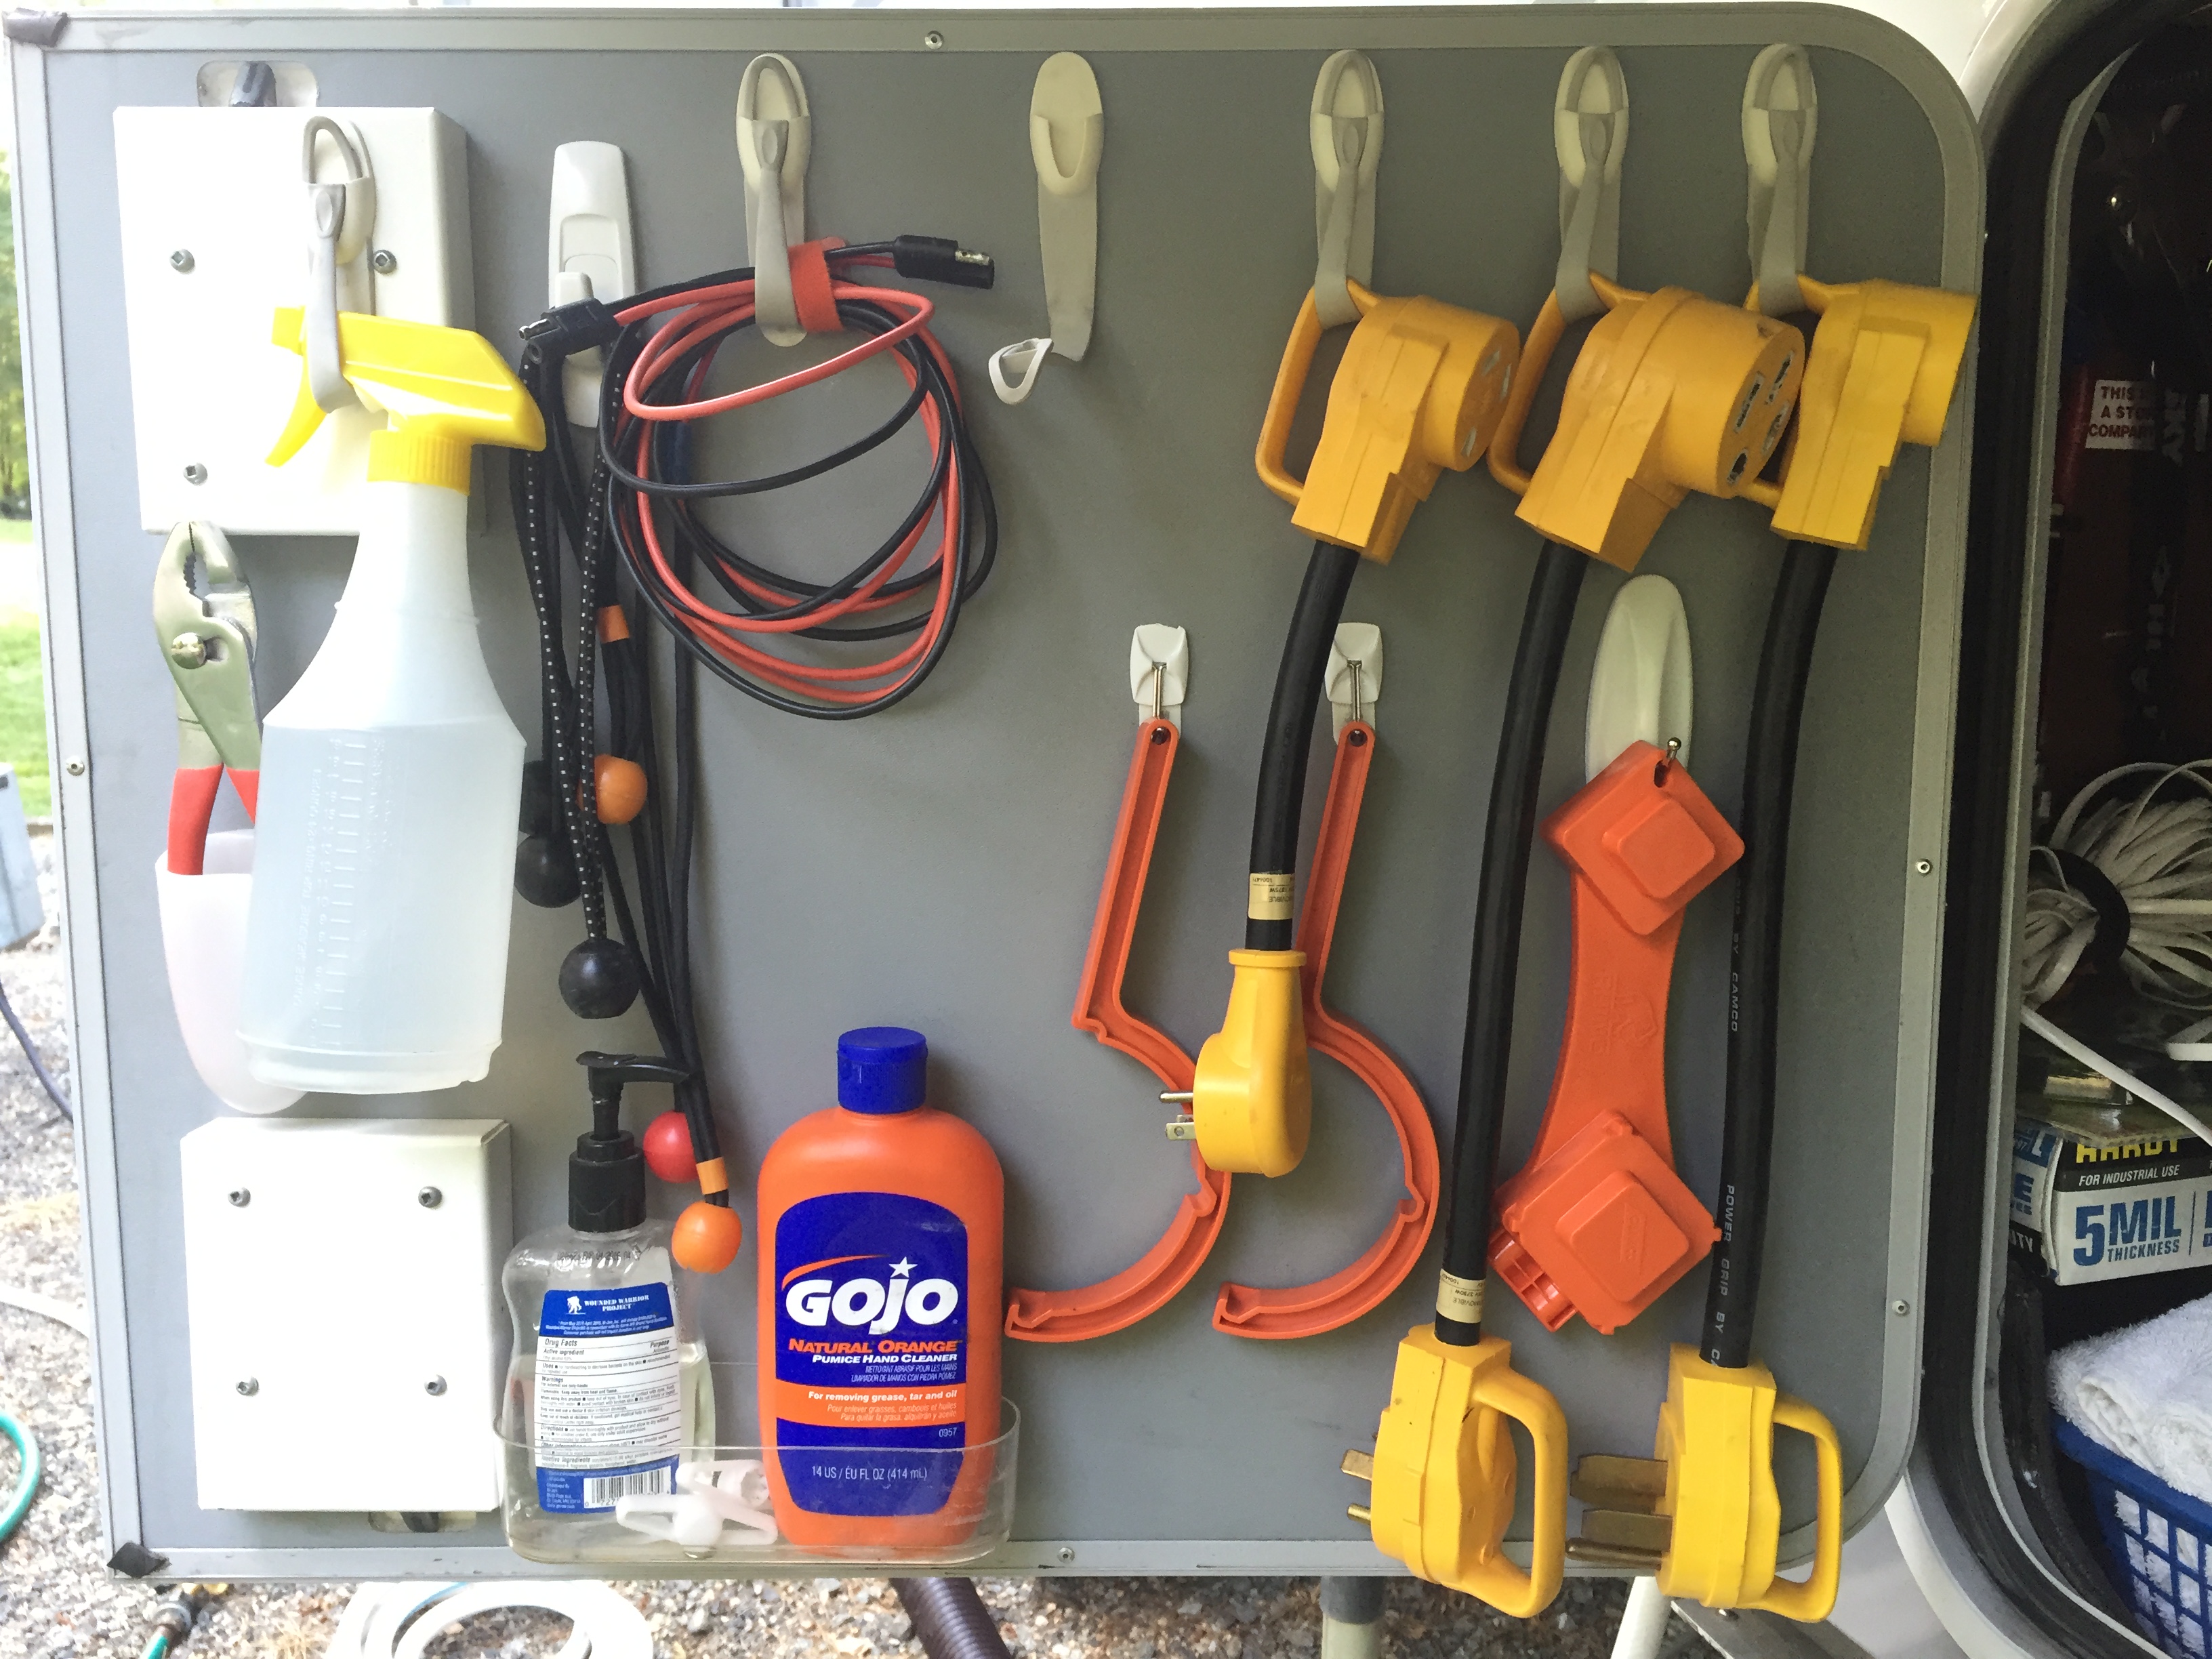
These are fantastic cable hangers.
On the opposite door are a few extra extension cords and the antennae cable for our cellular booster.

Speaking Of Wasted Space….
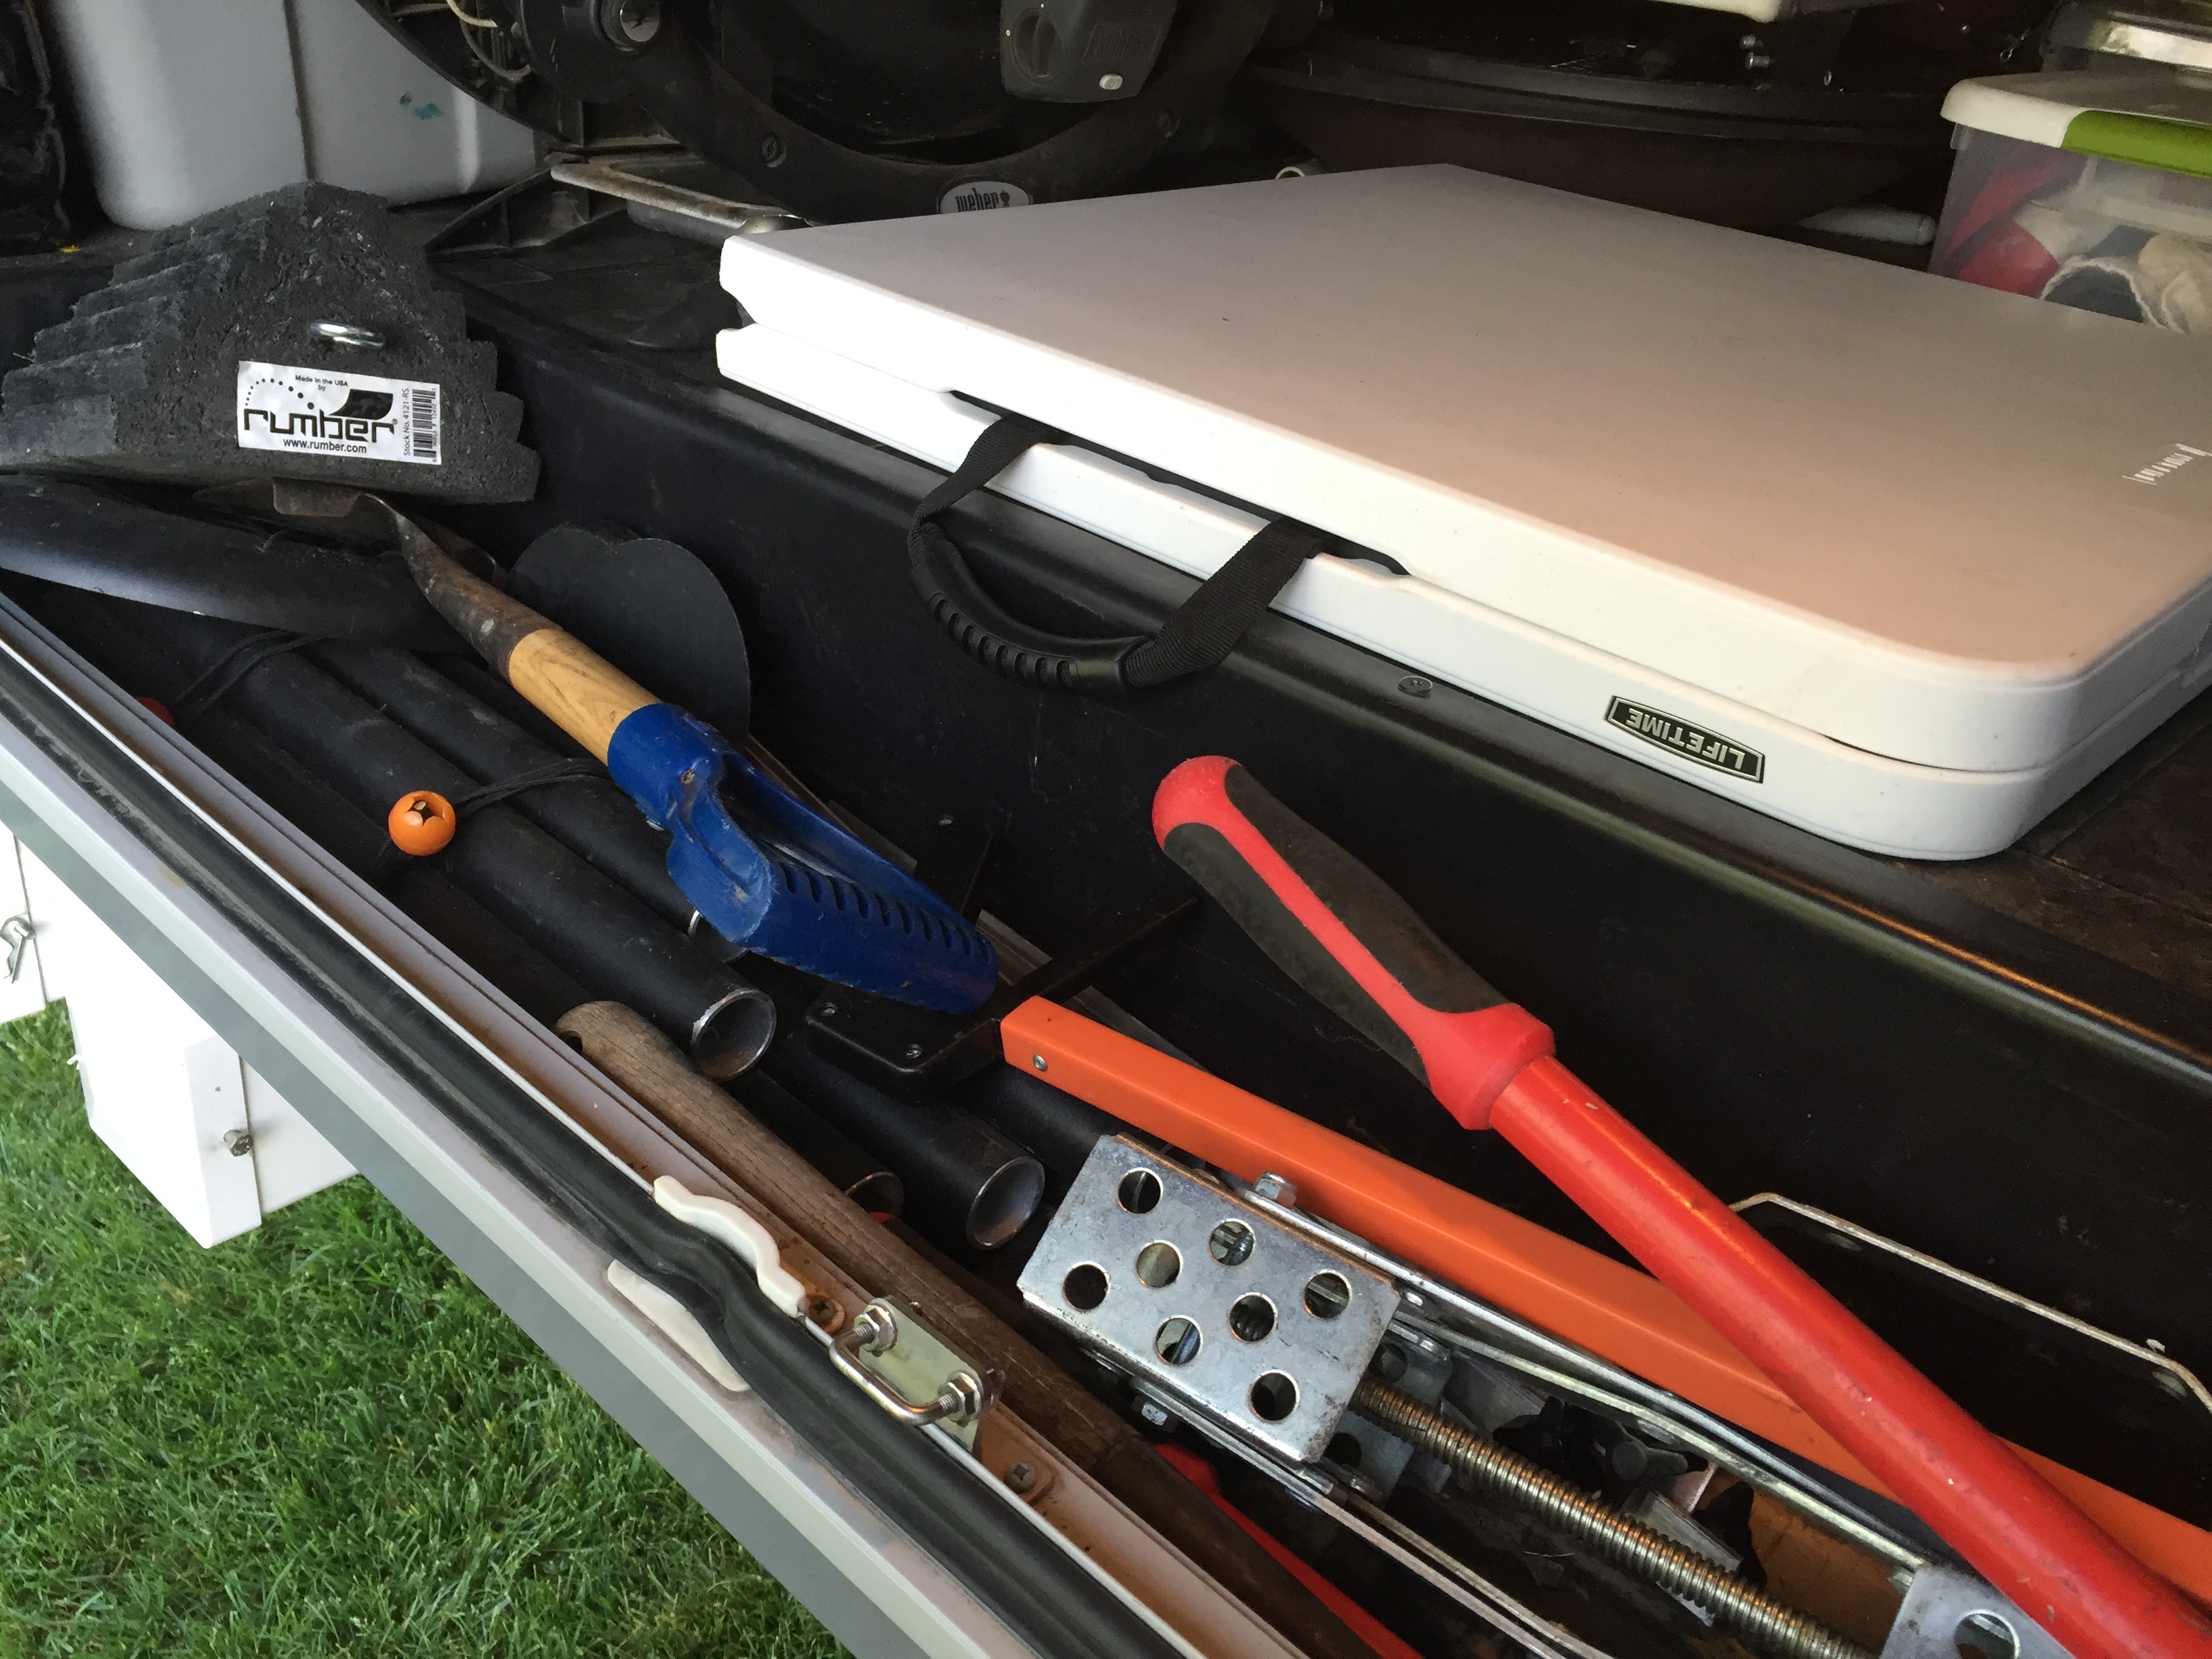
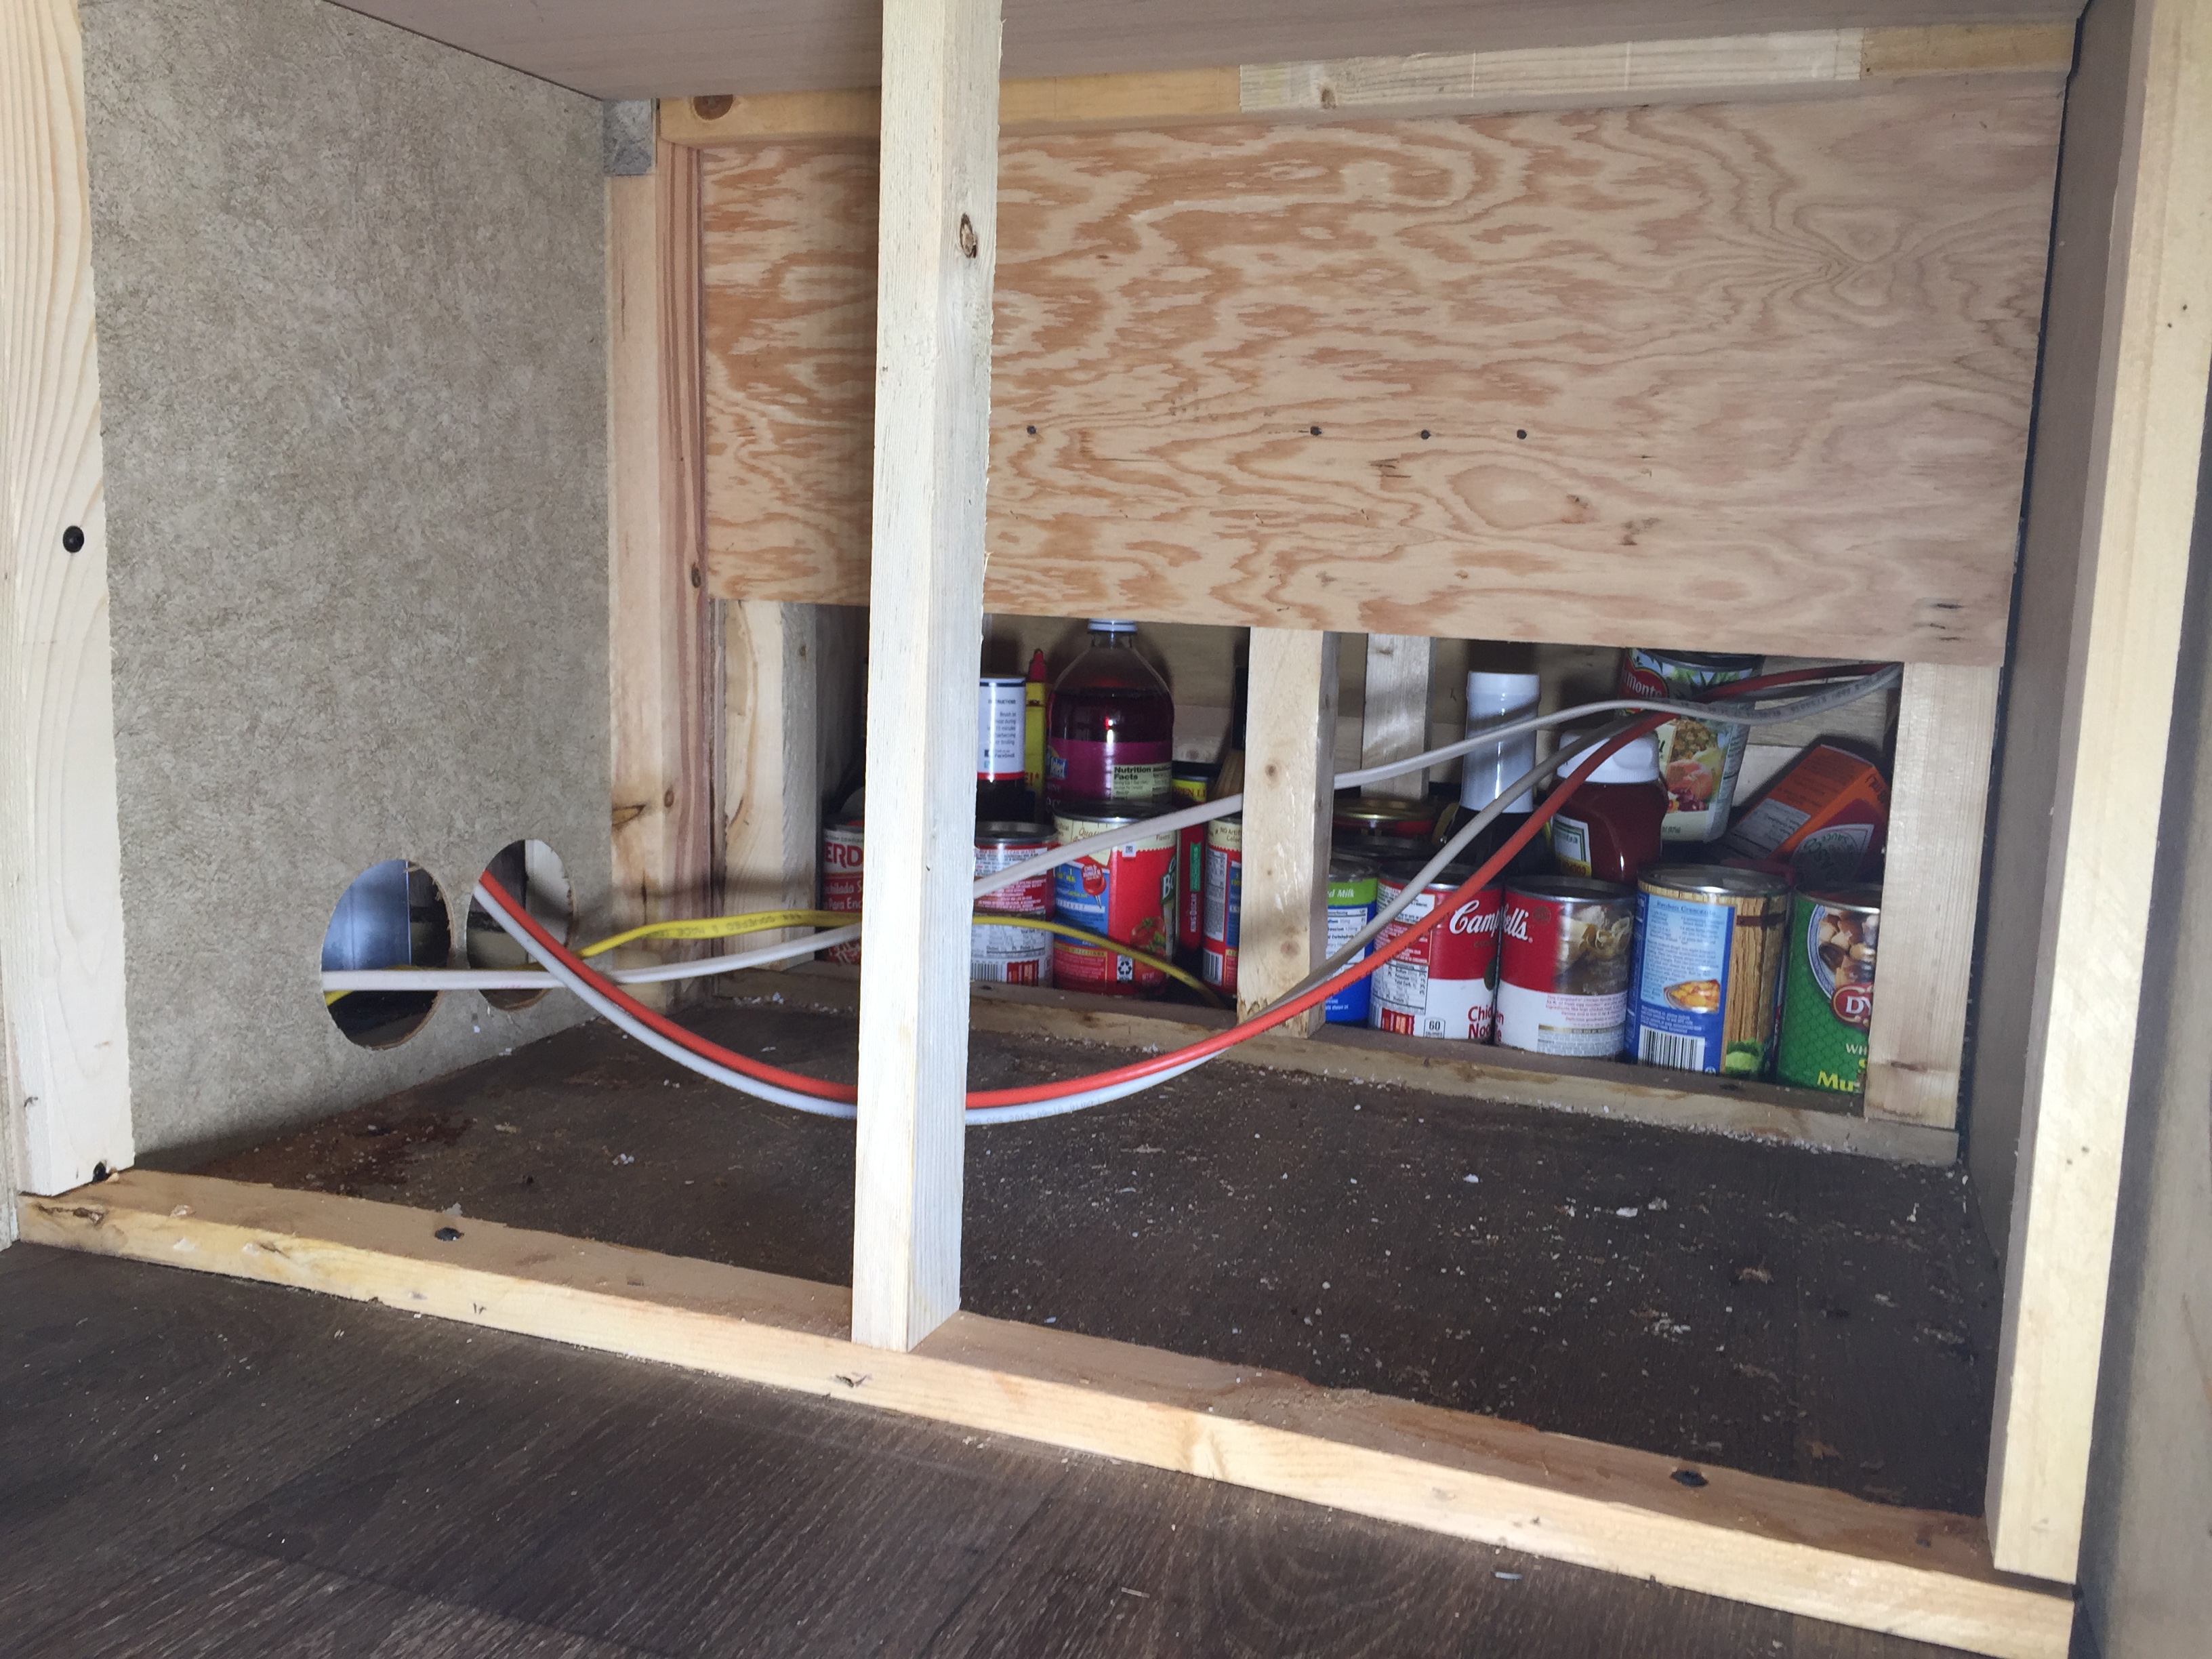
Since I’m always tinkering and poking around in the rig, I often run into things that look off, or just don’t make sense. Usually it’s something stupid the manufacturer did in the design or build process, and it always gets my attention. When I discovered useful wasted space under our rear inside stairs, I could see what looked like a pretty large void at the back of it, so I went looking to see why it wasn’t used. It’s closest to our smallish outside storage compartment, which looks like this:

I took some stuff out to get a better look at the construction of this “box” and noticed that there were trim pieces along the edges, which are usually there to help keep a wall panel in place and cover nail heads, or staples.
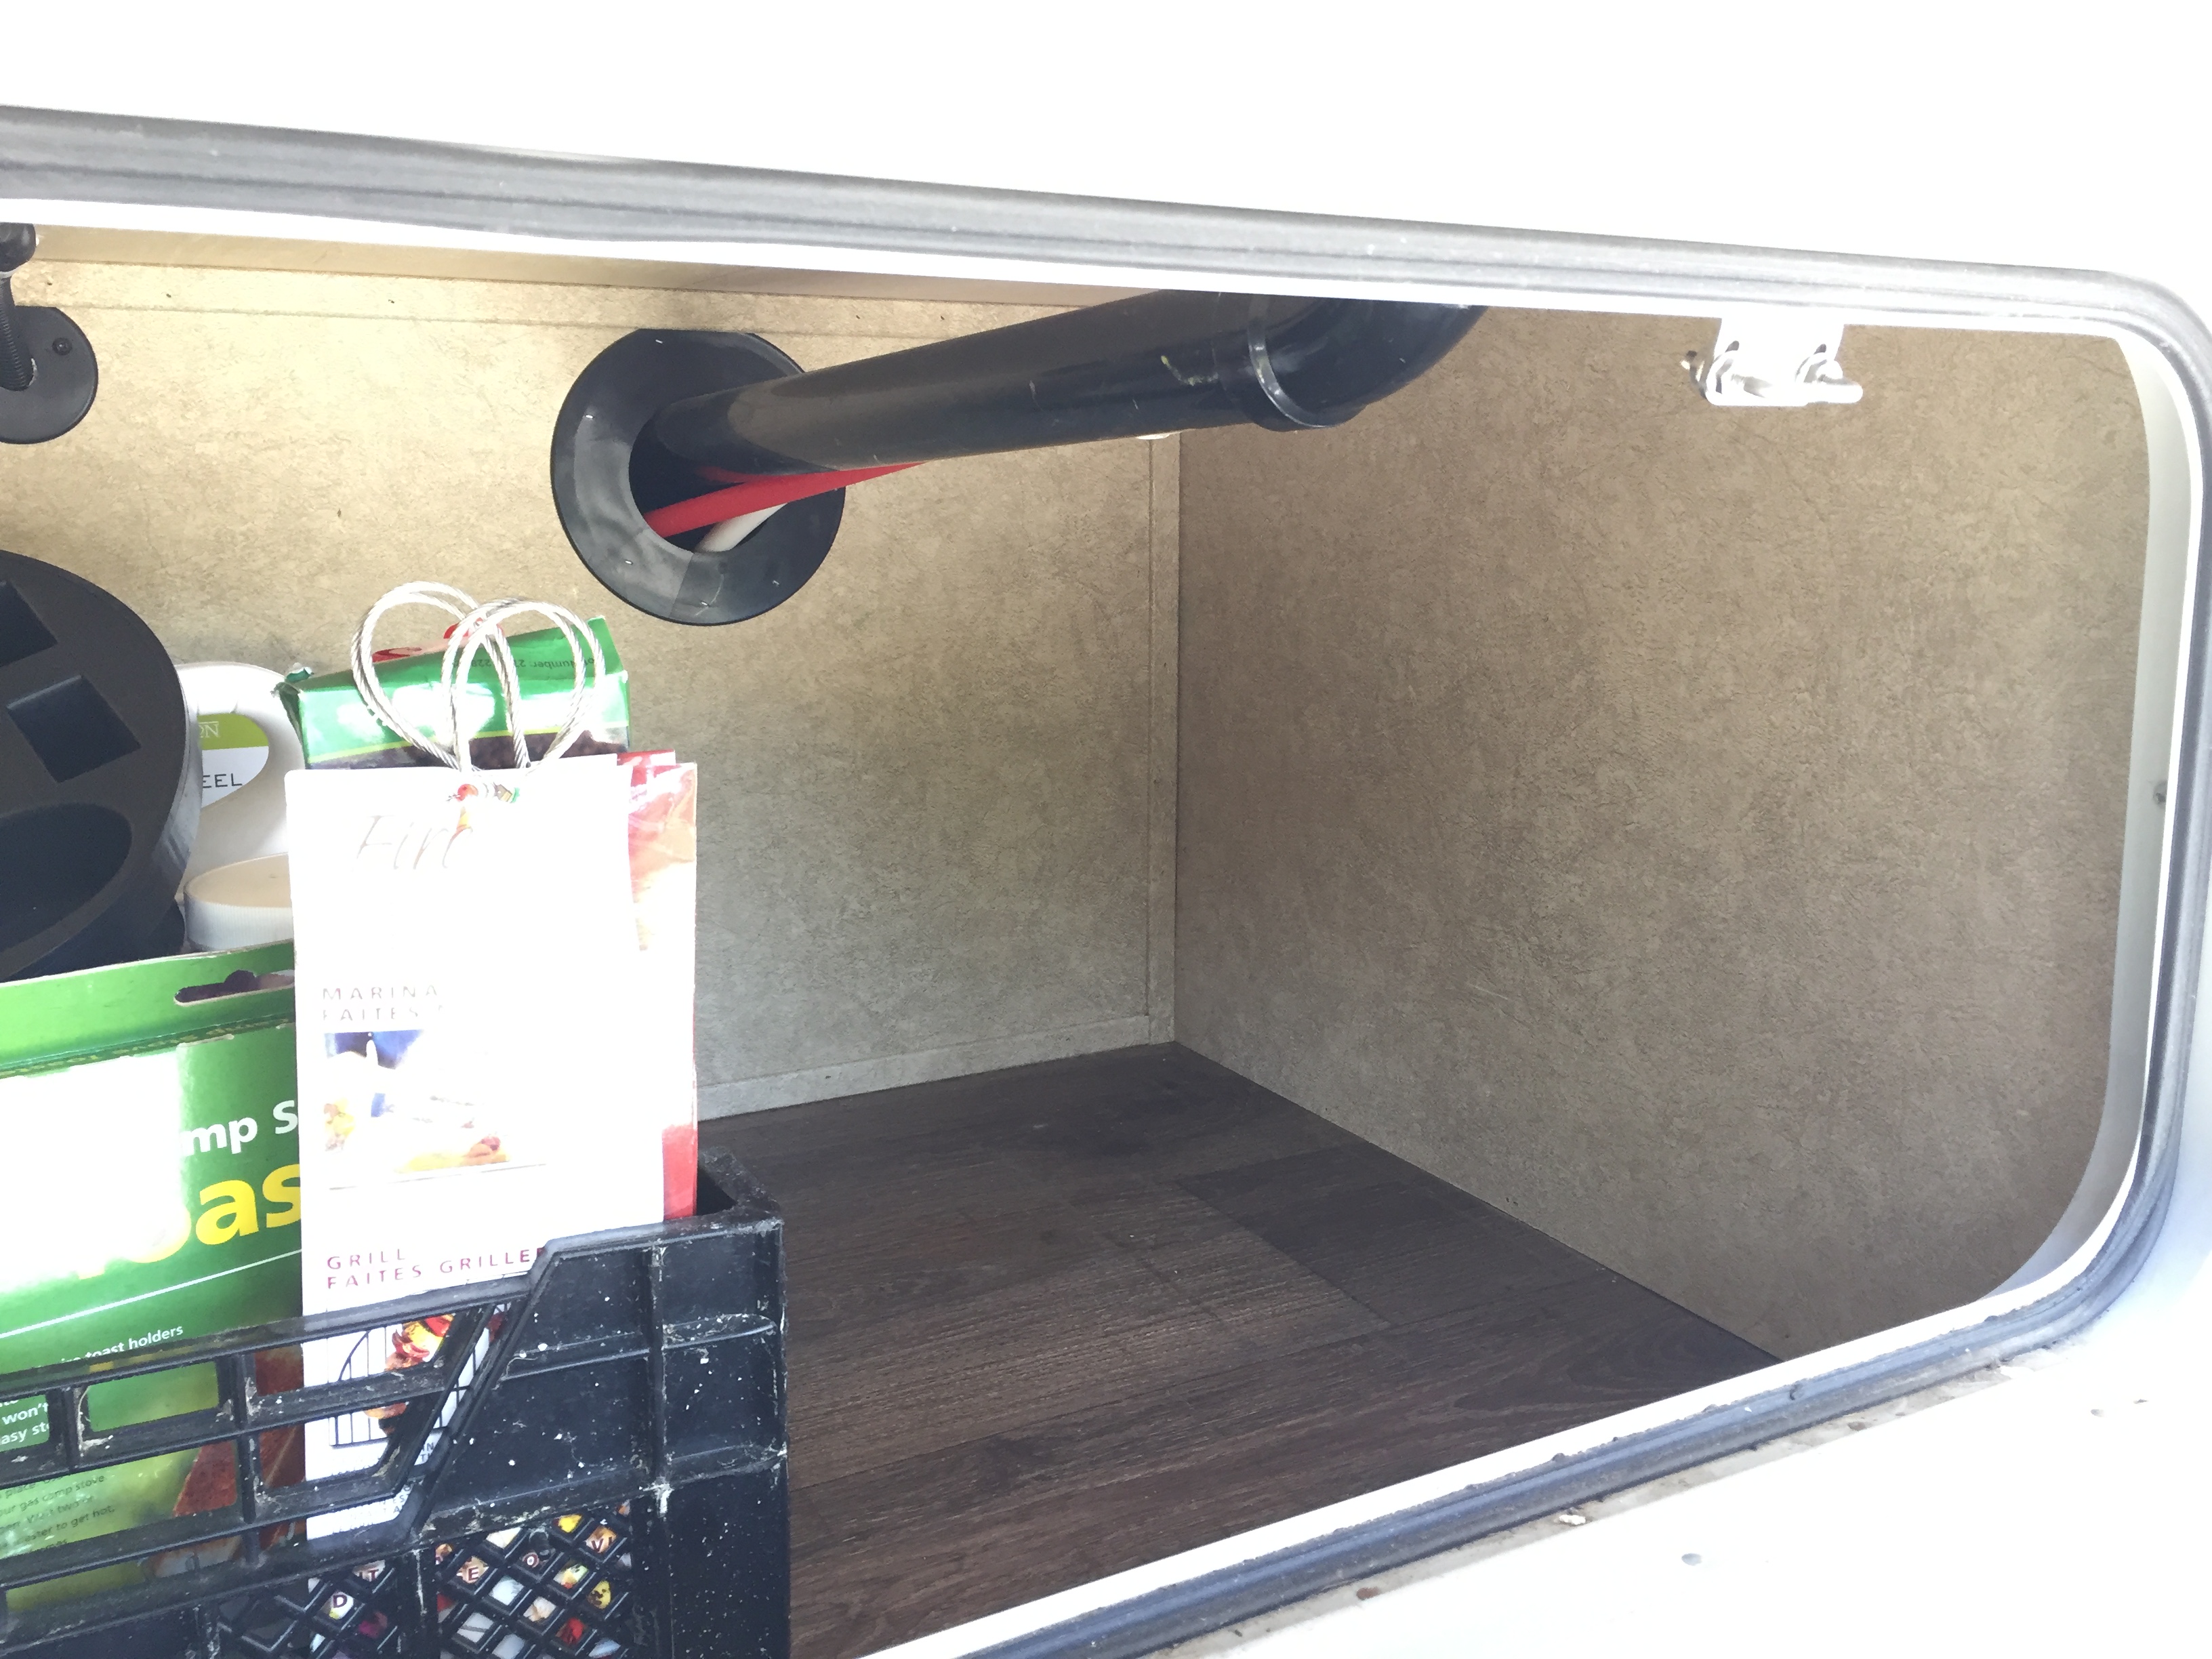
It wasn’t difficult to remove the trim pieces, and once I did, the small panel popped off pretty easily, and voila! A HUGE empty space. You can see the back of the area under the stairs I converted into storage by adding piano hinges to the stair treads.
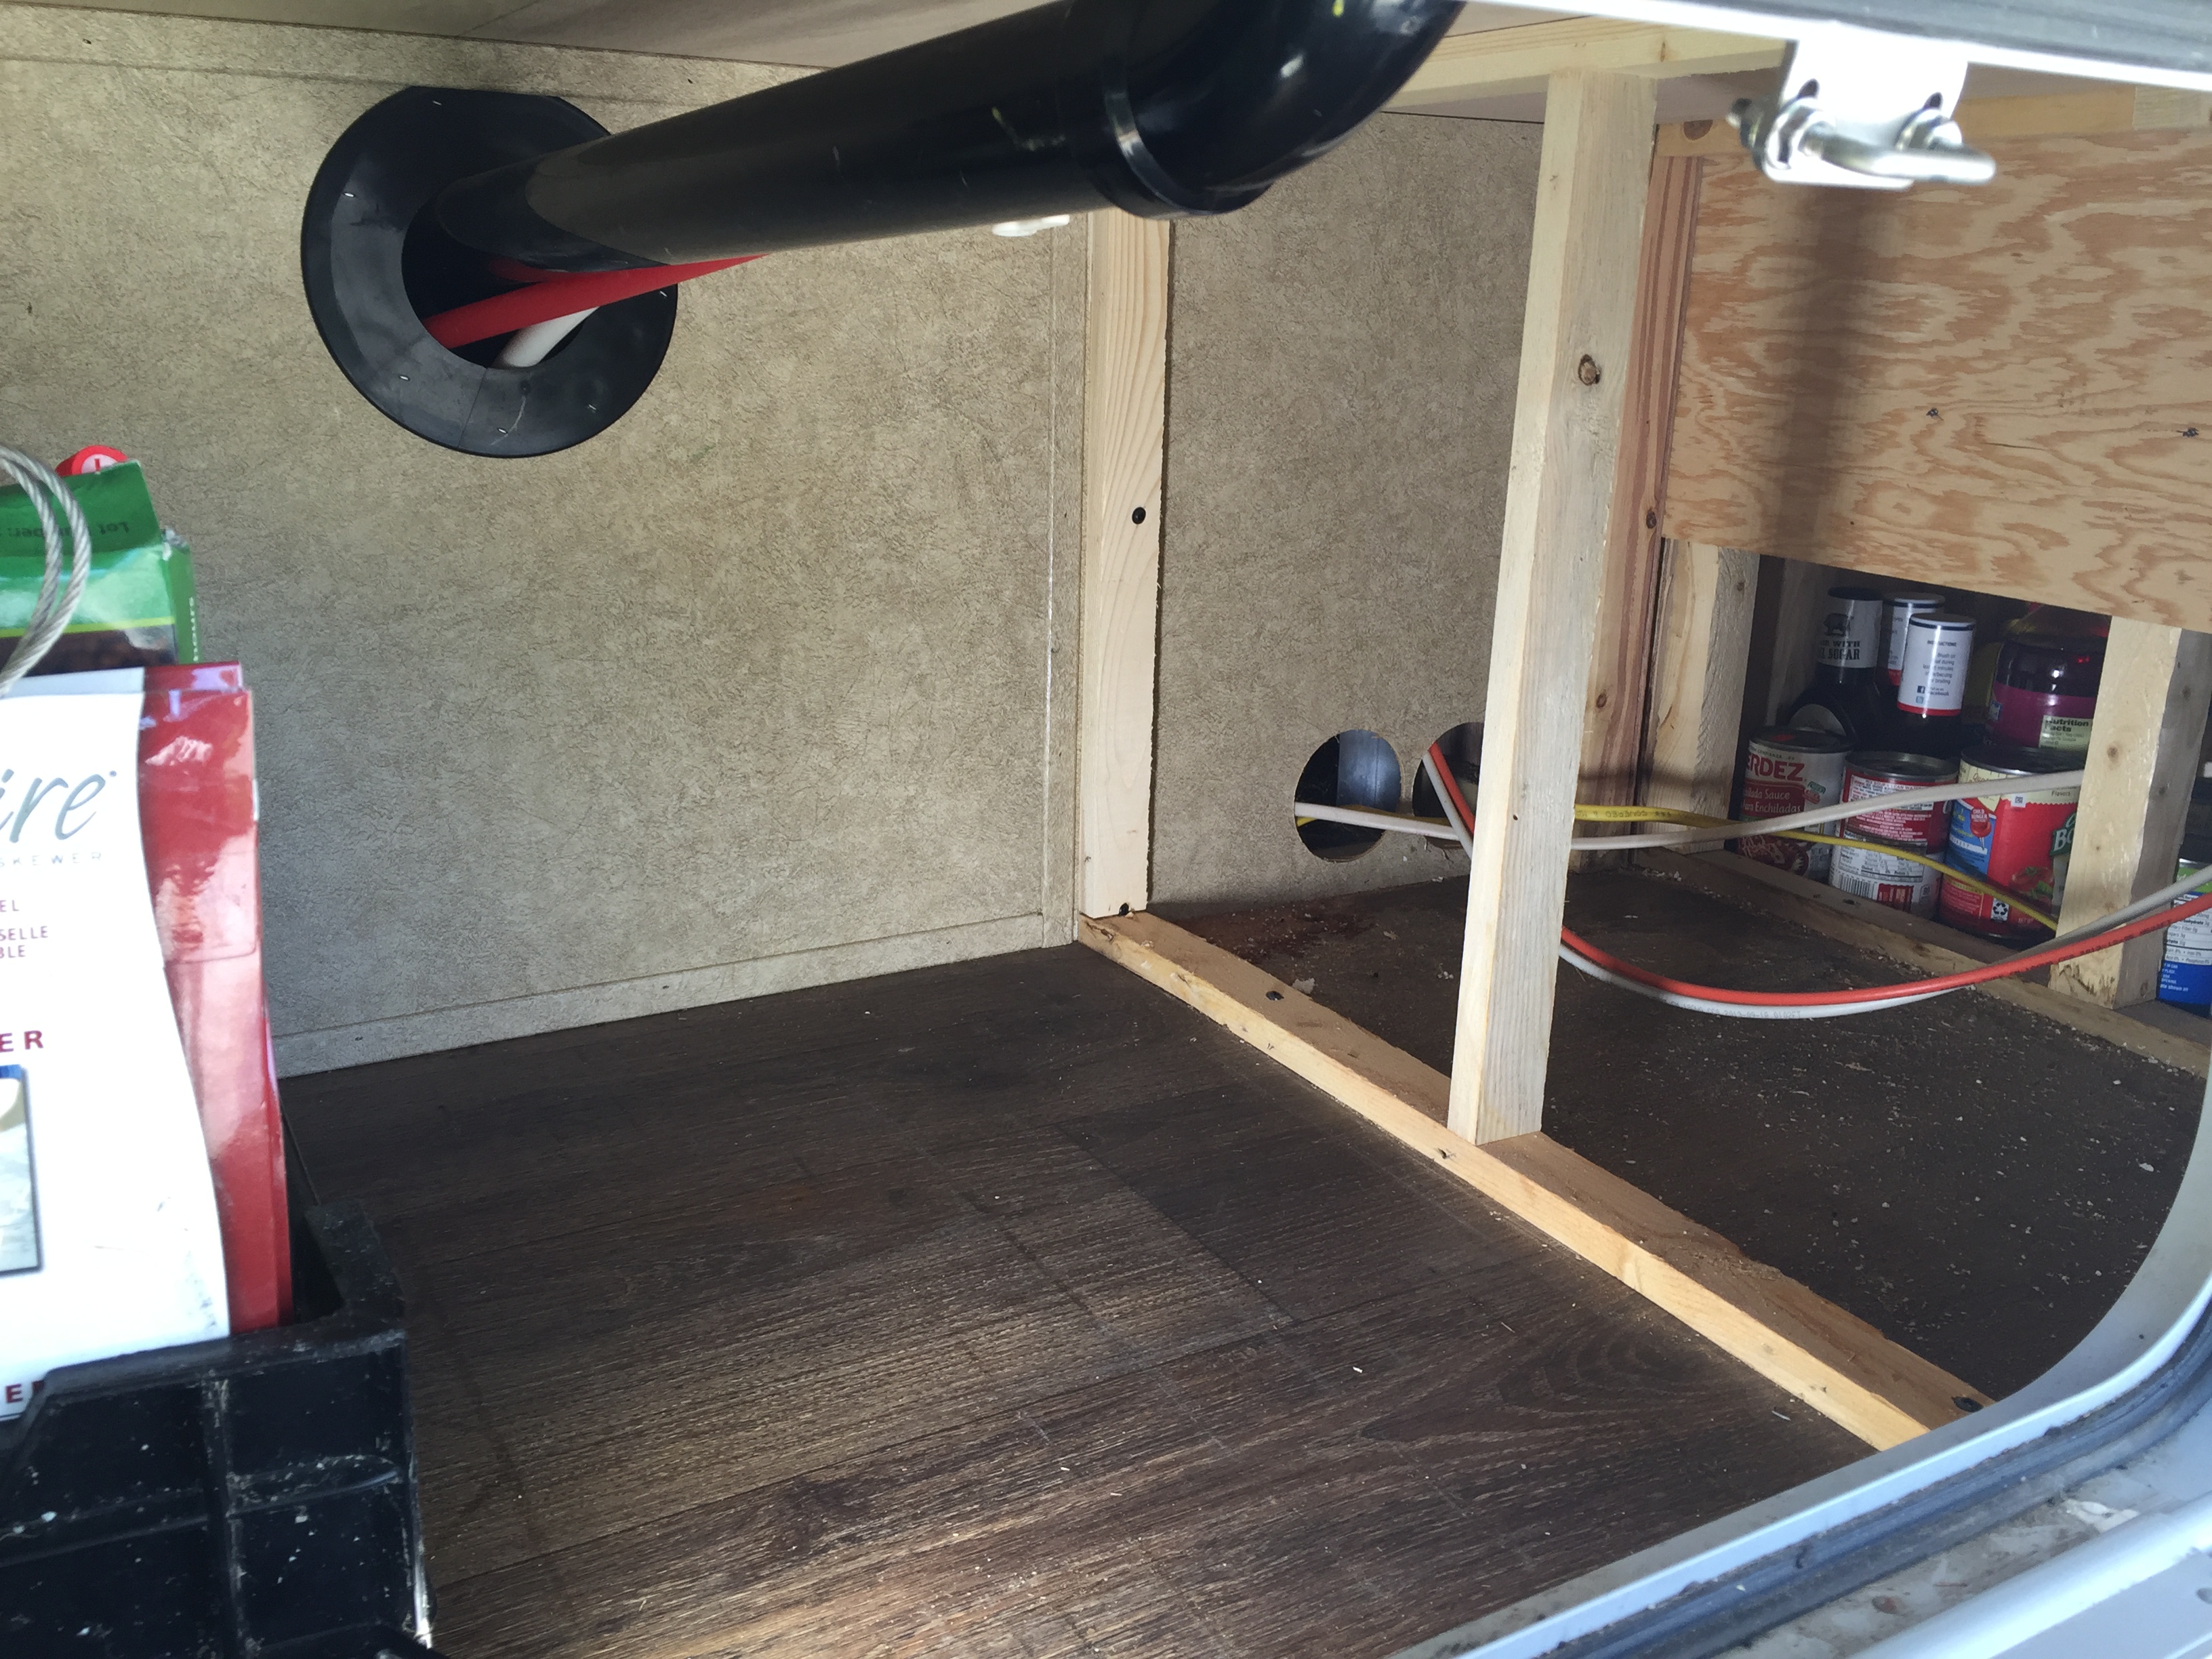
So this is a really nice large space, and the only reason I can think of that it wasn’t used is that it’s a little tricky to reach around past the compartment door opening to get in there. But small shoebox sized plastic totes fit in there perfectly, and it’s a great place to keep off shaped things that we don’t need to get to very often. I do want to point out that I will be rerouting the electrical line, which goes to an exterior outlet and the other two lines are exterior sattelite/cable jacks. I don’t need to, but it will look cleaner if I do. I decided to add this found storage blurb before I completed the project, because that might take a while, and Trace really wants this page done so she can publish it. And I’ll be adding a battery powered LED motion sensing light
It’s like a treasure hunt!!!
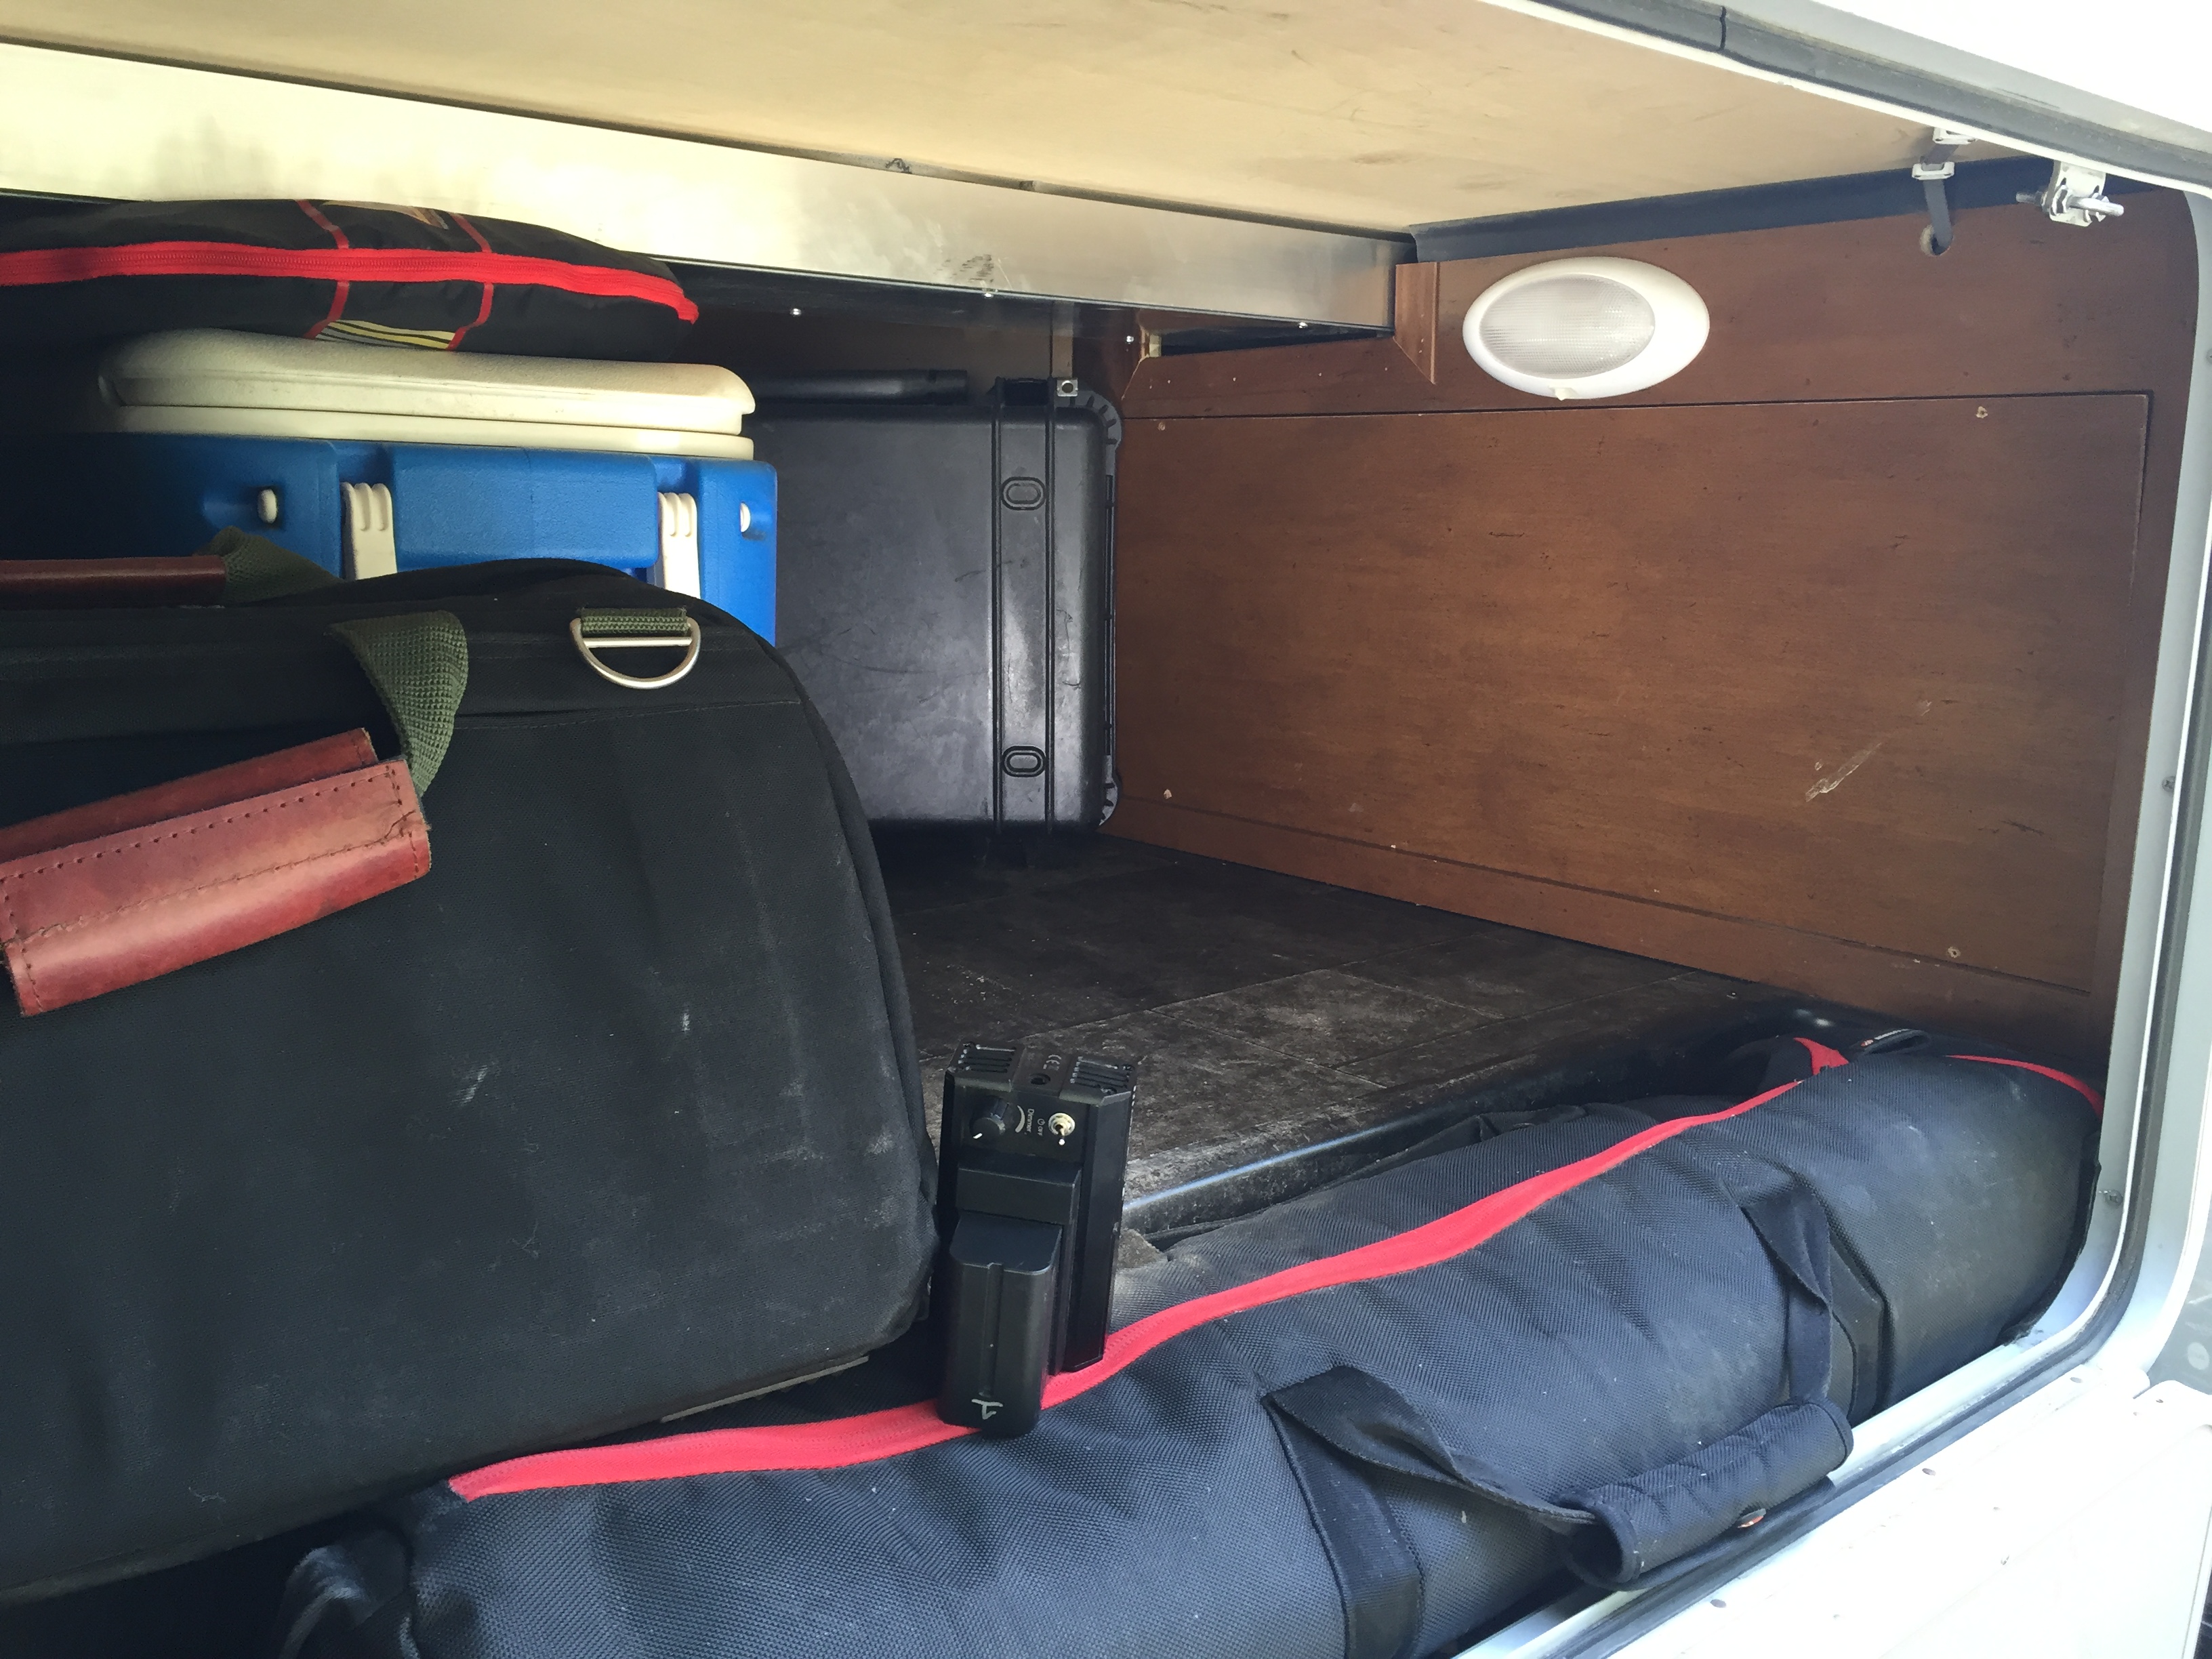
In another mod blurb I talked about having found an extra 20amp circuit to use for a space heater in the kitchen when we removed the old converter and battery charger. The space it was tucked into was another hidden void behind a panel. This particular find is very easy to access once the panel is removed, and easy to get into from the compartment door opening.
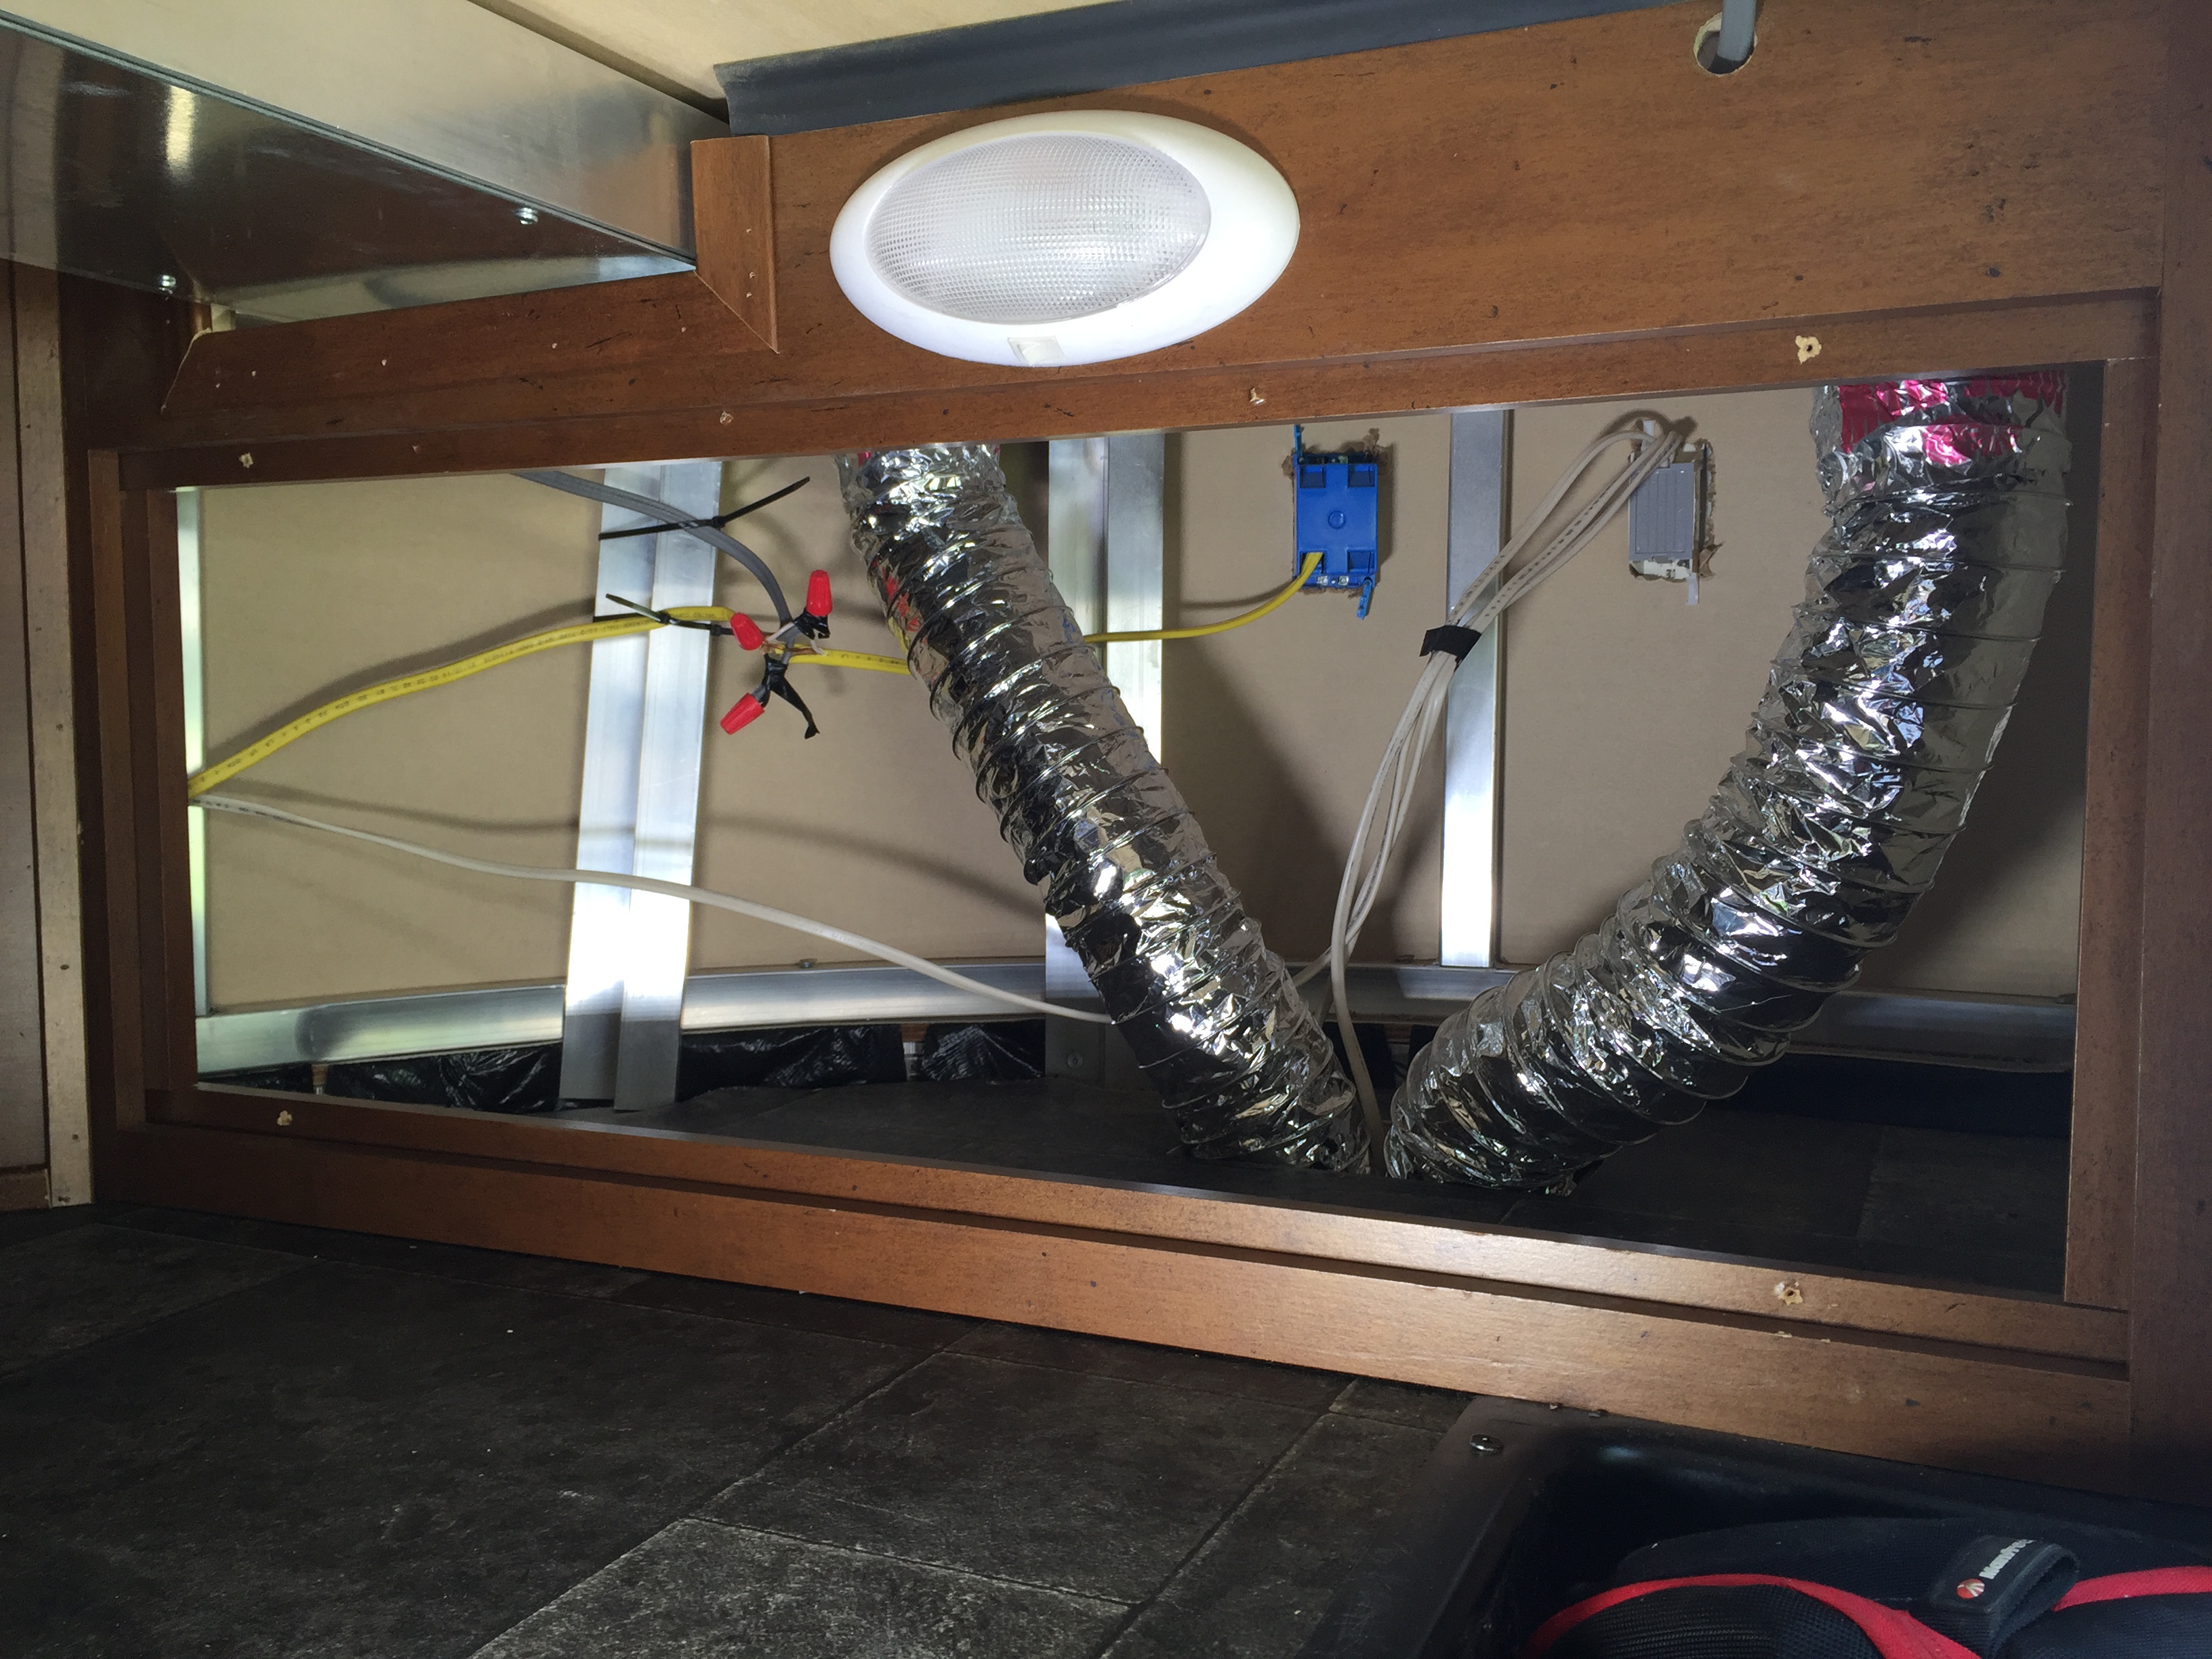
But, it has some wiring that needs to be cleaned up and moved out of the way, and a couple of ducts that will need to be extend and moved out of the way before the space can be utilized. I’ve looked under the area in the “crawl space” and there plenty of room to move the cut in the bottom of this space to relocate the ducts to the corner, and that will free up about 4 square feet. Again, perfect for shoebox sized totes that can be stuffed will little things that are hard to store.
Water Manifold
I use a four port water manifold to split the water source. At the manifold I hook up separate hoses for a loose hose for a sprayer so I can put out campfires, rinse things off, whatever I might need water for, the hose to the Flush King

Power
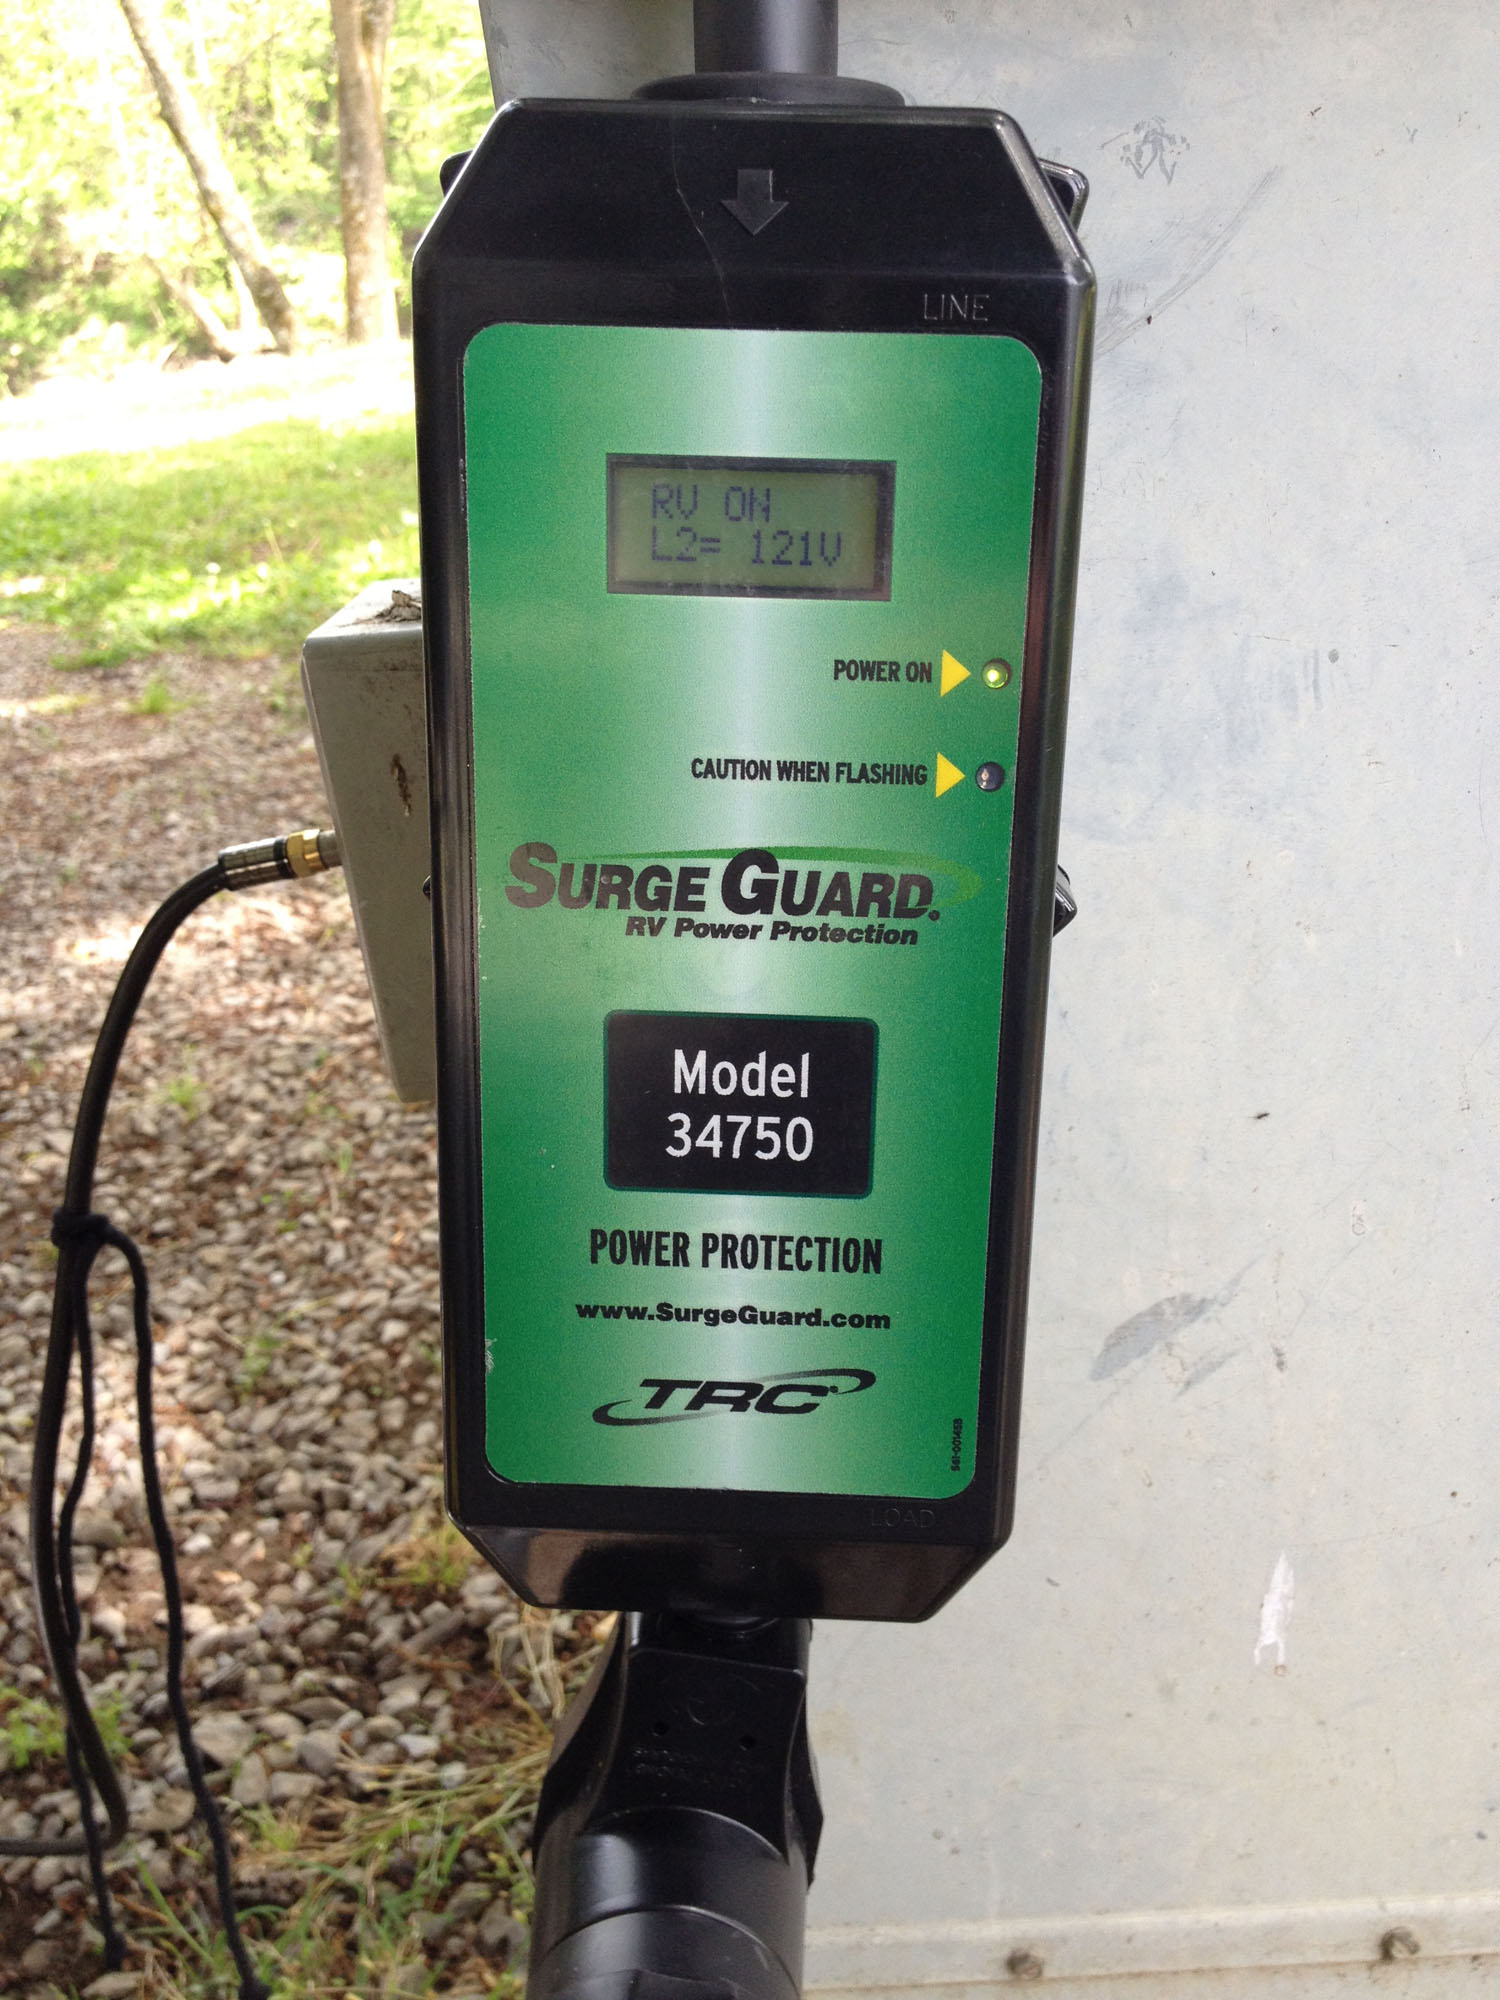
One of the first things we bought, while we were at our first RV Dreams rally, long before we hit the road, was a surge protector and voltage regulator, on the recommendation of our friend Red. I got the Surge Guard 34850
I also bought the surge guard Voltage Regulator
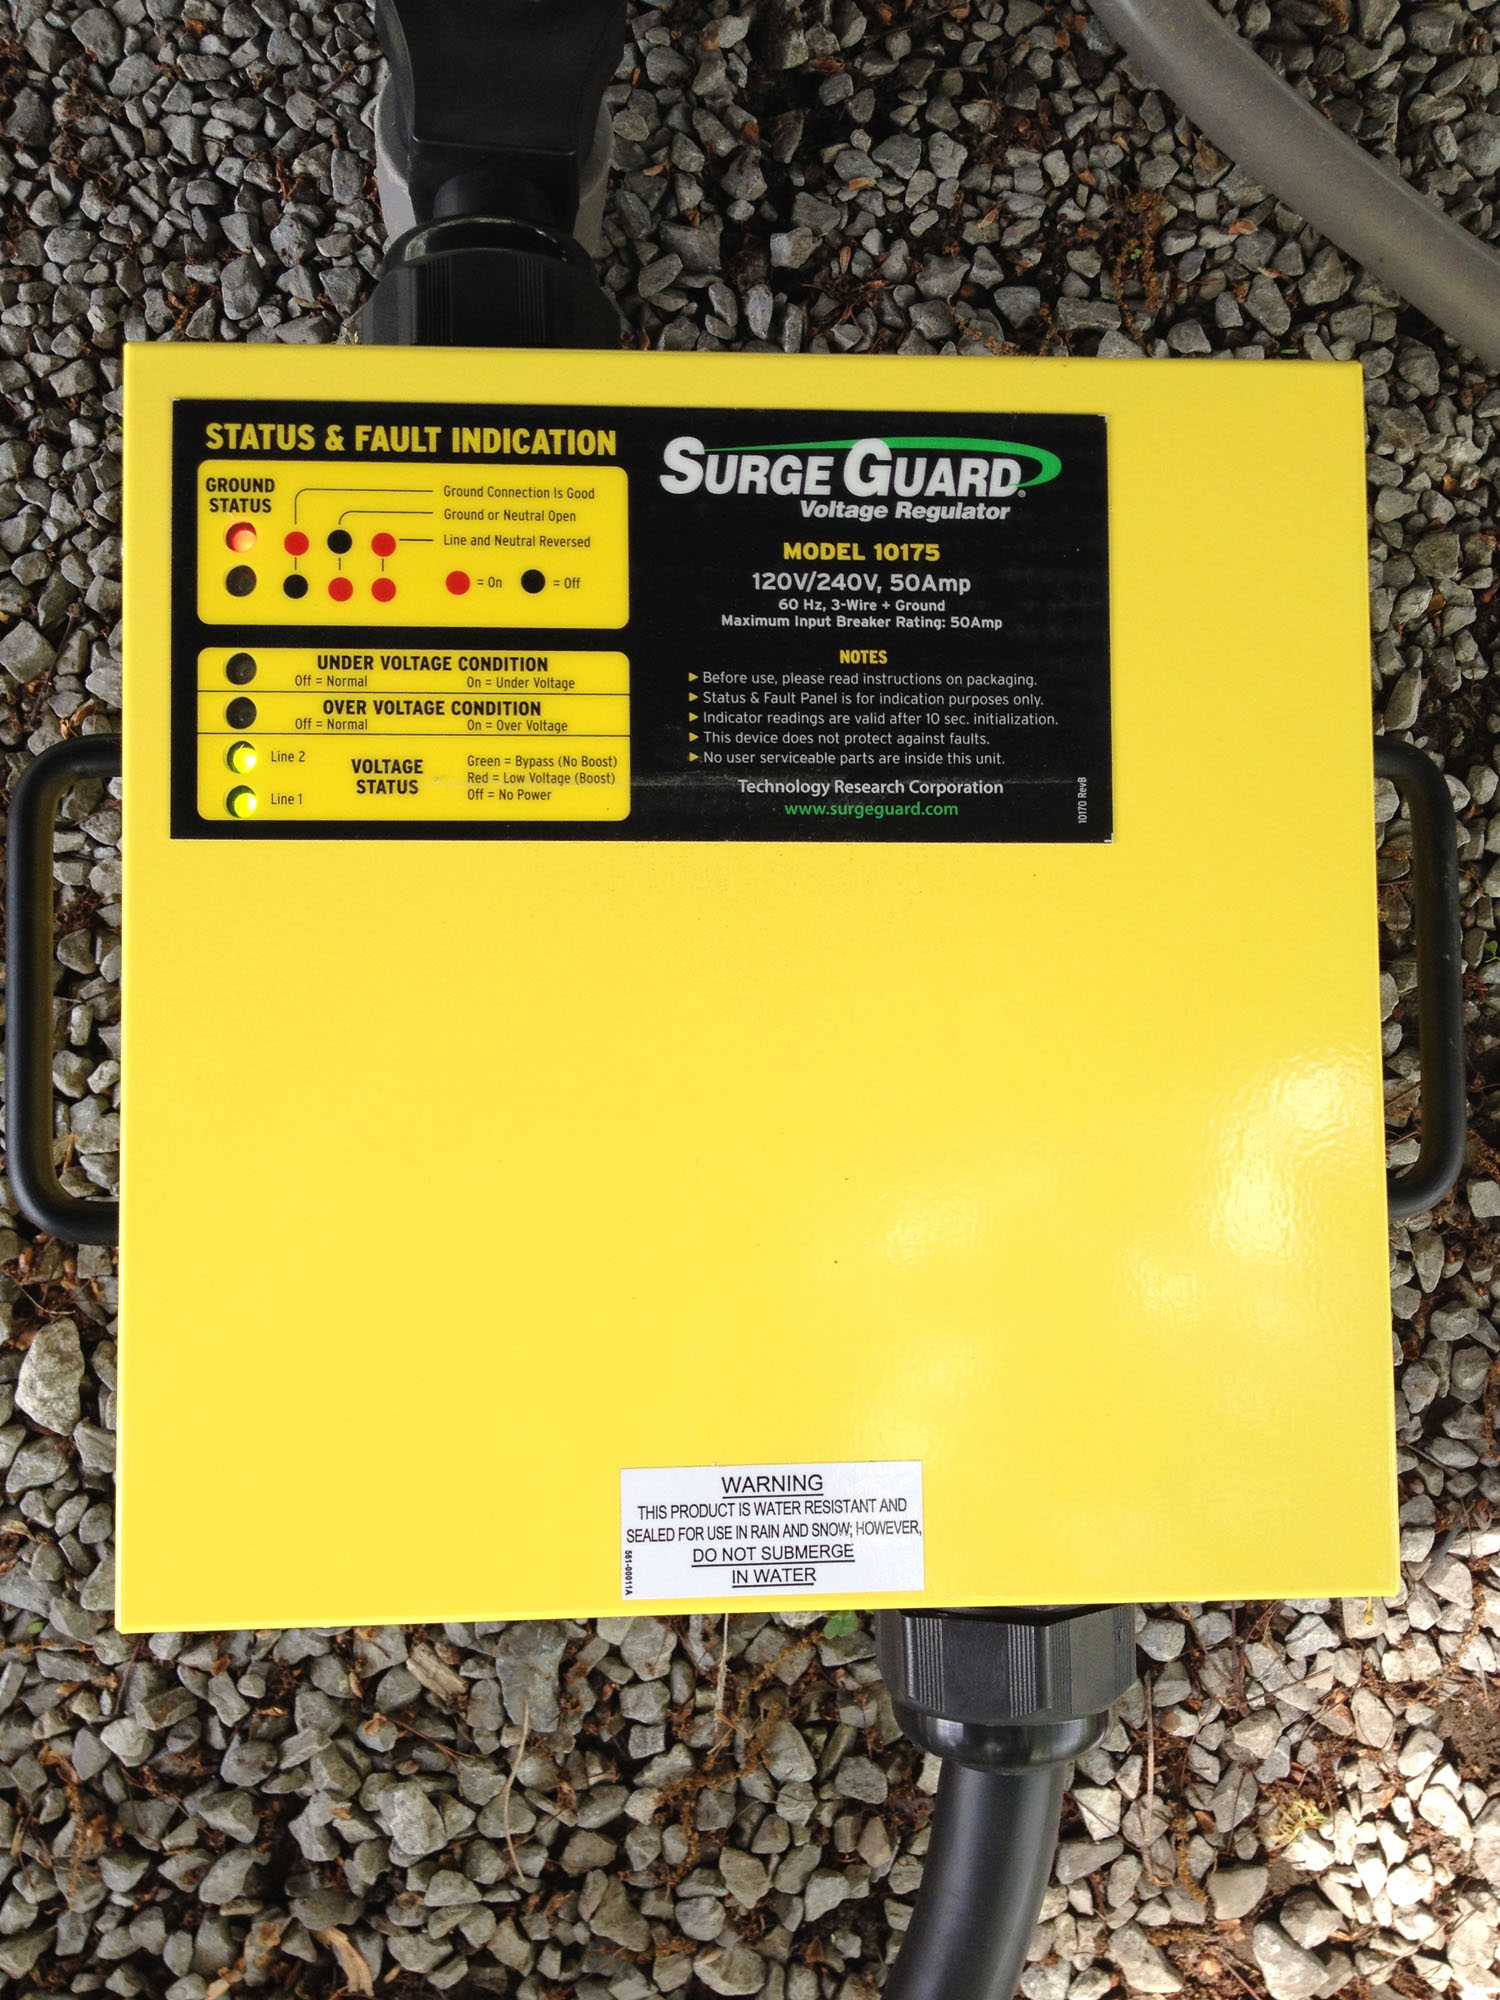
The down side is that both of them are very expensive, so they need to be locked up, or they are a very tempting target for theft. Surge Guard makes a locking hasp for the surge protector, but I never bought one. The voltage regulator is more expensive, so I just used a chain and padlock to lock that to the rig. Until….I got distracted when we were getting ready to leave a campground, and drove off without the surge protector. I just left it hanging on the pedestal. I was far enough away when I remembered it that it wasn’t possible to go back, but I called, and of course it was long gone. Because the voltage regulator is so heavy (50 lbs!!!) I was tired of hefting it and out of the rig, and it and it’s heavy cable took up a lot of space. That, and the fact that I needed to replace the surge protector, prompted me to try something a little different. I decided instead of just buying another pedestal surge protector, that I would buy the Surge Guard 35550

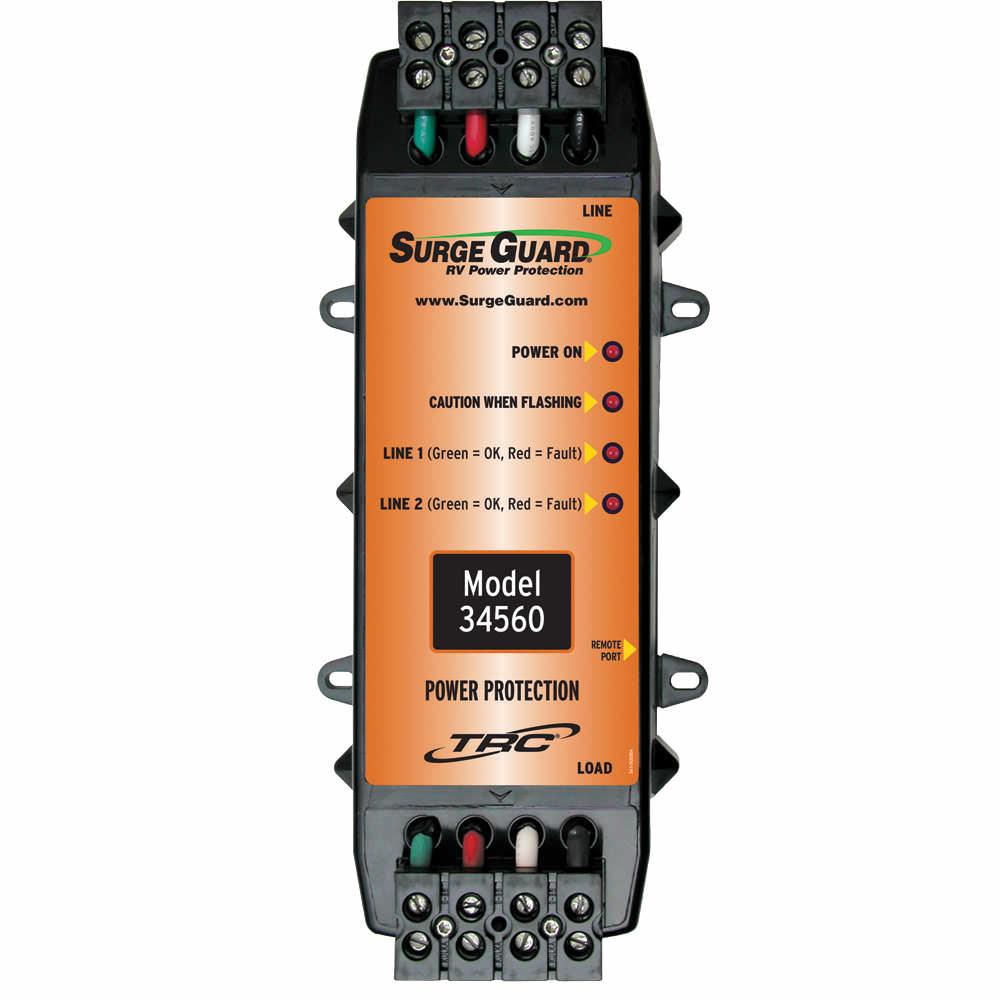
I poked around and found enough unused space in the crawlspace/utility area of my rig, and hard wired the surge protector and the voltage regulator. I didn’t want to break the seal of the 50amp connector on the outside of the rig to do the wiring, so I found enough slack on the inside, and cut it. I hard wired the feed from the back side of the supply connector to the surge protector, and then made a short 3′ cable with a Camco 55353


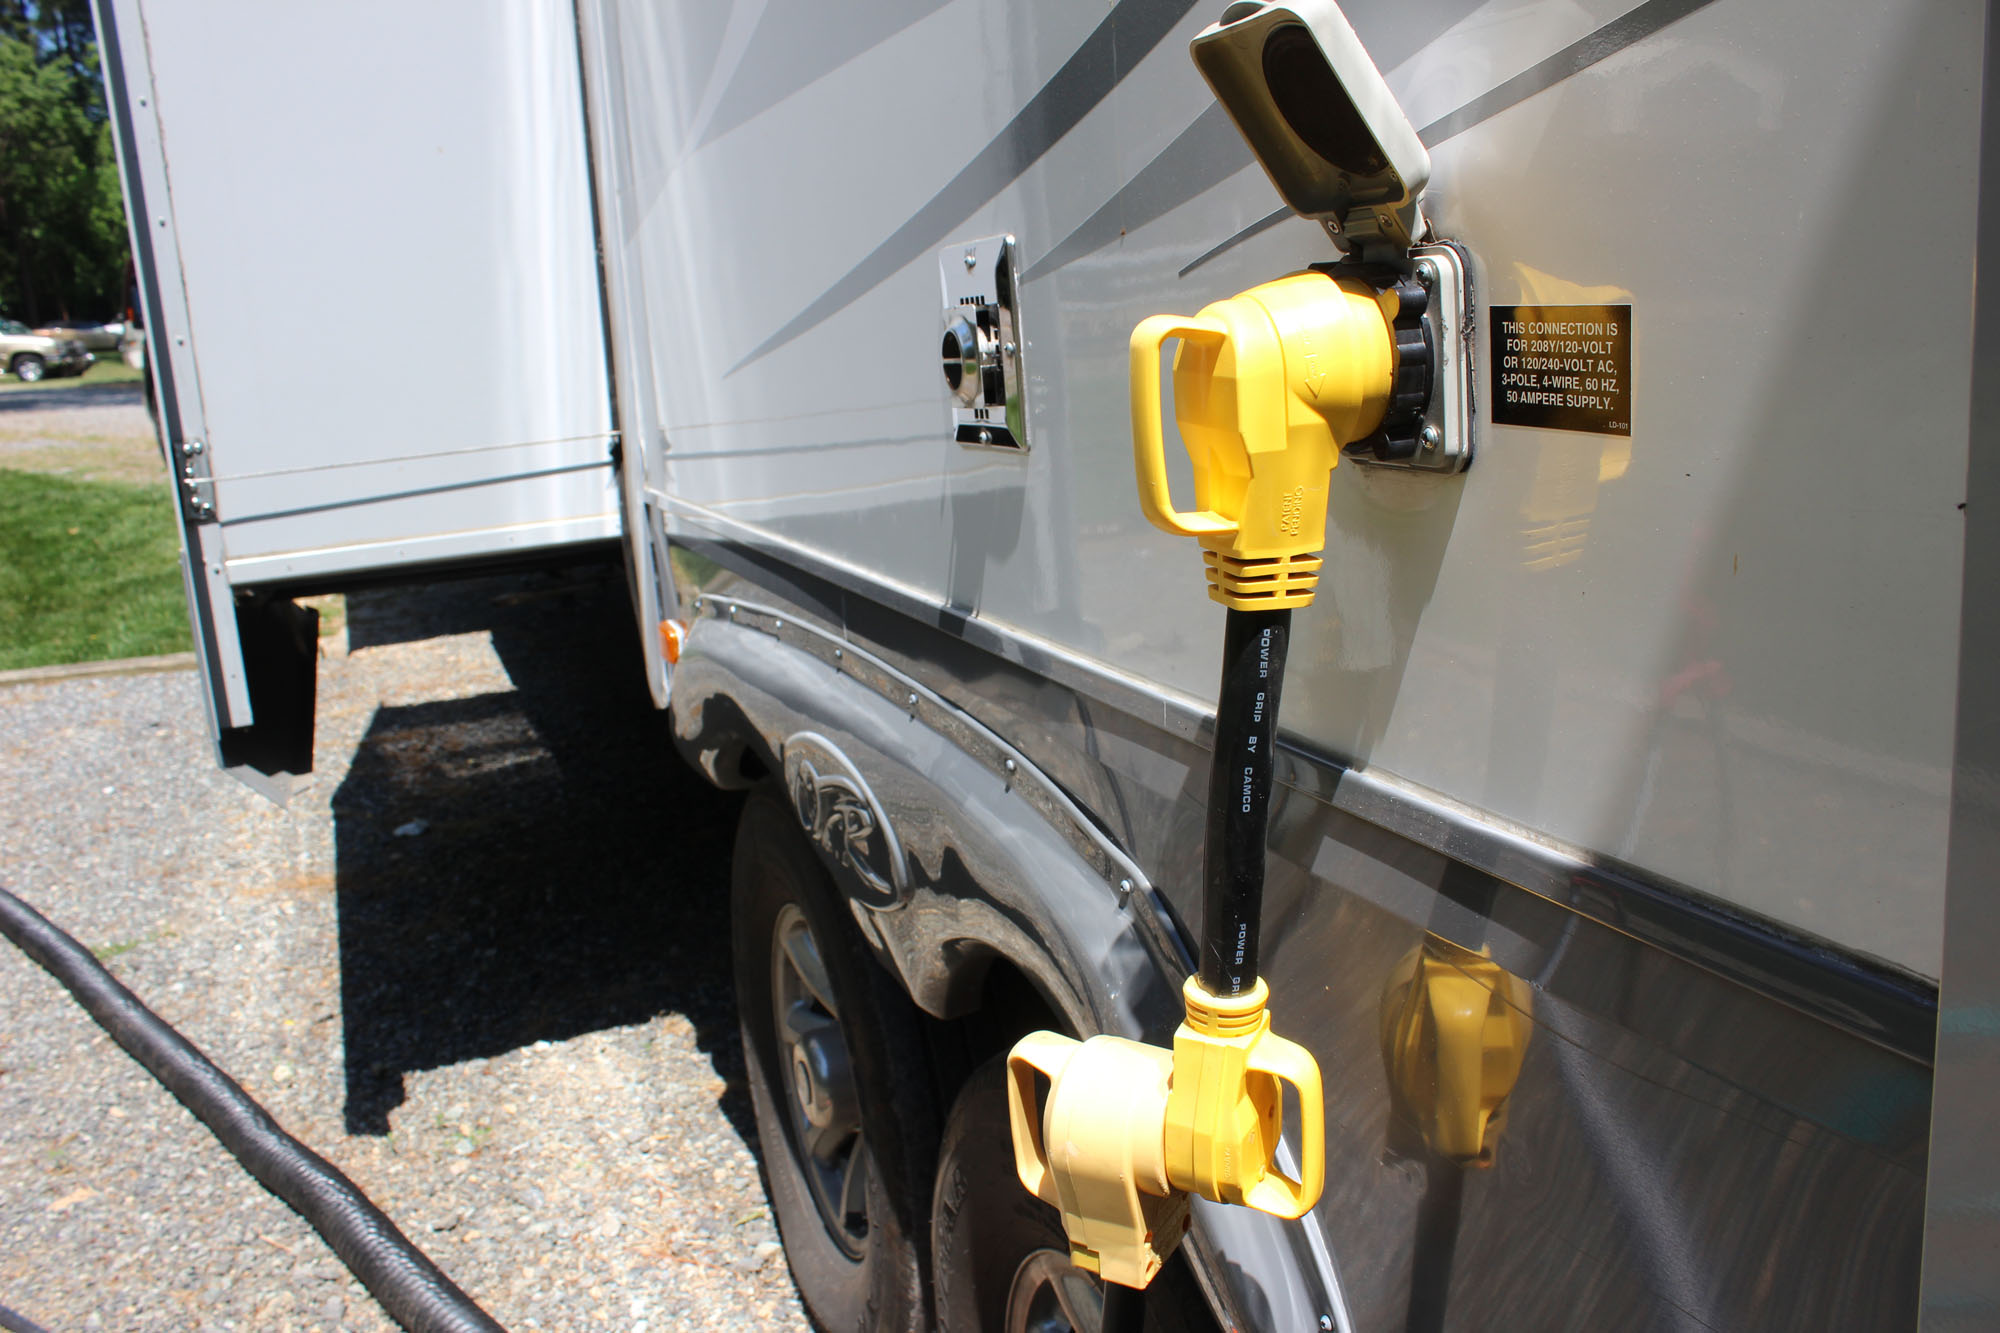
And speaking of upgrading the power system, the main power cable that came with our rig had several features that drove me crazy. First of all, it’s way too long. 35′ of 50amp cable in a cheap jacket that doesn’t coil well and is hard to work with. Plus the giant heavy locking connector where it enters the rig comes out like 8″ at a 90 degree angle, and was putting way too much strain on the connector mounted to the rig. I bought a Camco 55562
Supporting our Blog
We very much appreciate your support of our blog.

Lots of great upgrades Lee. I’ll have to start looking around my own rig now.
Great read thank you for posting, I’ll be “reading” along seeing how YOU didn’t pickme up hitch-hiking….. Safe travels ahead.
After looking at your upgrades, I think we would be great camping neighbors with lots to chat about! If you get a chance, check out our blog, we’re just getting started online documenting our upgrades. 🙂
Thanks for a great post – lots of ideas! unfortunately, our ‘rig’ is very small lol – only 15′ box, 18′ overall. I’ve done a lot of mods to make it much more livable, you might enjoy poking around. Let me know what you think!
Really good info. What is the name of the cable hangers you use? I’d want to get those. Thank you.
Lee says they are awesome but a little pricey. https://amzn.to/2D6mZUk
Pretty sure you know you need a check valve or vacuum breaker on the crossover from your shower to your black flush. I think the shower may come with one of them. Just checking. Great ideas. I too am going to mount a surge protector inside the rig, for some of the same reasons.
you sound like me I’m always looking for ways to improve my rig. Have one question how did you attach the water hose to the Shower valve. What size and type fitting was it You used?
Robert – If you’re talking about the outside shower, where I have a hose going from that outlet to the black tank rinse input, the attachment point in the outside “convenience compartment” is just a standard garden hose fitting, so I just cut a short length of hose and put on connectors. If you’re talking about something else, let me know. – Lee
Great stuff! Thank you and I’m definitely going to use a few of these.
great improvements and Ideas!
Thanks !