
Disclaimer: This modification requires dealing with your propane system and extreme caution should be used. Before starting the repair turn all of your propane tanks off and bleed the remaining propane from the system. If you are not comfortable for any reason, please don’t attempt this modification.
For years we have been talking about removing the propane oven and reclaiming the huge space that the oven was taking. Initially I was very resistant because I was intimidated by a convection oven, and I liked the idea of a propane stove for when we were boondocking. My mind changed however as I saw how easy the convection ovens were, how unevenly the propane oven baked, and most importantly, how hot the RV got when we were using the propane oven. If we were somewhere chilly it was no big deal, but in warmer temps I would often have to turn on the AC to counter the heat from the stove, which was pretty ridiculous. When we were boondocking this wasn’t possible so I ended up not using the propane oven much anyway.
Still, it was what we had, and like many other things in an RV we learned to live with it, but things really came to a head when our friend Cori gave us an Air Fryer. Don’t get me wrong, we were thrilled to get it, but there was absolutely no place to make a permanent home for it. We were already moving our Instant Pot back and forth between the counter top and under the desk and the air fryer was one more thing we were constantly moving. When we realized that the space where the oven was would be the perfect space we were both sold!! One side note they came out with a combination Ninja pressure cooker/air fryer right after we got our air fryer. I hear they work great from friends, but I am not replacing mine until one or both break which will hopefully be awhile.
In any event, I am glad it worked out this way, because now that the remodel is done I am absolutely thrilled. I am using my convection oven (see previous post for how we replaced) to bake and cook and I still have a propane cooktop for when we boondock. I also have enough storage space for the air fryer, the instant pot, their accessories, and a new shelf for baking pans. Perfect! So here’s Lee’s step by step beginning with the all important step to burn off the propane in the lines before doing anything else! Oh and don’t judge me for how dirty it is. We have been using it for five years 🙂
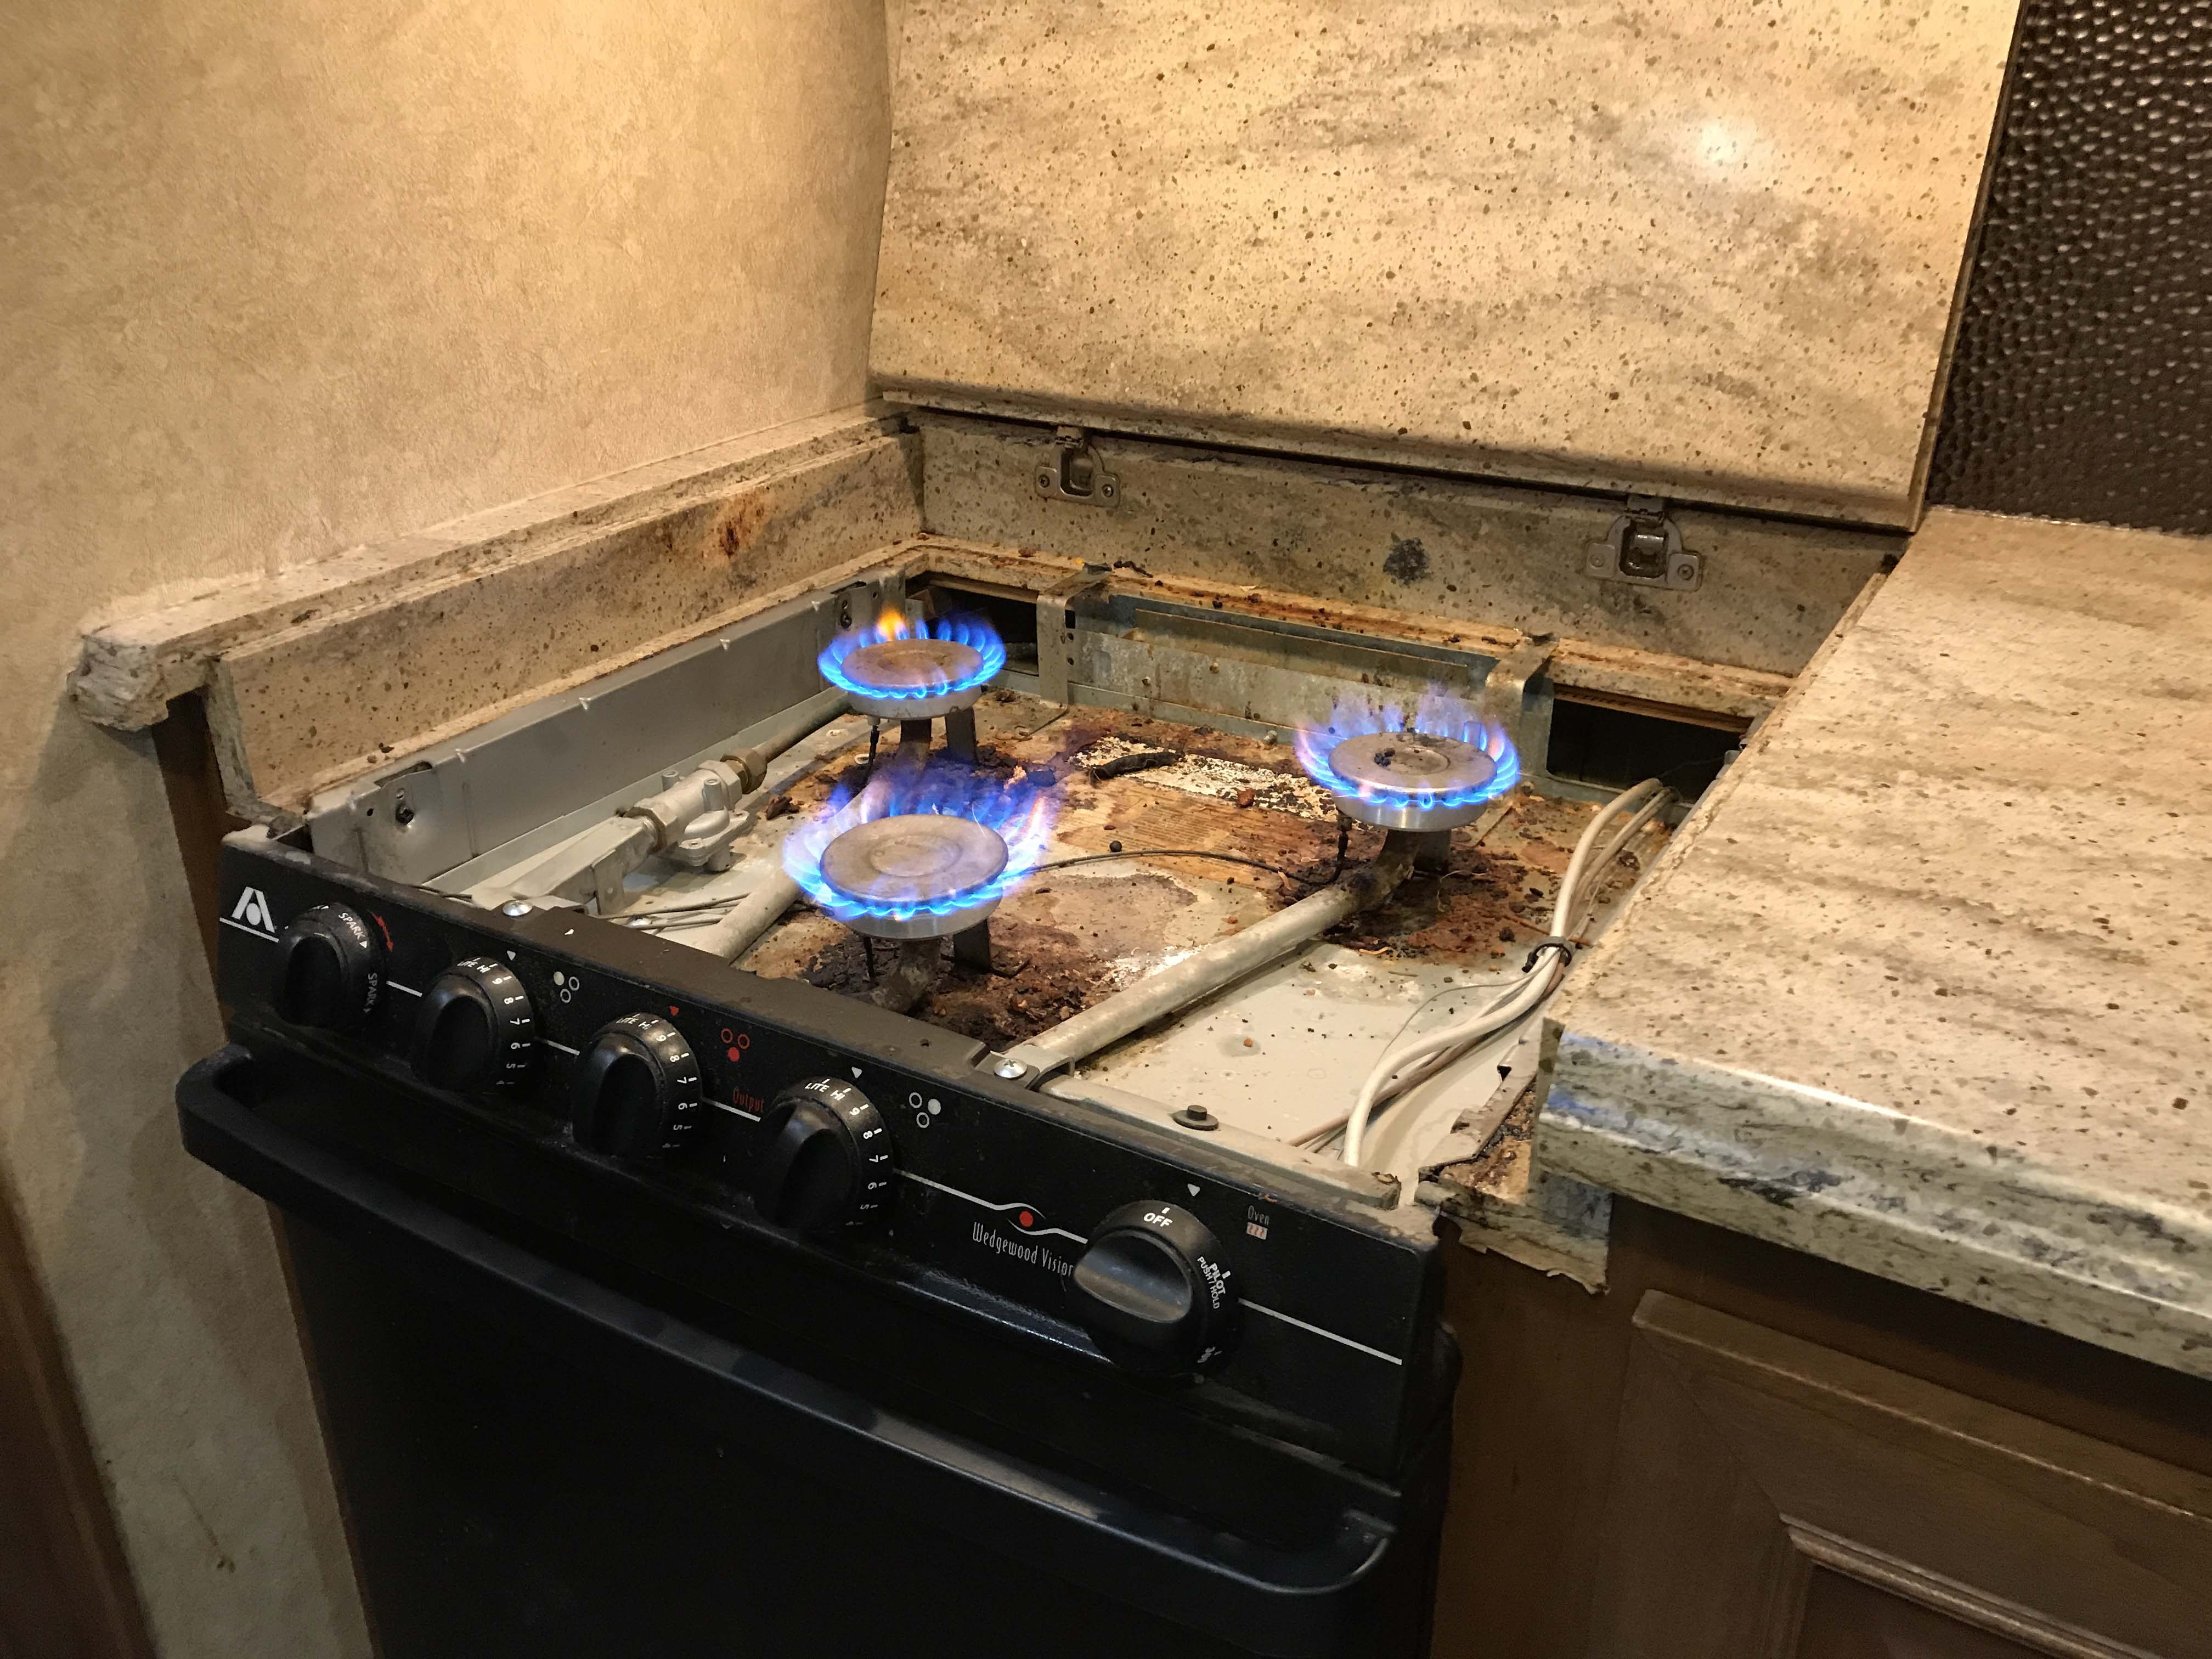
The first step was to turn off the propane from all of the tanks and then light the burners to clear all of the propane out of the lines.


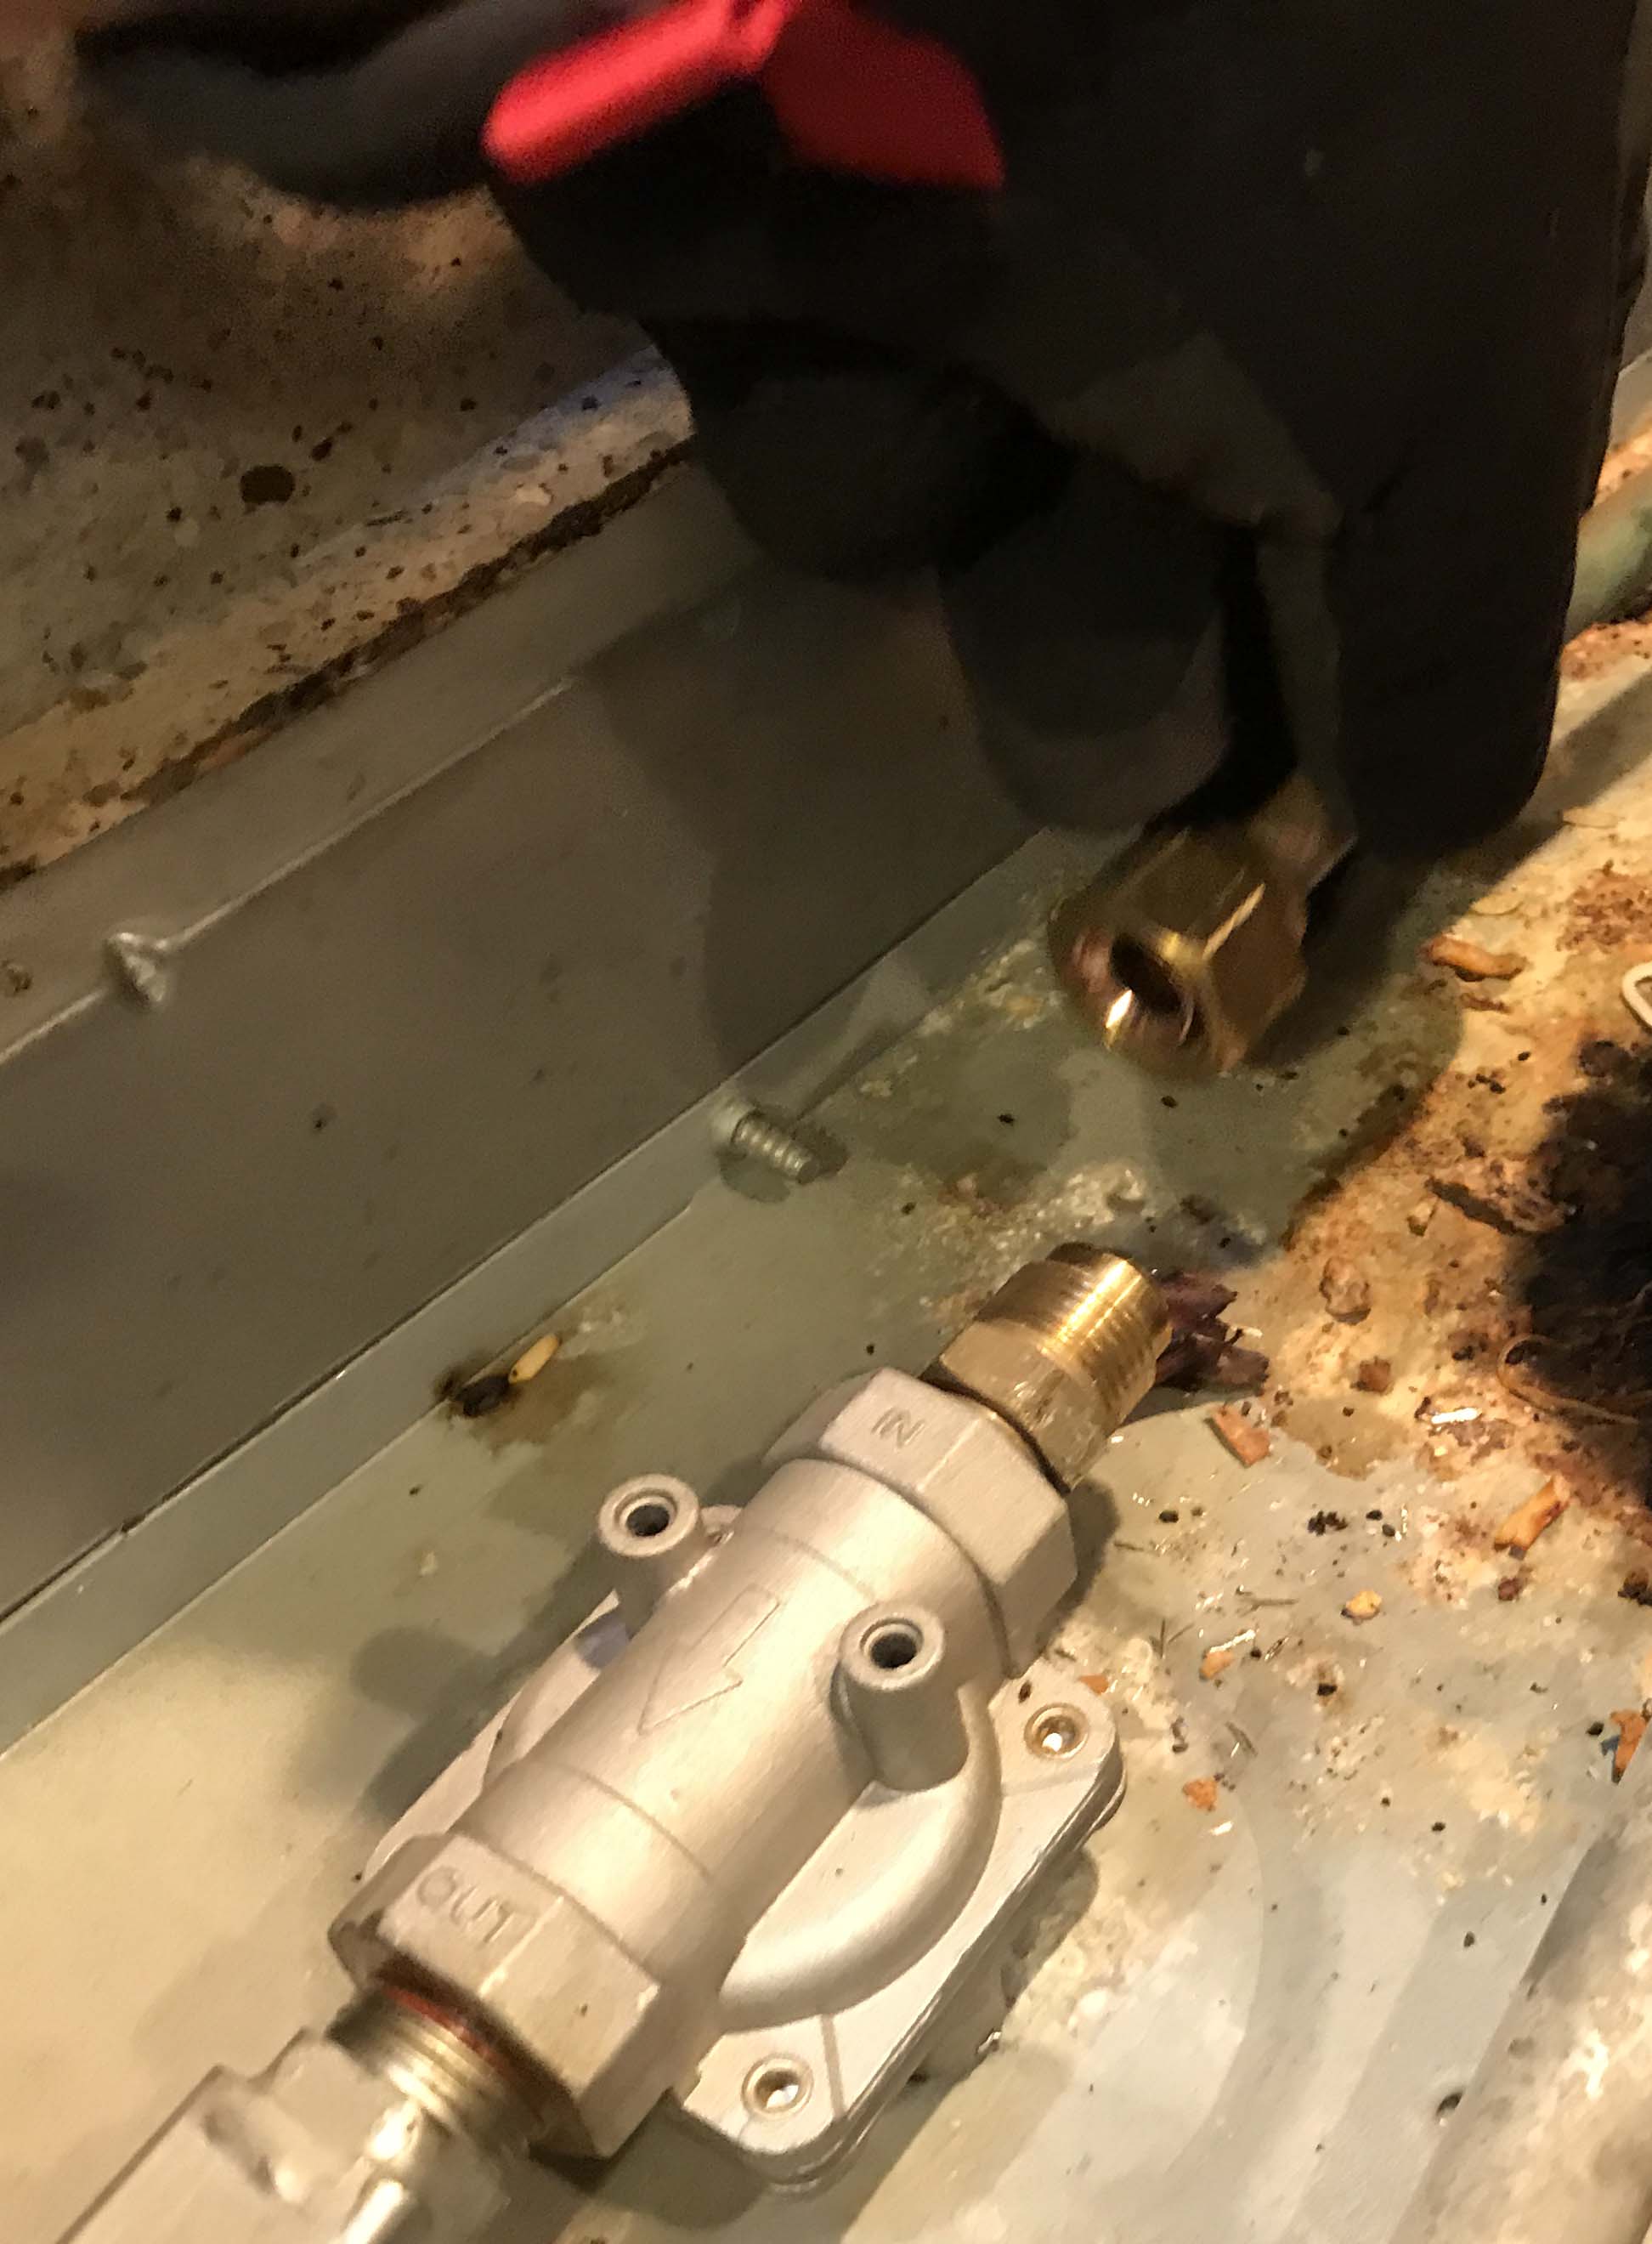
Next was disconnecting the gas line. You just need two wrenches for this. One to hold and stabilize the nut on the stove, and another to turn the nut that connects the gas line to the stove.


Next is the removal of the mounting screws. On our oven/stove there were only 4 at the top. Two in front, and two towards the back. Removing them only took a few seconds each. From what I’ve read, this is all that holds most of them in place, because the lip rests on the counter edge, and that bears the weight. The screws are just there to keep it from sliding out when you turn corners, I guess.
After removing the screws I tipped it forward expecting it to just slide right out, but it didn’t. So I checked the bottom front, and sure enough, there was a screw on each side holding the bottom to the cabinet face.


Once all six of the screws were out, it was just a matter of pulling it out and off to the side.

What I was left with was a mess to clean up!

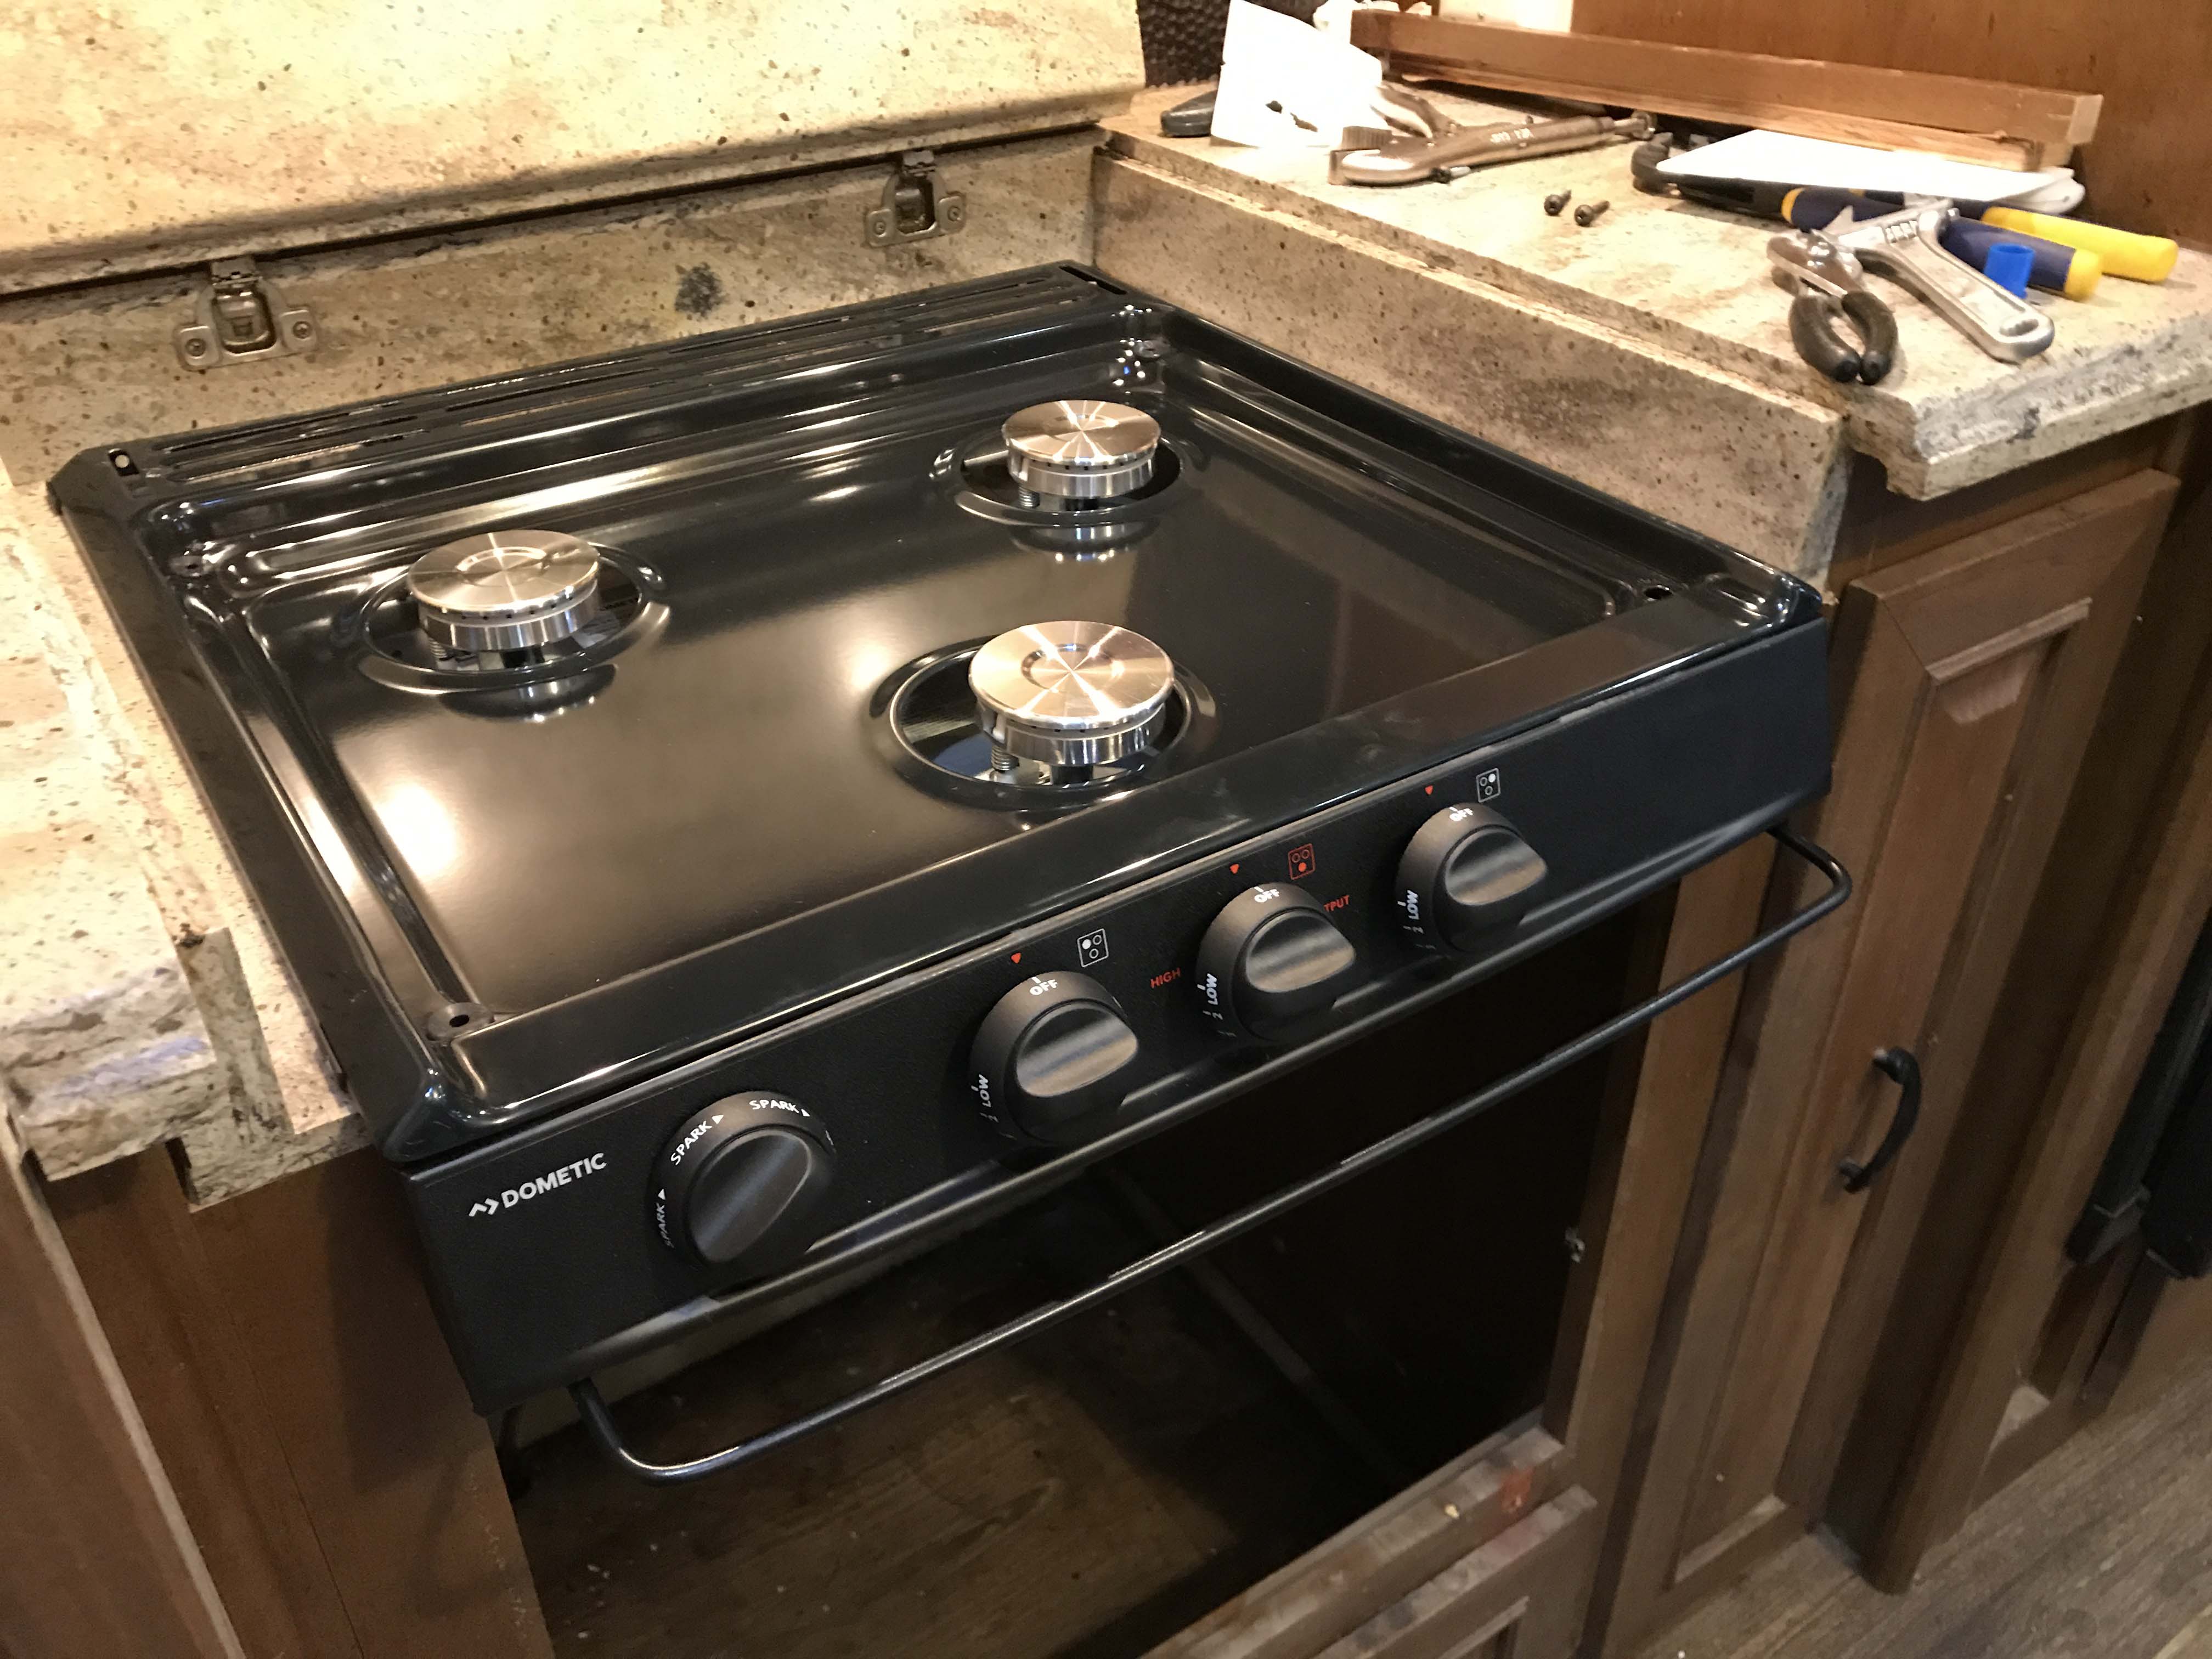
After I cleaned up the counter and walls, I removed the new cooktop from the packaging. It’s the same form factor so it just slid right in where the old one was. You can see along the edge the two concave areas where the mounting screws go. You can also see the blue plastic cap for the gas line. Everything is exactly the same as the other cooktop, except these are sealed burners.
Sliding the cooktop into position. The strip of metal on the right is a retaining strap. It uses spring tension to hold the cooktop cover in place.


It only took a few seconds to reattach the gas line and screw the new cooktop to the counter.
Another few seconds to drop on the cover and lock it into position and set the grate in place.

Once the new top was in place, I just need to do some more cleaning of the newly reclaimed space underneath. A LOT of gunk ended up under and behind the oven over the years.

I used some small pieces of wood to create cleats for the shelf. I know it looks like I used a LOT of screws on the right side, but that panel is only a thin veneer, and there’s really no way to get to the other side to put in a backing plate, so I just put in a bunch of screws. The weight is distributed pretty well, so it will be fine.

I used the piece of 1/2″ plywood from the under the bed storage project from last week to cut a shelf, and lopped of the corners and cut a little area out for the gas line. It’s bigger than it looks like it needs to be because the shelf had to go through the opening at a 45 degree angle and then slide down onto the cleats. I wanted a very snug fit.

Once the shelf was in position, I saw that I had a fair amount of space between the top of the appliances and the bottom of the cooktop, so I made another shelf to hold pizza sheets and wire racks and other small accessories. And not only did the air fryer and instant pot easily fit, so do all the all the accessories for them, and there’s room to spare.

Once I knew everything would fit I stained the shelf and screwed them down, and used a spare piece of wood from the inside of the cabinet that was no longer needed to act as a trim piece on the upper shelf which helped dress it up a bit from the raw plywood edge. I also did what I could to clean up the markings on the cabinetry.

With the lower shelf stained and screwed to the cleats. Jack hopped up in there to check out my work, so I have to clean his paw prints off the shelf.

With the upper shelf and trim piece added.

The recycled trim piece went a long way towards dressing up the finish.

Ready for some Old English to try to clean up the nicks and scratches.

Now that everything is done I don’t think I want to get a cabinet door like I originally planned. I think it will be very hard to find a perfect match, and even if we have a door or pair custom made and stained to match, there’s the question of finding a matching handle. I like the open shelf look a little more. We’re going to use it this for a while and if we change our minds, we can always get a door or pair of doors later.
Supporting our Blog
We very much appreciate your support of our blog.
- As an Amazon Associate I earn from qualifying purchases. Search Amazon Here
- You can purchase the ebook telling the story of how we became full-time RVers.
- You can purchase our recipe book filled with 80 recipes we have cooked in our RV and taste tested by Lee himself. You can purchase the kindle or paperback version on Amazon or buy the Apple version on Itunes.

Very nice. Maybe a tempered smoked or translucent glass door if you decide to go that route. Wouldn’t have to match up the wood.
Now THAT takes the word “handy” to a new level! Really nice job.
Looks good nice job 👍🙂
Very nice work!
That mod has been on my mind for several years. Thanks for the step by step with pics. Looks totally doable now.
That mod has been on my mind for several years. Thanks for the step by step with pics. Looks totally doable now.
A convection oven and an air fryer are redundant as they cook in the same way… blow hot air around the food. Be that as it may, congrats on a good job and a nice improvement!
True, but we already had the air fryer, it was given to us as a gift. We got the convection oven not to replace the air fryer, but to allow us to cook larger things than would fit in the air fryer, and to give us back the space taken up by the oven. Also, the air fryer starts cooking immediately, whereas the convection oven needs to be preheated. – Lee
Pingback: October 2019 Budget – Camper Chronicles
Was thinking of removing both the stovetop and oven.Wife would like to put her foodie and Nuwave induction cooktop on top, plugged in, with shelves below. We rarely boondock,and have outside kitchen with propane connection.
Terrific. I don’t regret giving up the propane oven at all . The convection oven cooks much more regularly. We kept propan burners for when we boondocking
I missed how you plan to protect the stove top’s propane pipe from being damaged by pots or things stored in the new cabinet/cupboard where the oven was previously located. An Instant Pot or crock pot handle, rotated by vibration so it’s up against that propane pipe, might easily crimp it closed, and eventually wear a thin spot into the hose. Which obviously is a safety hazard for starting a fire / explosion. What recommendations do you have for covering that pipe so it’s out of sight, out of reach of damage by items stored in the new cupboard/cabinet?
Lee said this was a good question and grabbed a flashlight and went and checked. There is nothing touching it naturally and the pipe is copper so he feels it’s pretty safe. The underneath part of the stovetop itself is blocked. The copper pipe running from the floor is exposed but nothing is near it. Good question.
He also said he might buy some styrofoam pipe insulation just in case. Good safety tip.
Thank you for this. Exactly what I was looking for. In 6 years I have never used the oven in either the motorhome before, or the trailer now, and it really is wasted space for me. Your post is perfect, straight-forward and clear! All I want is a nice, sealed burner cooktop to replace the 30+ year old 4-burner “rattler” that I have now, and buckets of cupboard space underneath.
Thanks so glad you found it easy and straightforward
Lobe this,Exactly what I have been wanting to do. Now that I read about your story,I will start tomorrow! Thanks for encouraging me!
Fantastic! I rarely regret it but I did buy a small toaster oven /air fryer as a secondary appliance as well.
I want to complete the same mod that you did. But I’m having trouble finding the replacement cooktop that will fit in where the stove was. Where did you find the cooktop and how did you go about determining which one would fit?
I’ll ask Lee to answer as soon as he is back in town !
Lee says there are only two main manufacturers Atwood and Suburban. And they sell cooktop only same size of stove. He looked up our make and model oven stove combo and got the installation diagram with measurements and then compared to stovetop only and ordered it from there . Hope that helps
Pingback: 7 Miracle RV Storage Ideas: Ways to Overcome Kitchen Chaos
Pingback: Wohnmobil Kochfeld Ausbauen (DIY oder Fachmann?) – Camper Welten