
For those of you who don’t like reading about bodily functions you probably want to skip this one, but for those who acknowledge that everybody poops, this is a detailed explanation of how Lee replaced our RV toilet. I mentioned in our last blog post that we were having some trouble with the valve in our toilet and that we had gone to Camping World to look at a possible replacement, but what I didn’t know during that trip was as soon as we arrived at our gate guarding position the valve would break and be stuck in the open position. This meant that we couldn’t turn the water on in the rig at all, so it went from a future upgrade to an immediate need, which happens more often than I would like living in an RV.

Original toilet

Flush valve stuck in the open position, so you can see why we couldn’t turn the water on.
Add to that neither one of us had ever actually replaced a toilet, although Lee learned how to do it in RV Tech school and felt pretty confident that he could make the switch. Thankfully we were only an hour away from a Camping World that had one in stock, so as soon as we got settled in Lee left and went to pick up the Revolution 320

The reason we didn’t buy the toilet initially was because we needed to make absolutely sure the measurements would work. Lee had measured the height and width of the existing toilet, but since this one was 2″ deeper (from the drain hole to the wall behind) we needed to make sure we had the space. I was pretty excited about the new model because it was made of porcelain instead of plastic, and feels much mor like a residential toilet. I’ll admit it, I am not a fan of these plastic toilets, and after three years that feeling has gotten worse, not better. Plus, they are pretty difficult to clean and the lack of a lip on the outside edge does lend itself to spattering. This toilet not only feels better, but also automatically puts a small amount of water in the bottom of the bowel after flushing which helps keep the seals from drying out, and cuts down on spatters. I’ll let Lee explain the details of how he made the switch, but the whole thing went beautifully, and I am VERY happy. What can I say, some things in life just matter, and if I knew the switch would have been this easy and would have made such a difference I would have done it a long time ago. It ended up costing $250 but I think it was worth every cent, and for those of you who know how cheap I can be about stuff like this, that is saying something! Alright onto Lee’s description…
There’s actually not much to describe. It was probably the easiest RV related thing I’ve ever done. The most important thing if you’re going to do this is to make absolutely sure that the new toilet will fit in the space, and not interfere with anything else. In our particular case the big concern was the distance from the center of the drain hole to the wall behind. We were told that most toilets are 9″ on this dimension, but the one we wanted requires 11″.
Removing the old one was incredibly easy. I just turned off the water and disconnected the spin-on water fitting. Then took off the bolt covers and removed the two nuts that secure the toilet to the floor. Lift up and away, and it’s gone. Be careful how you tip it when you lift, whatever water is in the valve and inner hoses/pipe will leak out onto you. But it’s just clean water.

Have a towel handy to set it on.
I took advantage of having it out and thoroughly cleaned the floor and wall around it, which can be hard to get to with a toilet in the way. I really appreciated this. That’s my guy, he always does the complete job. – Trace

I cleaned the mounting flange, which is the large black disc in the photo above, and checked to make sure all the screws were solid and tight. This is a flat round disc that is attached to the floor, and the toilet attaches to it, so it’s good to be sure it’s well secured. Technically there should be eight screws in it, but four are also OK.
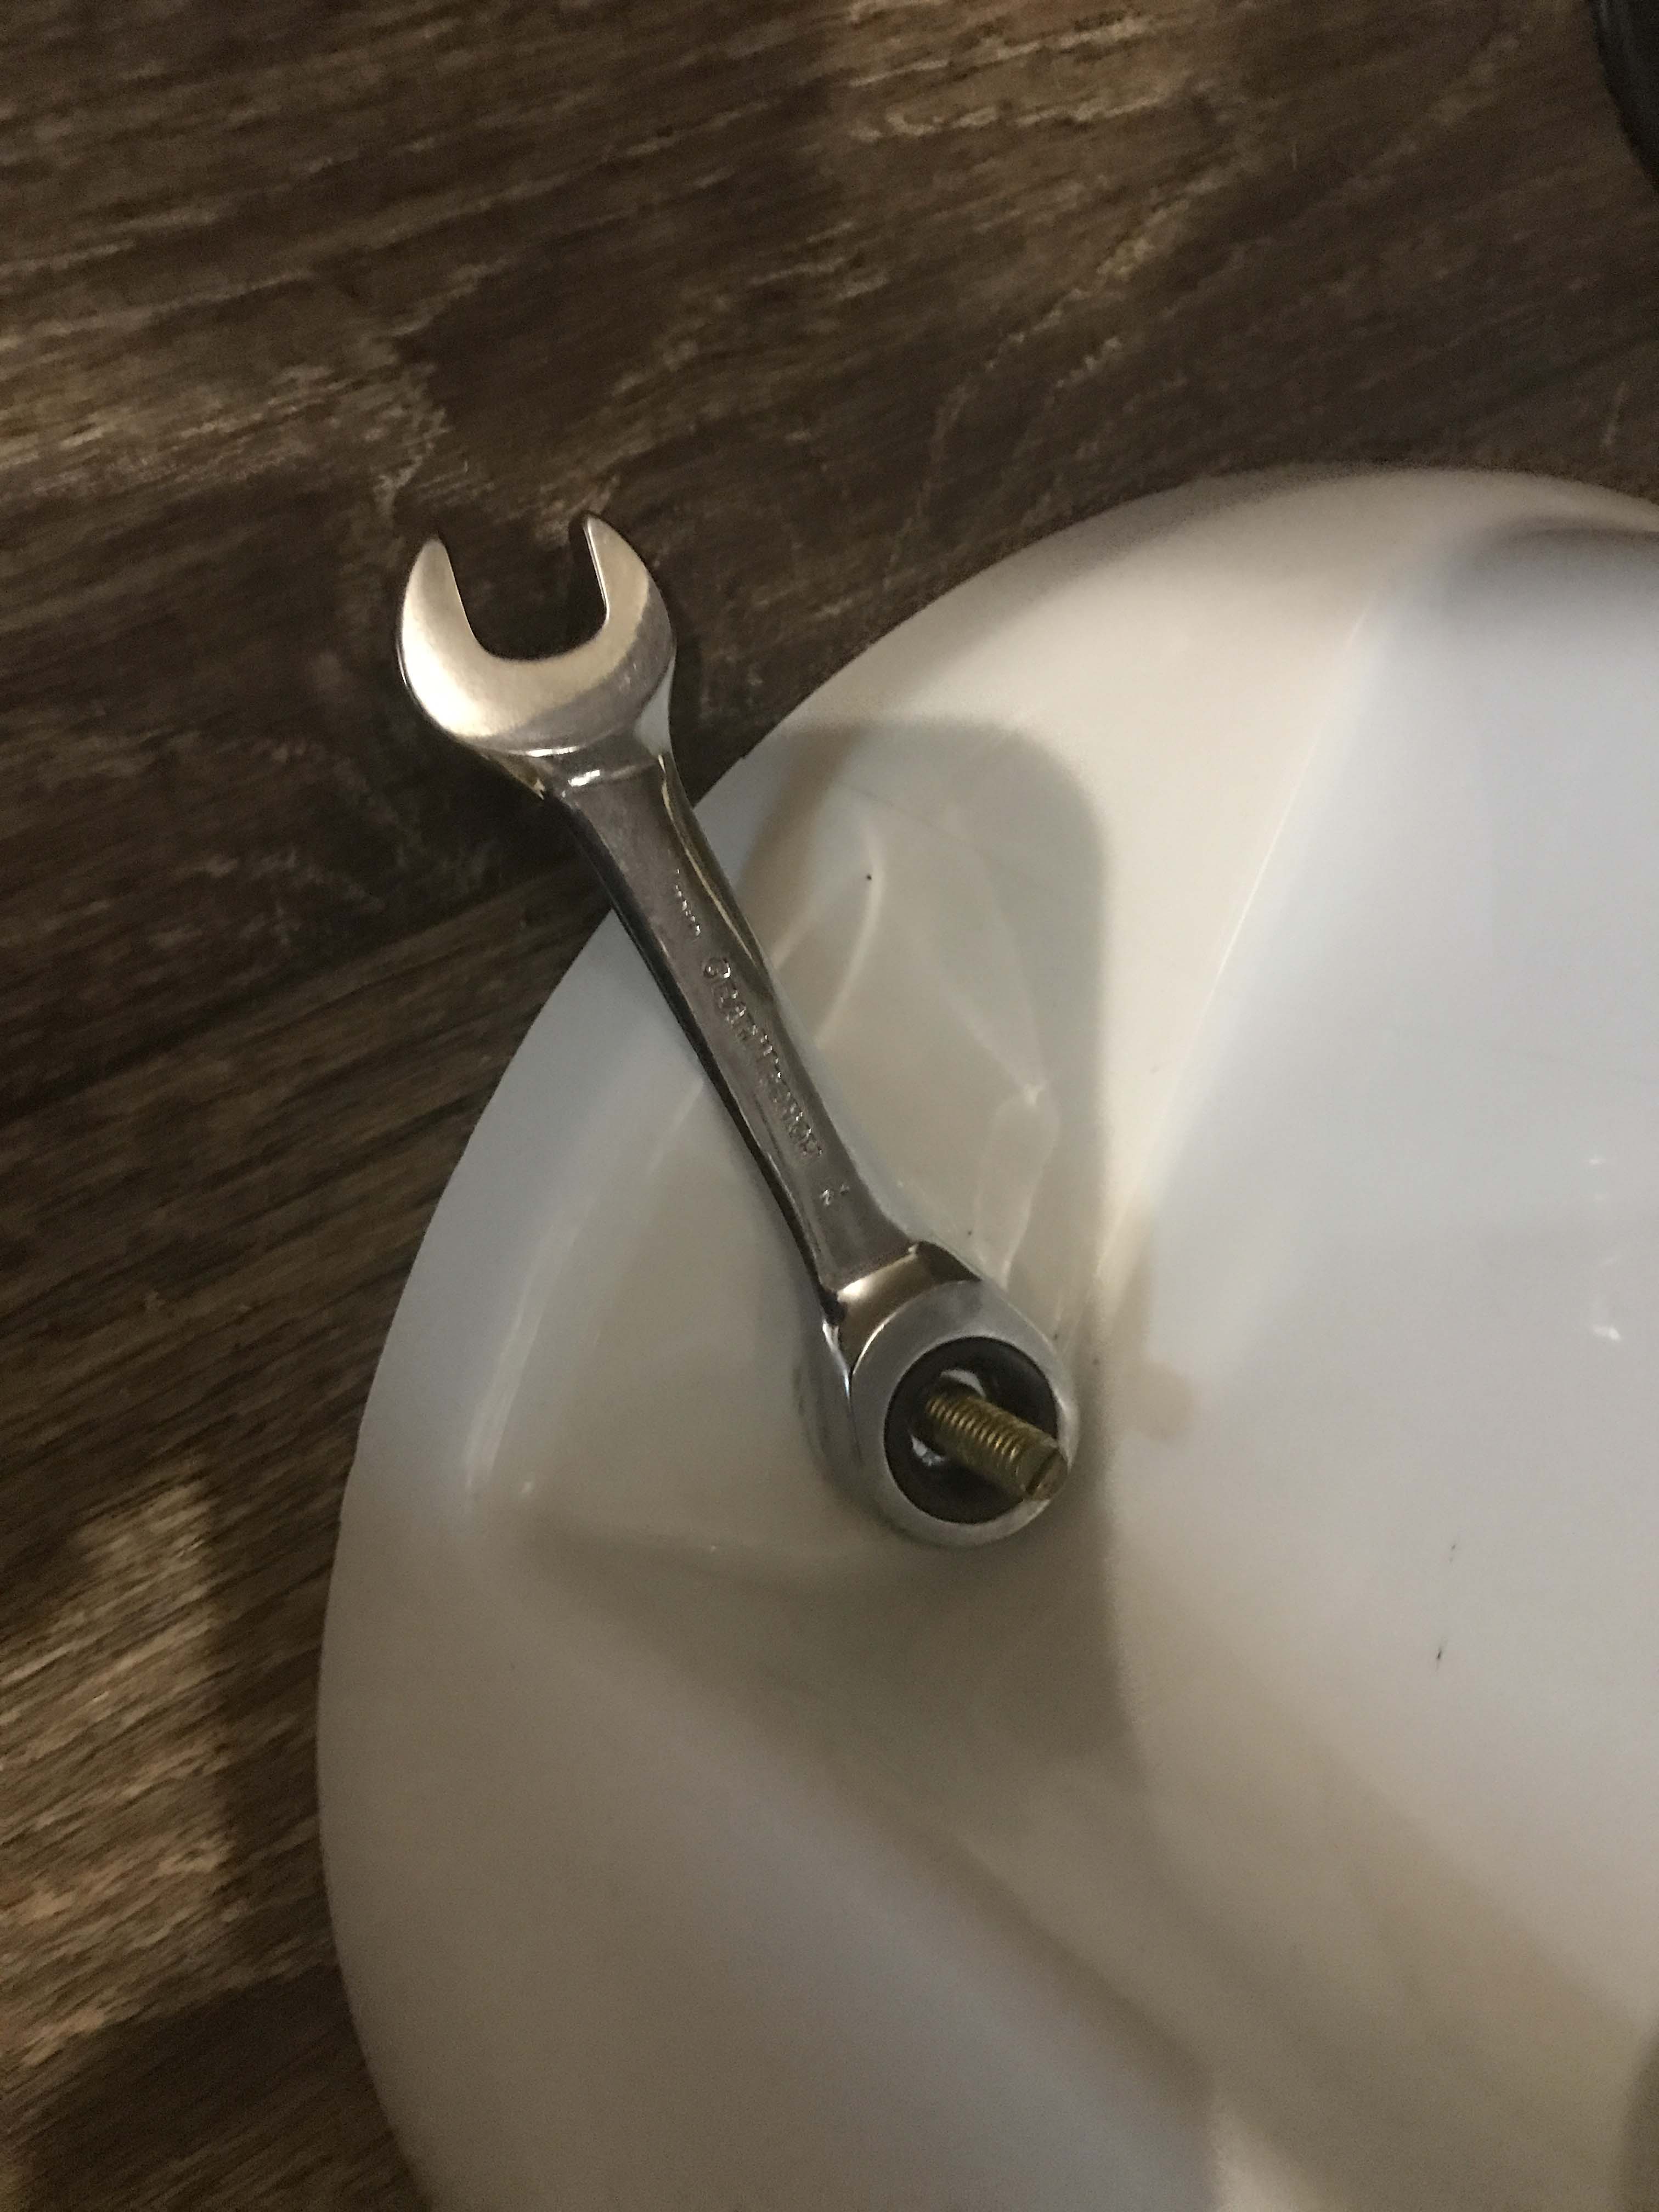
Next I put in the new T bolts that came with the new toilet, and carefully lowered the toilet onto them. I checked to make sure it was lined up properly and put on the included washers and the nuts, and tightened them down. A ratcheting wrench works really well for this, because there’s not enough clearance to get a socket over the nut. You have to be careful not to over tighten, because while the bowl is ceramic, the base is plastic, and you don’t want to crack it. You also want to alternate sides as you tighten them to keep everything even.


Then I covered the tops of the T-bolts with the covers, and reattached the water line. I turned on the water and did a seal test, and everything was just fine, no leaks inside or out. The original toilet had a center water fitting, and this one has an offset, but there was enough slack in the pex line to pull it up a few inches to make the angle. One of the problem we had that caused us to do all of this was that when the valve failed it would just run and run. The first time it happened I was sitting outside while Trace slept and I heard water hitting the ground. The valve had stuck open and filled the bowl, and then overflowed. Luckily I was there and able to turn off the water, and the valve “unstuck”. The second time it happened I was standing in the bathroom and couldn’t get the valve to close, so I was able to just turn off the water. But that meant that we had no water unless we popped the Johnny Chock in so the water could run down the drain. So the next thing I will be doing is putting an inline shutoff valve between the floor and the toilet fitting, so if I ever need to I can turn off the water to just the toilet. I will probably go ahead and do the same thing to the hot and cold on the sinks and shower while I’m at it, which will give me peace of mind and the ability to continue to use water in the rig if we have another failure and we aren’t close enough to get a replacement part right away.I would have done it at the same time, but I couldn’t lay my hands on a 1/2″ to 1/2″ inline valve. Apparently, they’re uncommon.


I also double checked the seat, and it was a little loose, so I tightened that up with a large screwdriver while holding the plastic nut underneath.

It’s Tracy again. Once that was done we tested it. We decided to use the internal water supply so I stood at the panel while Lee stayed with the toilet. We ran water and everything worked fine and we were both pleased to see that after every flush a small amount of water comes into the bowl which helps keep the seals from drying out and to keep the bowl clean.

So here it is, in all it’s glory and again we couldn’t be more pleased. I love the extra height, how it feels, and no more splatter because it has a lip! We may seem a little too excited, but if you think about it, a toilet is something you use every day. Why shouldn’t that be something to care about? Plus I used the new toilet as an excuse to get some new bathroom accessories. I kept the toilet paper holder, but the rug, toilet brush, and trashcan are new!

Fits perfectly and allows the door to open fully which was important since we do use those cabinets

Larger seat!

New toilet brush. I made sure it was heavy and had a wide base so it wouldn’t just flip over when we travel.

New trash can although I really liked the old one so replaced it with the same thing

And the rug, which I obsessed over. Ended up getting a 100% cotton one because I was concerned the memory foam ones wouldn’t wash in our Splendide.
So if you are not feeling your old toilet…pun intended…don’t be afraid to put in a new one. Just make sure you take good measurements prior to making your purchase, because once the toilet is removed from the packaging you cannot return it according to Camping World.
Supporting our Blog
We very much appreciate your support of our blog.
- As an Amazon Associate I earn from qualifying purchases. Search Amazon Here
- You can purchase the ebook telling the story of how we became full-time RVers.
- You can purchase our recipe book filled with 80 recipes we have cooked in our RV and taste tested by Lee himself. You can purchase the kindle or paperback version on Amazon or buy the Apple version on Itunes.

I changed to a 320 several years ago, best investment ever. Also the flush seal on the 320 can be removed and cleaned or replaced without taking anything apart.
Nice. Not unlike replacing a household toilet, except no tank. You might want to get some deep-well sockets, for just such an occasion.
One of the interesting thing about living on the road is your inability to carry all the tools. It’s both a weight and a space issue. Lee’s gotten pretty good at making do with less in that arena
Oh, I get it. If you carry ONLY deep well sockets, you will occasionally have a job they are TOO long for. Combining open-end wrenches with racheting wreches is a good idea and shows how far you have to drill down the stuff you carry to make sure you are maximizing space and weight.
Pfft. I have a complete set of deep well sockets, metric and imperial. The problem was that there wasn’t enough space between the socket and the toilet base. Which is why I also have a complete set of ratchet wrenches, metric and imperial, short and long. If I could figure out how to fit more tools in my truck, I would. – Lee
Very informative post! I am curious about one thing, though…my residential toilet requires a “Wax ring” at the toilet base. Are RV toilets exempt from said ring?
Great question. According to Lee the RV toilet has its own built in seal. It is a soft rubber that mo,da and compresses. I learned something on this one. Had no idea!
If I may, the wax ring is required because on residential toilets, some waste water is contained IN the fixture in the S-trap at the bottom. The wax contains leaks and sewer gas. RV toilets contain no wastewater, when you open the valve, everything goes straight down into the black tank, then you backfill the top of the valve with water which serves the same purpose. Short answer: residential toilets are gravity fed and the “flush” valve is at the top of the bowl in the tank, RV toilets the “flush” valve is at the bottom, so no wax ring is needed!
Awesome explanation Ted! I learned more stuff today 😍
Good job. How much heavier is it?
I’m not sure. It’s not as heavy as a home toilet.
Great photos of the job. Interesting reading.
Thanks for the photo comment. I kept hanging on top of him and making him stop so I could take pictures, he was a good sport about it lol
Thanks for the tutorial, I’ve swapped out several house toilets so I can probably handle that job when necessary. I also like the idea of open/ box ratchet wrenches. I picked up my proposed tool box and I knew it was waaay to heavy. I think i loaded like i was going to doung maintenance on the sticks and bricks. I need to think smaller.
My advice is take everything you possibly can, and get rid of things in small and large “purges” if you don’t use them within a year or some other arbitrary time frame that you decide on. – Lee
Great job! I agree that porcelain is far superior to plastic – you will not regret the upgrade! Our valve doesn’t shut on its own, we have to push up on the pedal with our foot to get it to fully close. It’s been that way since we moved in so it’s weird when we visit someone else and see how a properly working one is. Probably someday Bill will have to do this job – so thanks for showing how easy it (hopefully) is!
This is a job that’s next on our list and will be our 4th toilet in 8 years! The first 3 were covered under our extended warranty which has now expired. The seals never last and now the fill valve occasionally sticks in the open position.
I highly recommend putting in a shutoff valve right before the water inlet fitting, so you can turn the water off any time you want or need to. I finally found what I needed, and assuming you have 1/2″ pex, this is what you can use. It’s a 1/2″ x 1/2″ ball valve, with push to fit (sharkbite type) fitting, so all you need to do is cut the pex, and put this in!
HOMEWERKS WORLDWIDE 126-8-12-12B 1/2″ Push Fit CPVC Valve
Lee
Thanks Lee. That’s another upgrade that’s been on my list. I think this is something that should be standard on all rigs.
Pingback: Fourth Year – By the Numbers – Camper Chronicles
Pingback: Fifth Year – By The Numbers – Camper Chronicles
Pingback: More Ten Year Lists – Camper Chronicles