
This post is written by Lee
First I have to apologize for taking so long with this post. I started to work on it a while back, and wanted to include a “before” picture of the tool boxes in the back of the truck that have been there since January 2015. I didn’t take one because I had been planning on this platform project for a while, and was walking past the truck, and thought “I should really get started on that before summer is over and it’s too late, and while I am sitting for a while and have access to a workshop, etc.” So I decided to get started by just taking the drawers out of the tool boxes. That was a lot easier than I thought it would be, and the next thing I knew the entire back seat area was cleared out and I hadn’t taken a picture. Then later when I was starting the post I thought maybe I had one that I took previously. So I started looking through pictures, which led me to start pulling out pictures I really liked so I could use them as wallpaper and screensaver images for the computer. I also made a ton of new masthead images for the blog. Why not? I was already looking through the pictures. Five weeks and just over 137,000 pictures later, and I was very depressed to find that in all these years, I never took a single picture of the back seat area of the truck, with the toolboxes in it. Isn’t that crazy? So I finally just decided to write the post anyway, even though it’s incomplete. If any of my friends or family out there have a picture of the toolboxes in the back of my truck, let me know, I will update the post. And it can’t hurt to look through all your pictures anyway, and pick some new ones for wallpaper and screensavers!
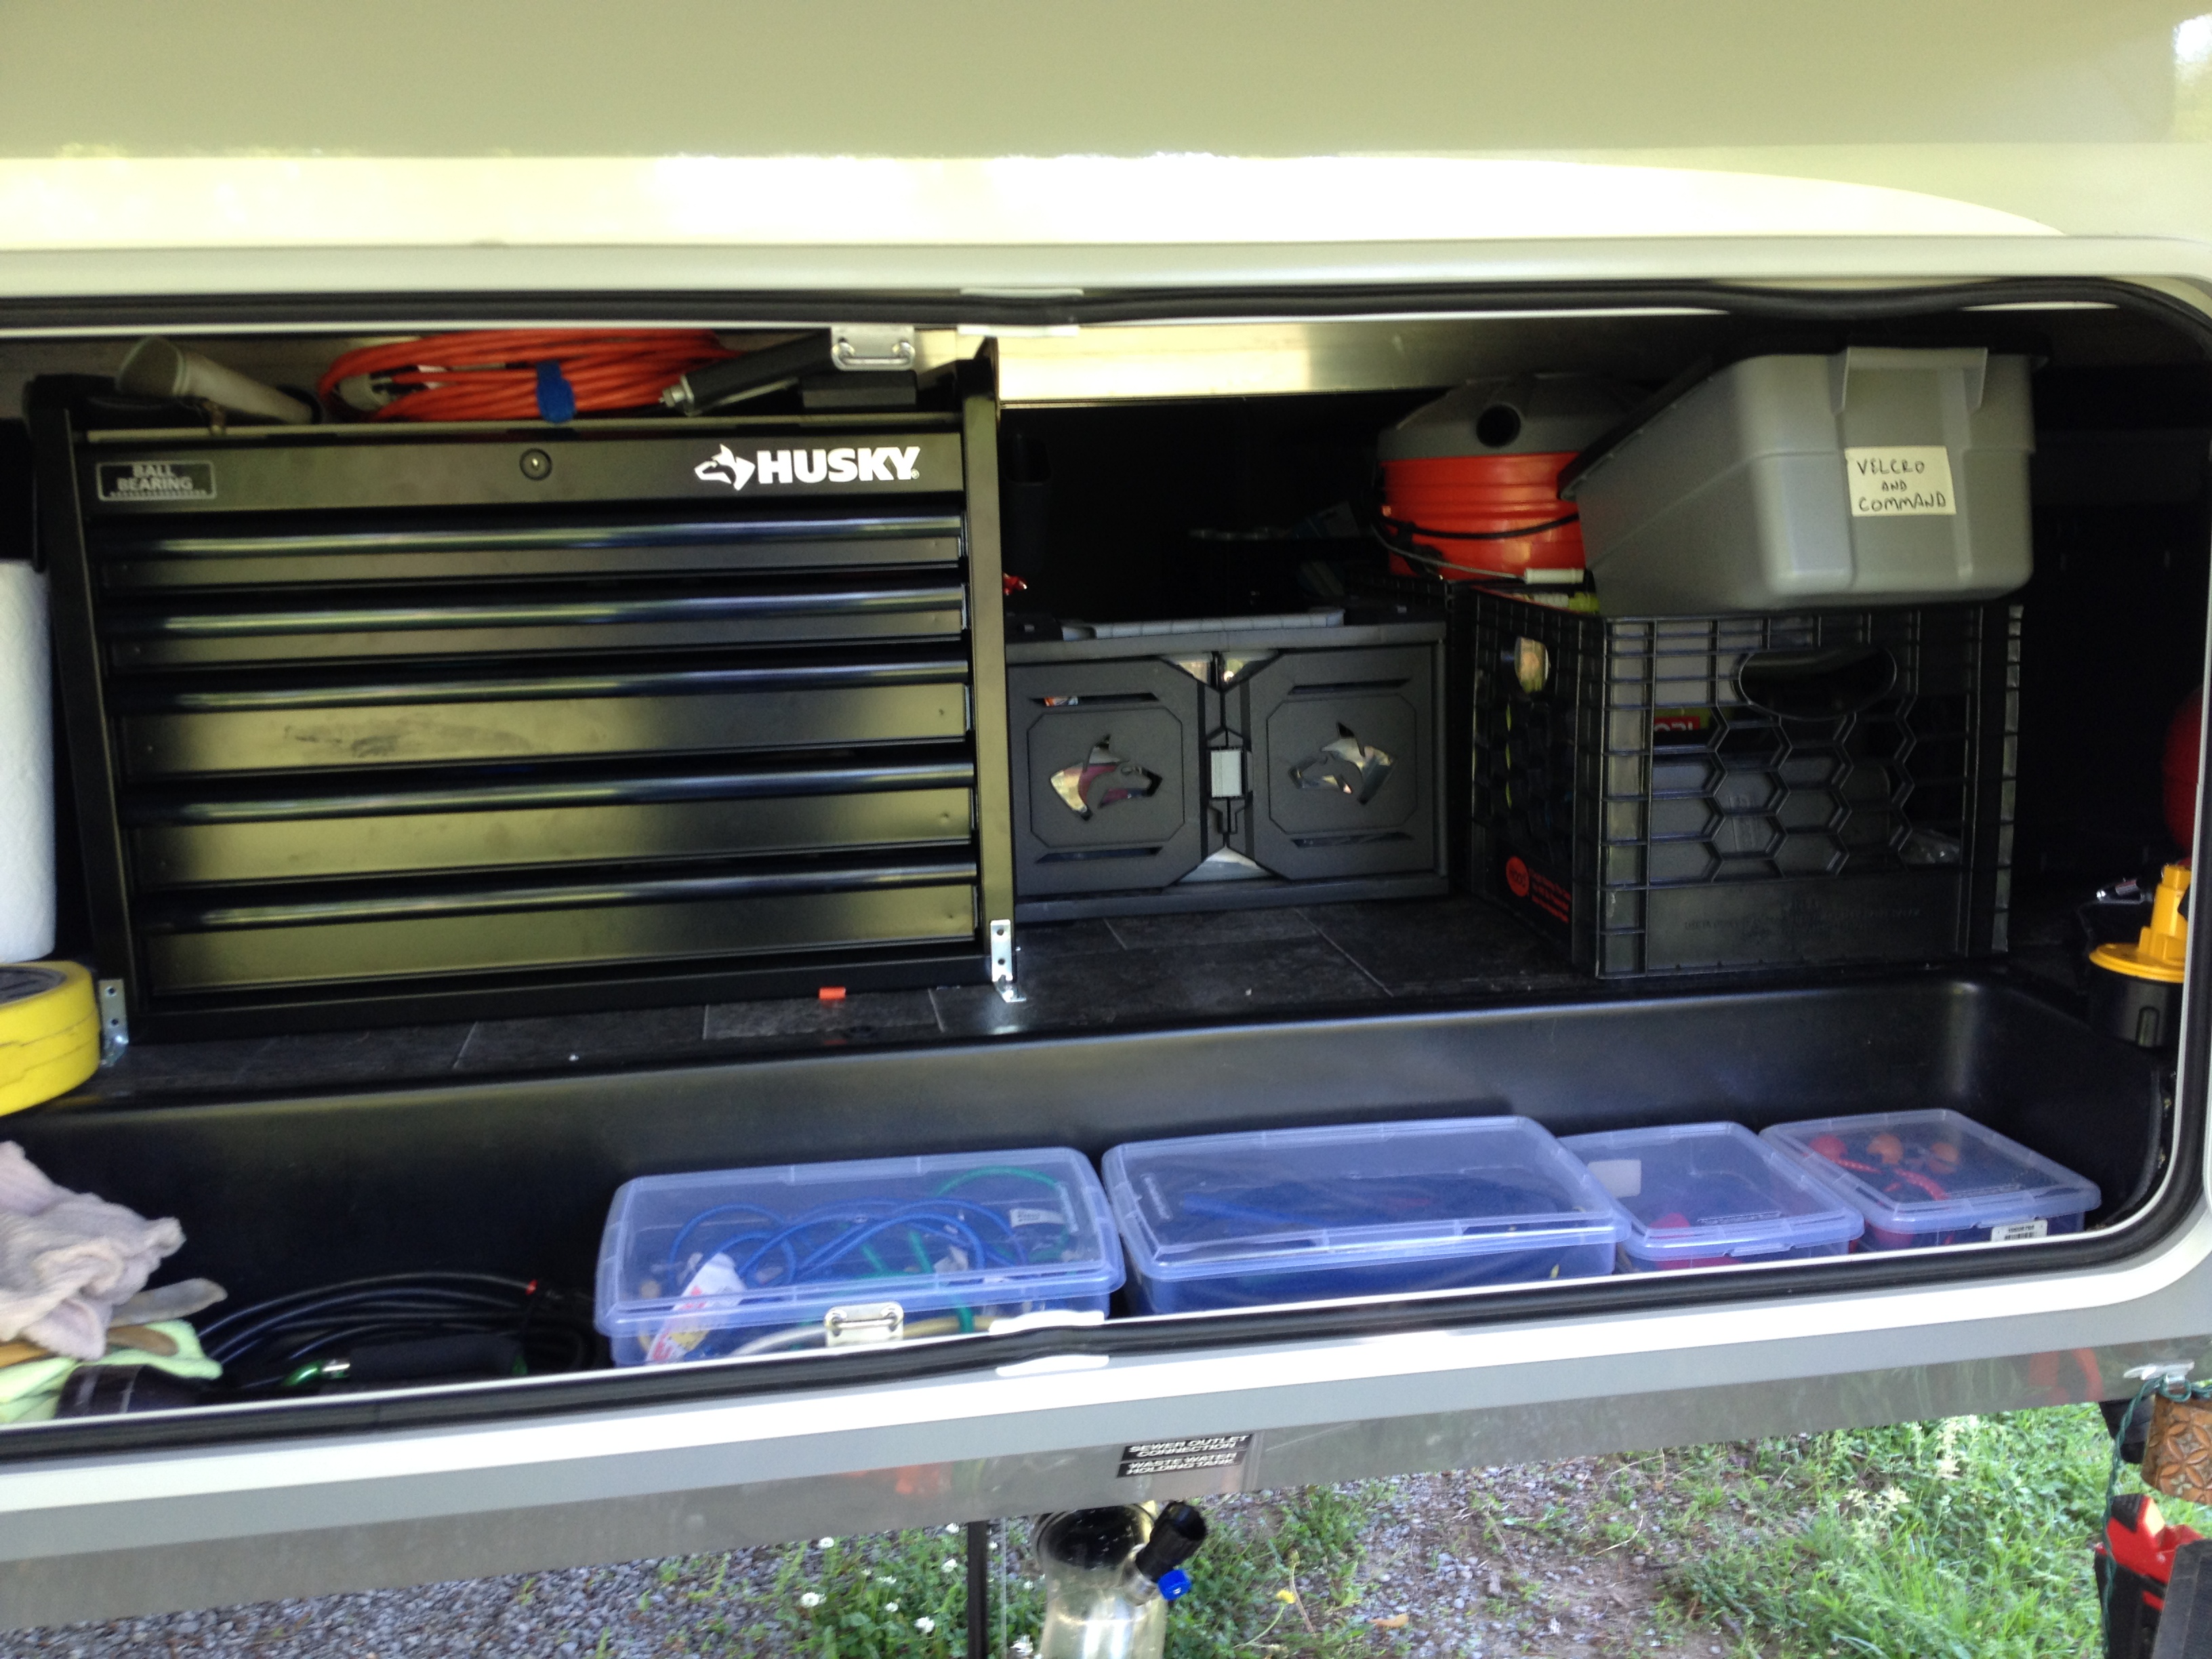
So, waaaaay back when we first first got our rig in April 2014, and knew we were going to be full timing, I wanted to have a tool box. I knew lots of people who used everything from a bucket to a plastic bag, and I wanted something accessible and organized, because I really thought I would need my tools more often. So I got a 5 drawer tool chest topper, like mechanics use, and had a friend who owns a machine shop remove the lid, which locked the drawers when it was down, and he installed a handle on the side that locked the drawers. I mounted the toolbox in one of my storage bays.
This worked really well in the beginning, but then once we hit the road I decided I would earn income by being a mobile RV tech. I thought it would be best if I had my tools in the truck, and so I removed the back seat. I didn’t take any pictures of that process, either, because it went the same way. I thought about it for a few days, and then just did it all at once. And back then Trace hadn’t reached the point where she wanted to document everything for the blog, so she didn’t ask me to take pictures. Oh sure blame me-Trace. Basically all I did was remove the back seat, and make a very short raised platform out of plywood so that I had a level surface. The floor is not level, it’s higher under the seat than where the feet go. I covered the plywood with black automotive carpet, and then I mounted a three drawer toolbox to the platform and mounted the five drawer toolbox on top of that. The rear of the toolboxes were against the rear wall of the truck, and they were no wider than the driver’s seat, so there was a TON of leftover space to use as a “trunk”. I’d show you pictures, but I didn’t take any, remember?
Soooo, a couple of things about removing the seat, if you’re considering it. We weren’t worried about resale value, because we plan to drive the truck until it dies. We weren’t worried about losing the seating, because I didn’t expect to ever need to put anyone else in the truck. I really didn’t think we would ever meet any people. The main issue with it was that it made the truck much, much louder. The back seat absorbs a LOT of road noise, and in particular it blocks sounds from the back wall, and when you remove it, there’s literally nothing there to stop that noise. There was a also a fair amount of rattling and racket from the tools sliding around. (The squeaking drove me absolutely crazy. Ultimately Lee used ratchet straps to help keep it from happening and they would eventually loosen and start squeaking again and then he would stop and tighten it. – Trace) But, we got a lot of space both in the truck and in the rig. Enough that our inflatable Sea Eagle fit in the truck, along with the pump and the seats and the paddles. We got used to the noise. We found ways around not being able to fit all of our new found friends in the truck. Everything was great. (Since we smoked we liked to drive separate anyways. Now that we don’t, having a back seat would be nice on occasion. Lee’s right though it usually does work out one way or another. – Trace)
And then along came Happy Jack, the Flying King Of The Puppers.
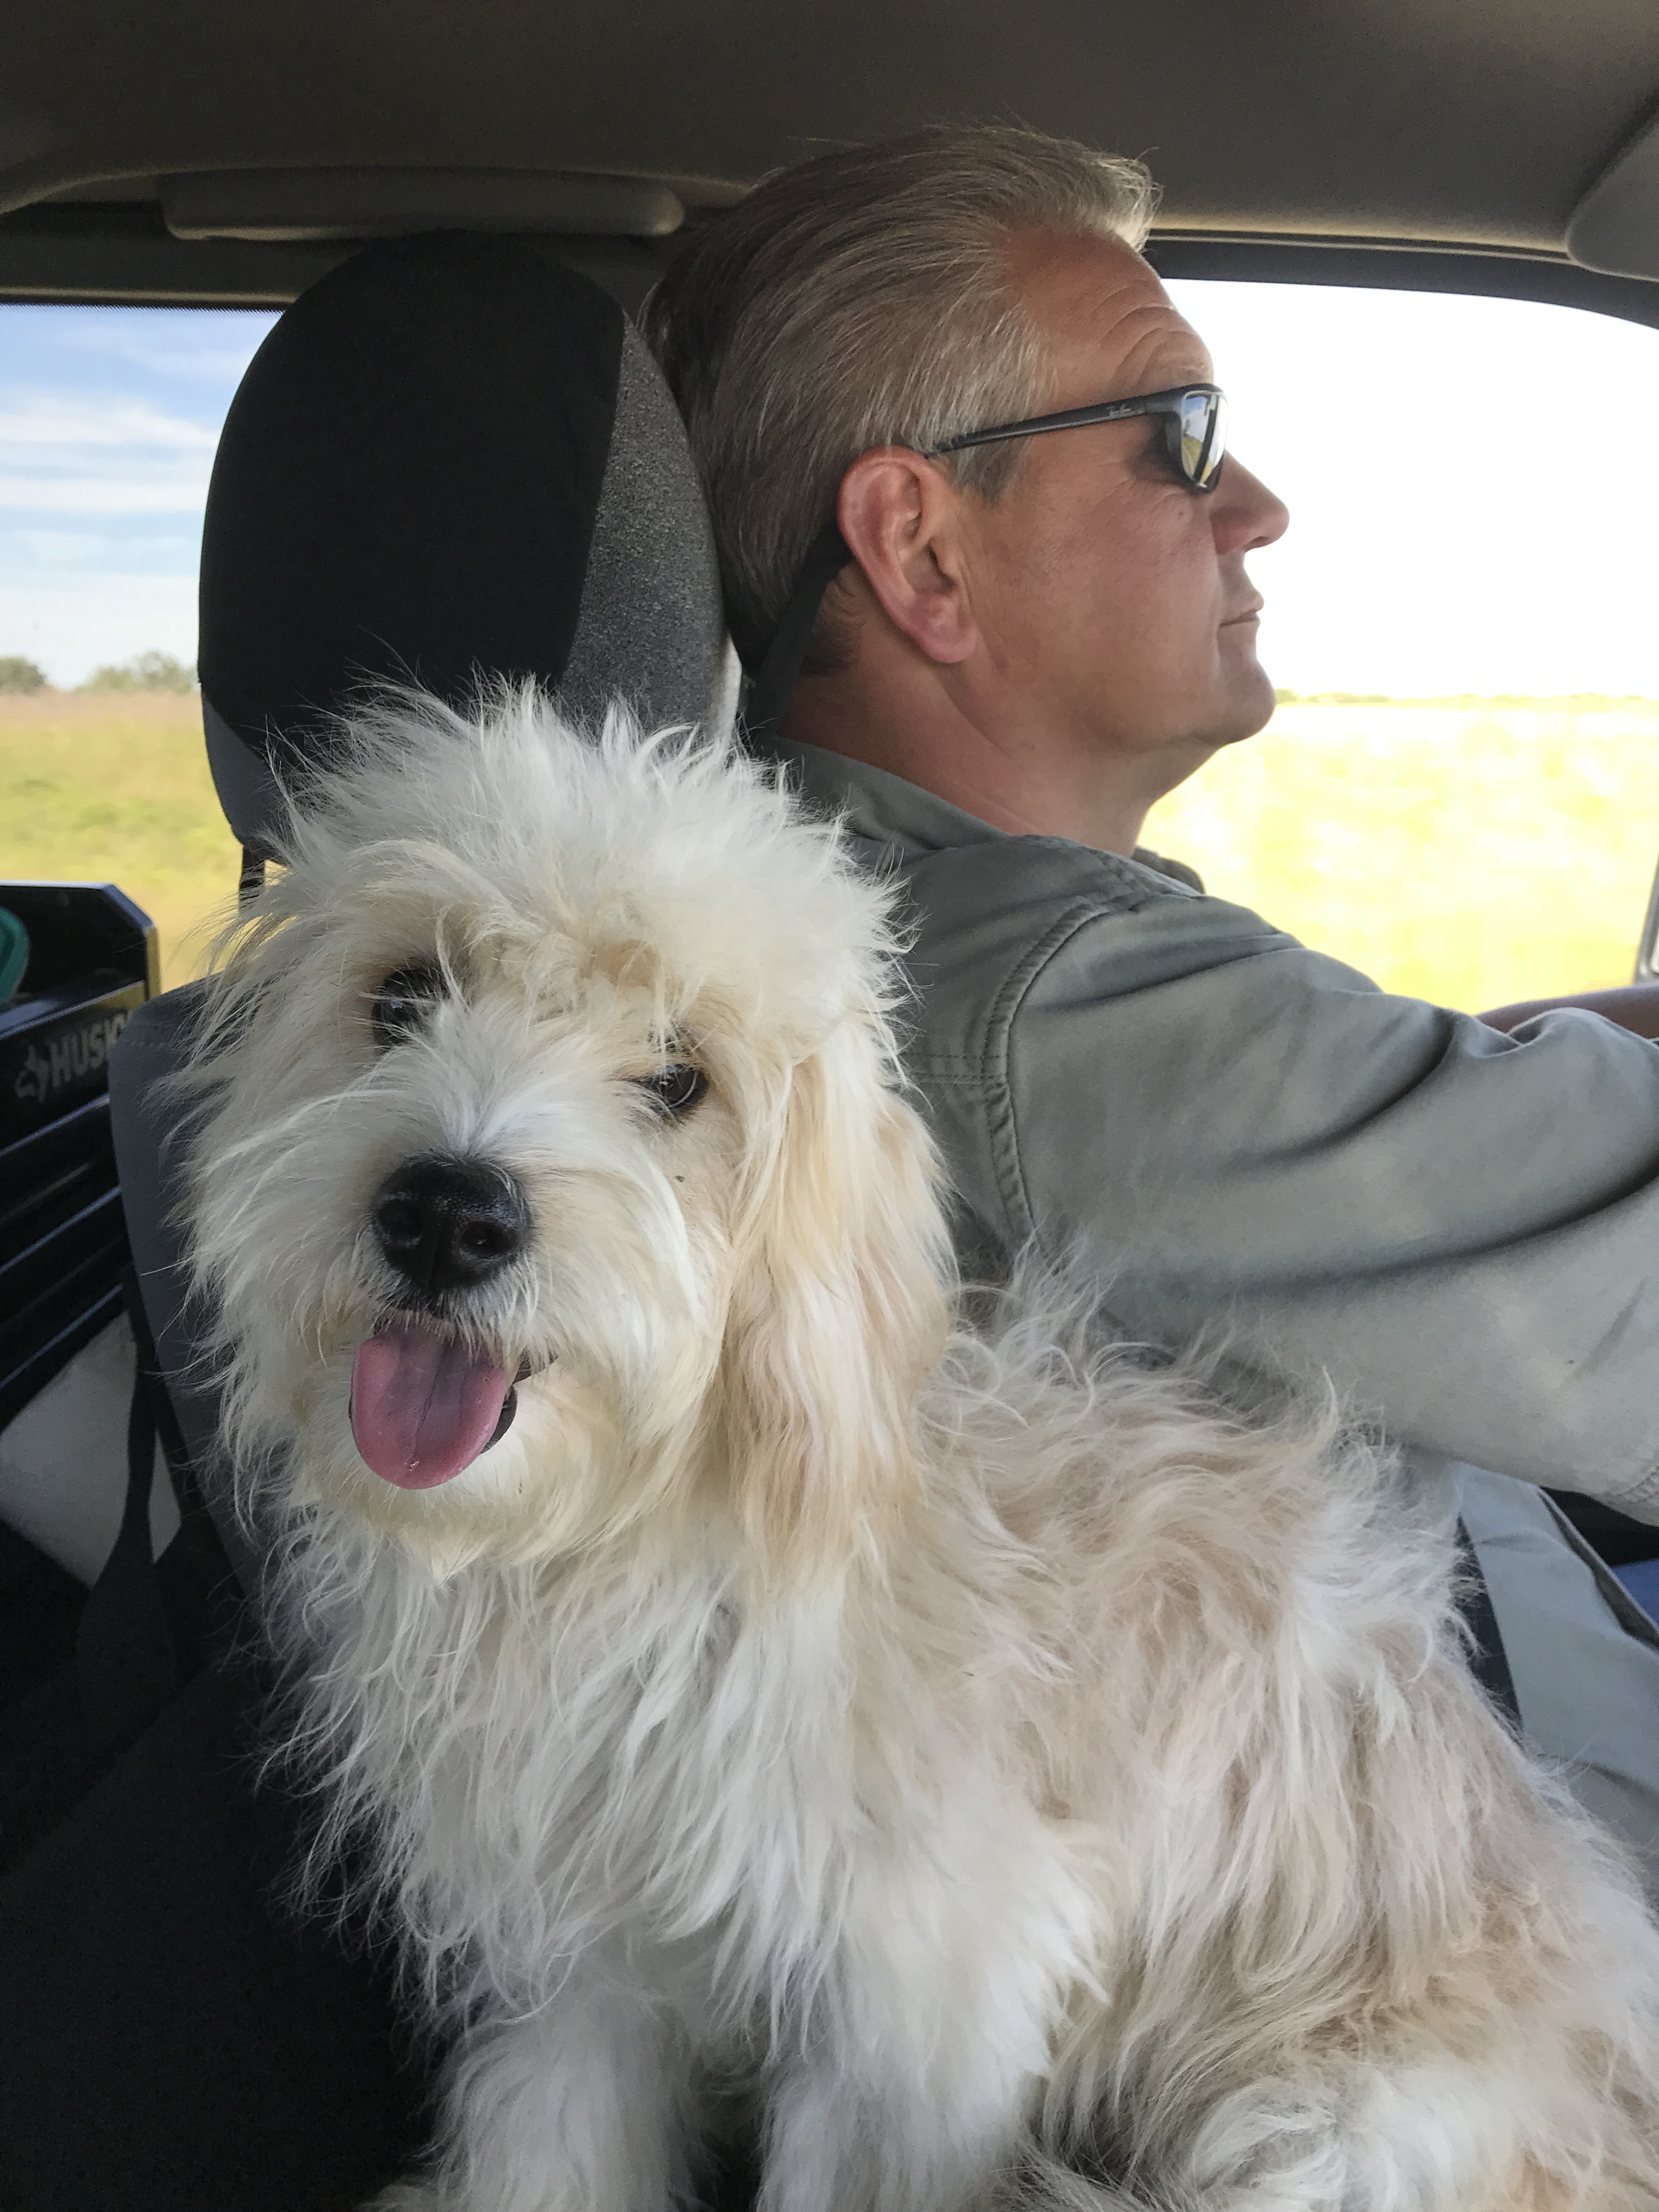
From the very first time he was in the truck he wanted to sit and/or lay on the big center console between us. That was fine at first, but it didn’t take long before he was a little too big. Plus, after five years of rarely needing most of my tools, I decided to get rid of a LOT of the tools, and take out the tool boxes. If I built a platform that was the same height as the console, we could use the space underneath for storage of the remaining tools, and other stuff, and the top could be Jack’s area, complete with a little crate in case we needed to secure him, and we would all have a more comfortable ride. Grocery store runs were also a major factor. With the toolbox we had limited space for grocery store visits which was really only solved by only one of us going and filling the passenger seat as well. – Trace)
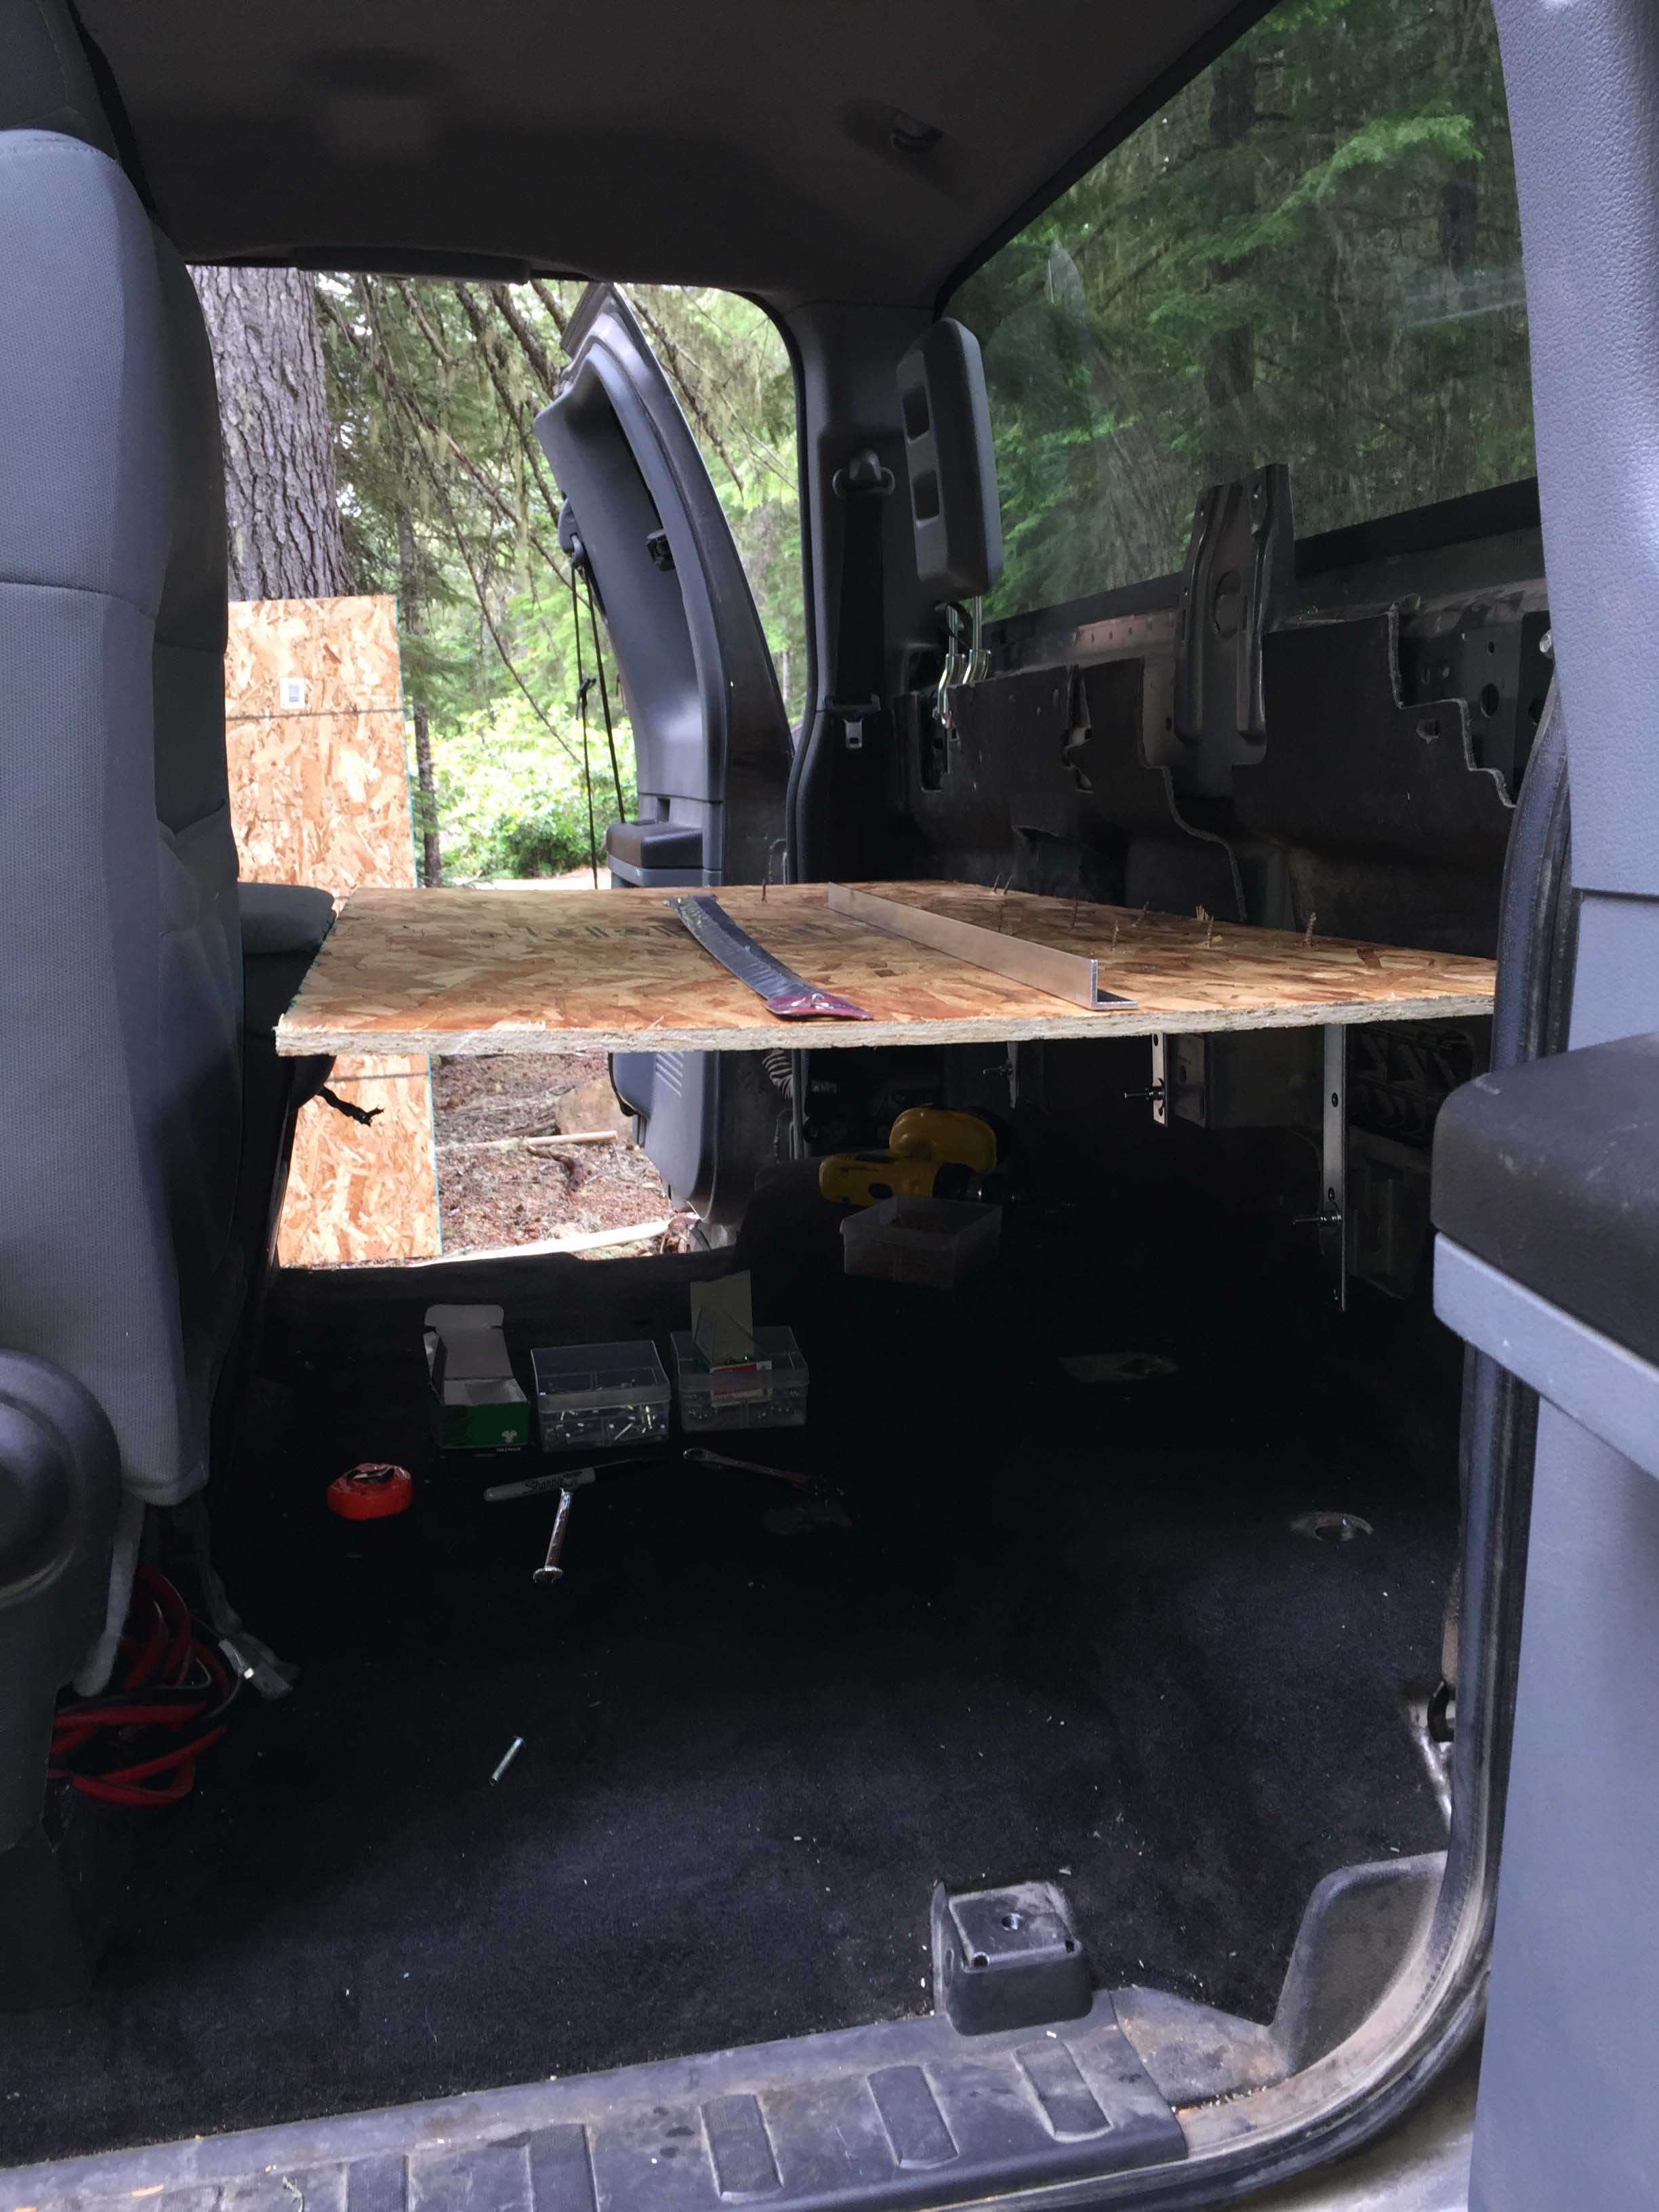
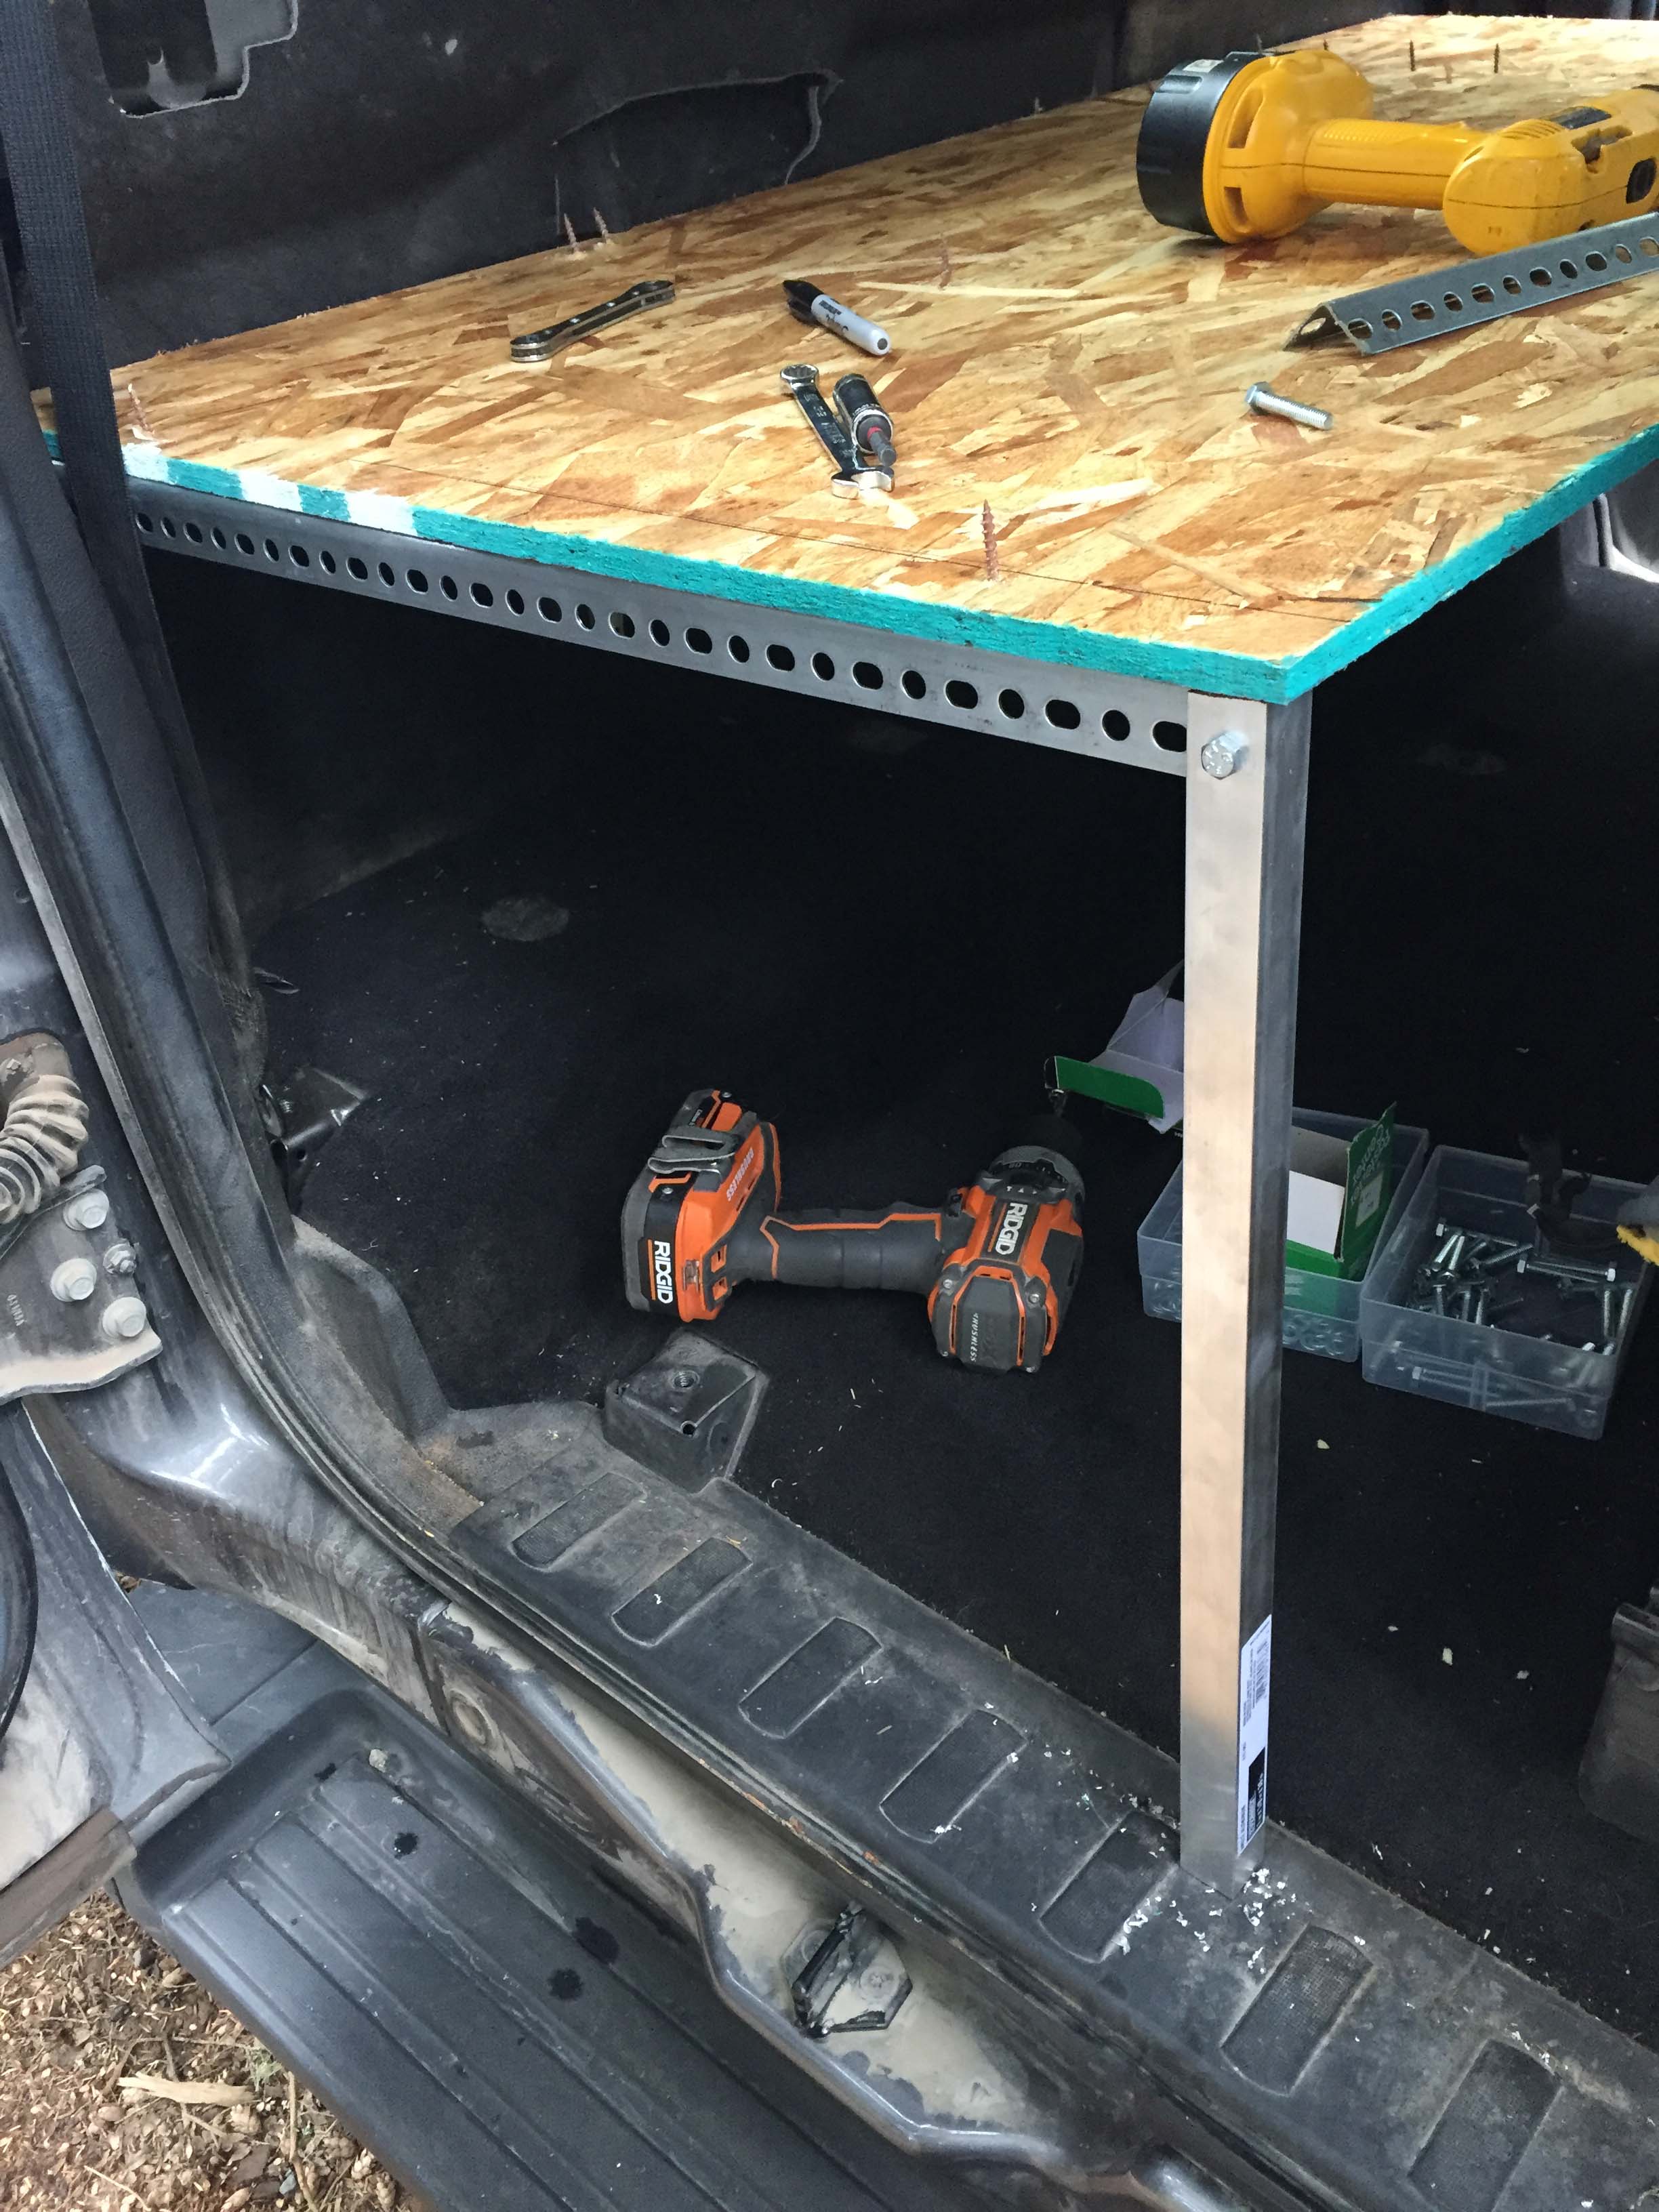
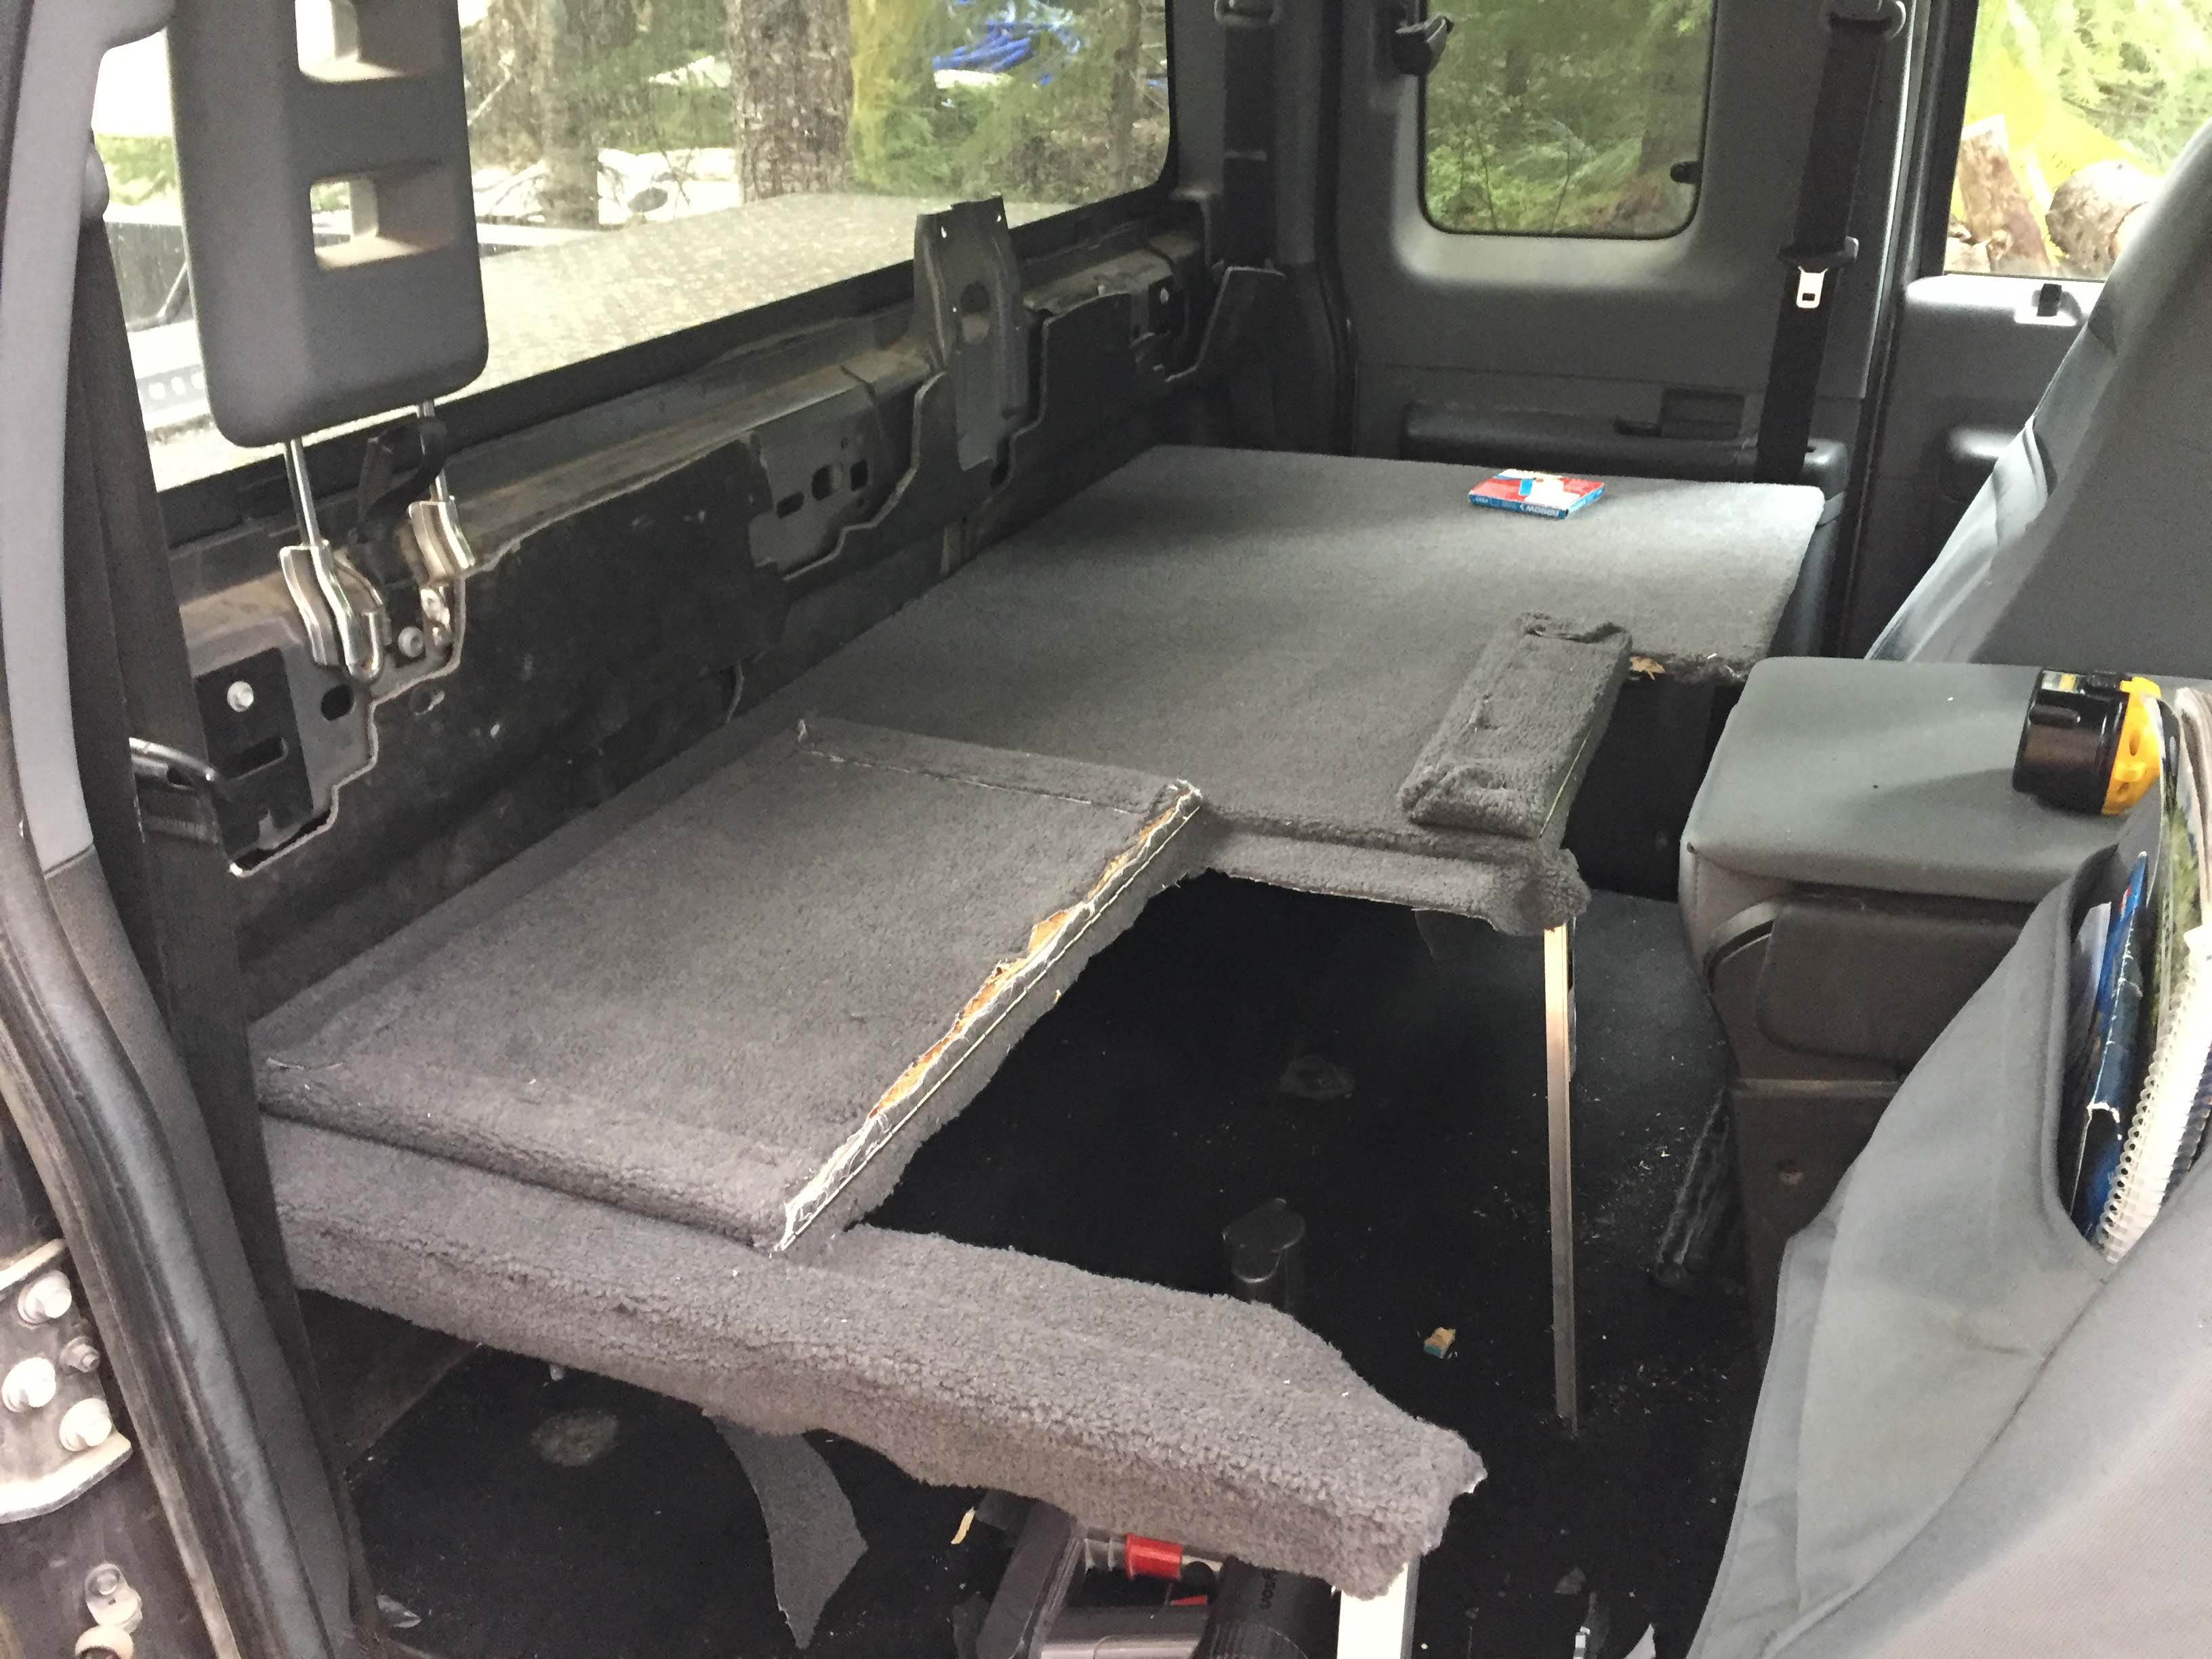
So the first step was to remove the toolboxes and the old plywood platform, which I did, and cleverly took no pictures. BUT, here’s what it looked like when I was all done!
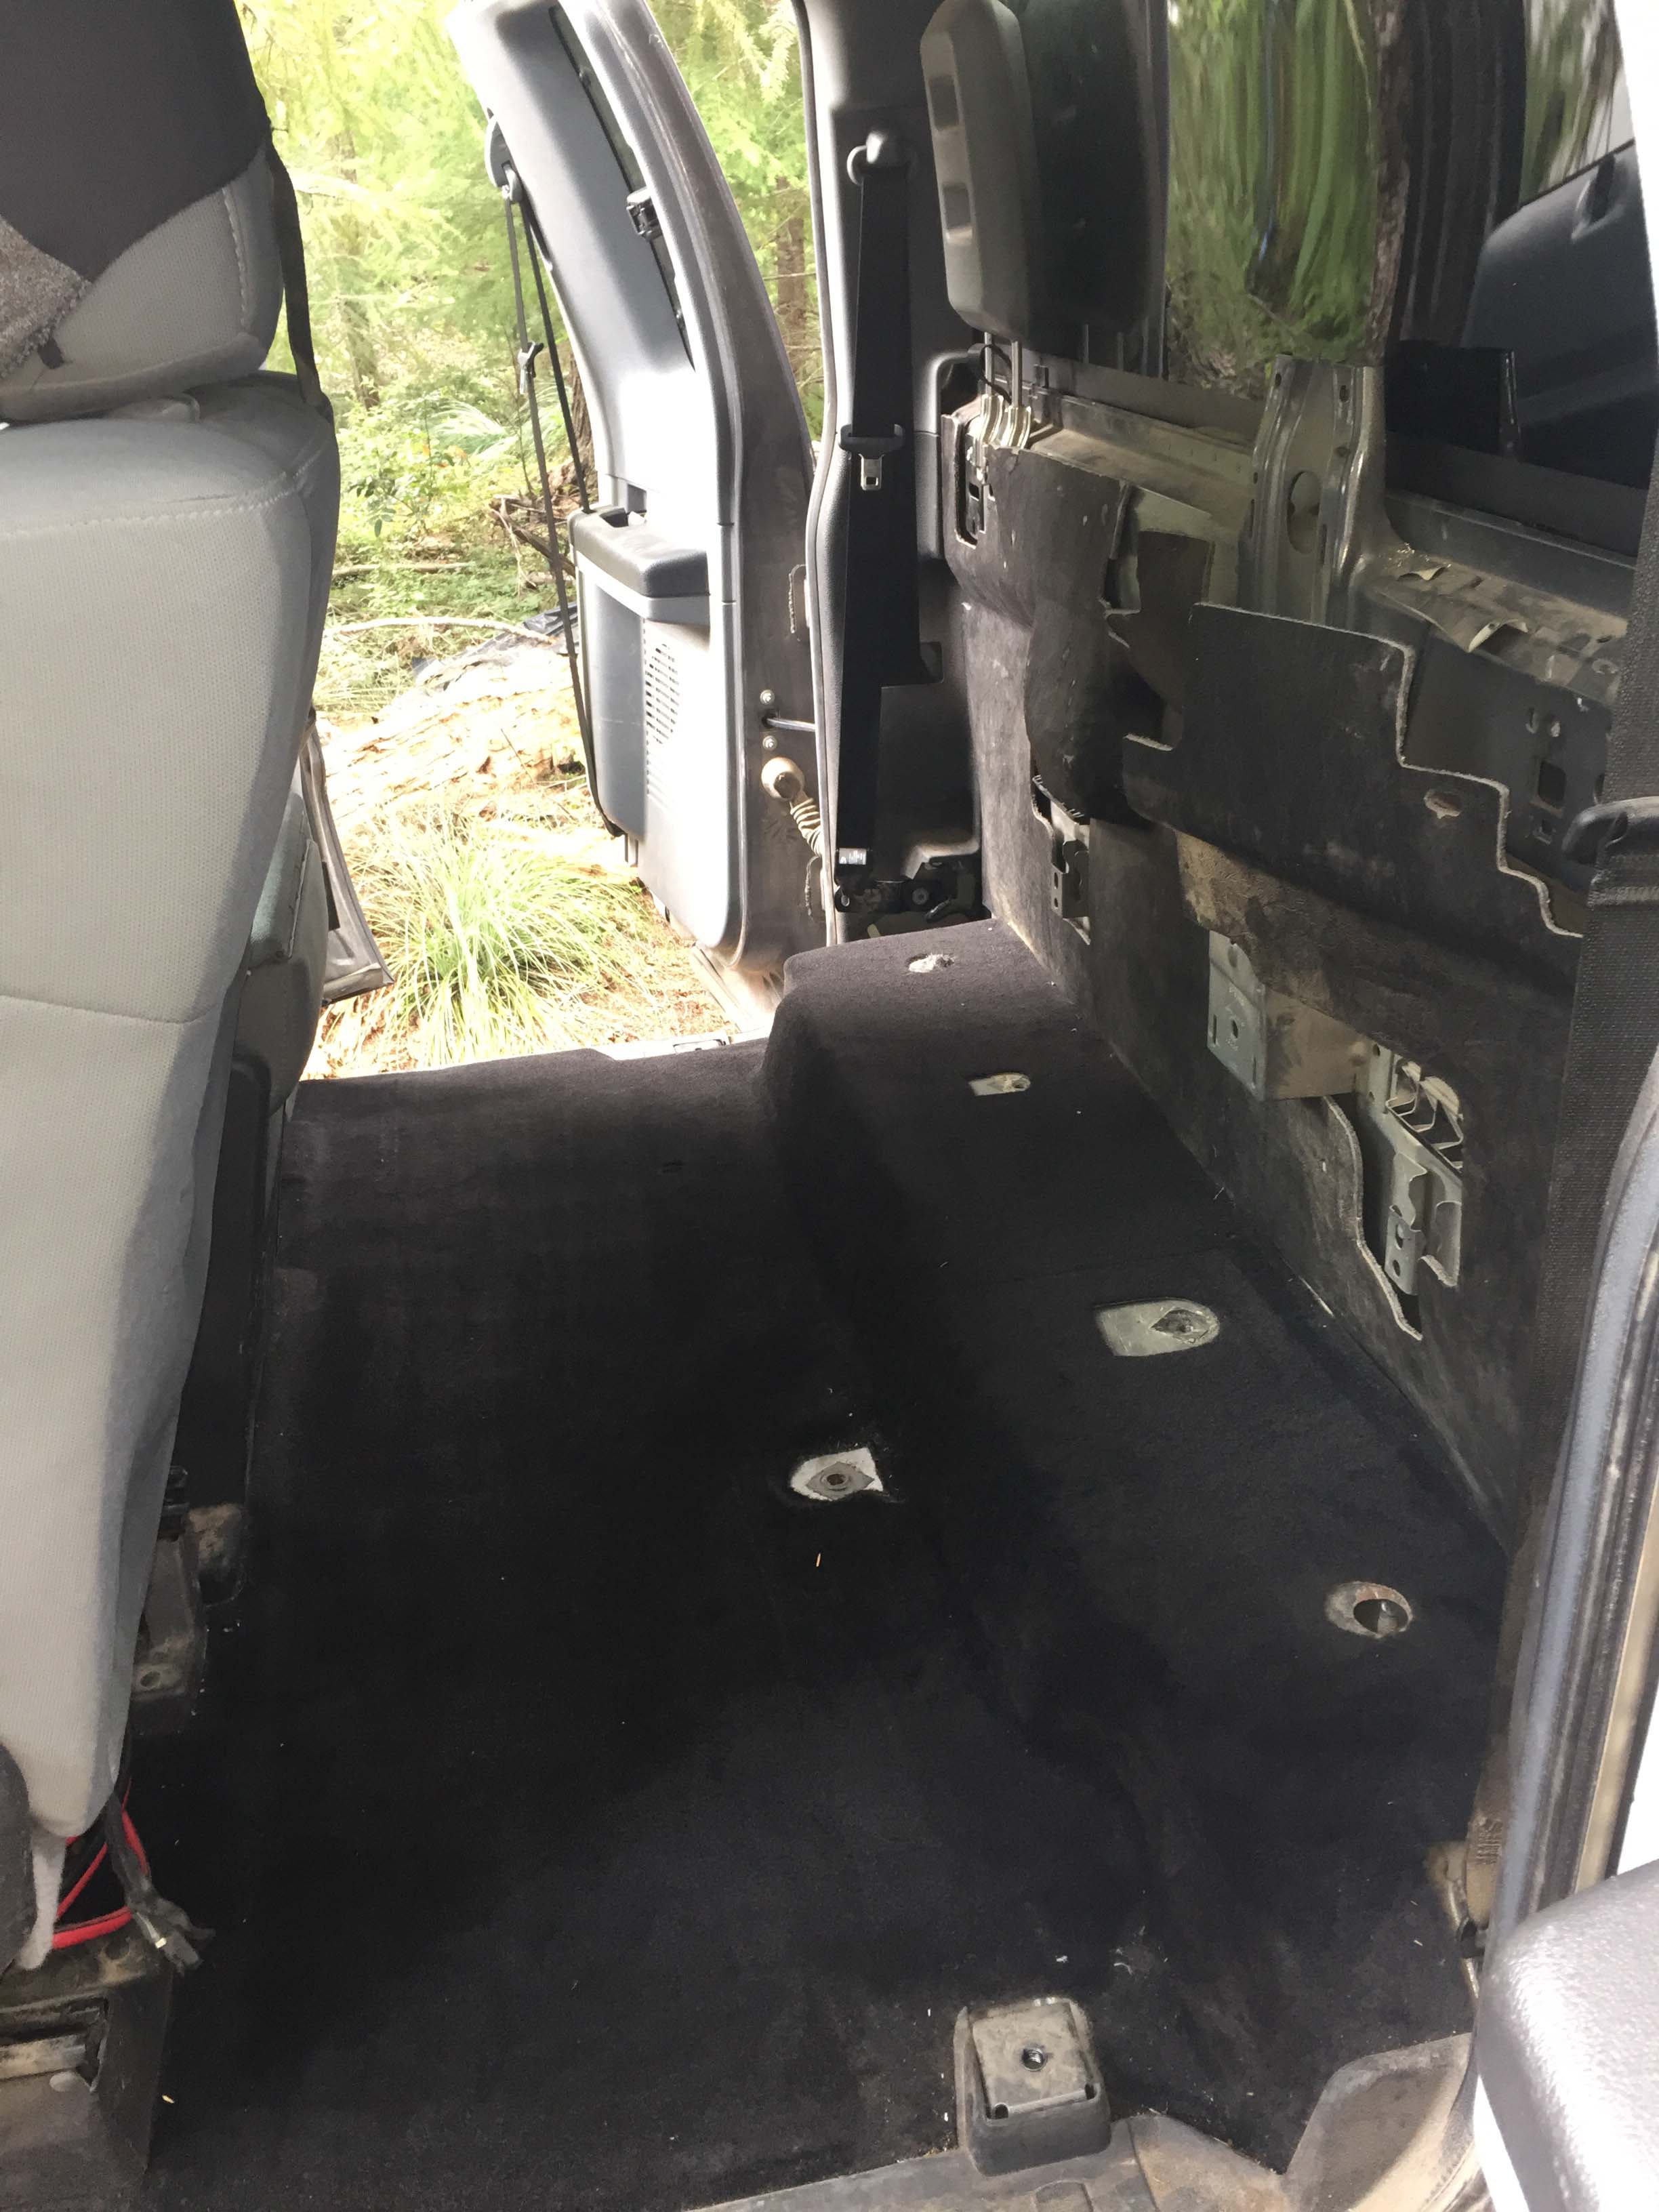
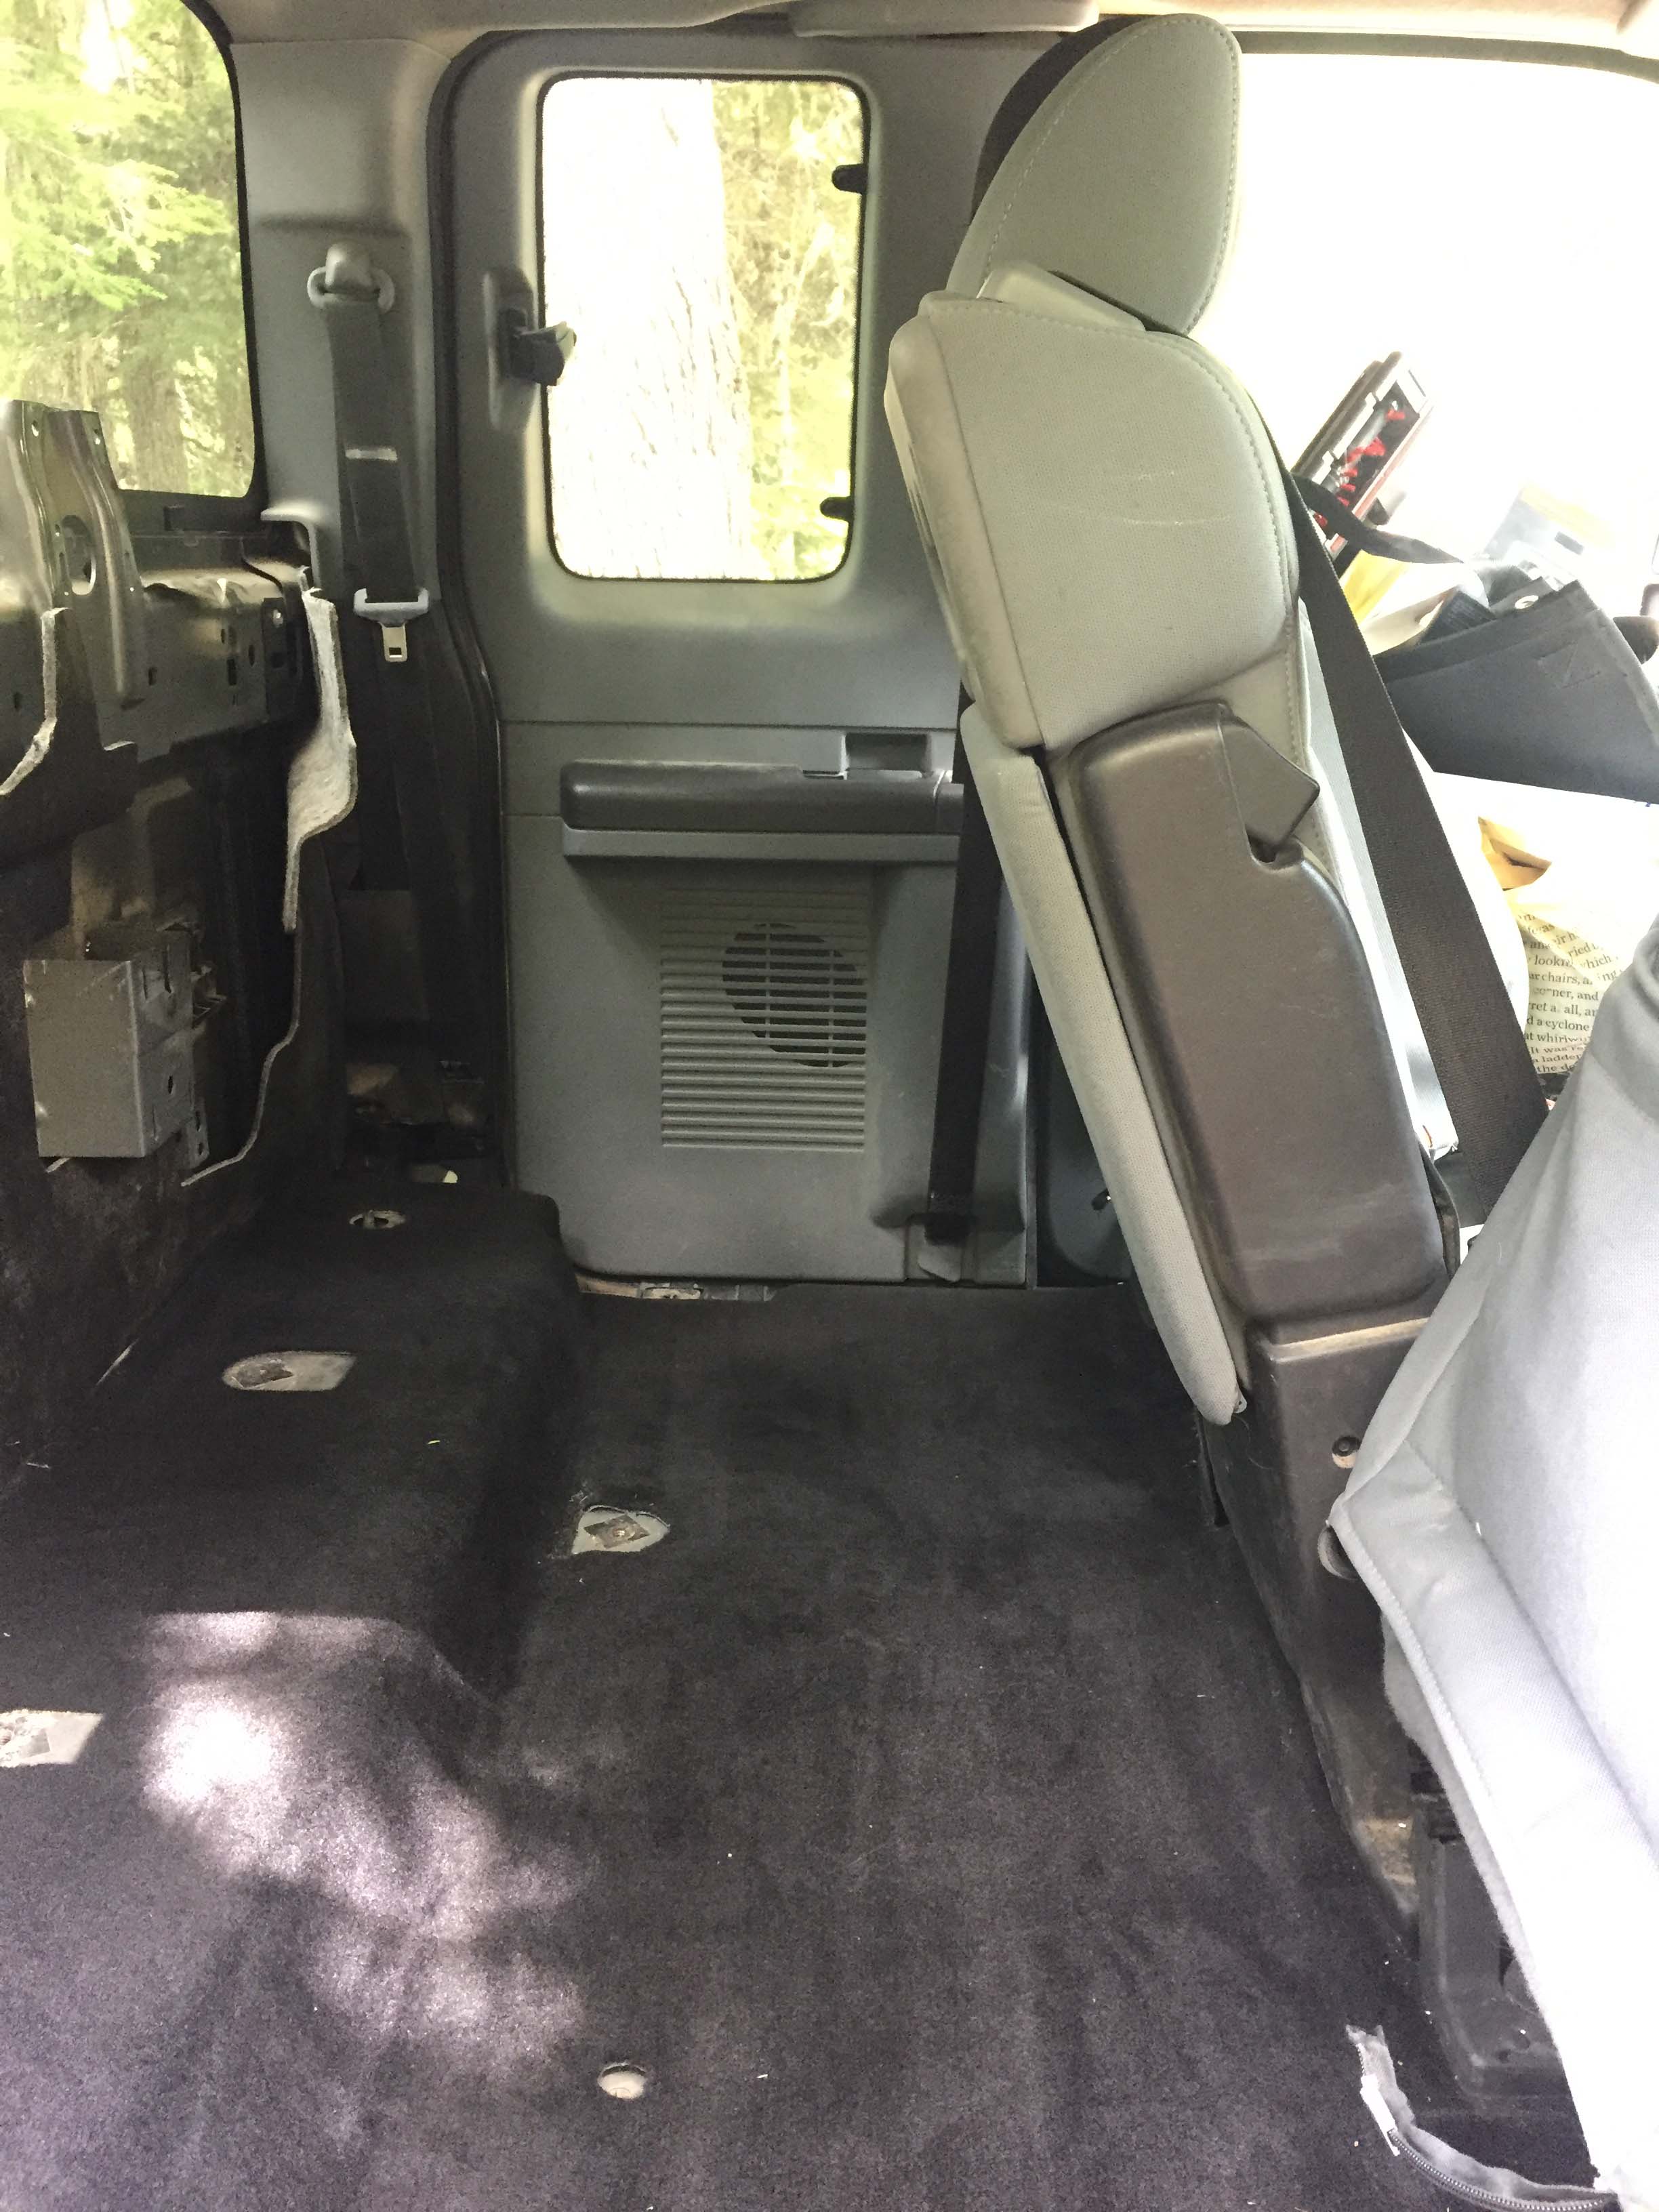
Apart from the platform needing to be the same height as the console, I also wanted it to take up as little space as possible underneath, to maximize storage. That wasn’t a concern, because Jack only weighs around 15-20 lbs, so it didn’t need to have a lot of structural strength. I also wanted to be able to have as much surface area for groceries and things on the top, without sacrificing the ability to recline the passenger seat. Sometimes we drive very long days, and I wanted to be able to lay the seat back to nap, which as you can see, eats up most of the rear area. (If you do this please build in a way to recline the seat completely. That is a BIG deal on longer trips days for both of us – Trace). And finally, the center console is actually the back of the center “jump” seat, and it flips up. When deployed, it’s about 5 inches back from the hinge, so that was also part of what I needed to plan for.
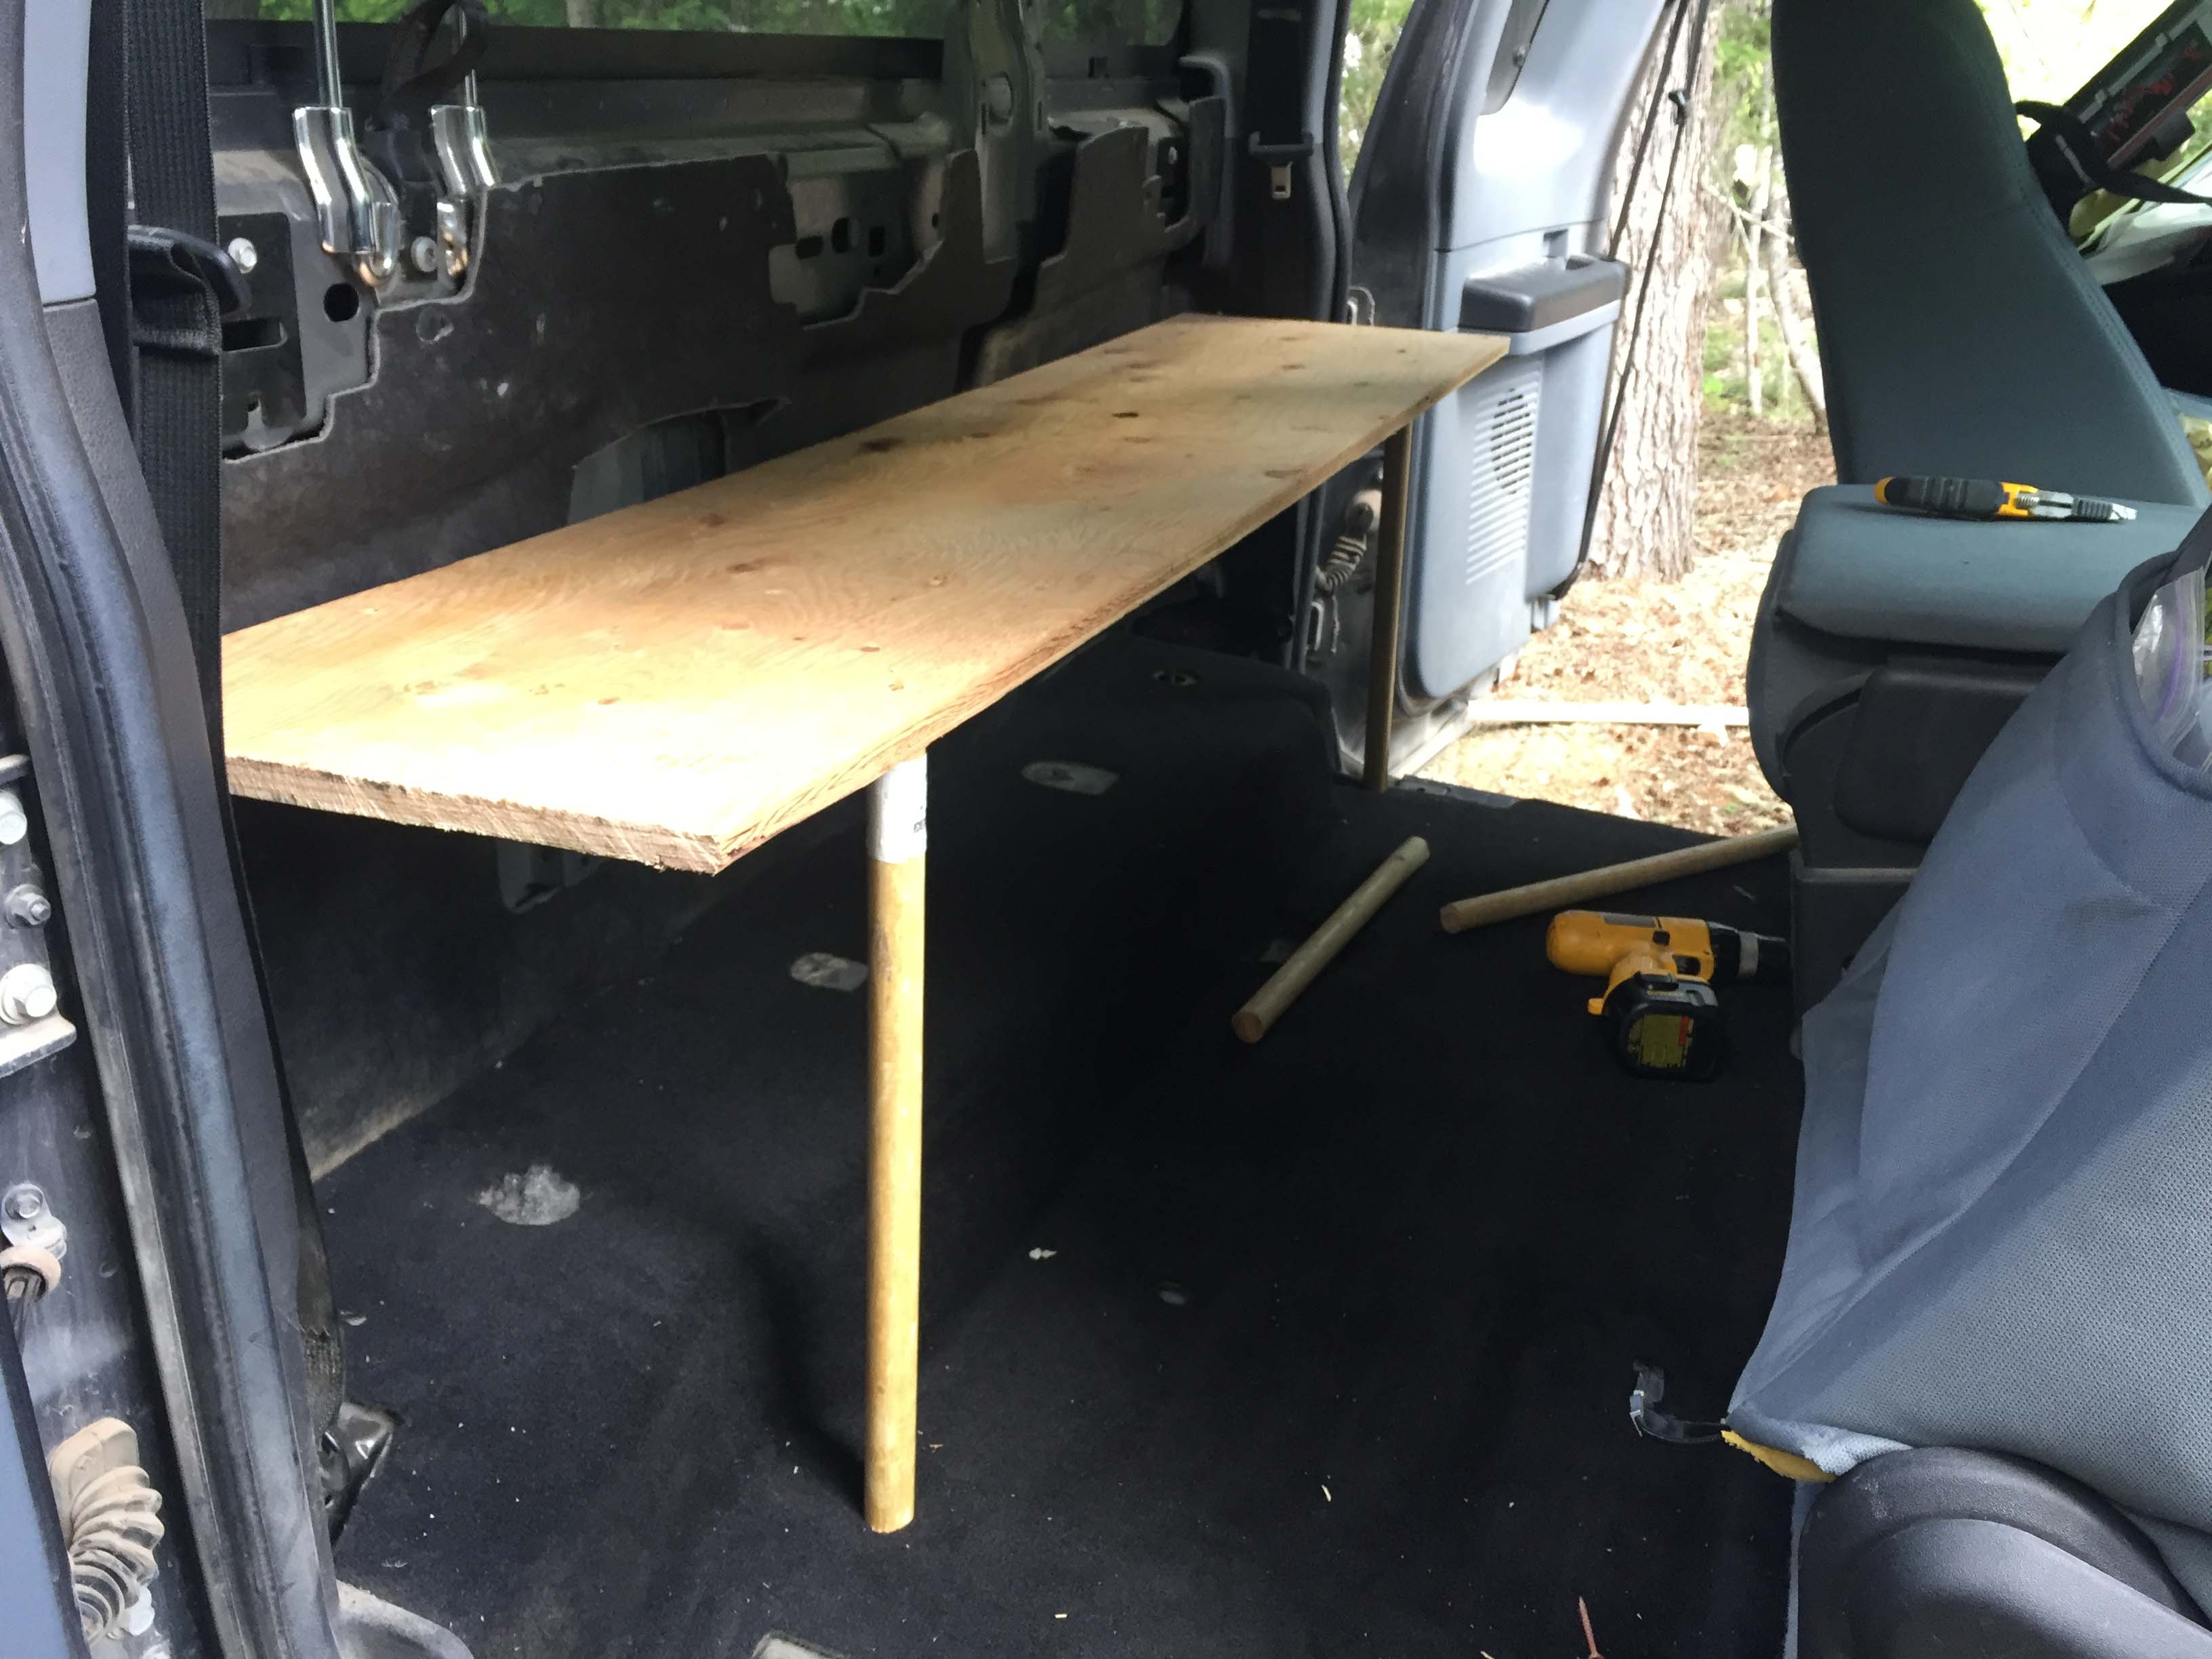
To start with I took some basic measurements and used some dowel rods and shelf brackets just to get an idea of how this would work. Sometimes it helps to just do a quick mock-up. I didn’t like the way the vertical support would cut the lower storage in half right where I would need to put things in, and I really didn’t like the idea of losing a third of my top surface if I made a “T” or fat upside down “L” shape. (This is when Lee’s creative side comes out. He starts a project and continuously improves as he builds. He also doesn’t get stuck with one idea and barrel ahead regardless. I really like that about him. – Trace)
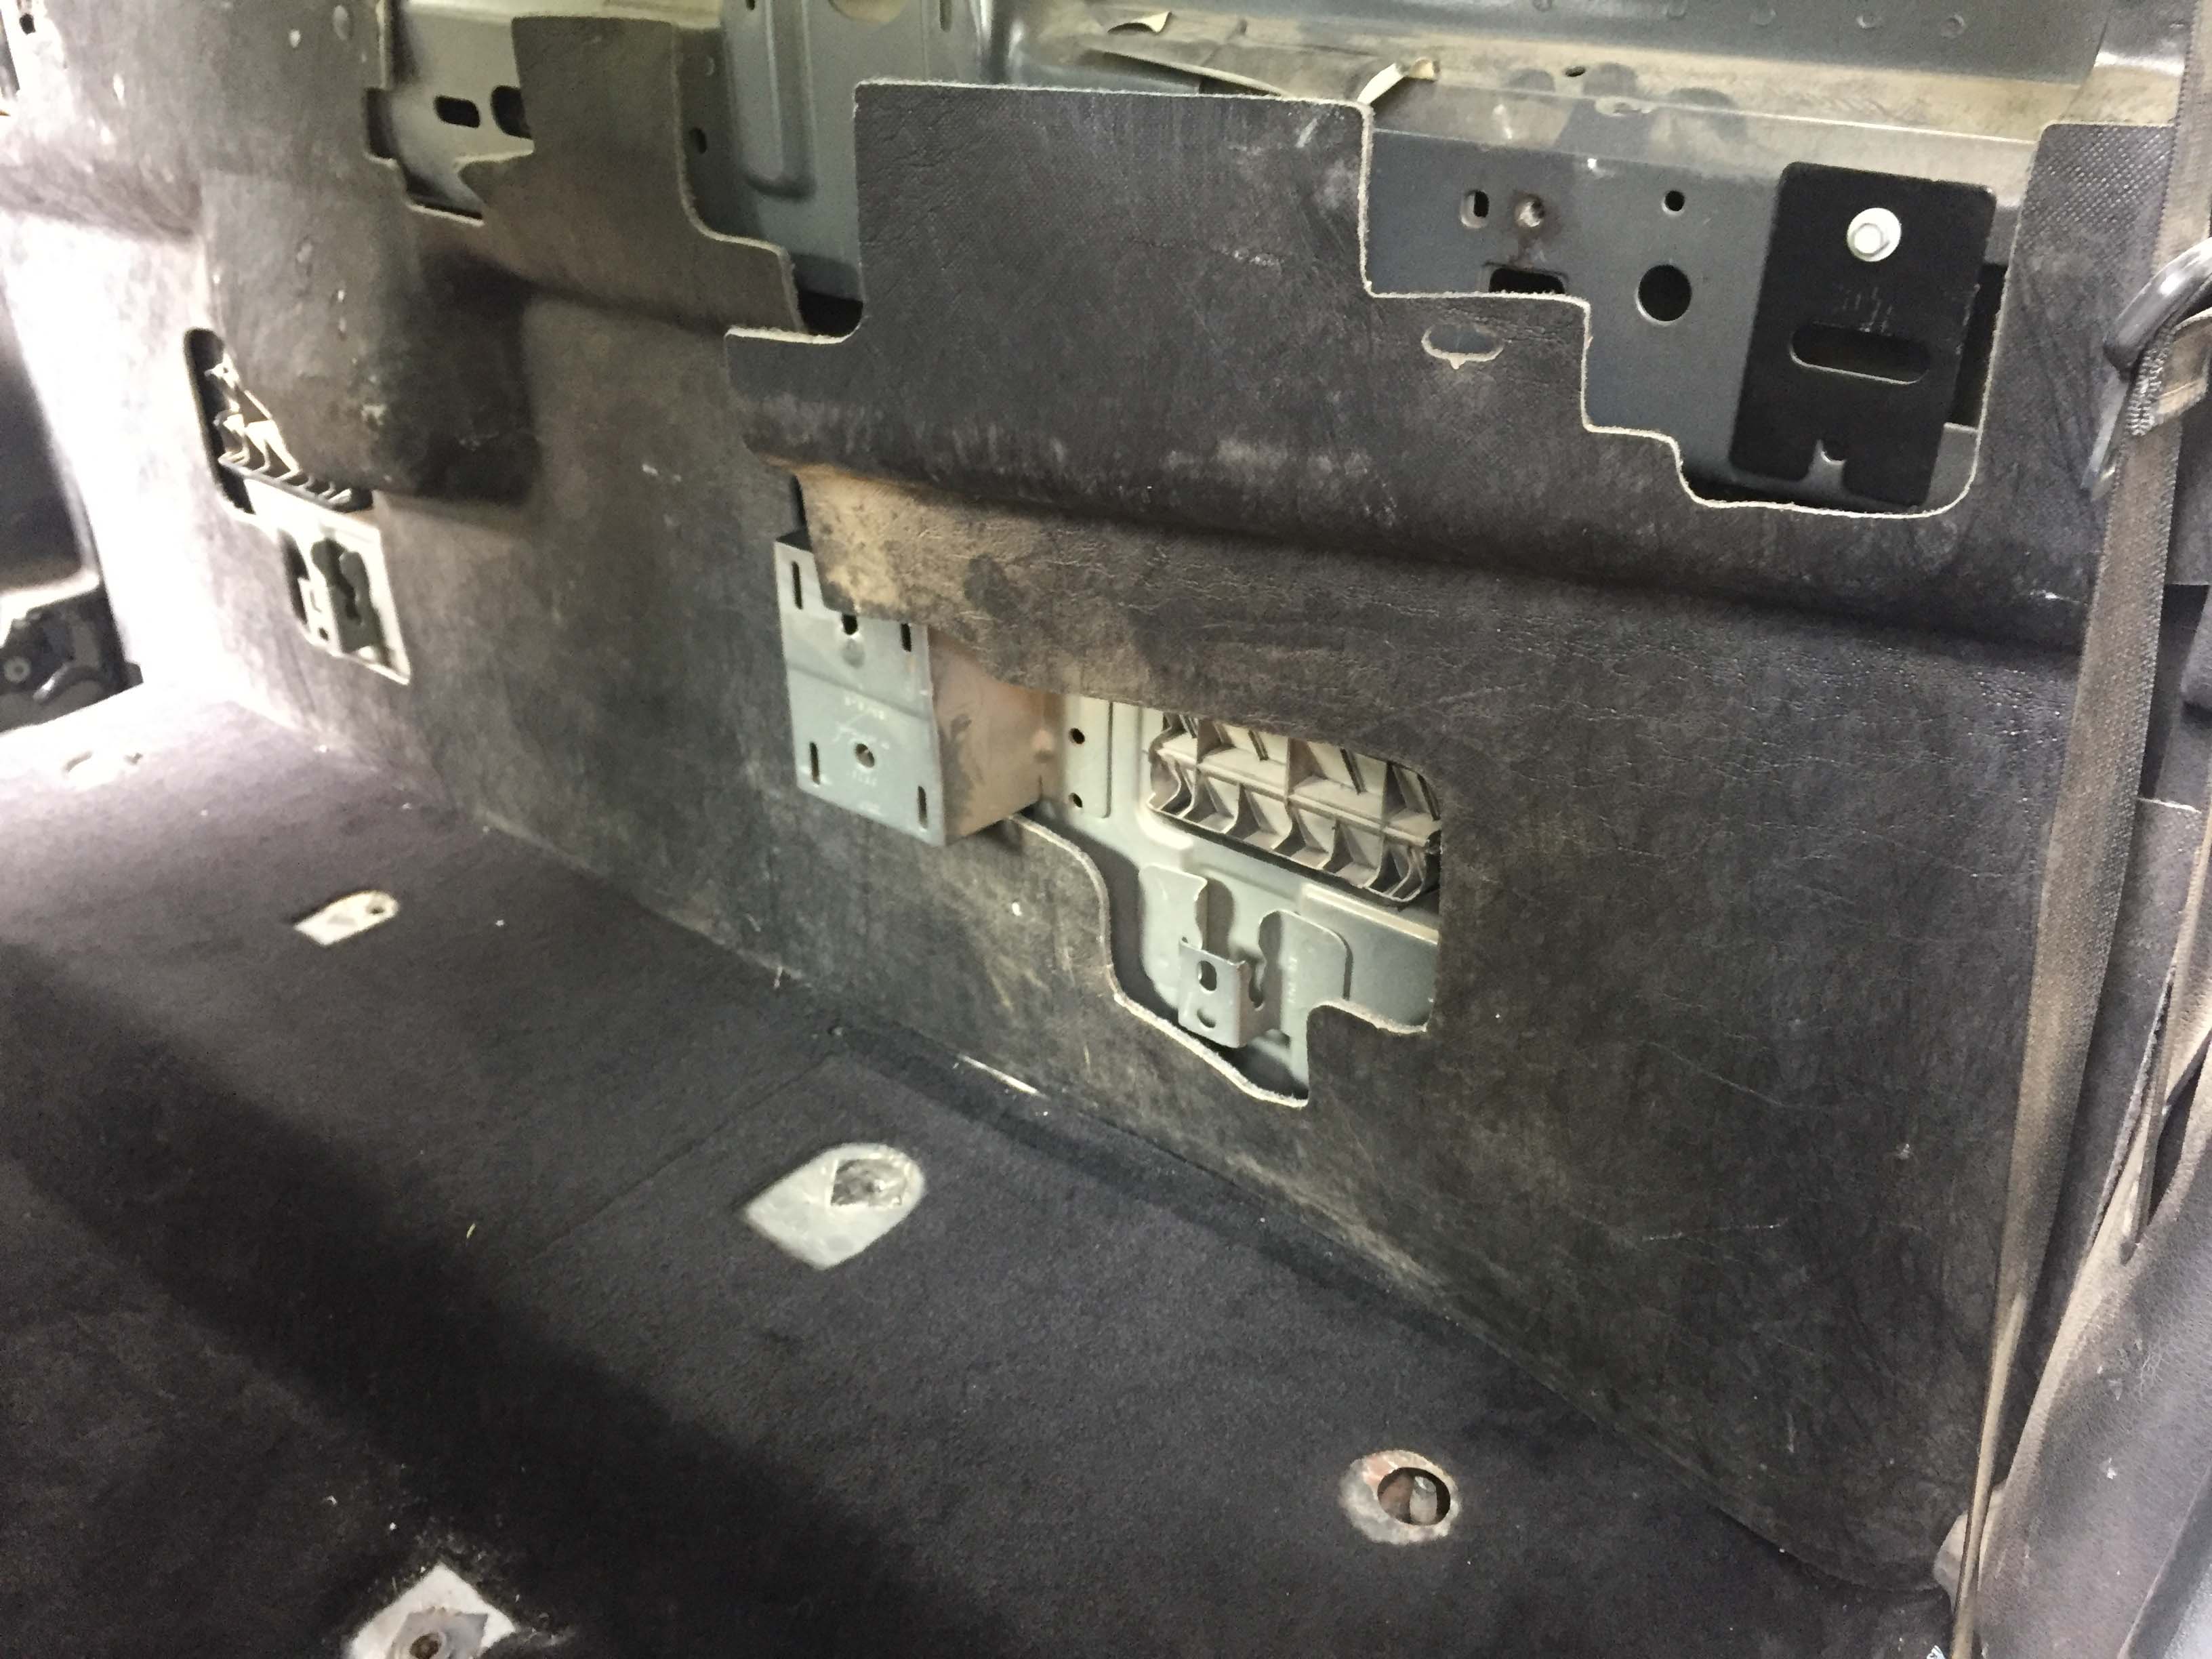
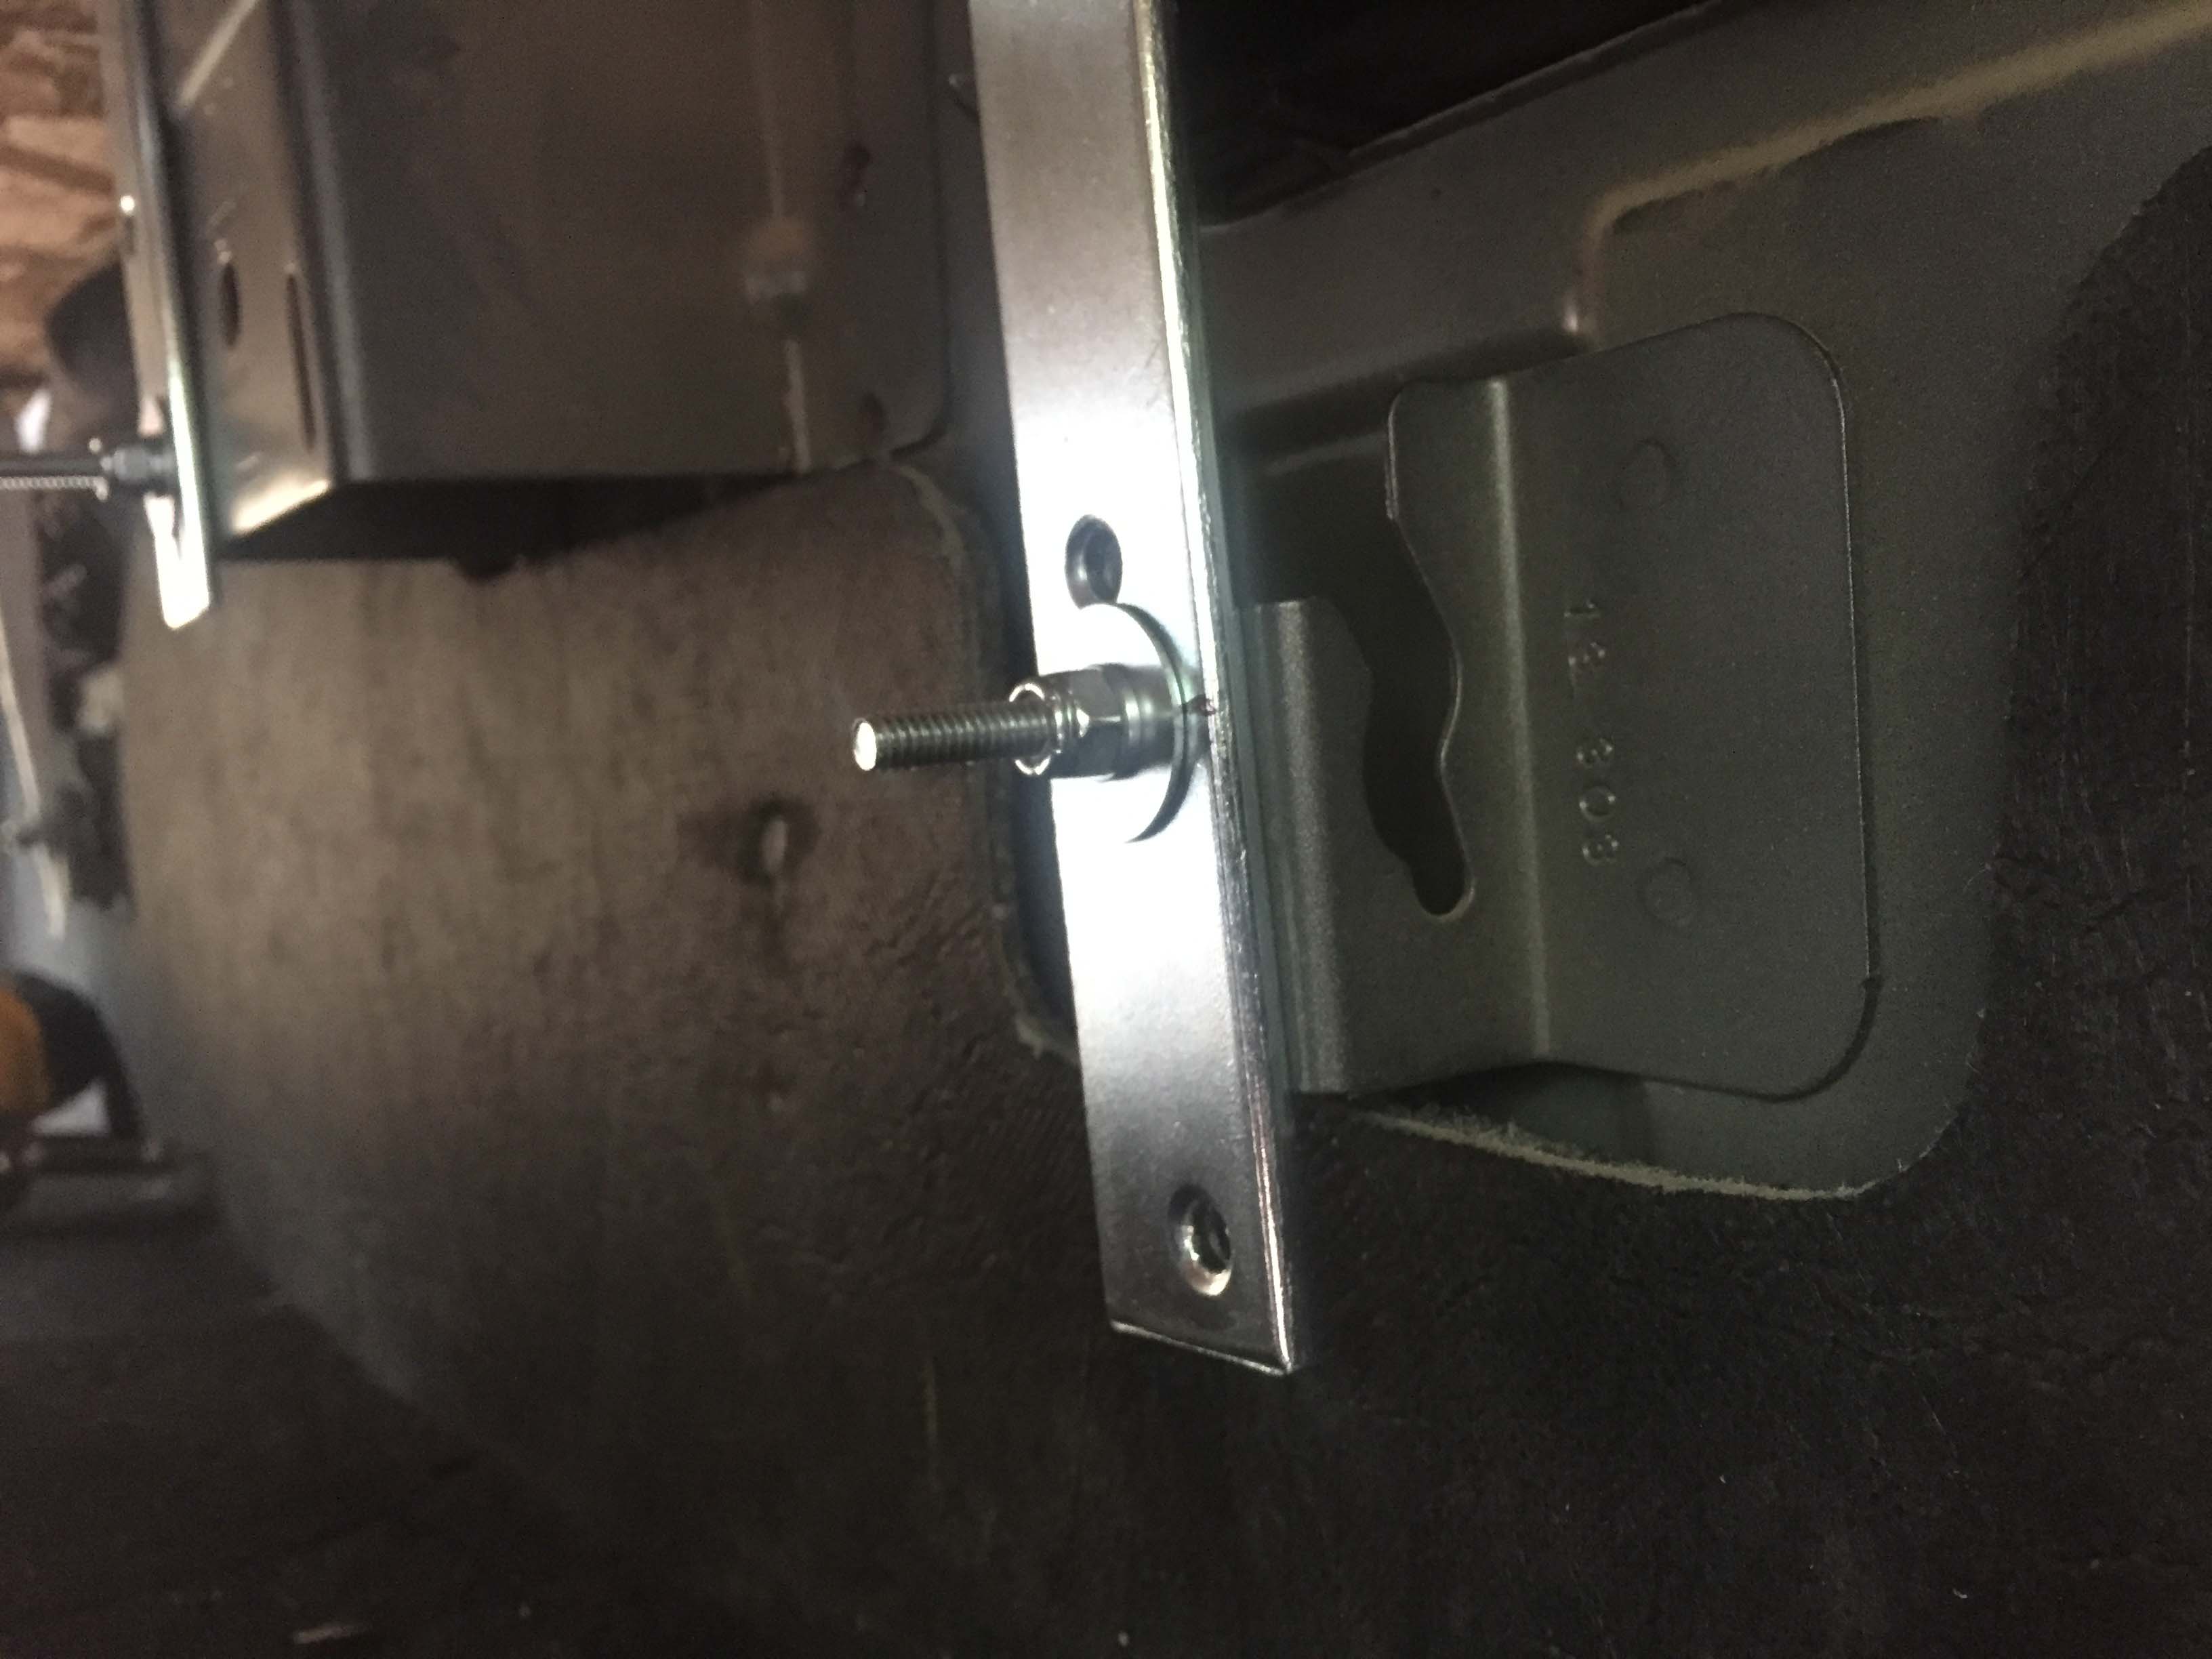
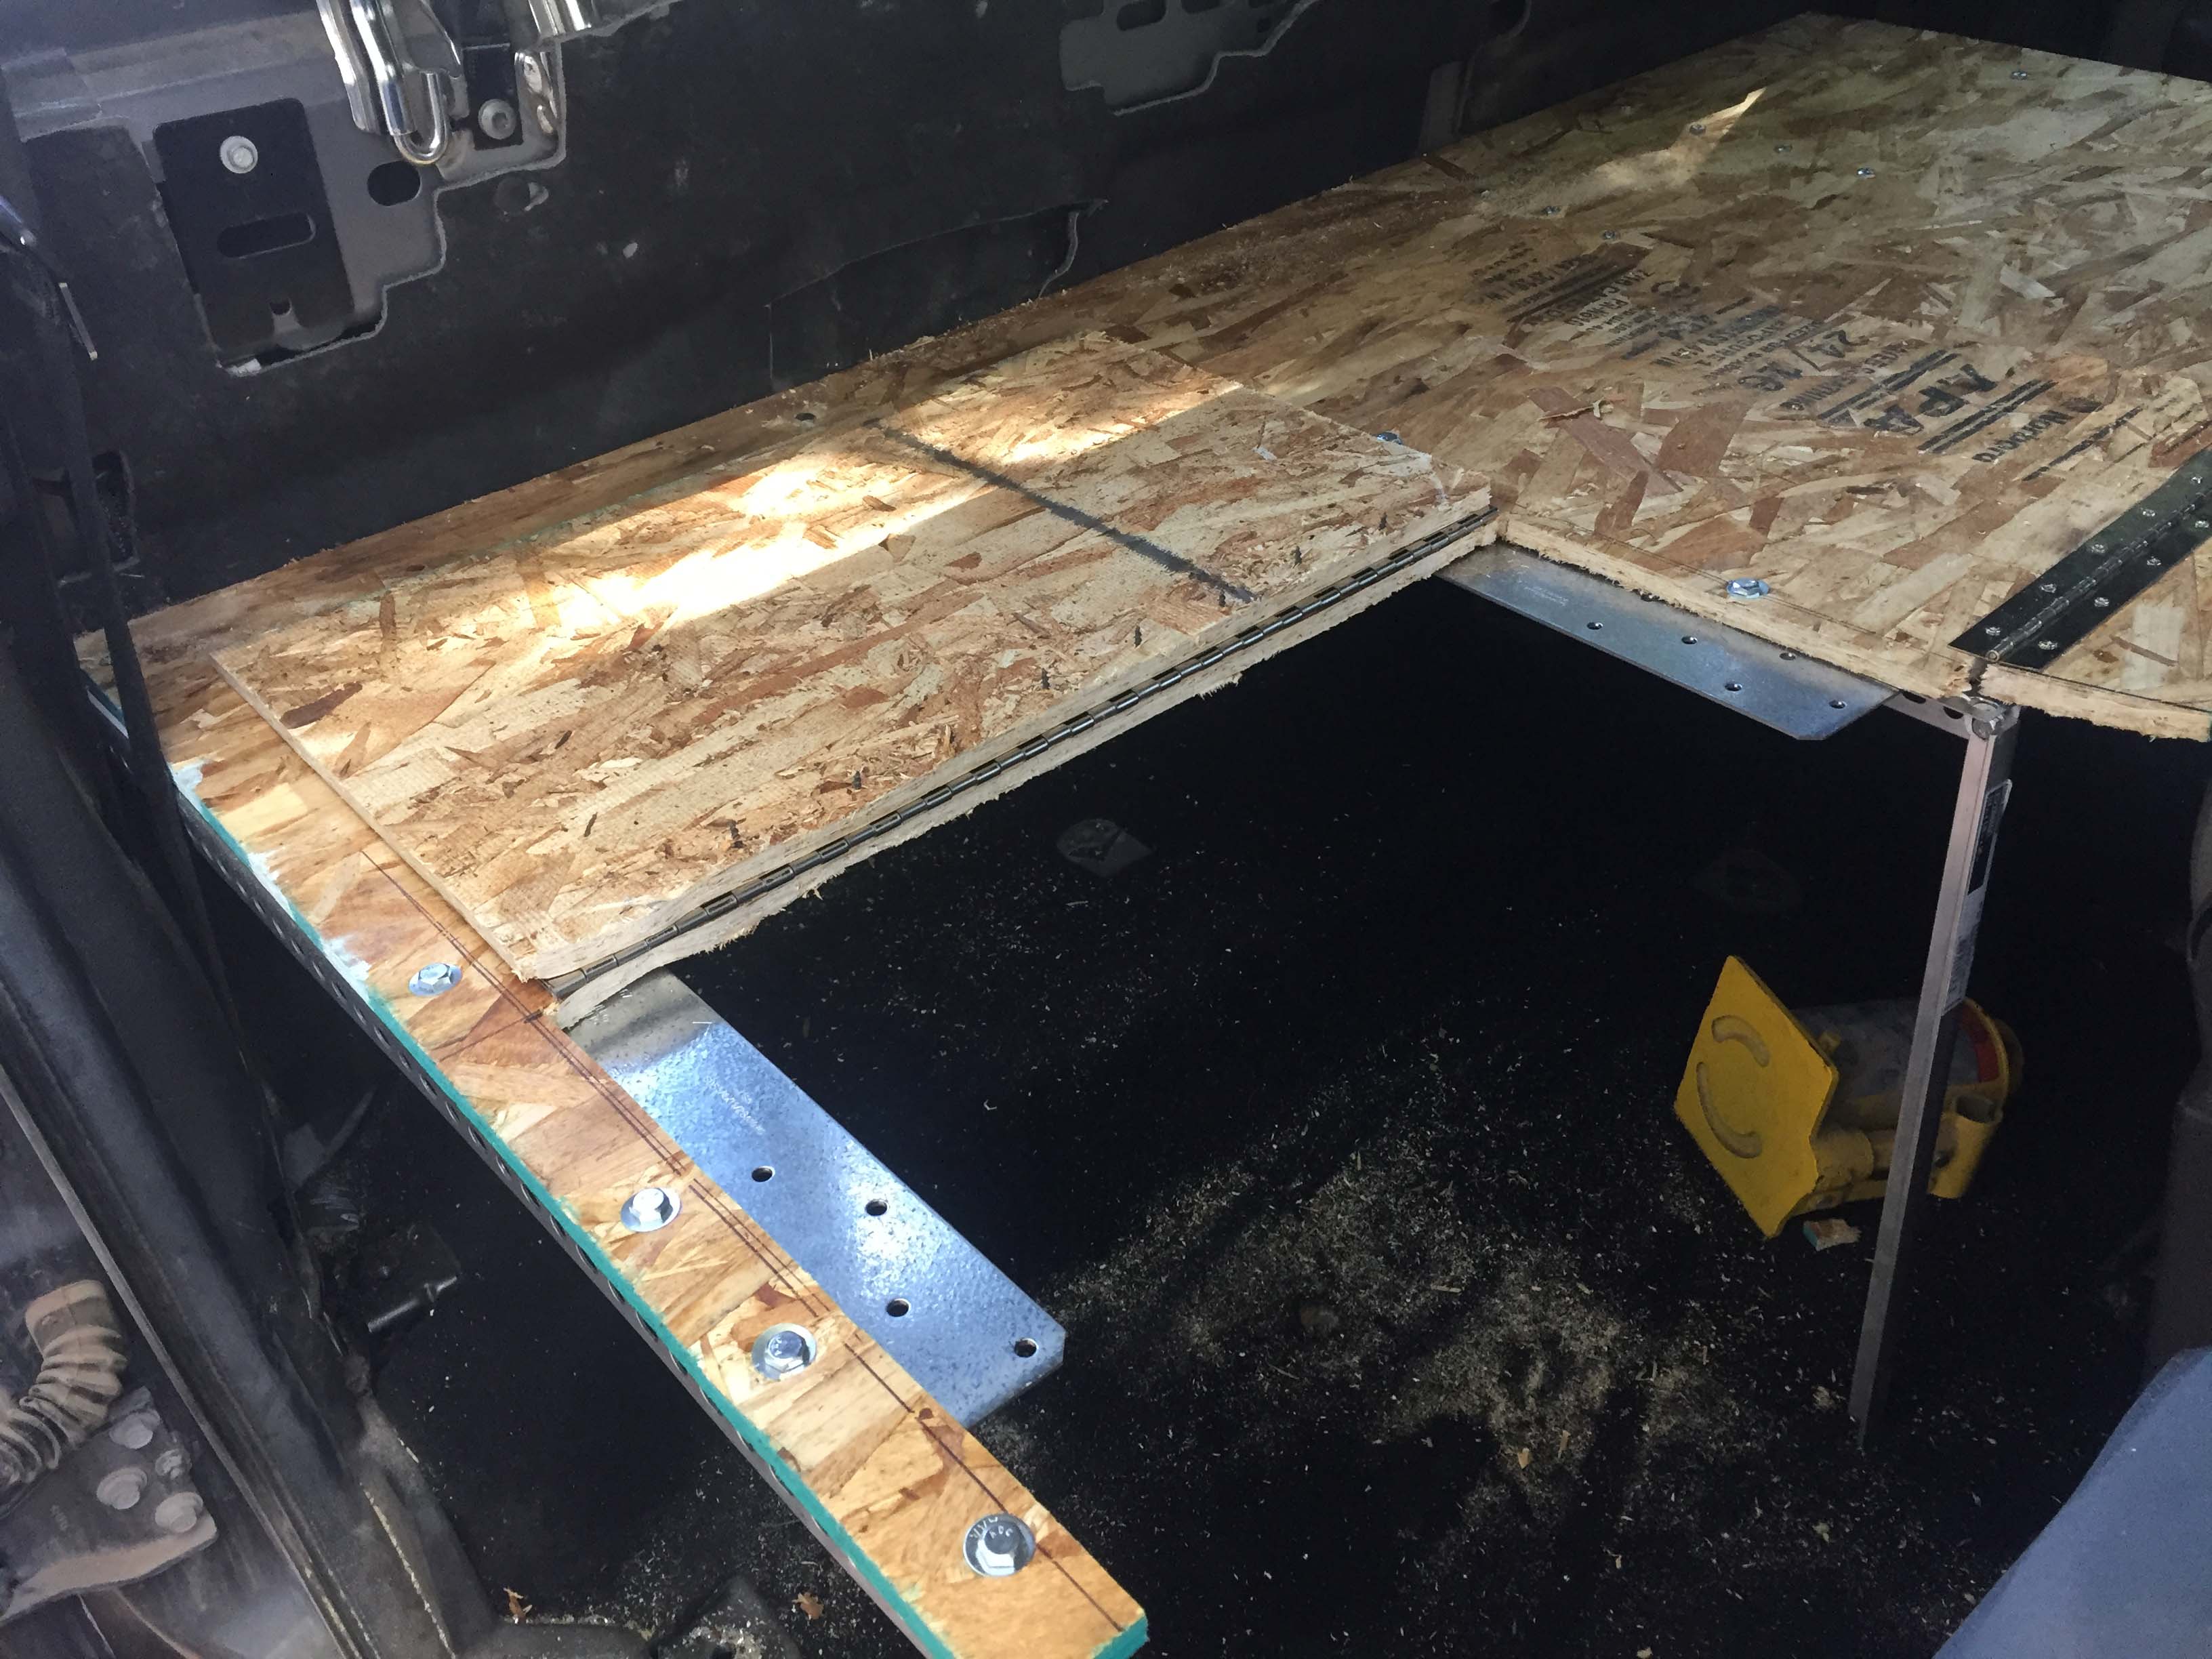
Luckily, the original mounts for the seat back on the back wall gave me a place to mount some nice heavy brackets to support the rear edge of the platform. I used nylon locking nuts and bolts wherever I could so I wouldn’t have to worry about vibrations allowing screw threads to chew their way loose from wood.
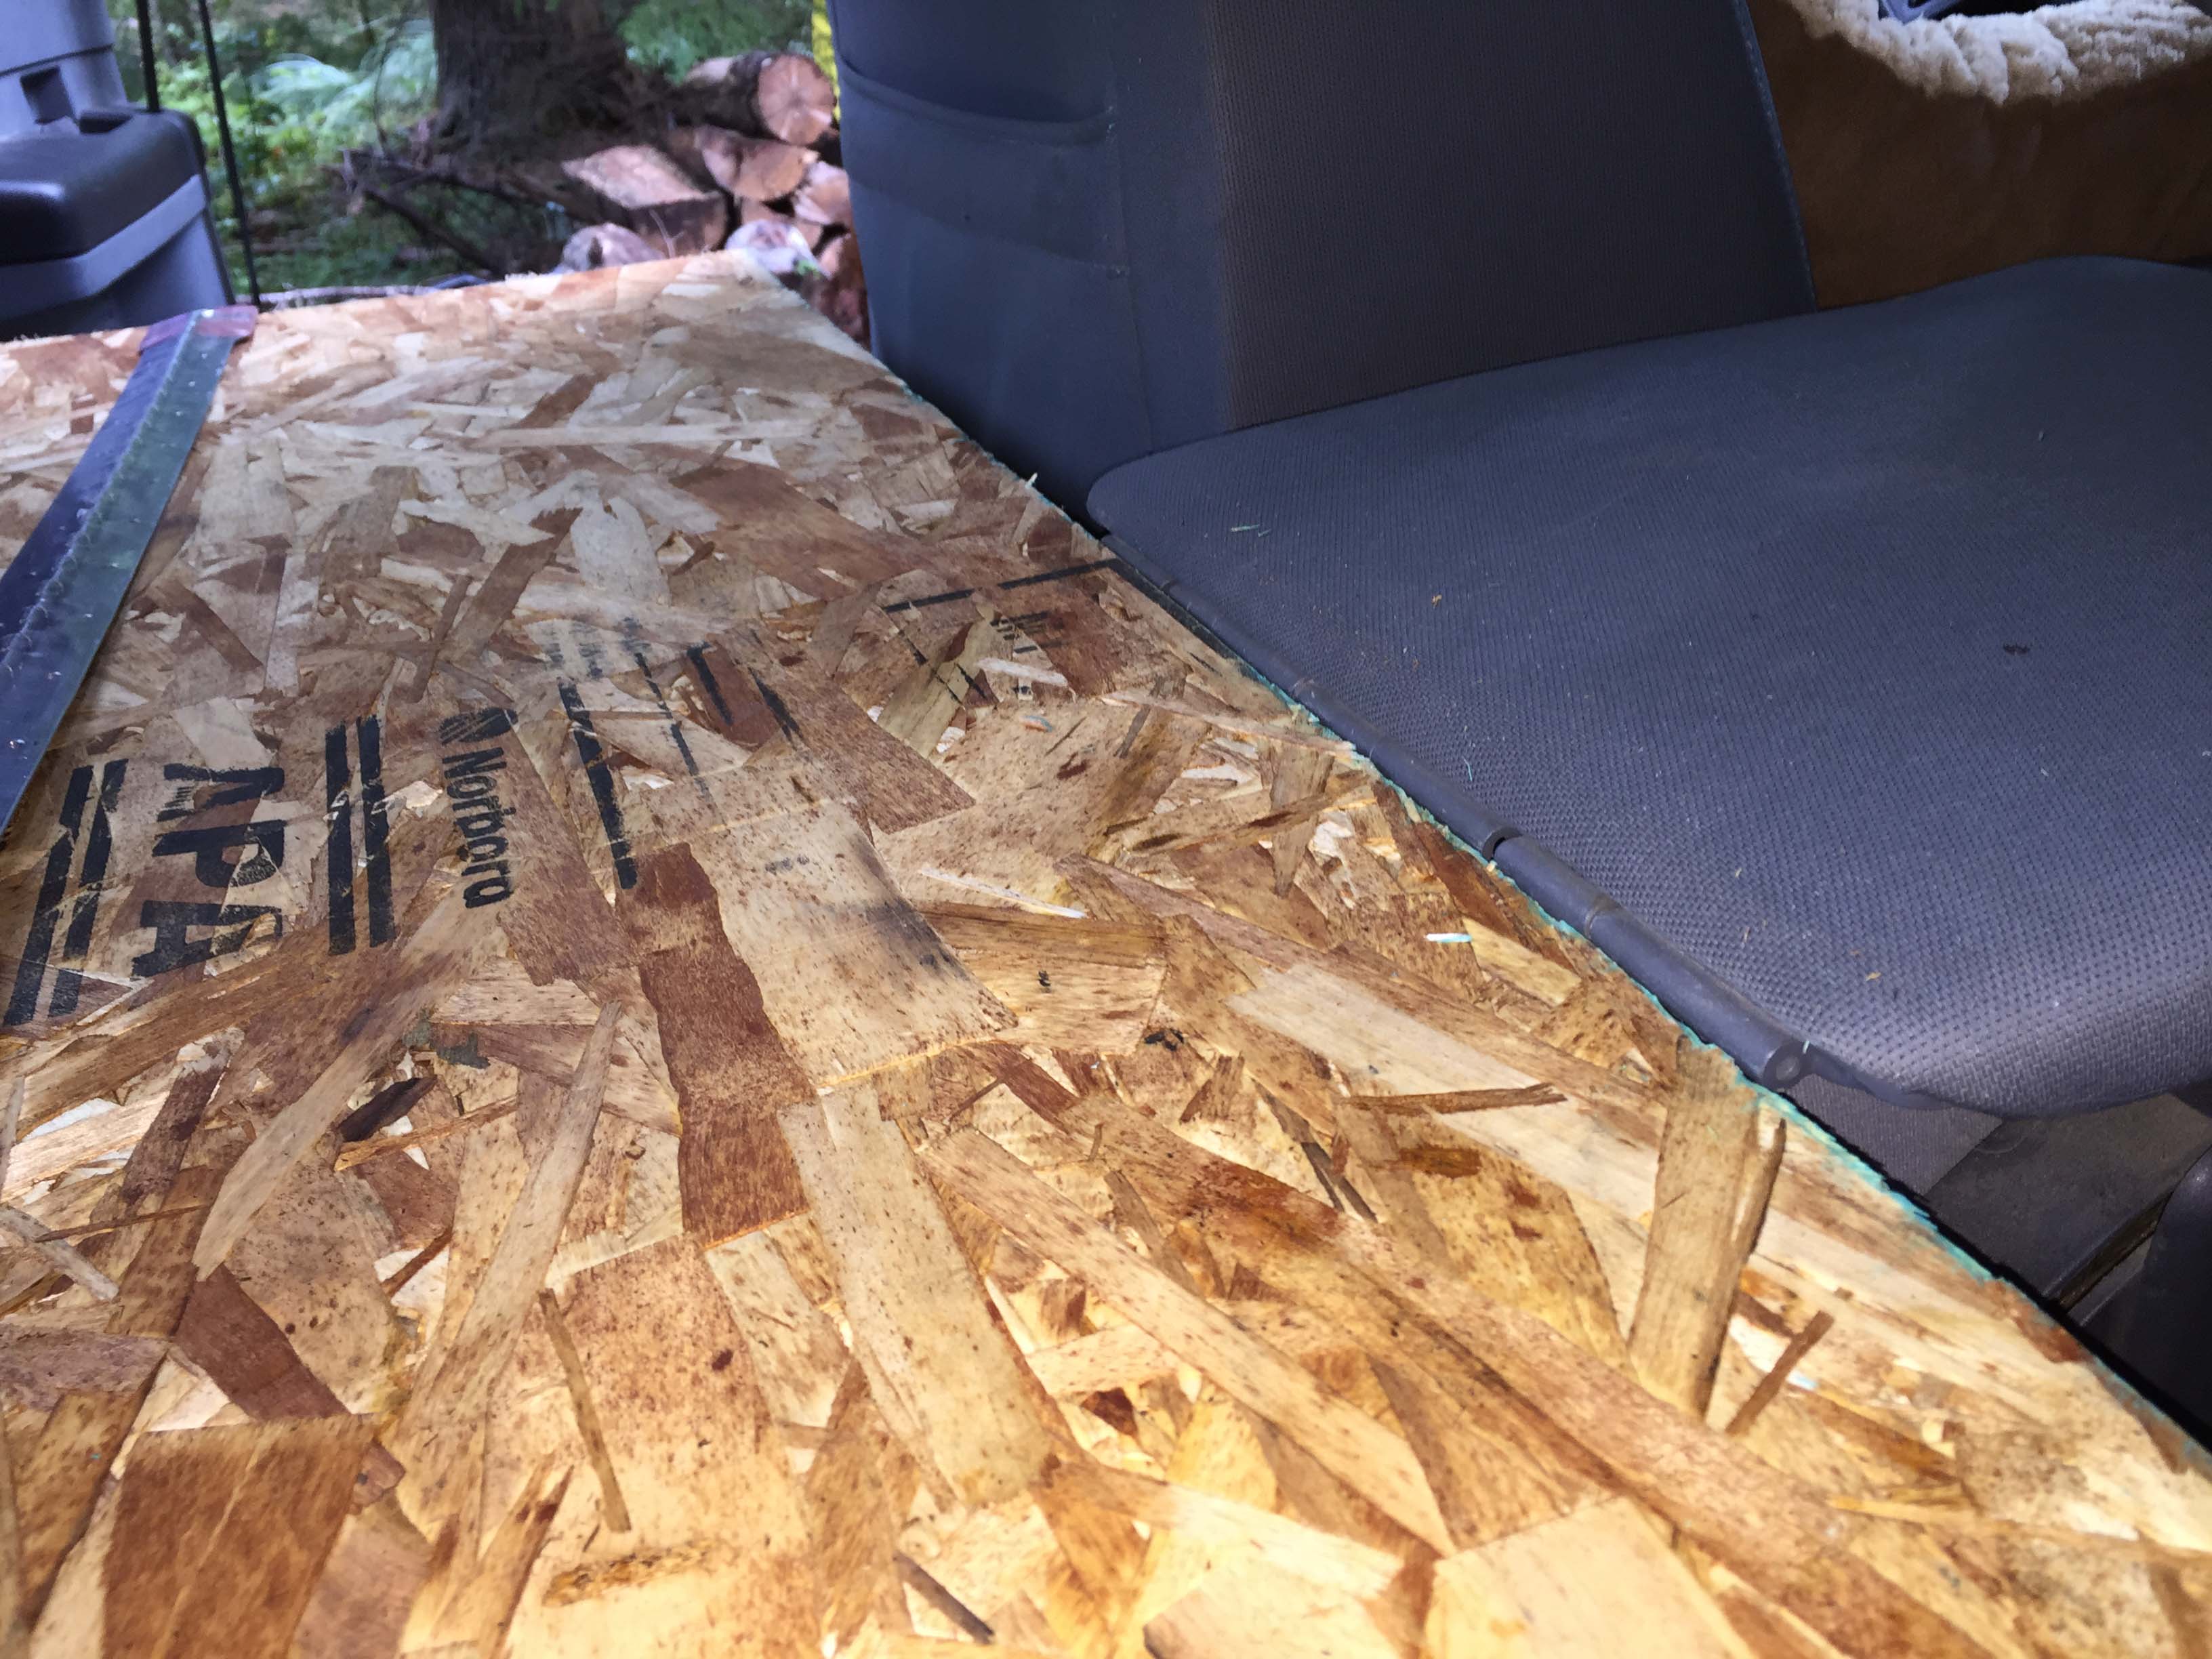
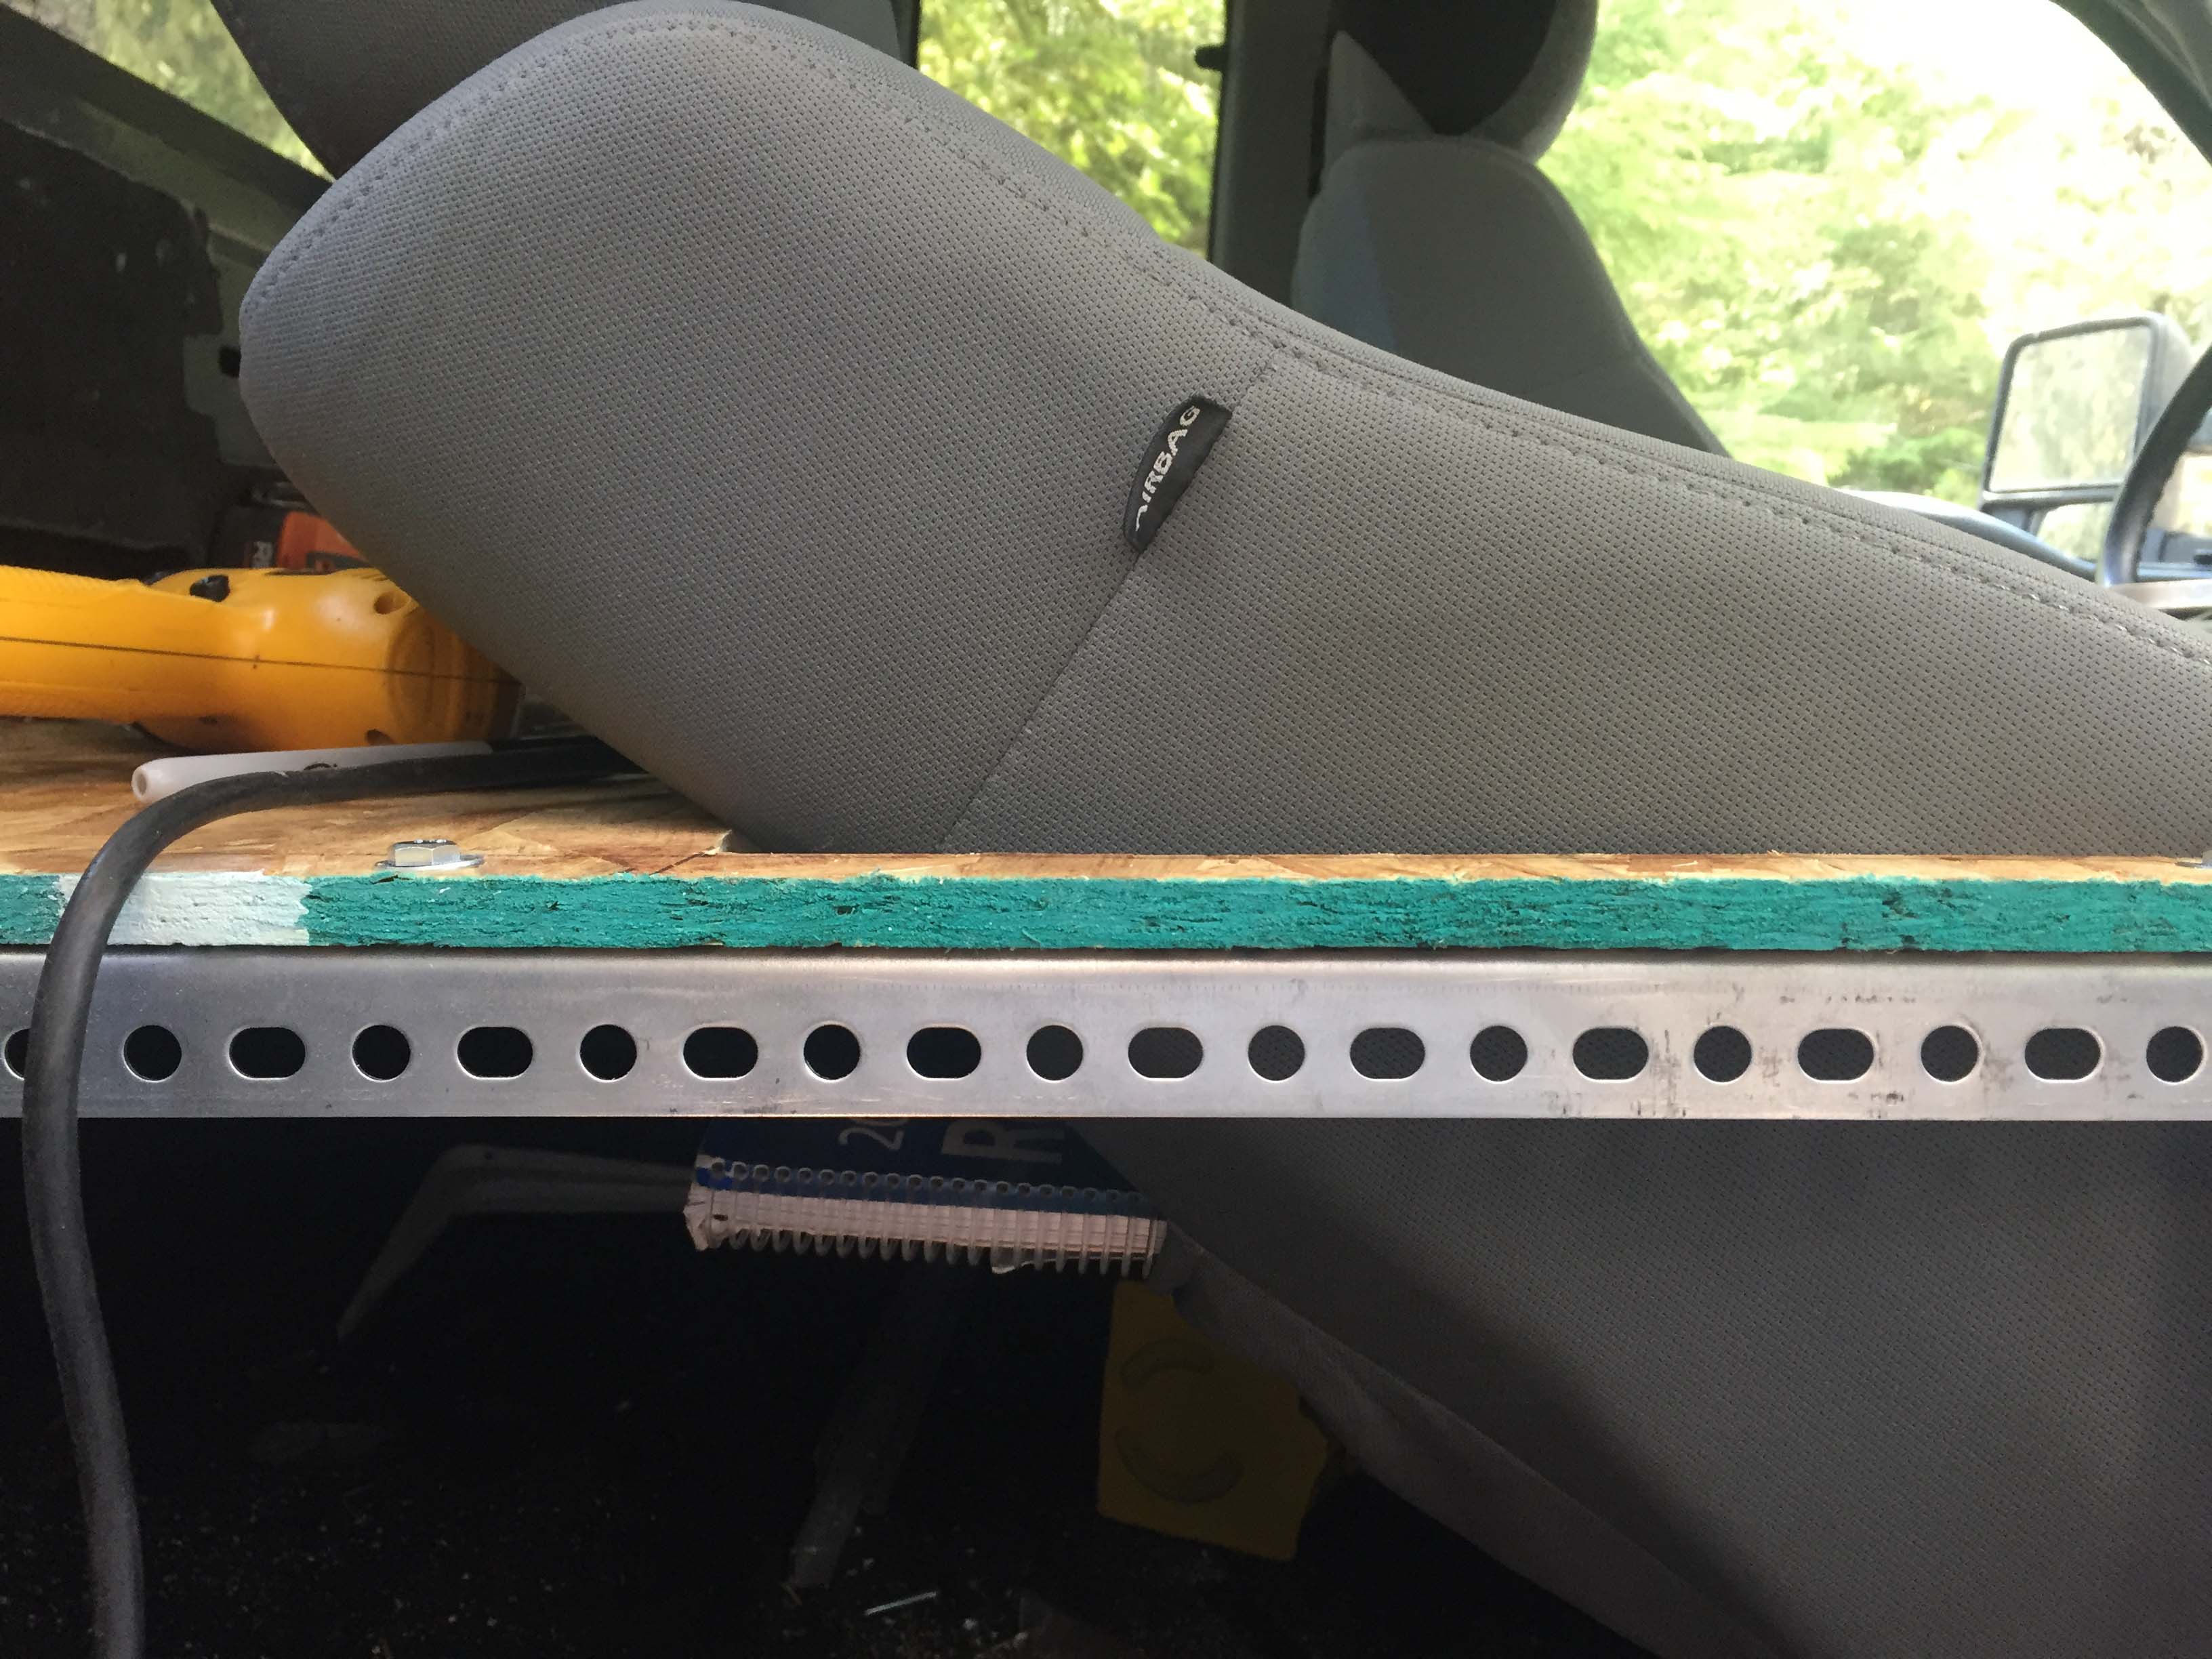
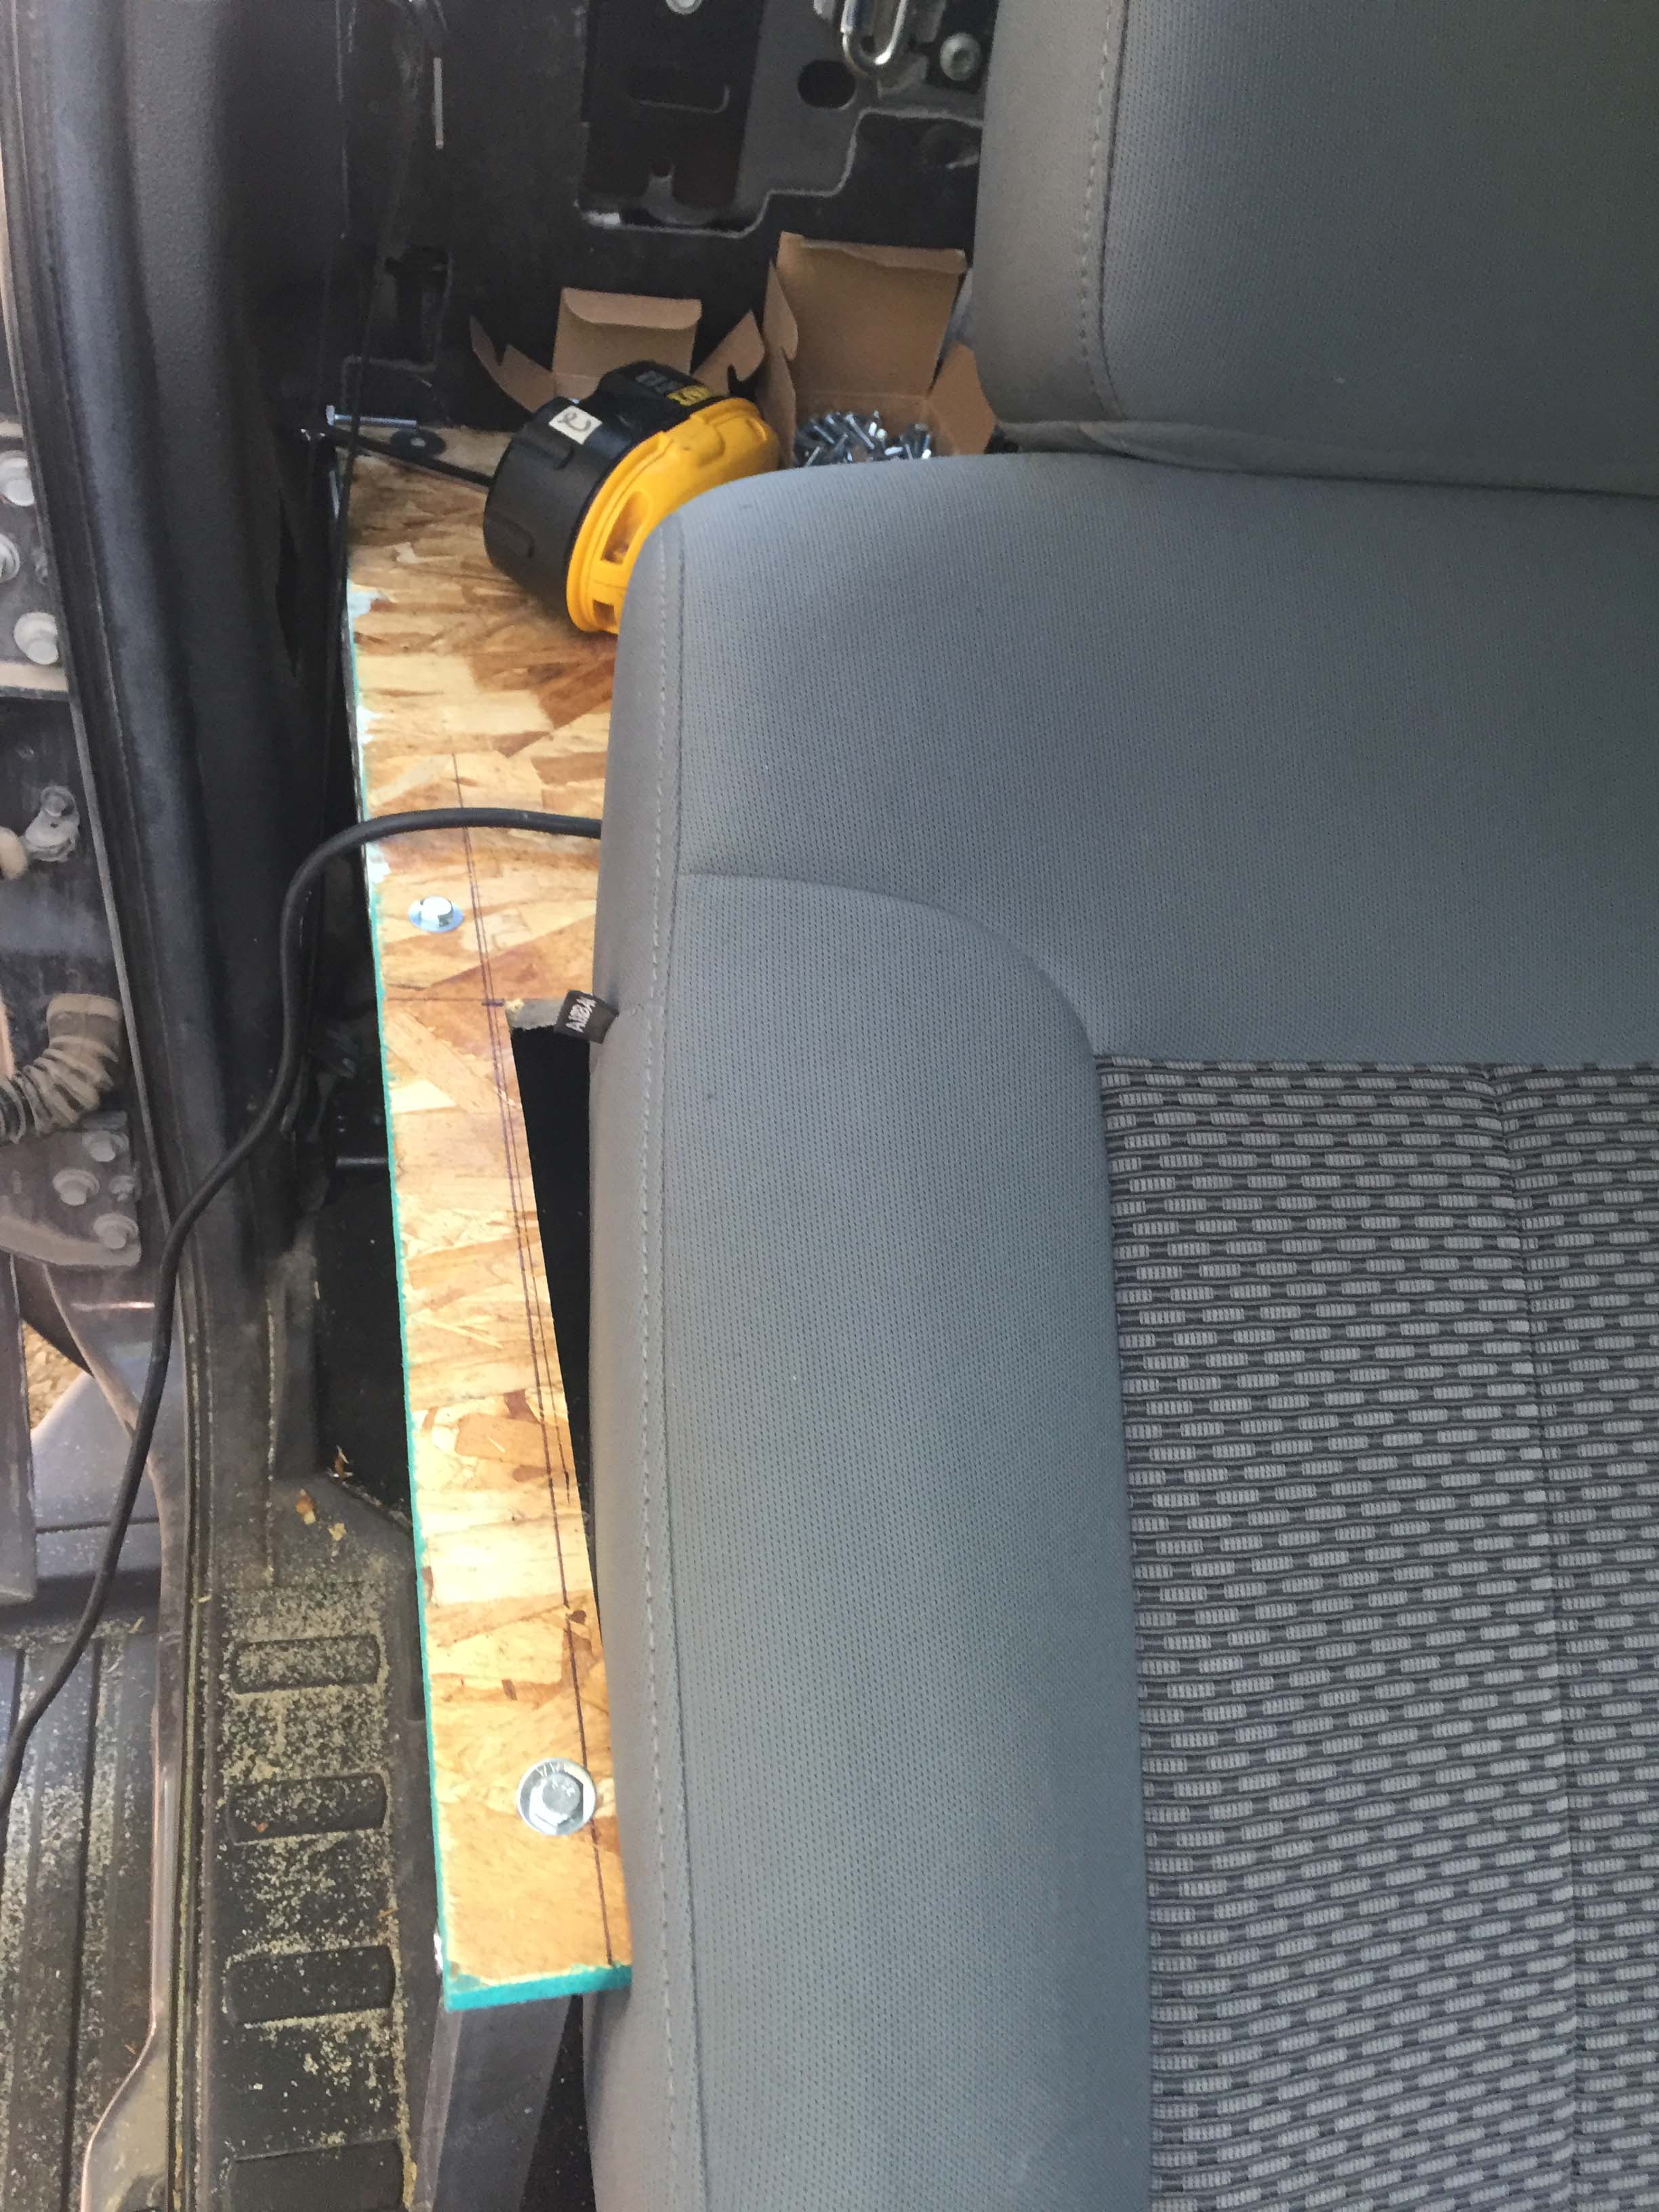
Once I had those supports in I was able to temporarily put in the platform to tweak the measurements and make sure everything would fit and work the way I wanted it to. And yes, the left edge of the platform is just resting on the edge of the console hinge plate, that’s how close the cut was.
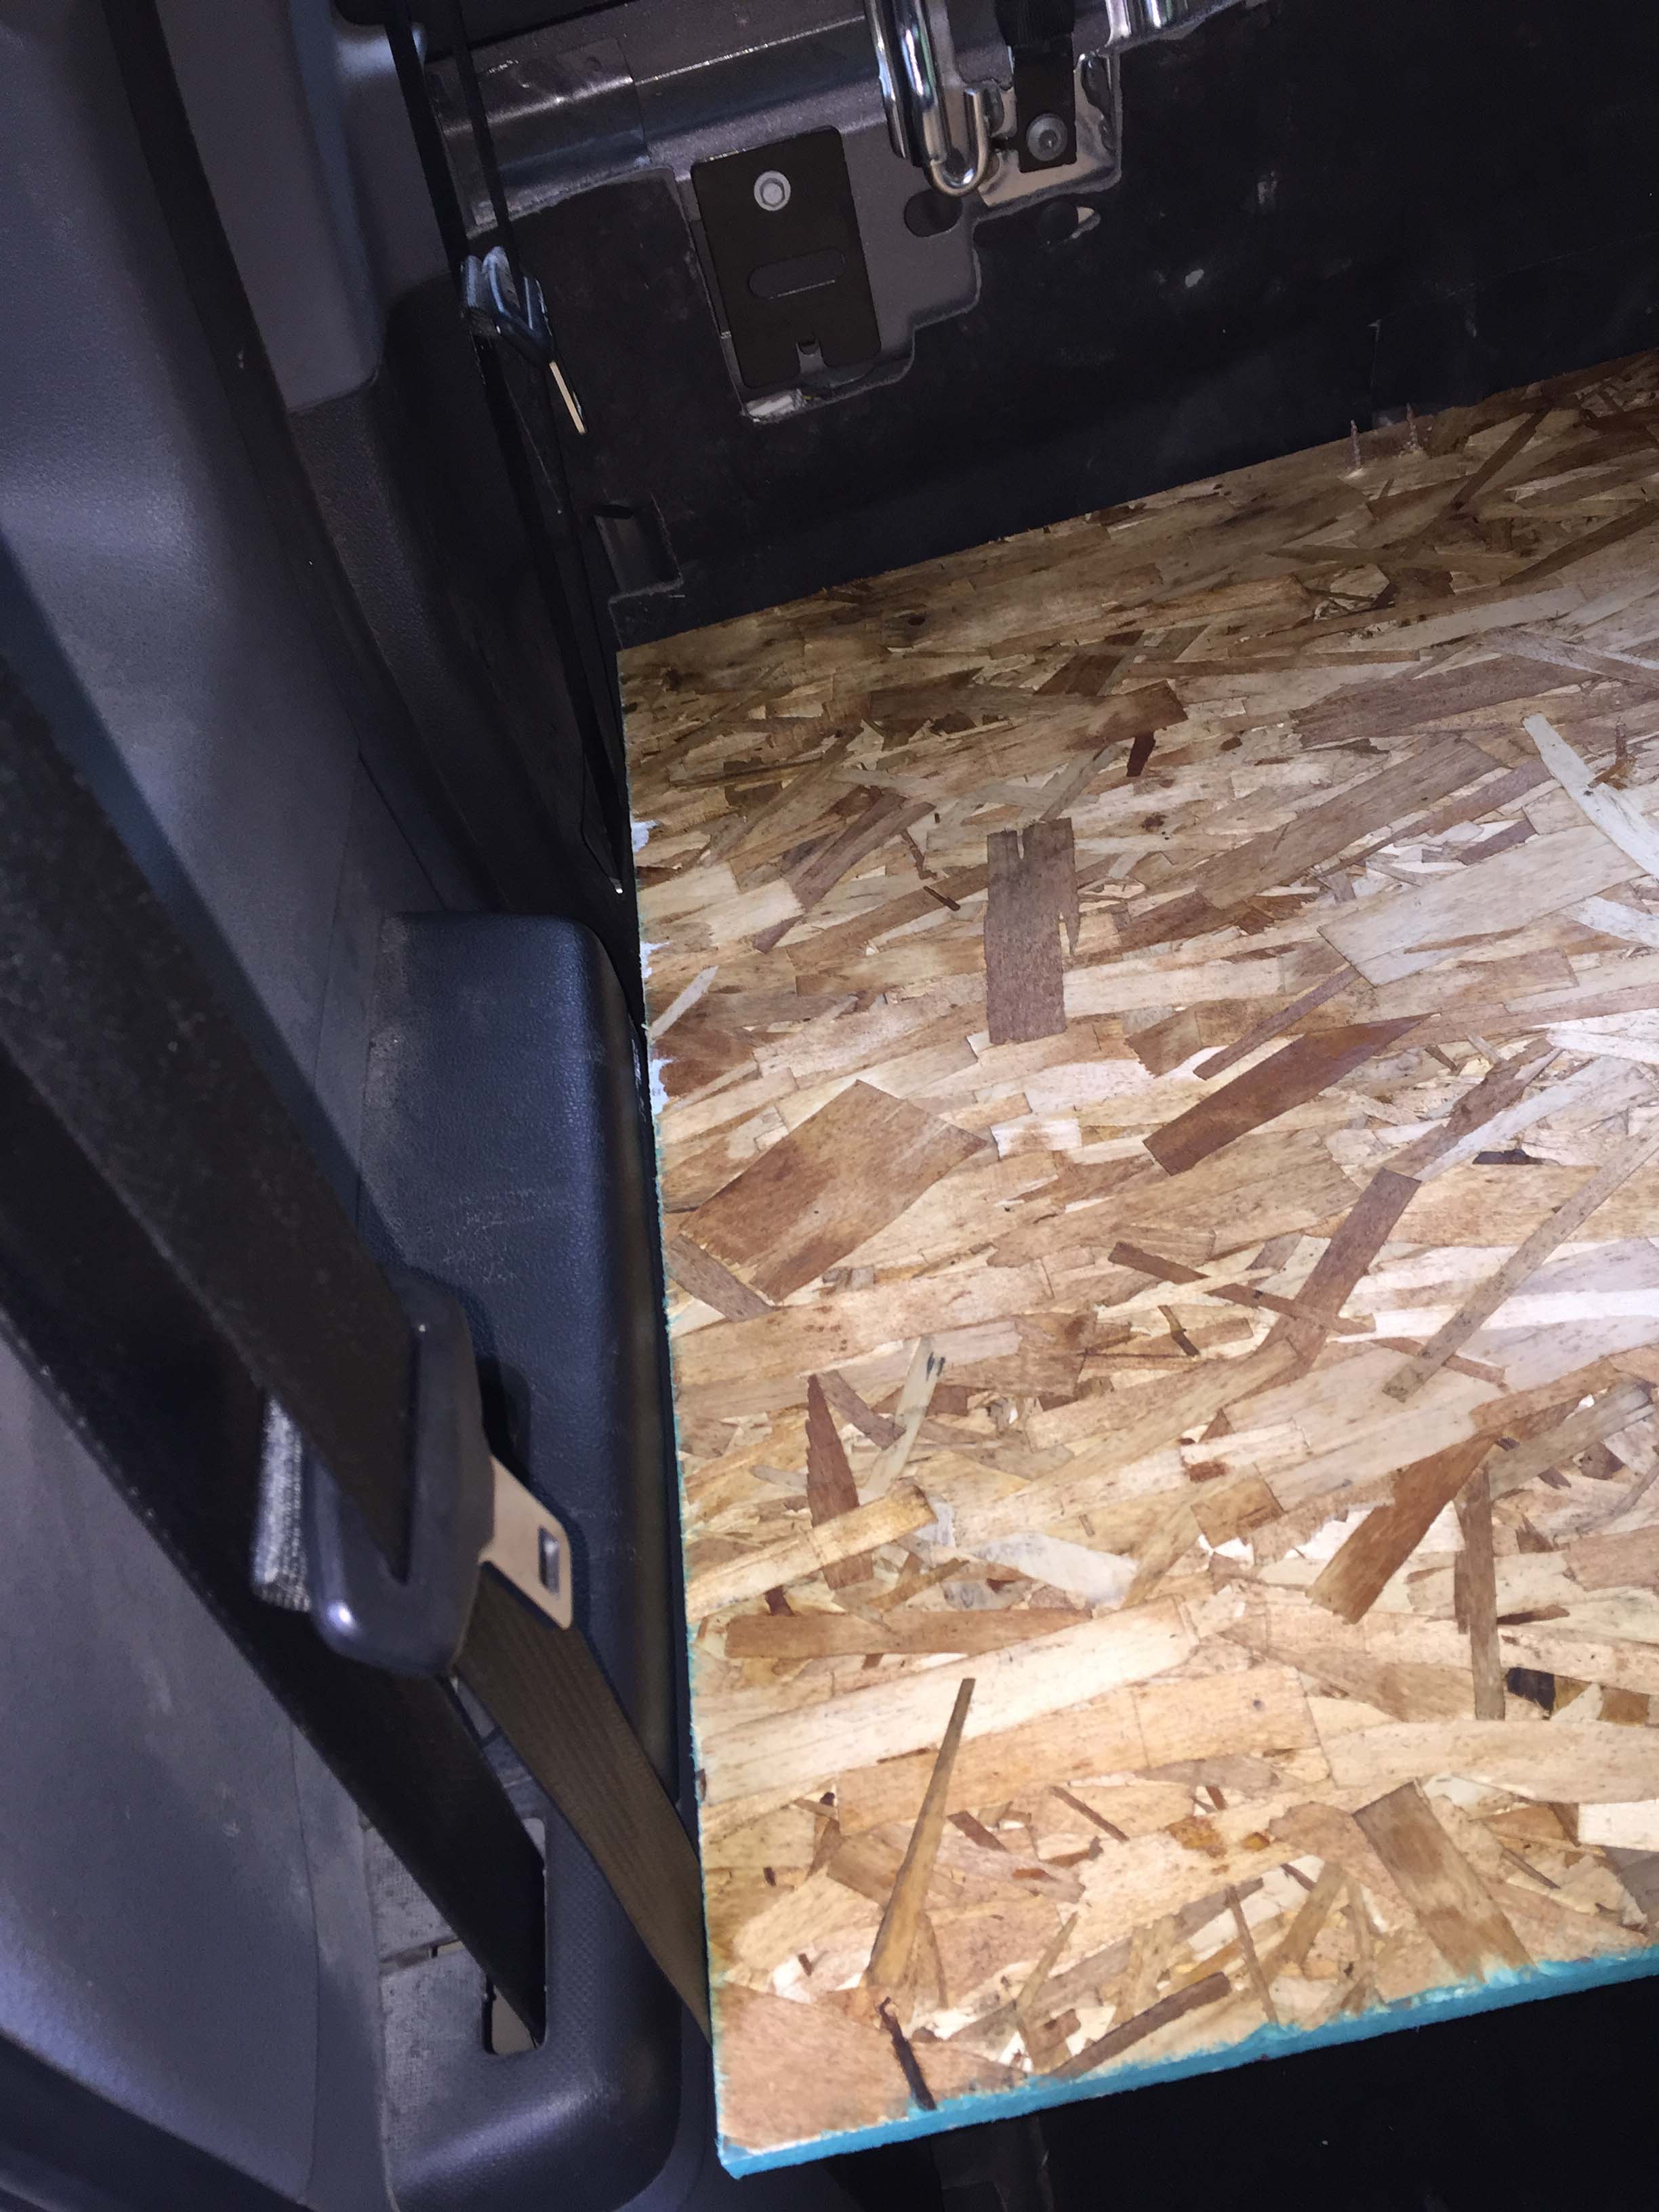
Here you can see the platform resting on the edge of the console, and in the next picture, the edge of the platform against the back door with the door closed.
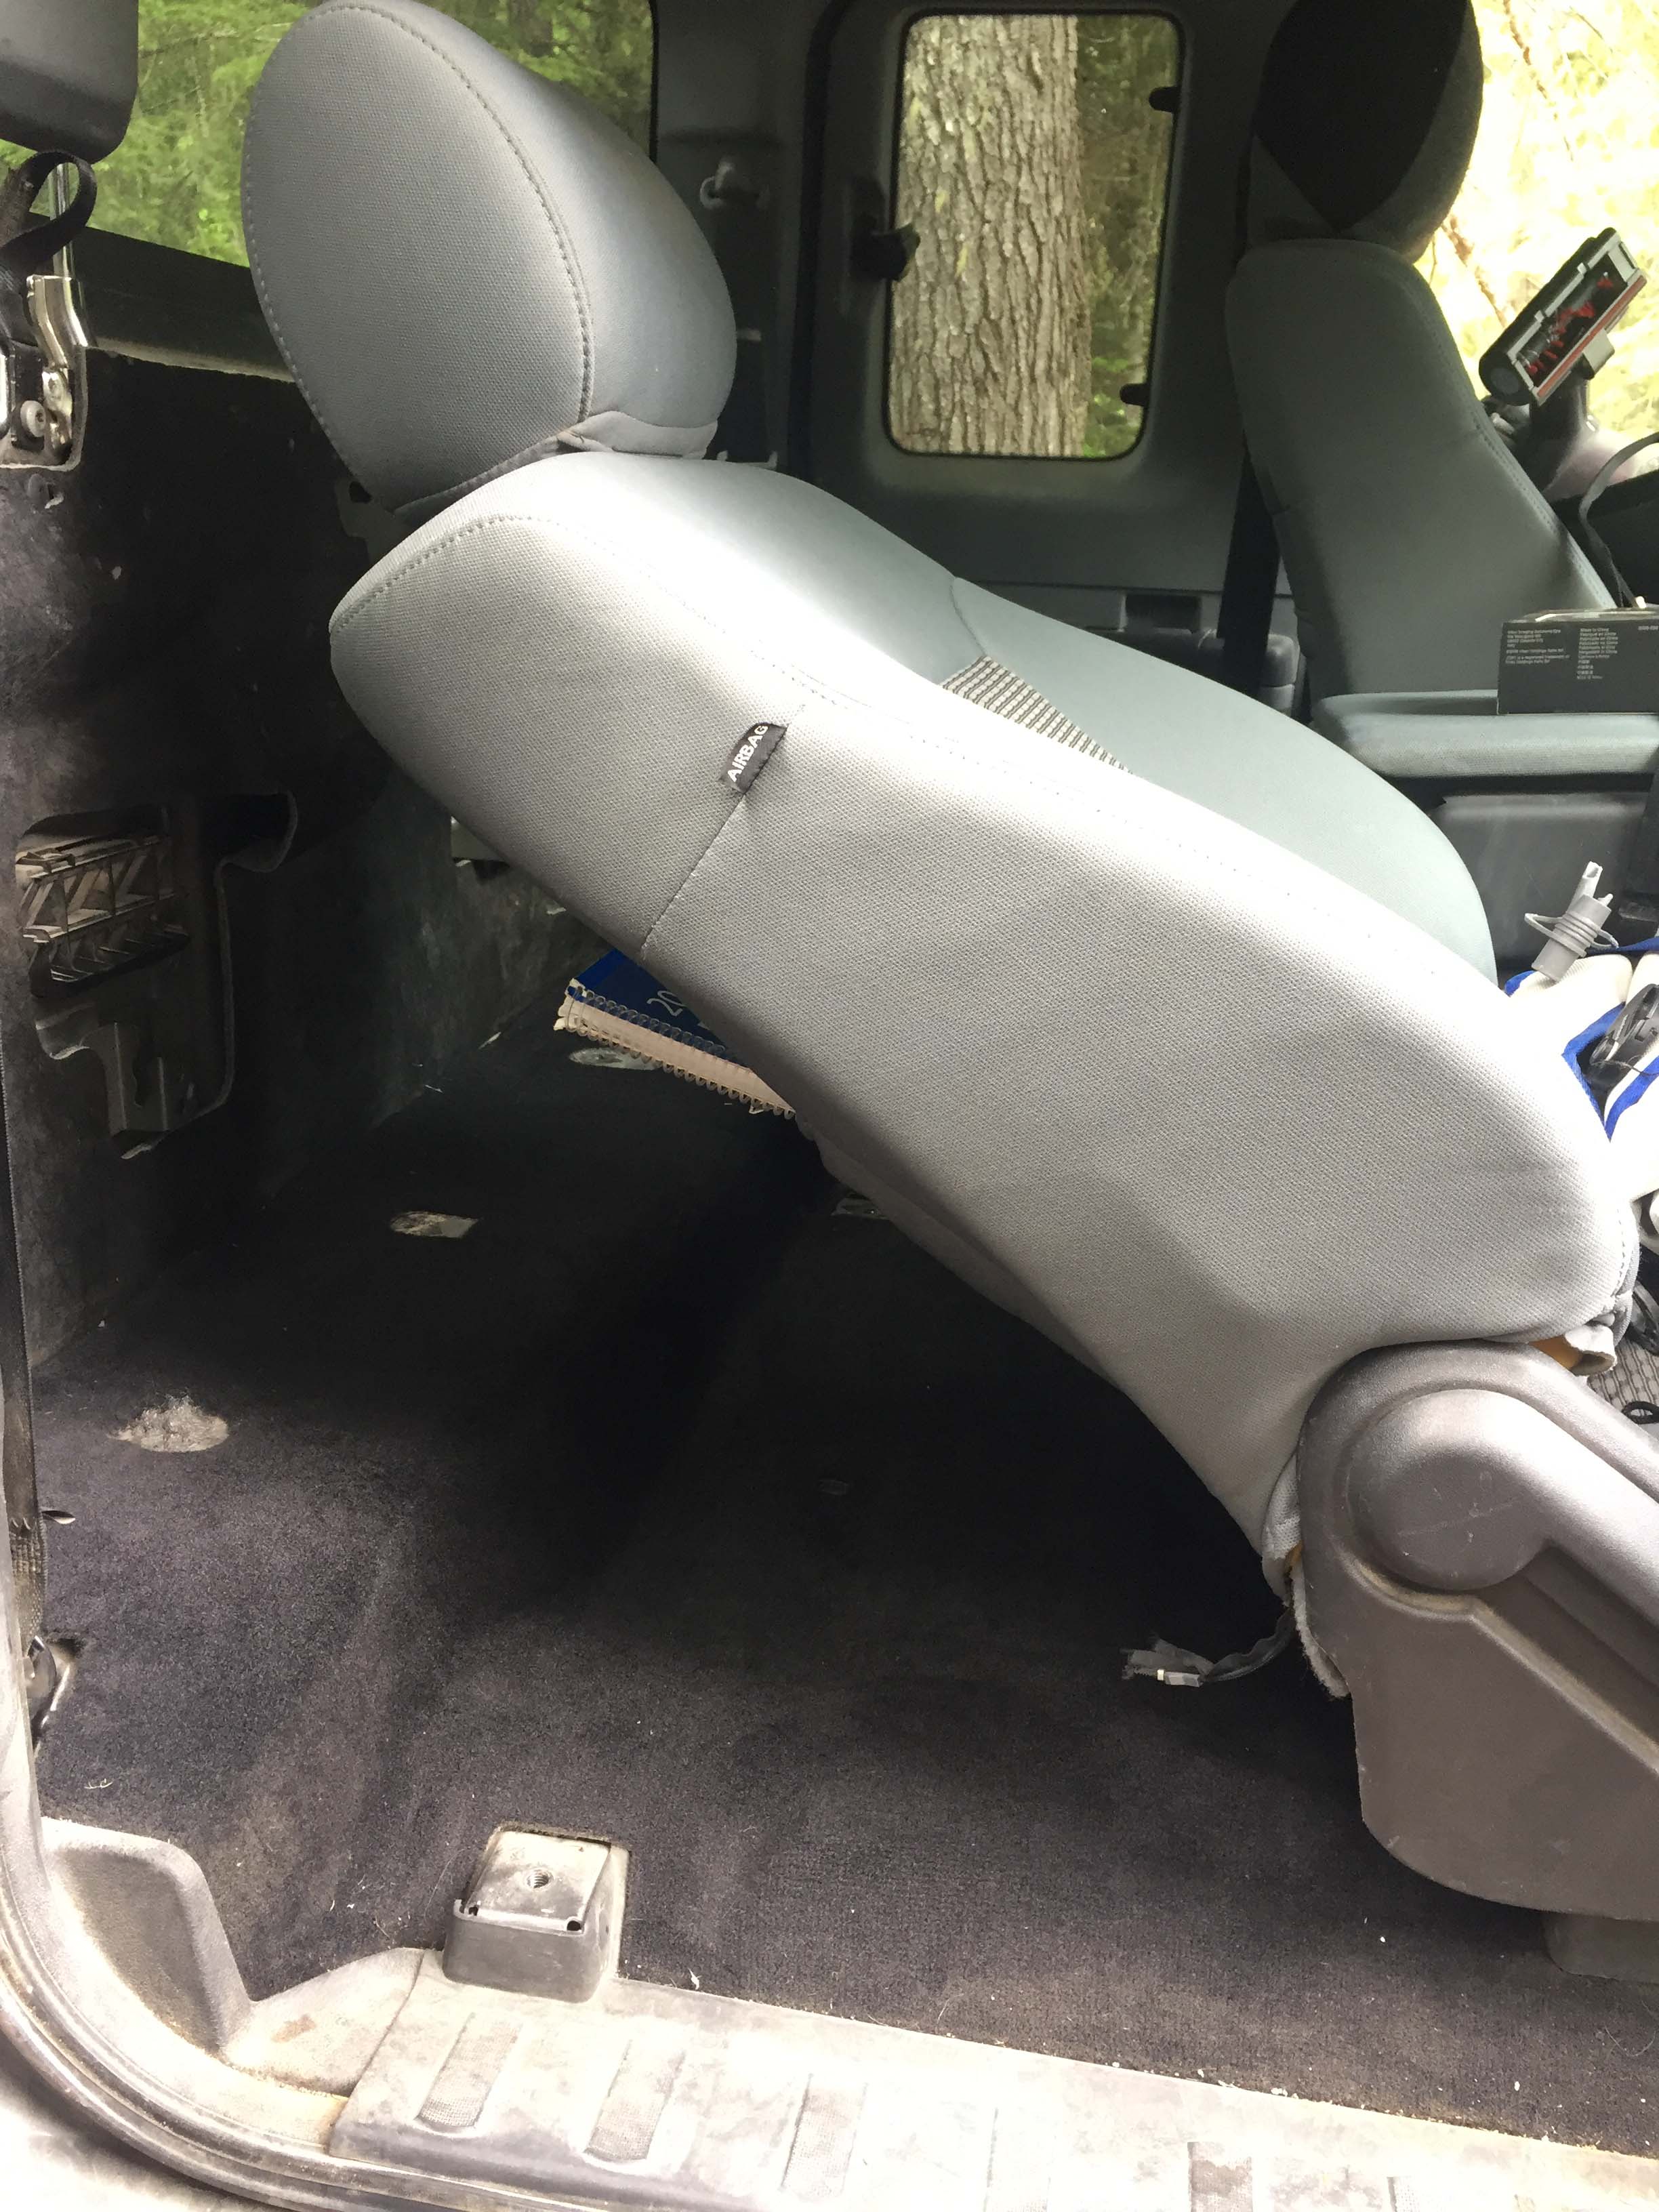
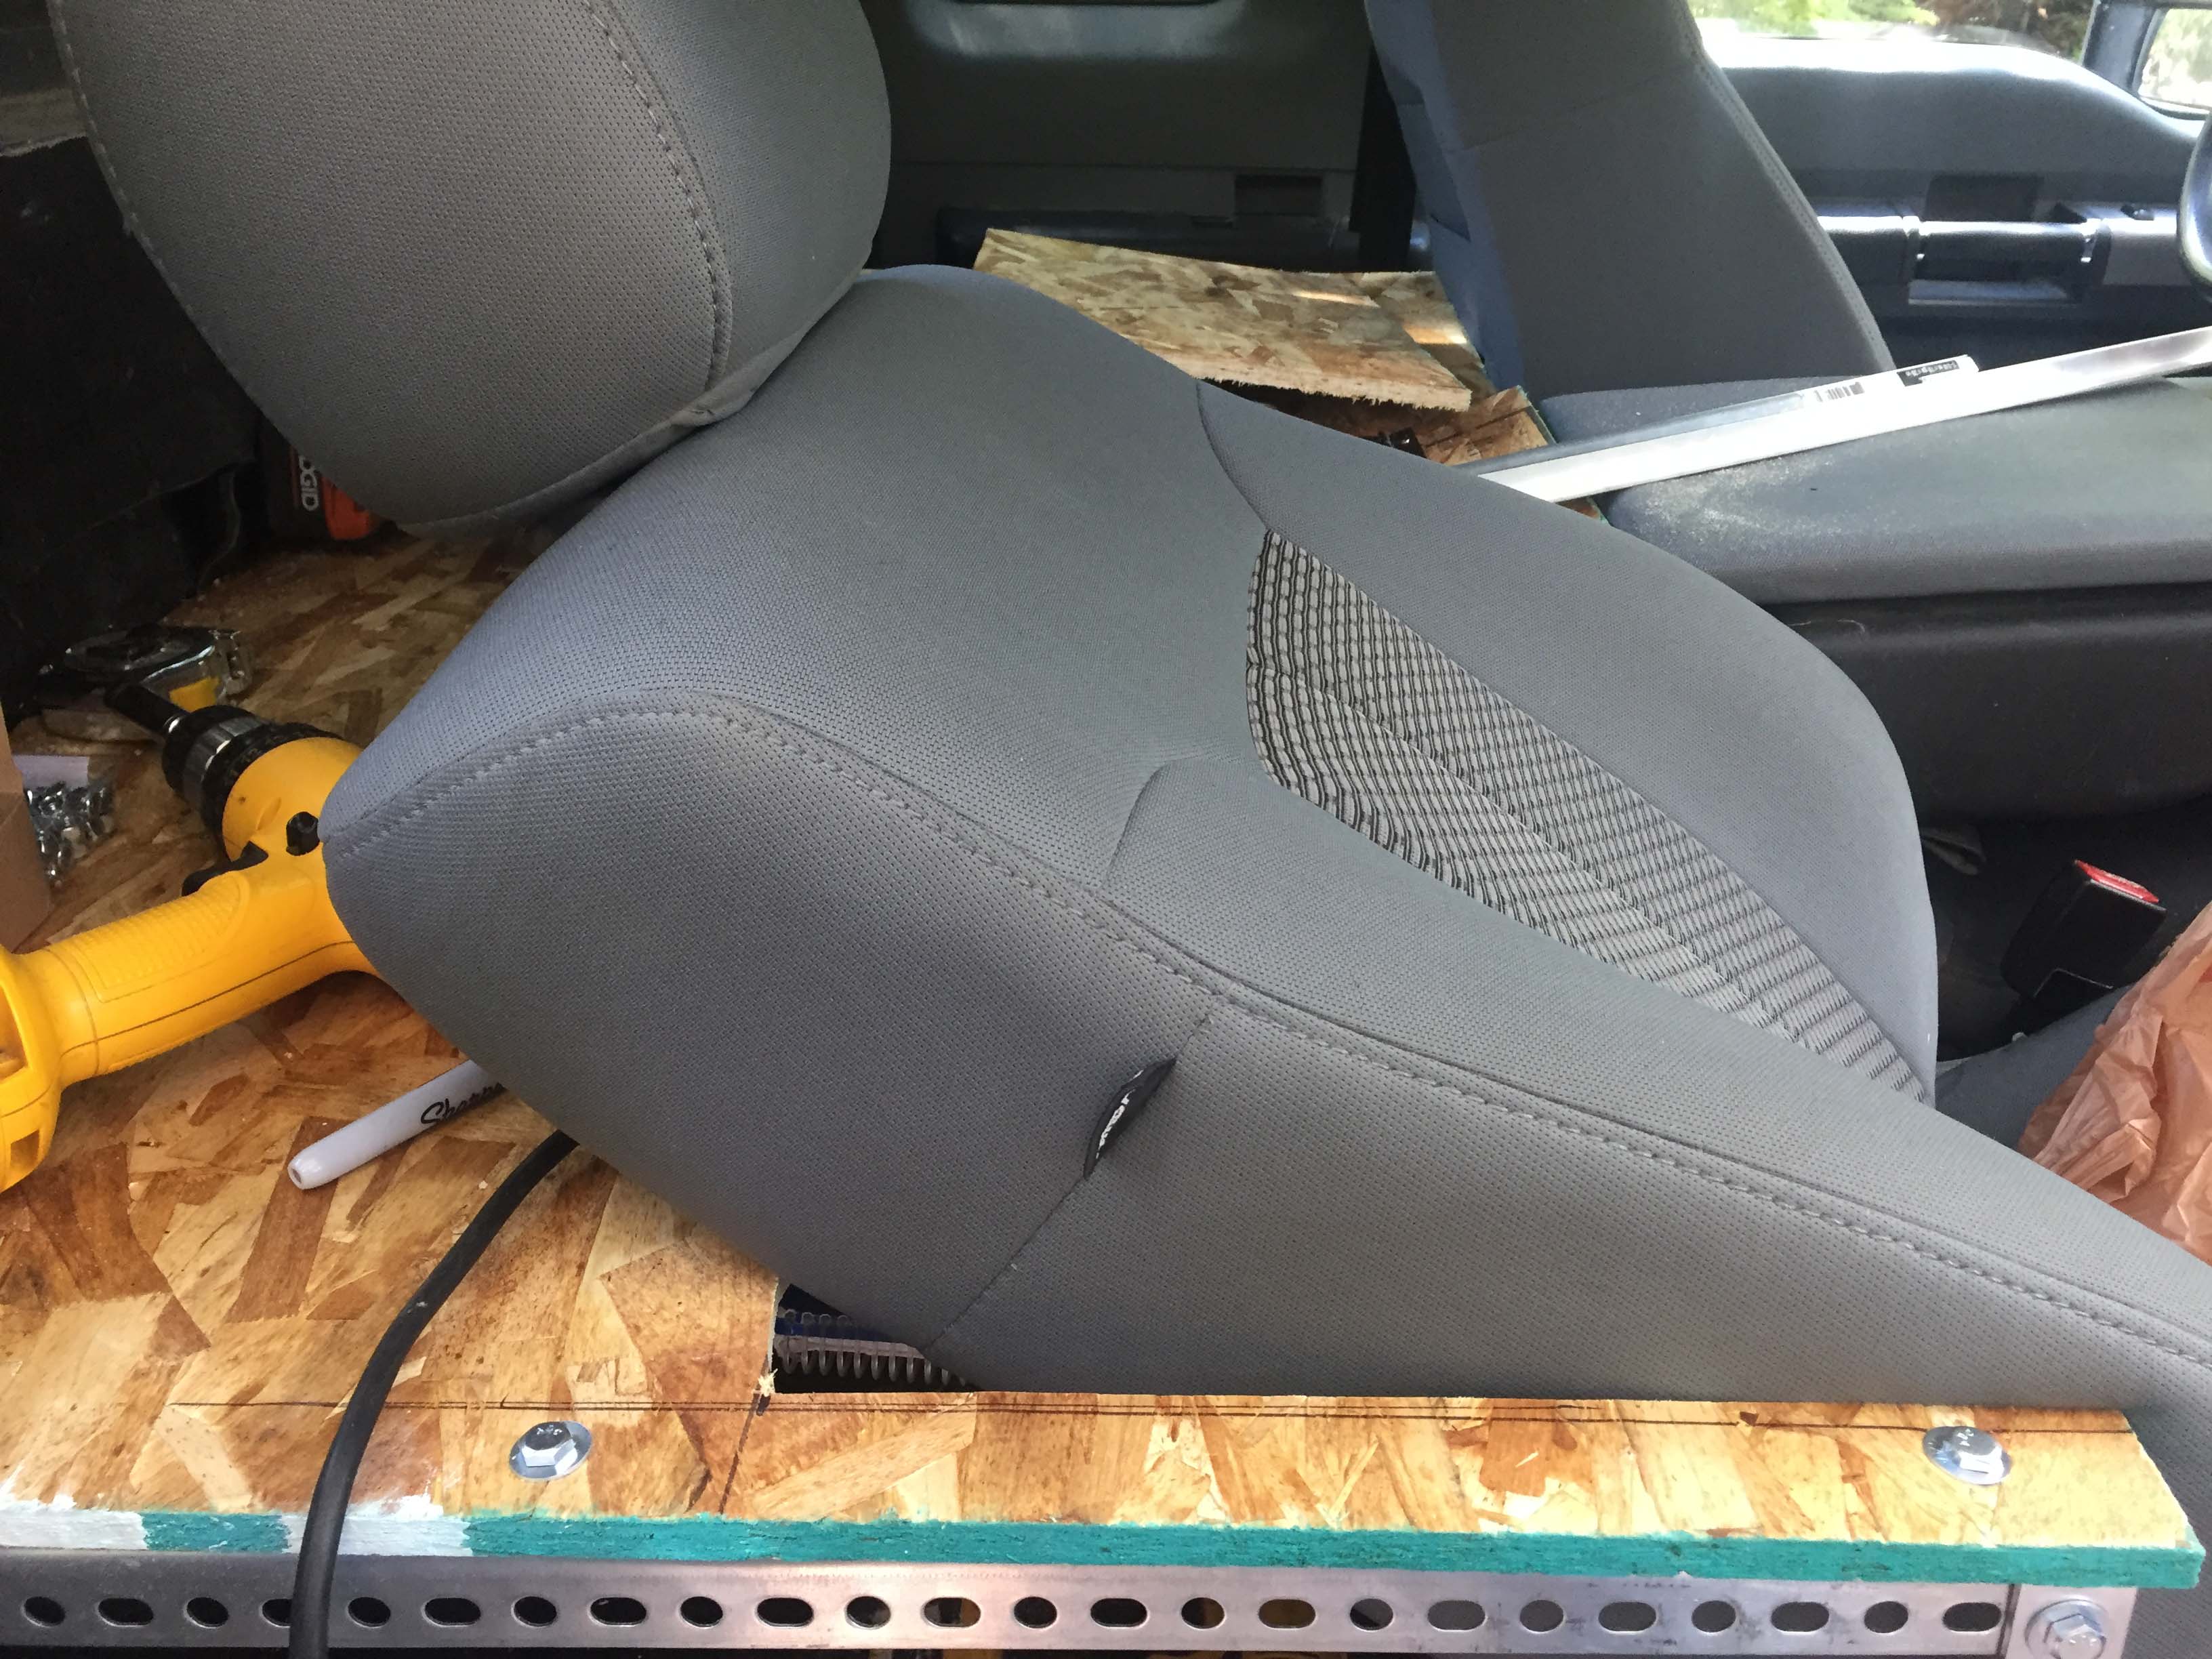
There’s a fair amount of just foam in the back of the front seat, so I knew I could get the platform right up against it, and I set the seat to a comfortable angle and distance from the dash and had Trace sit in it before I “locked” in the size of the platform. (Again that was really nice. I got to have some input – Trace.)
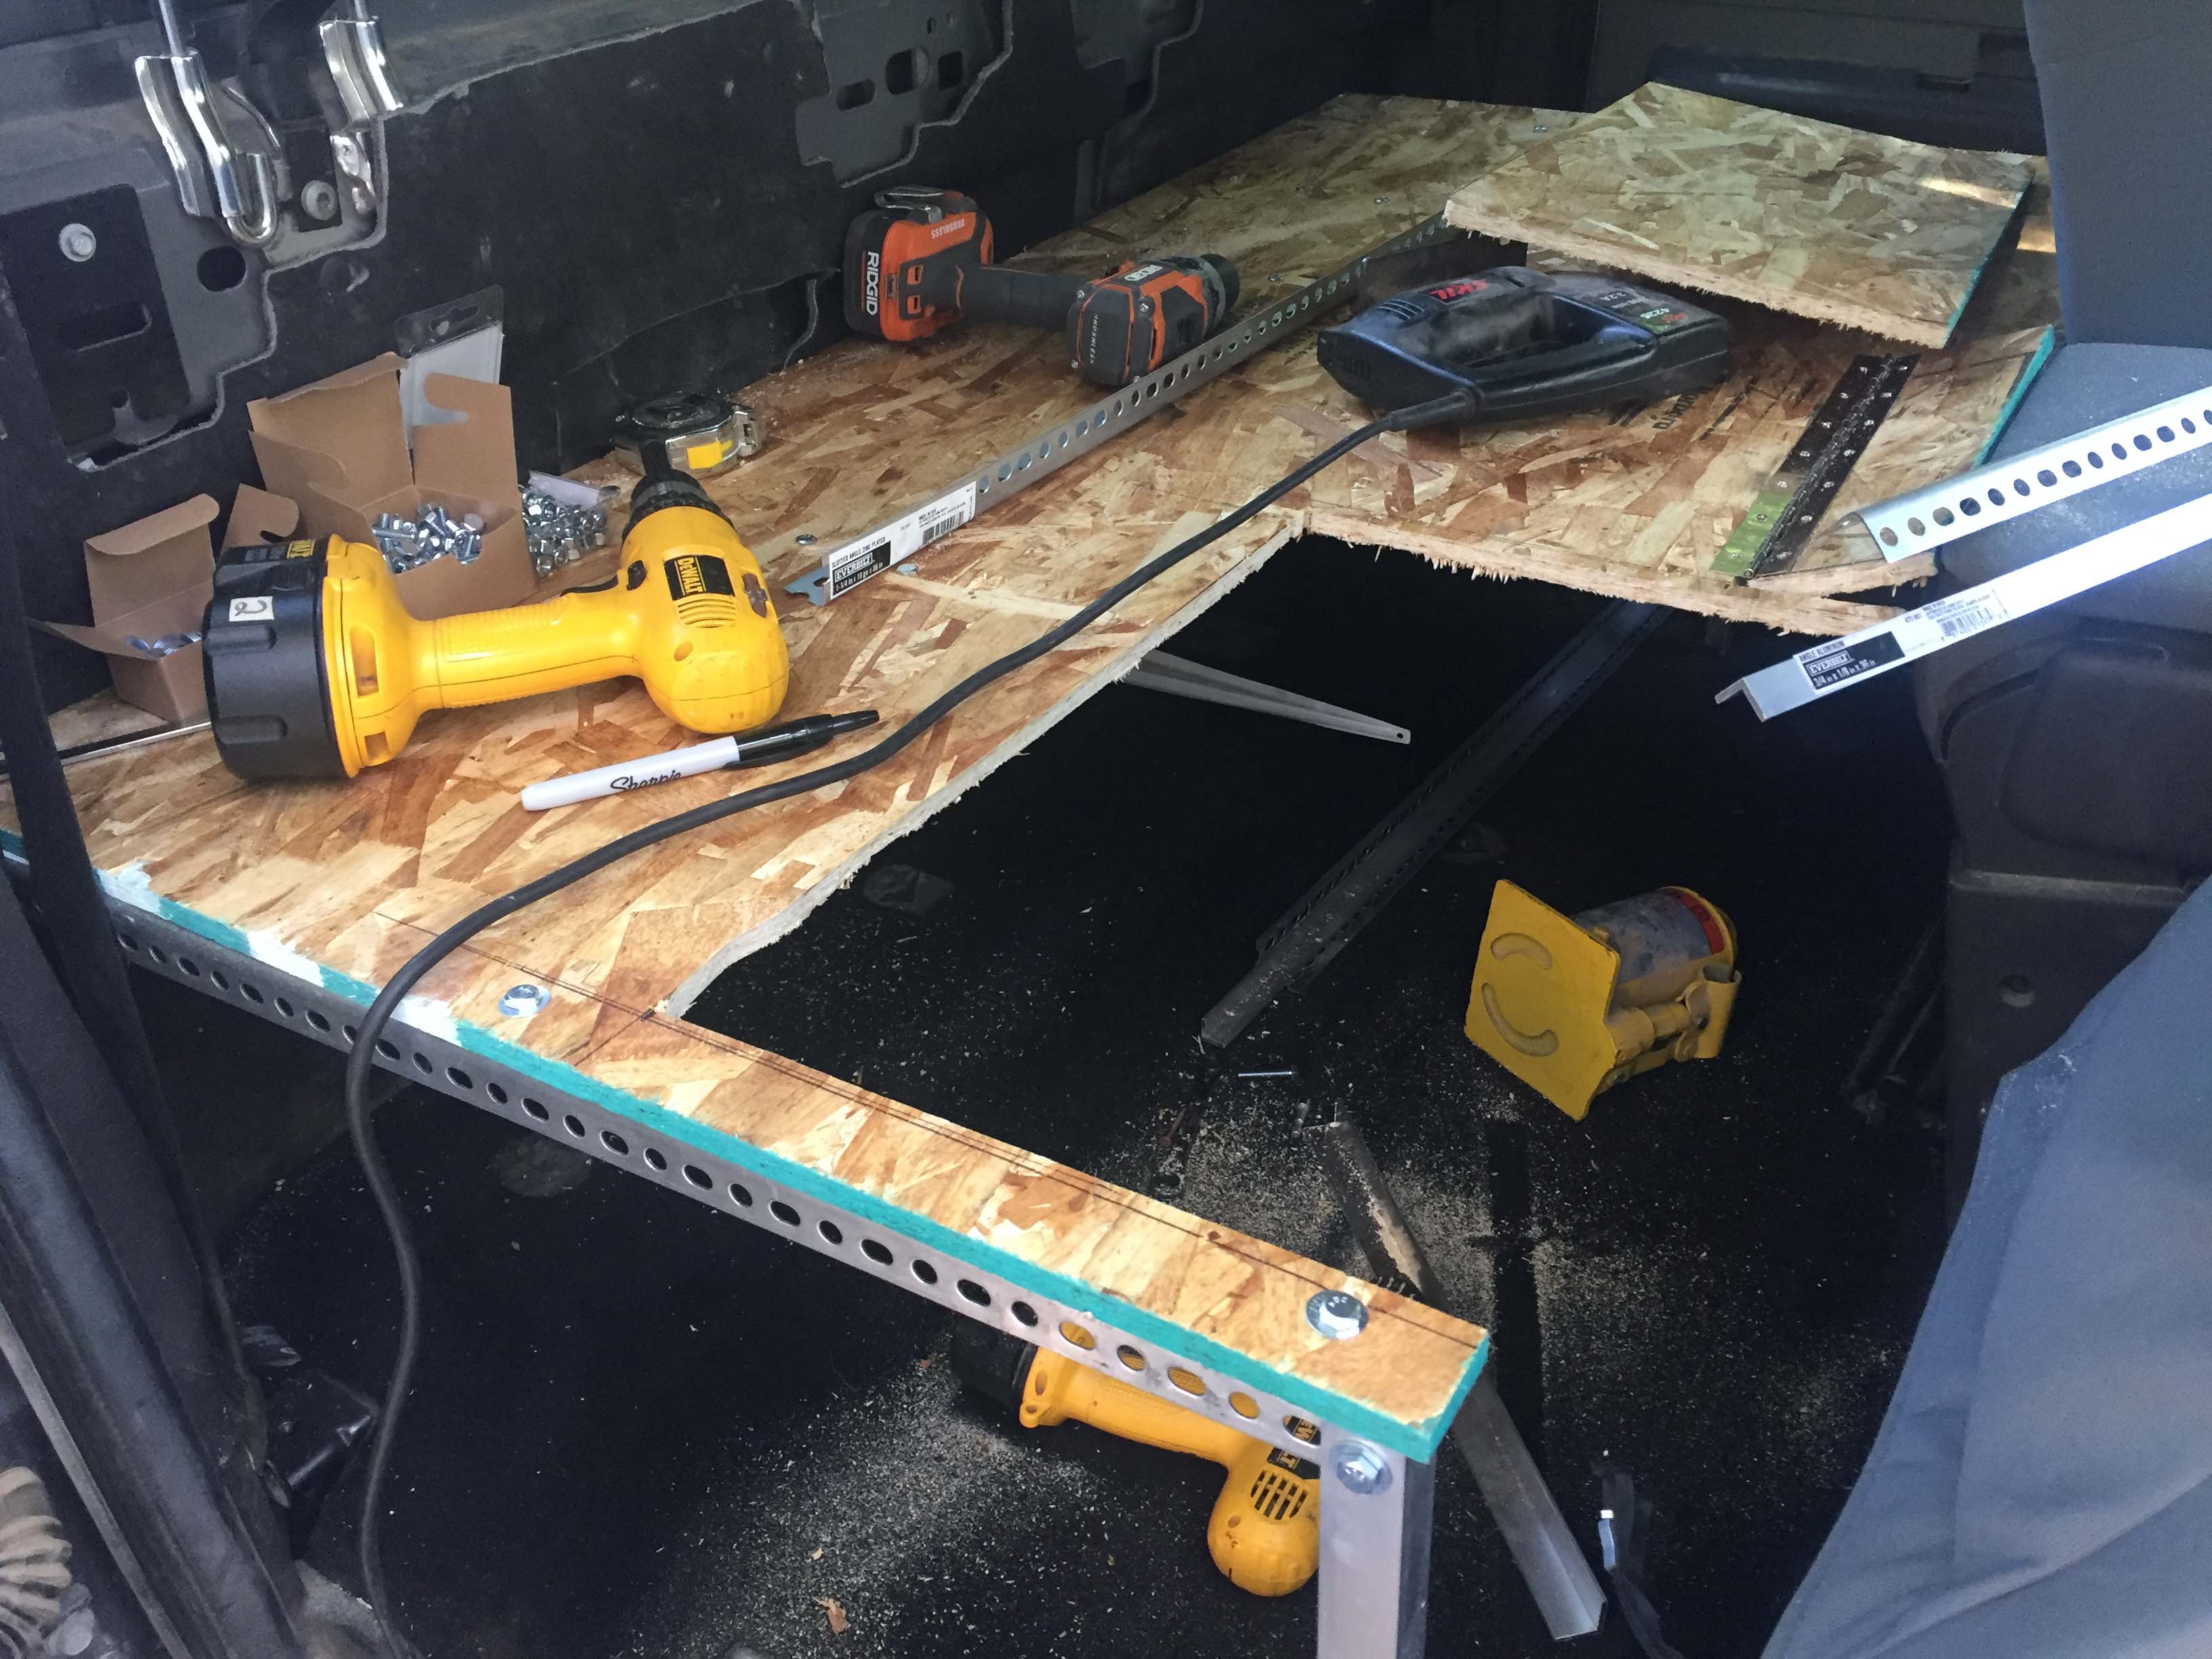
I used zinc plated punched angle steel to strengthen and frame up the side edges and to give something metal to attach the angle aluminum I was using for the vertical supports. The aluminum is easy to drill through and small but strong. It’s hard to see, but the leg is as far forward as the platform, so there’s as much width in the opening to the lower storage as there is width IN the lower storage.
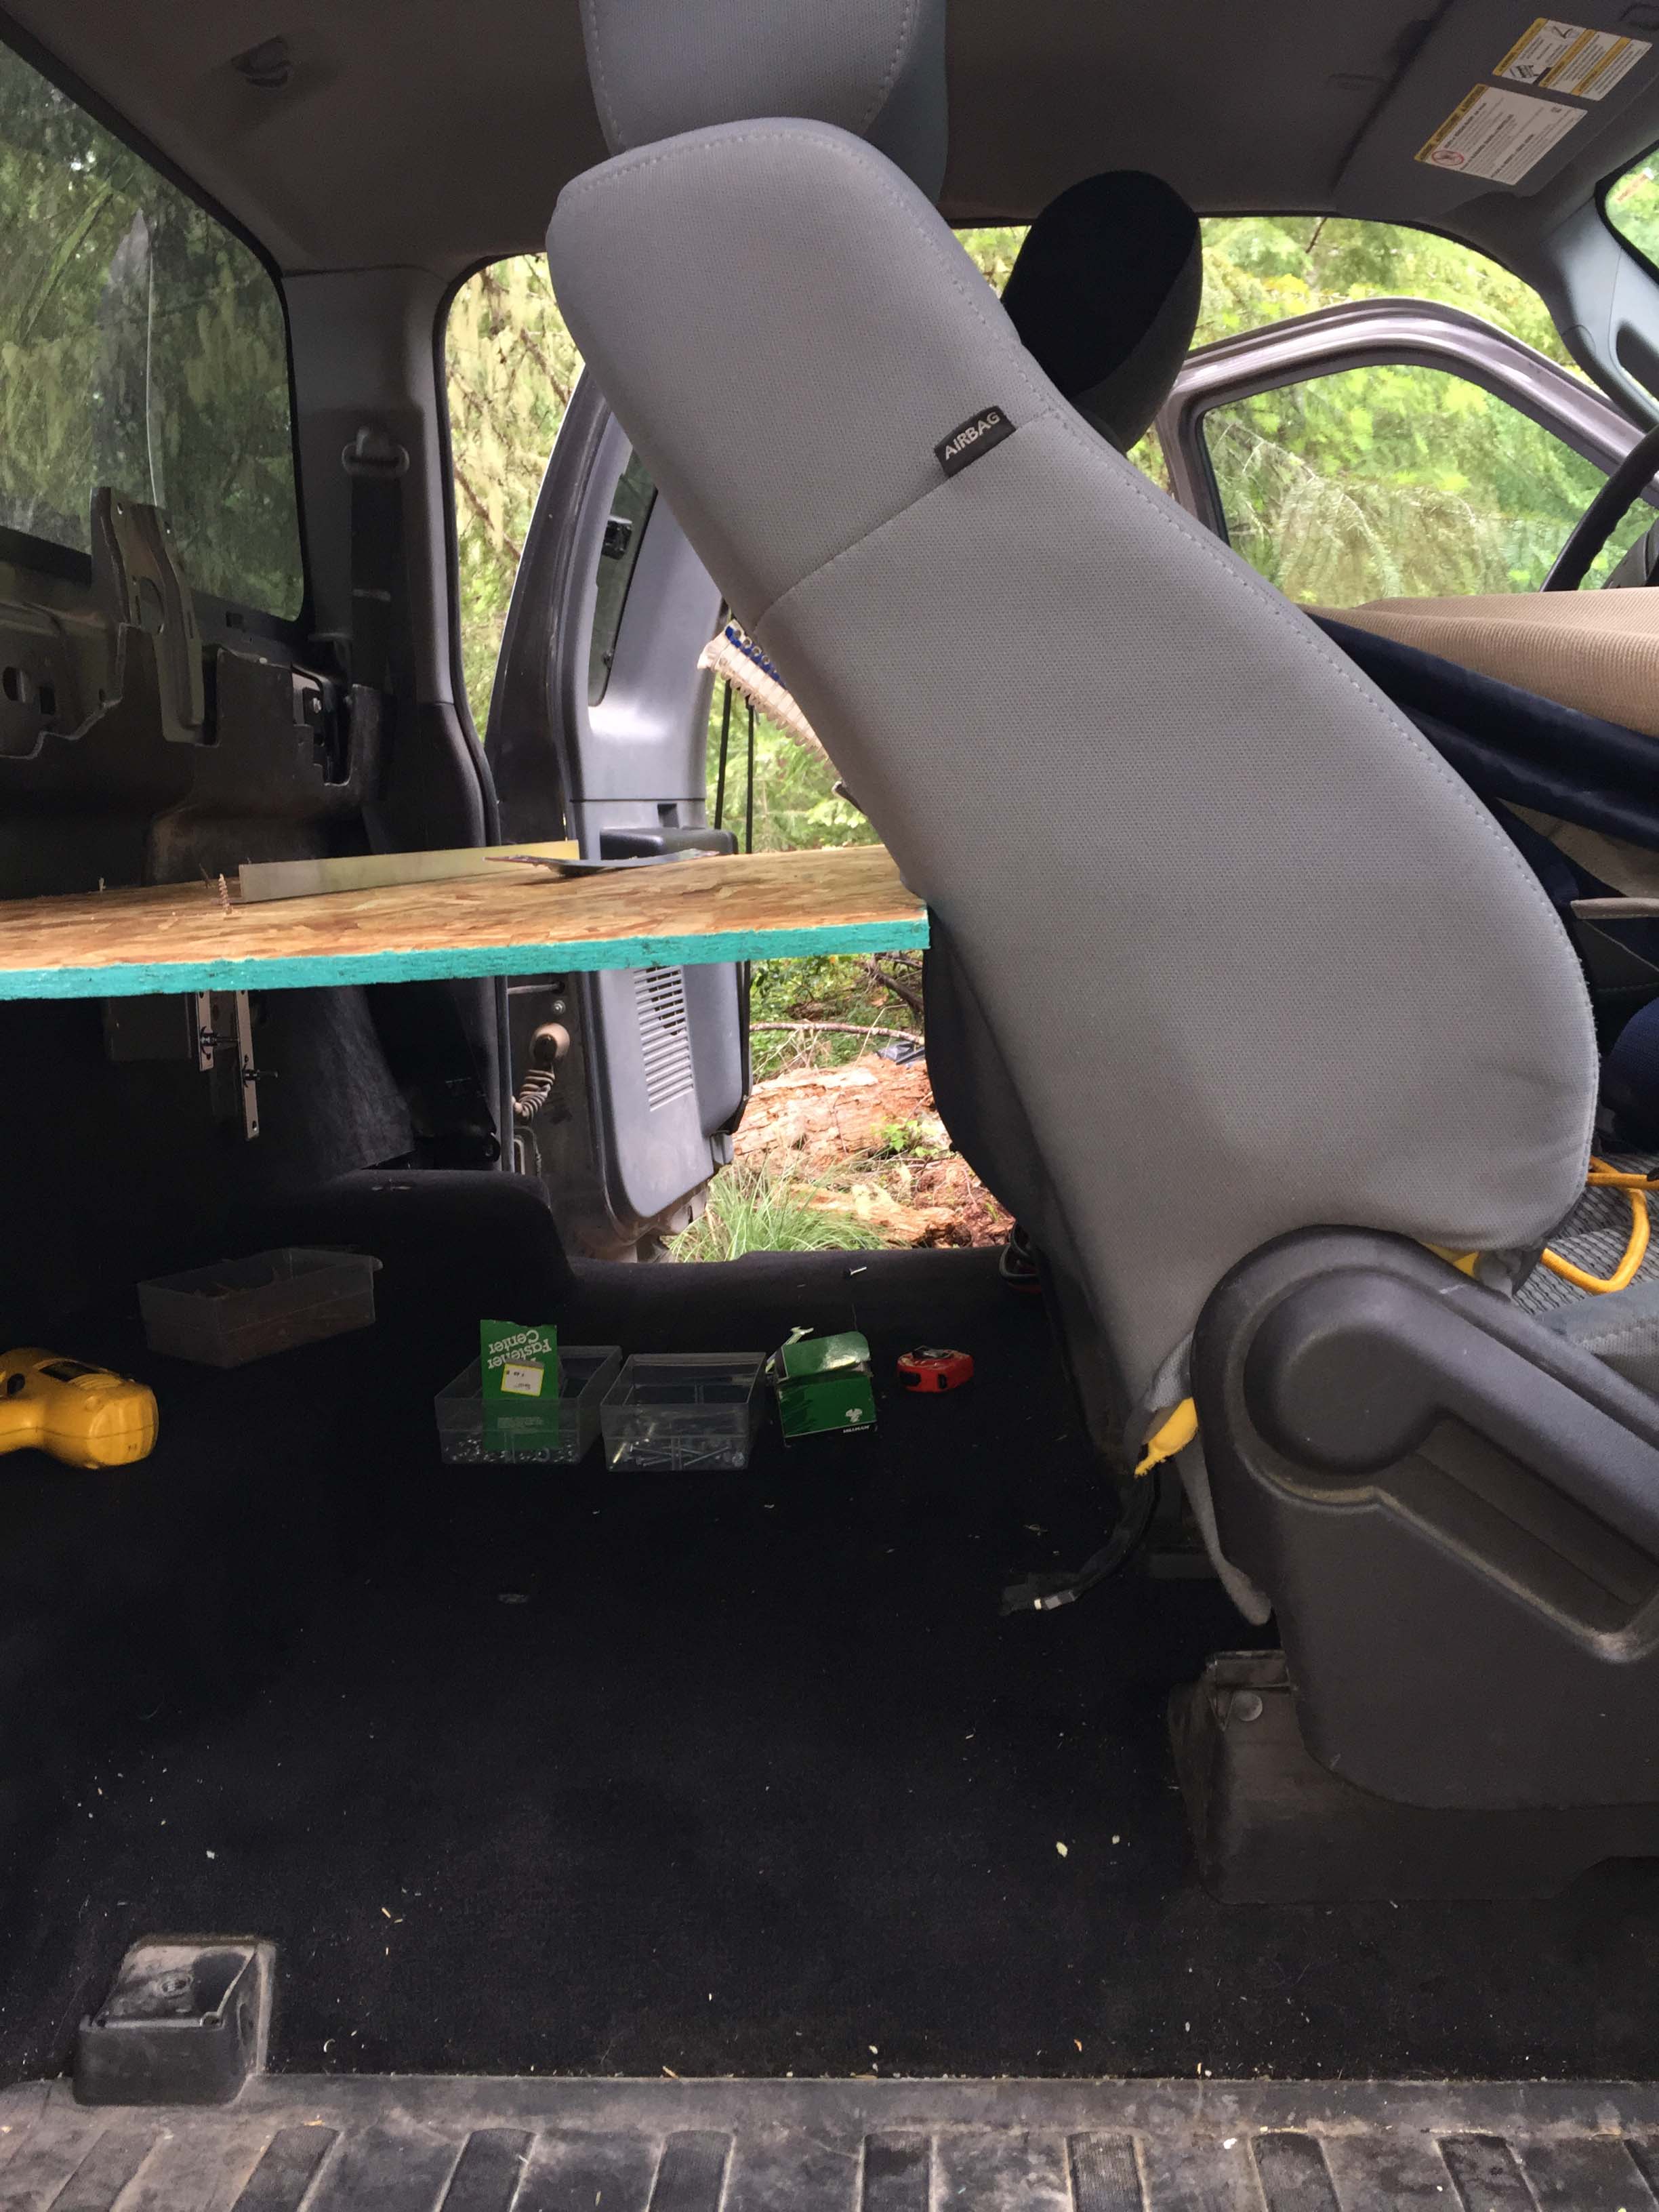
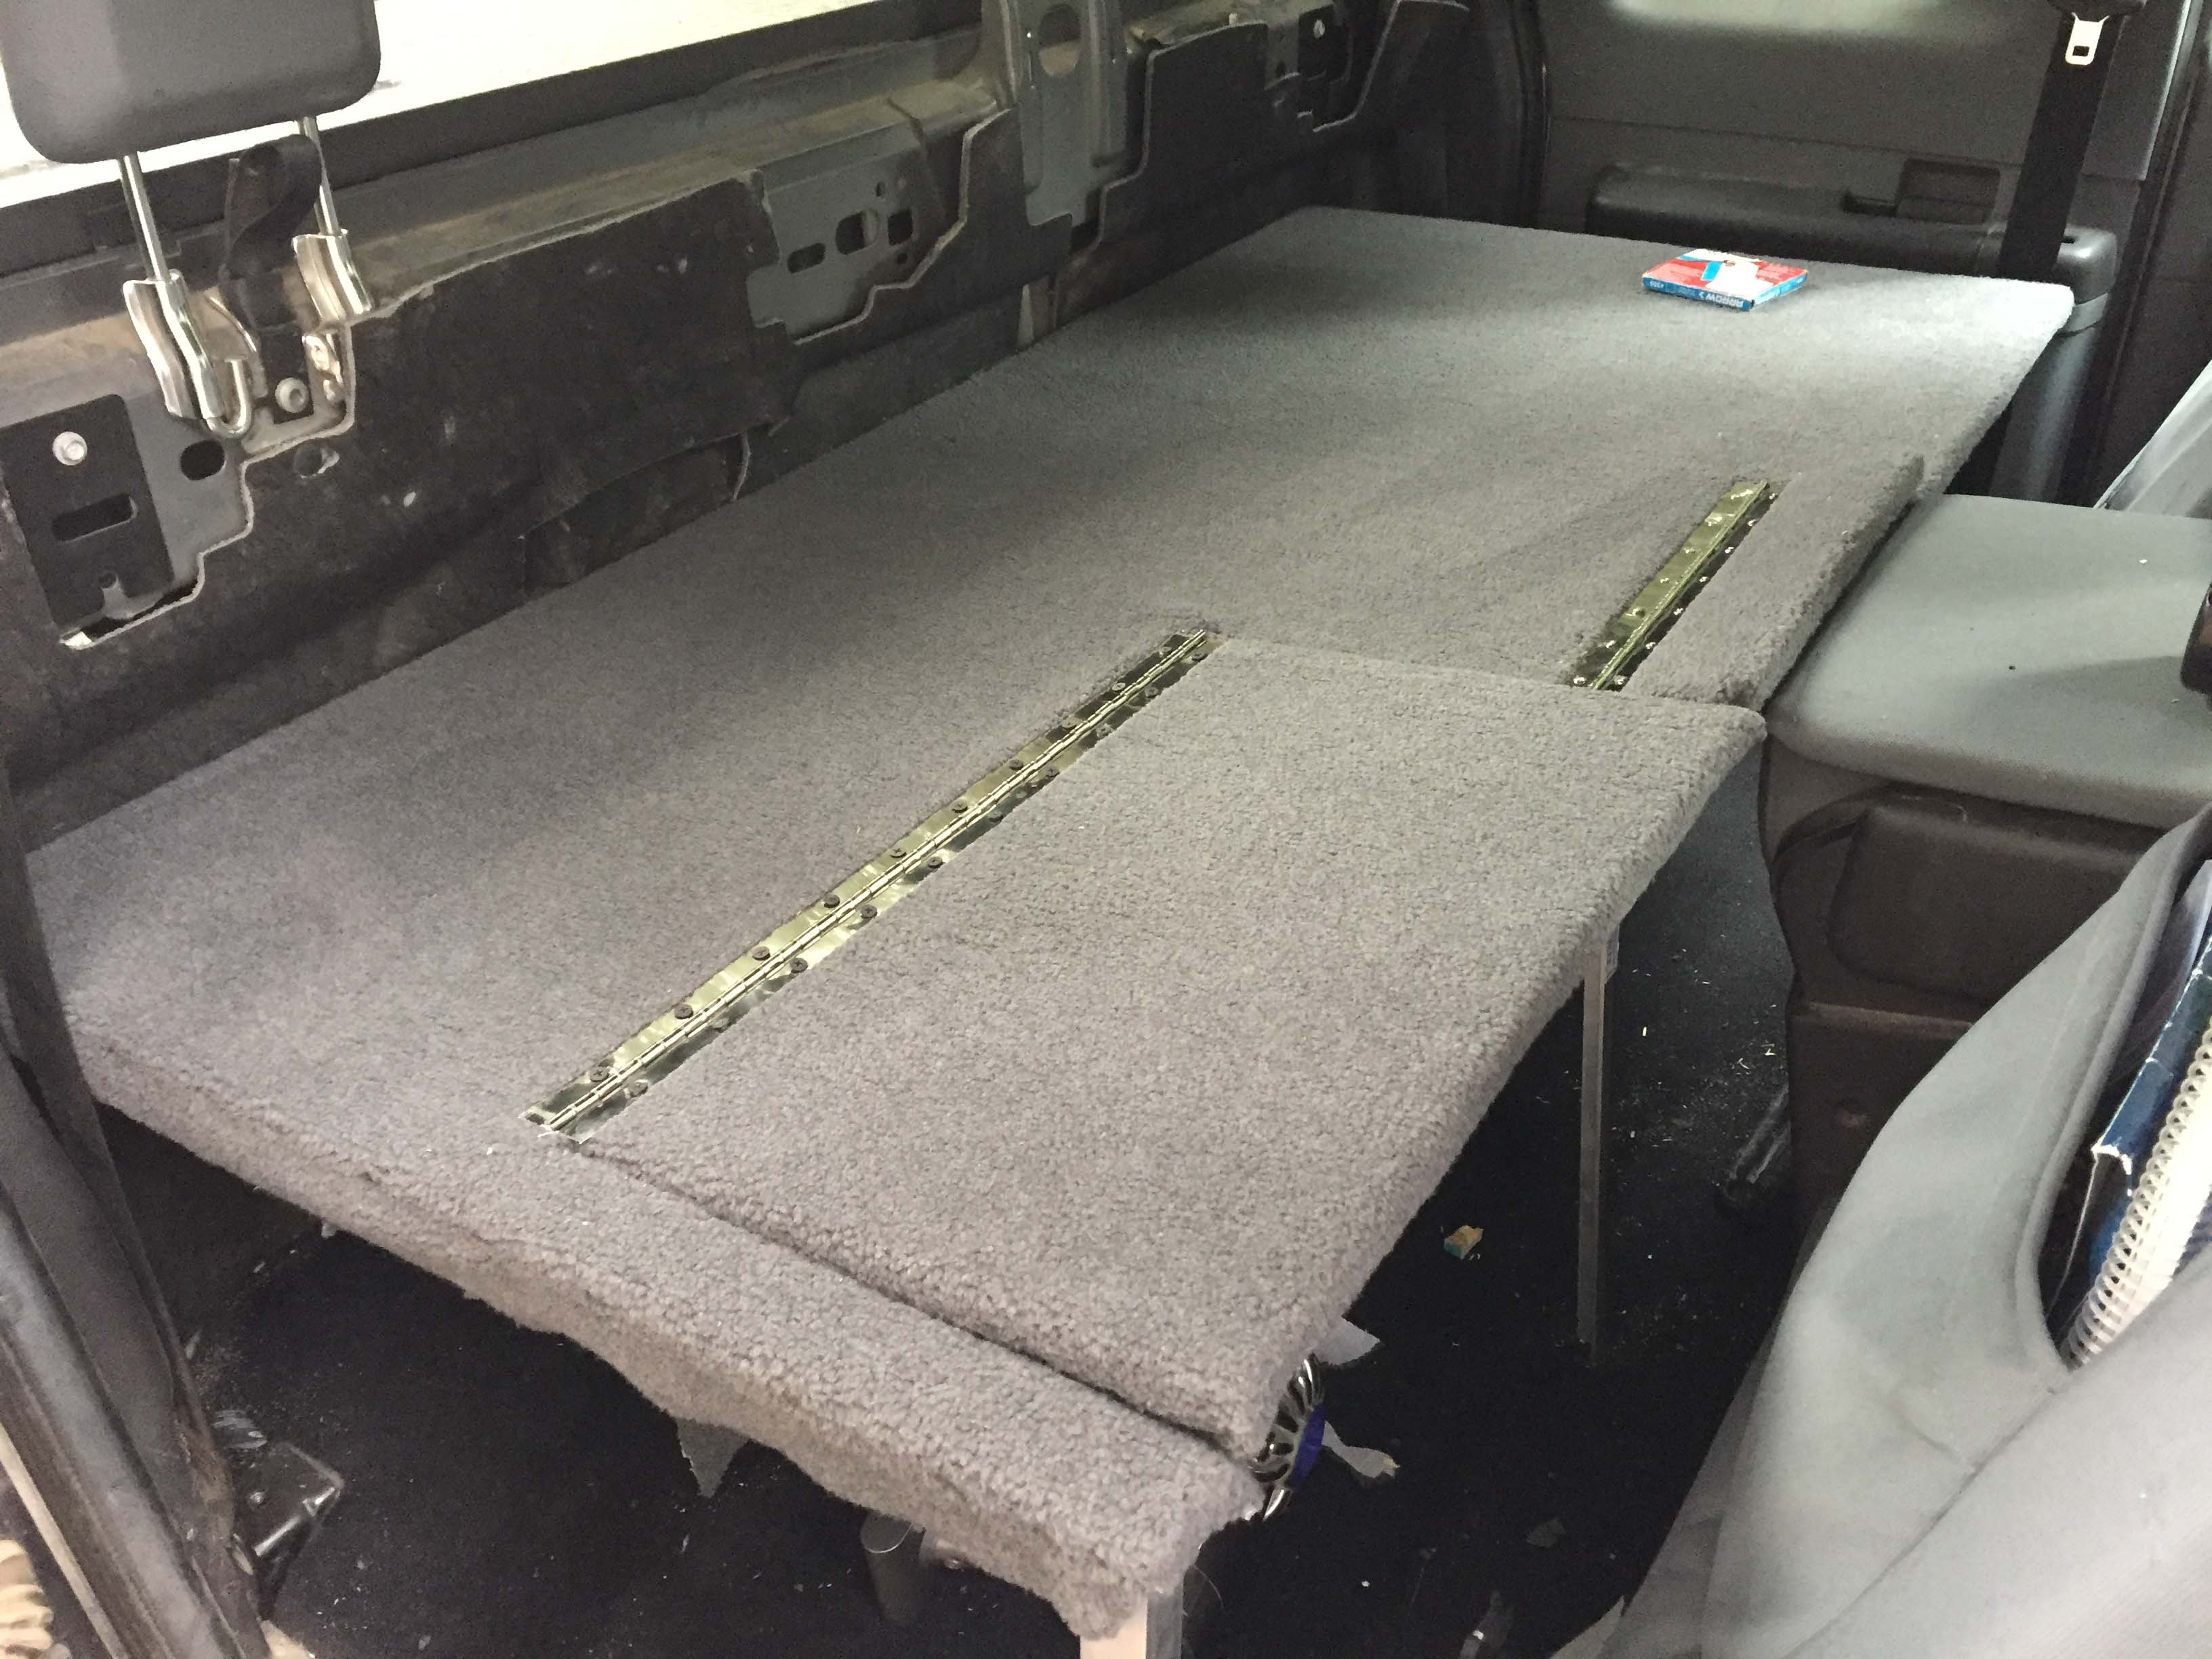
Next I used a jigsaw to cut out the piece where the passenger seat will recline. I suck at cutting straight lines, but it was passable. I had to do it in place, because I wanted the fit to be precise, and I didn’t trust just measuring it and cutting it outside, with the closest place to buy more wood 90 minutes away. On the right side you can see where I already cut and hinged the piece that allows the center console to flip up.
Like I said, I wanted the tightest possible fit, allowing the front seat to recline all the way back, without losing any more surface area than absolutely necessary.
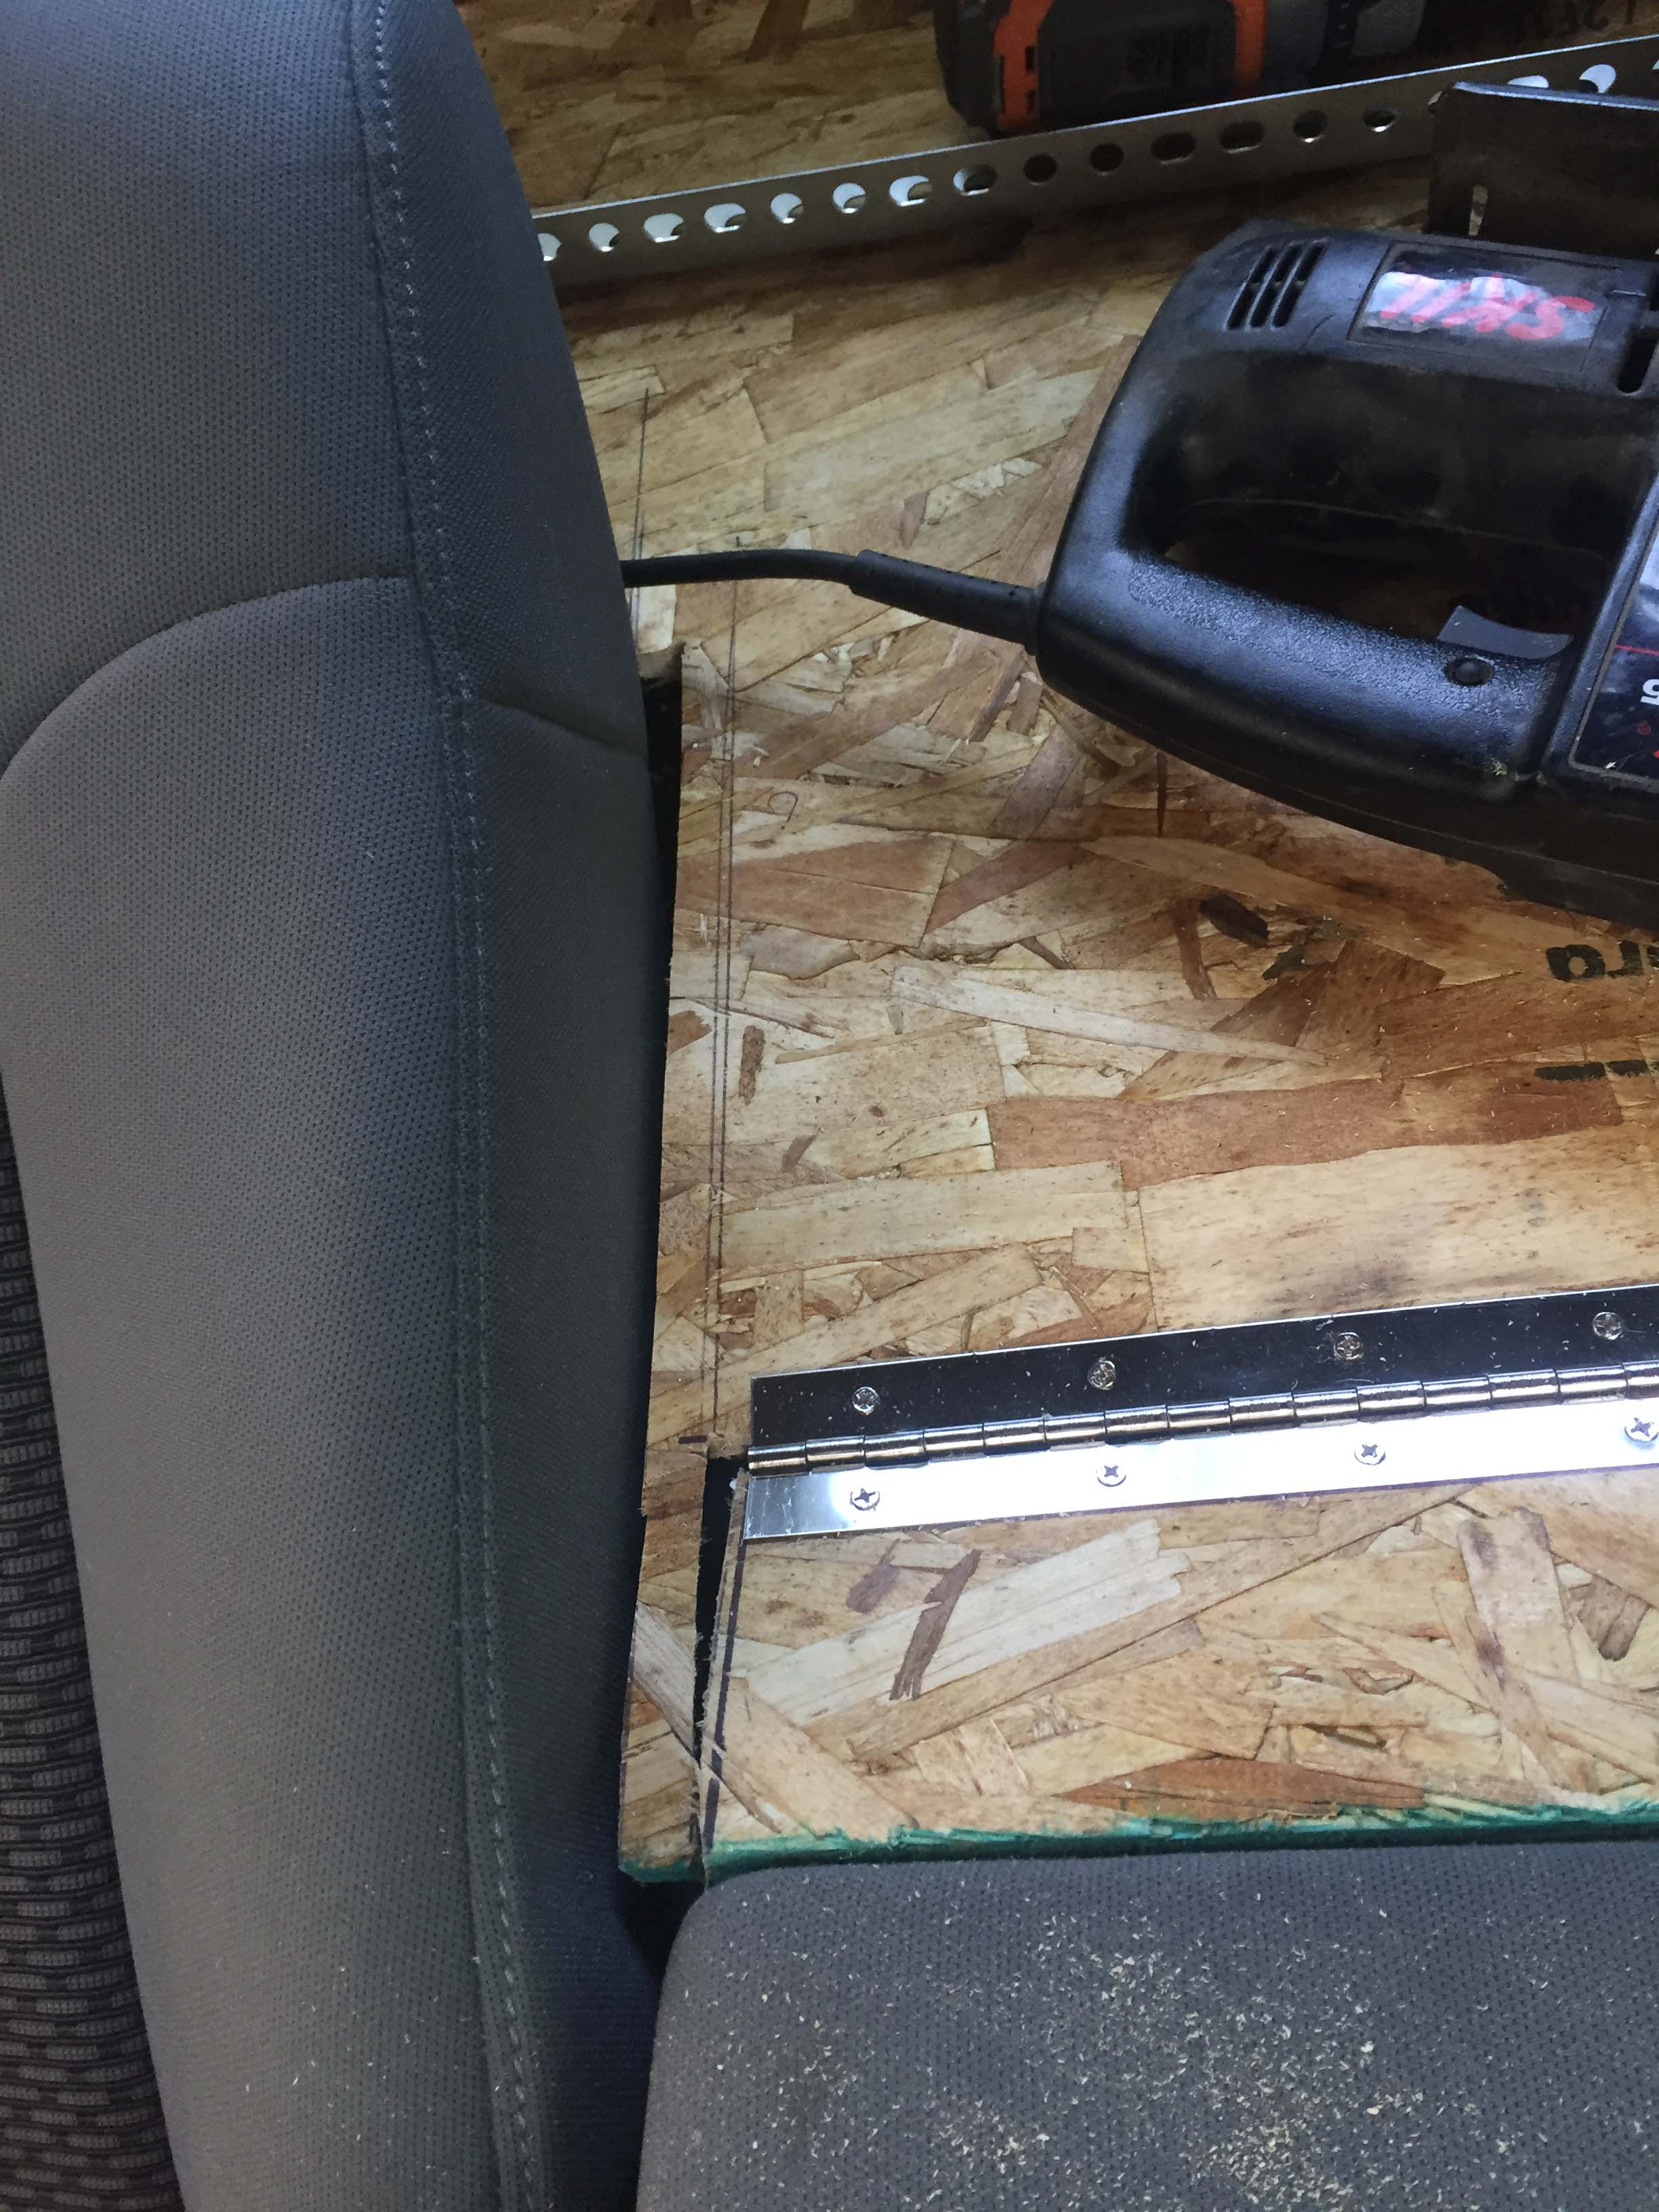
Once the cut was made I trimmed a little off the cut off piece of wood so it wouldn’t be too tight a fit, and used a piano hinge to reattach it.
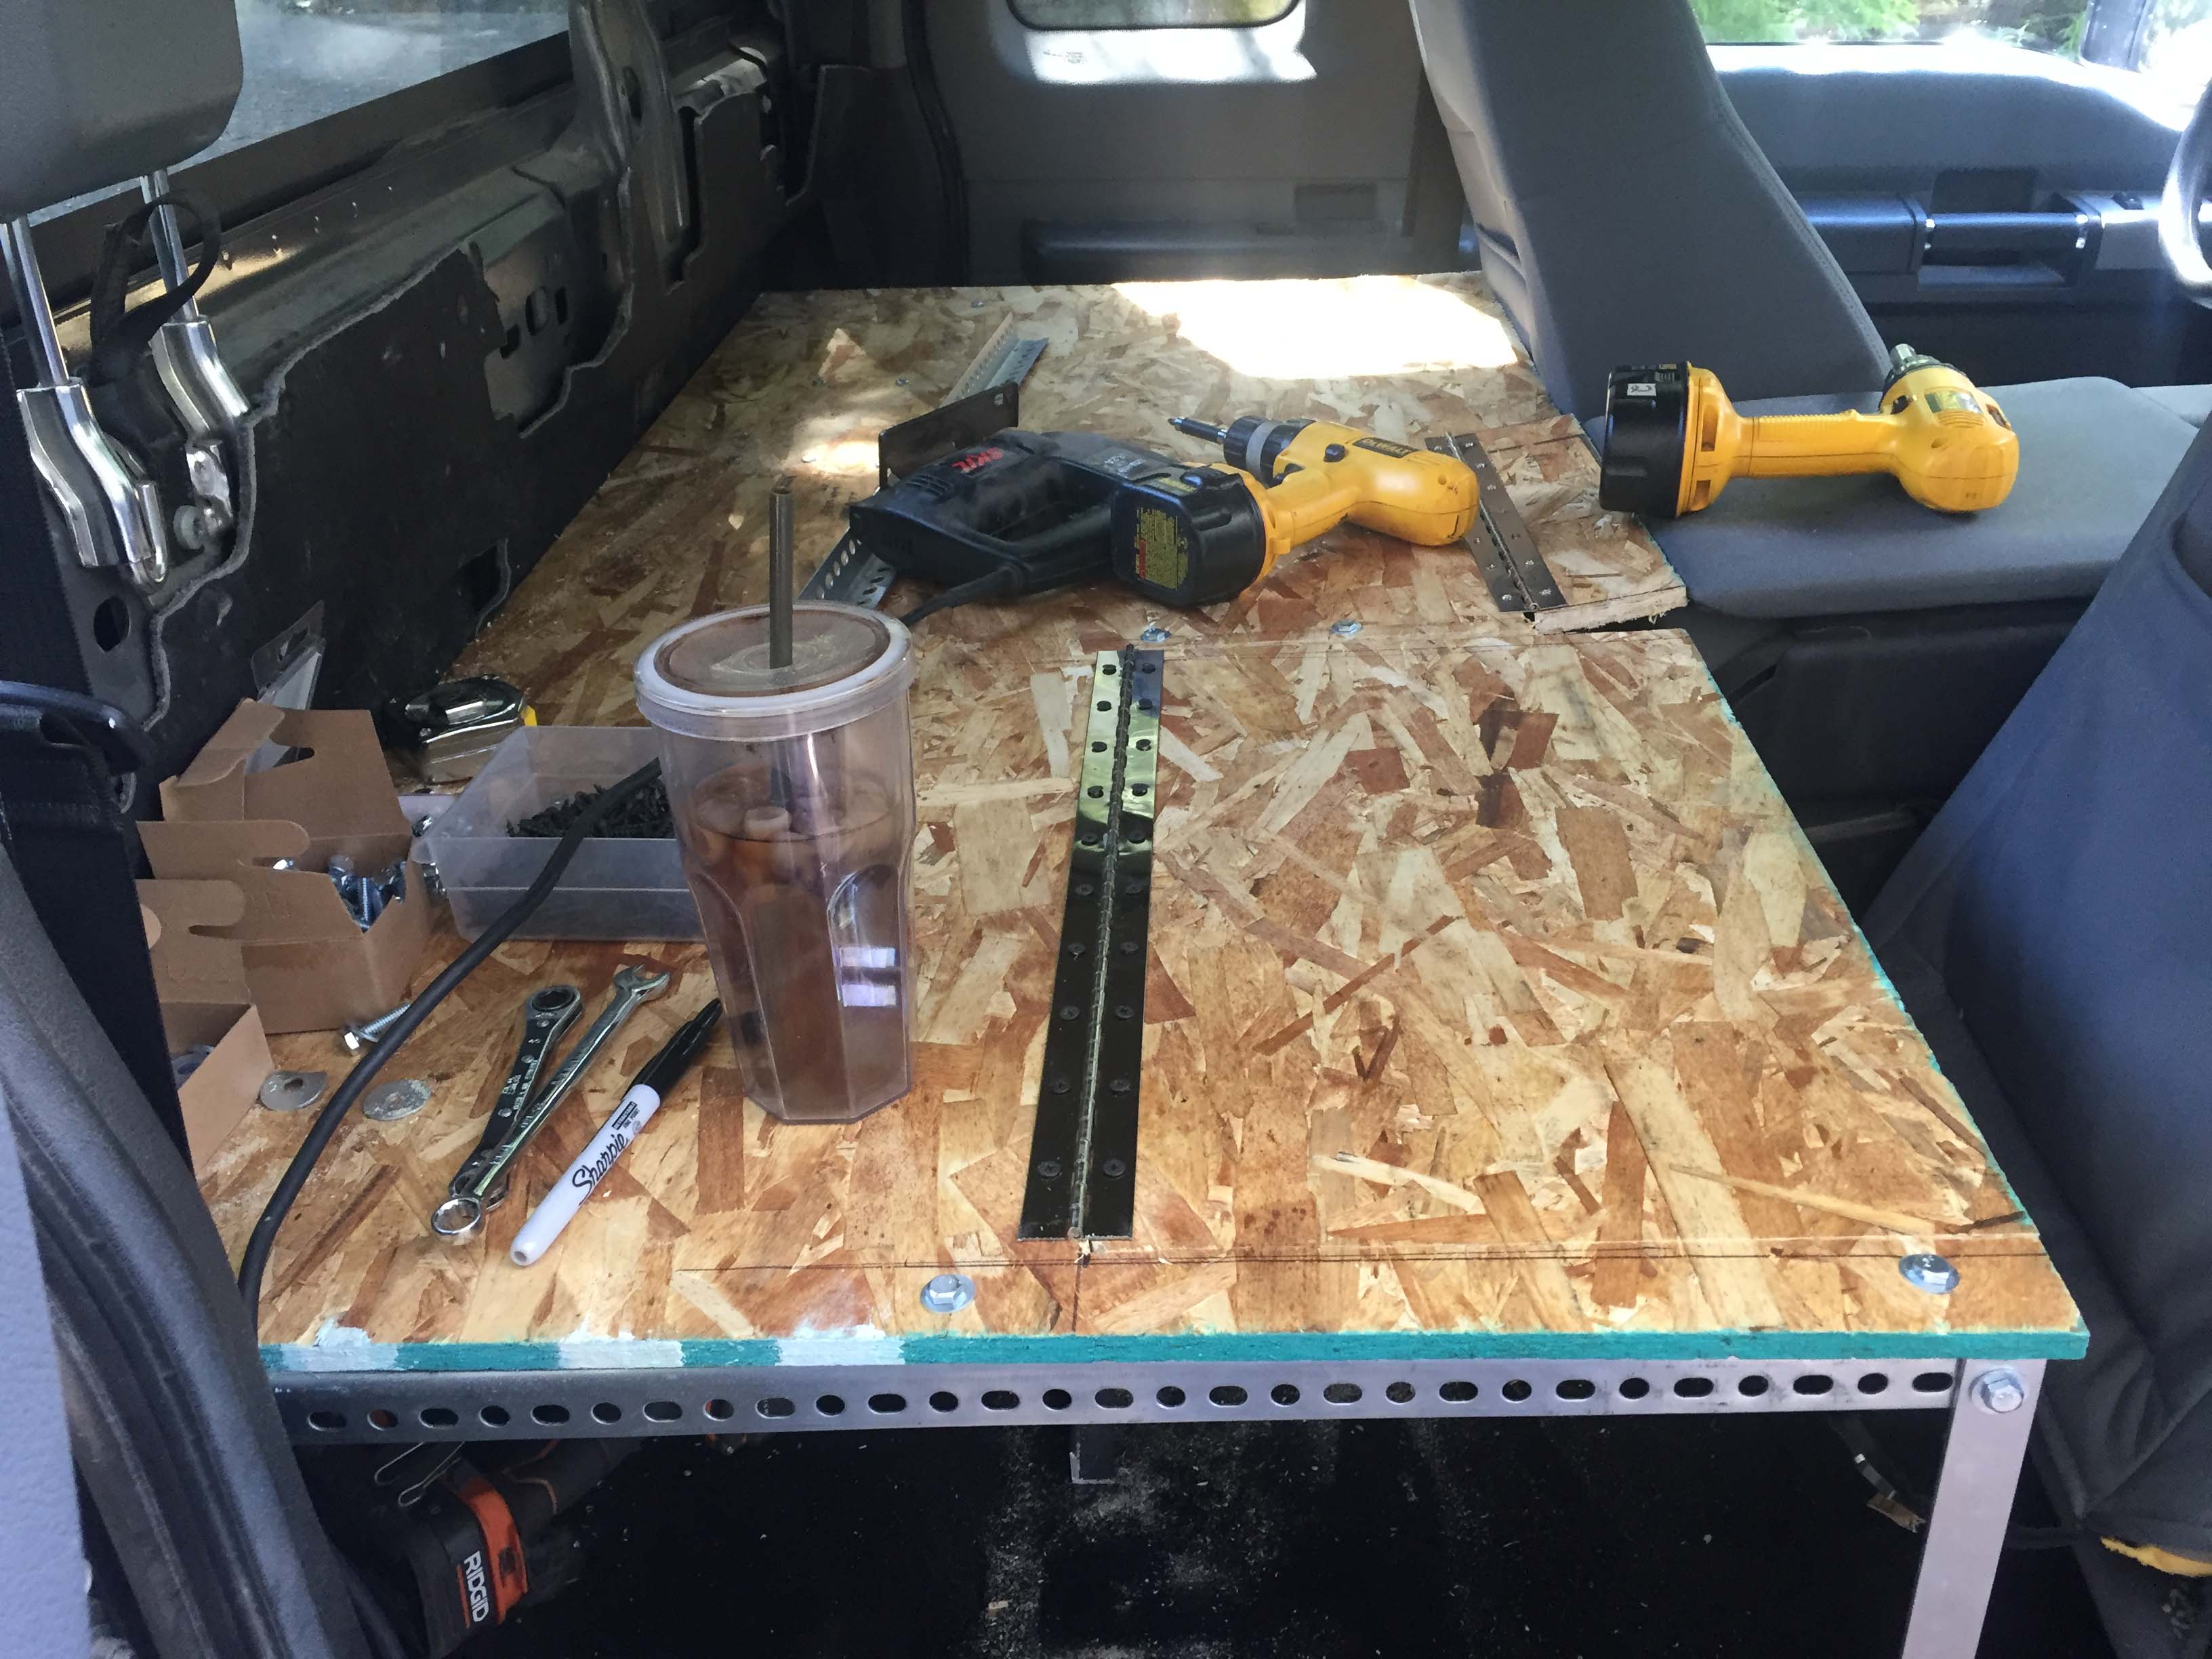
To prevent the “door” from sagging I added two mending strips of very stiff but thin steel. Due to it’s eased corners and stiffness it just pushes the foam out of the way when you recline, so none of the surface area was sacrificed to get that added support.
After that I went around and made sure all the nuts and bolts were tight so nothing would rattle and then added the closest color match automotive carpet I could find. In the picture the edges aren’t finished because I forgot to take pictures after that step.
Also not pictured is the crate, but it sits behind my seat so Trace can reach the door to put Jack in there if we need to.
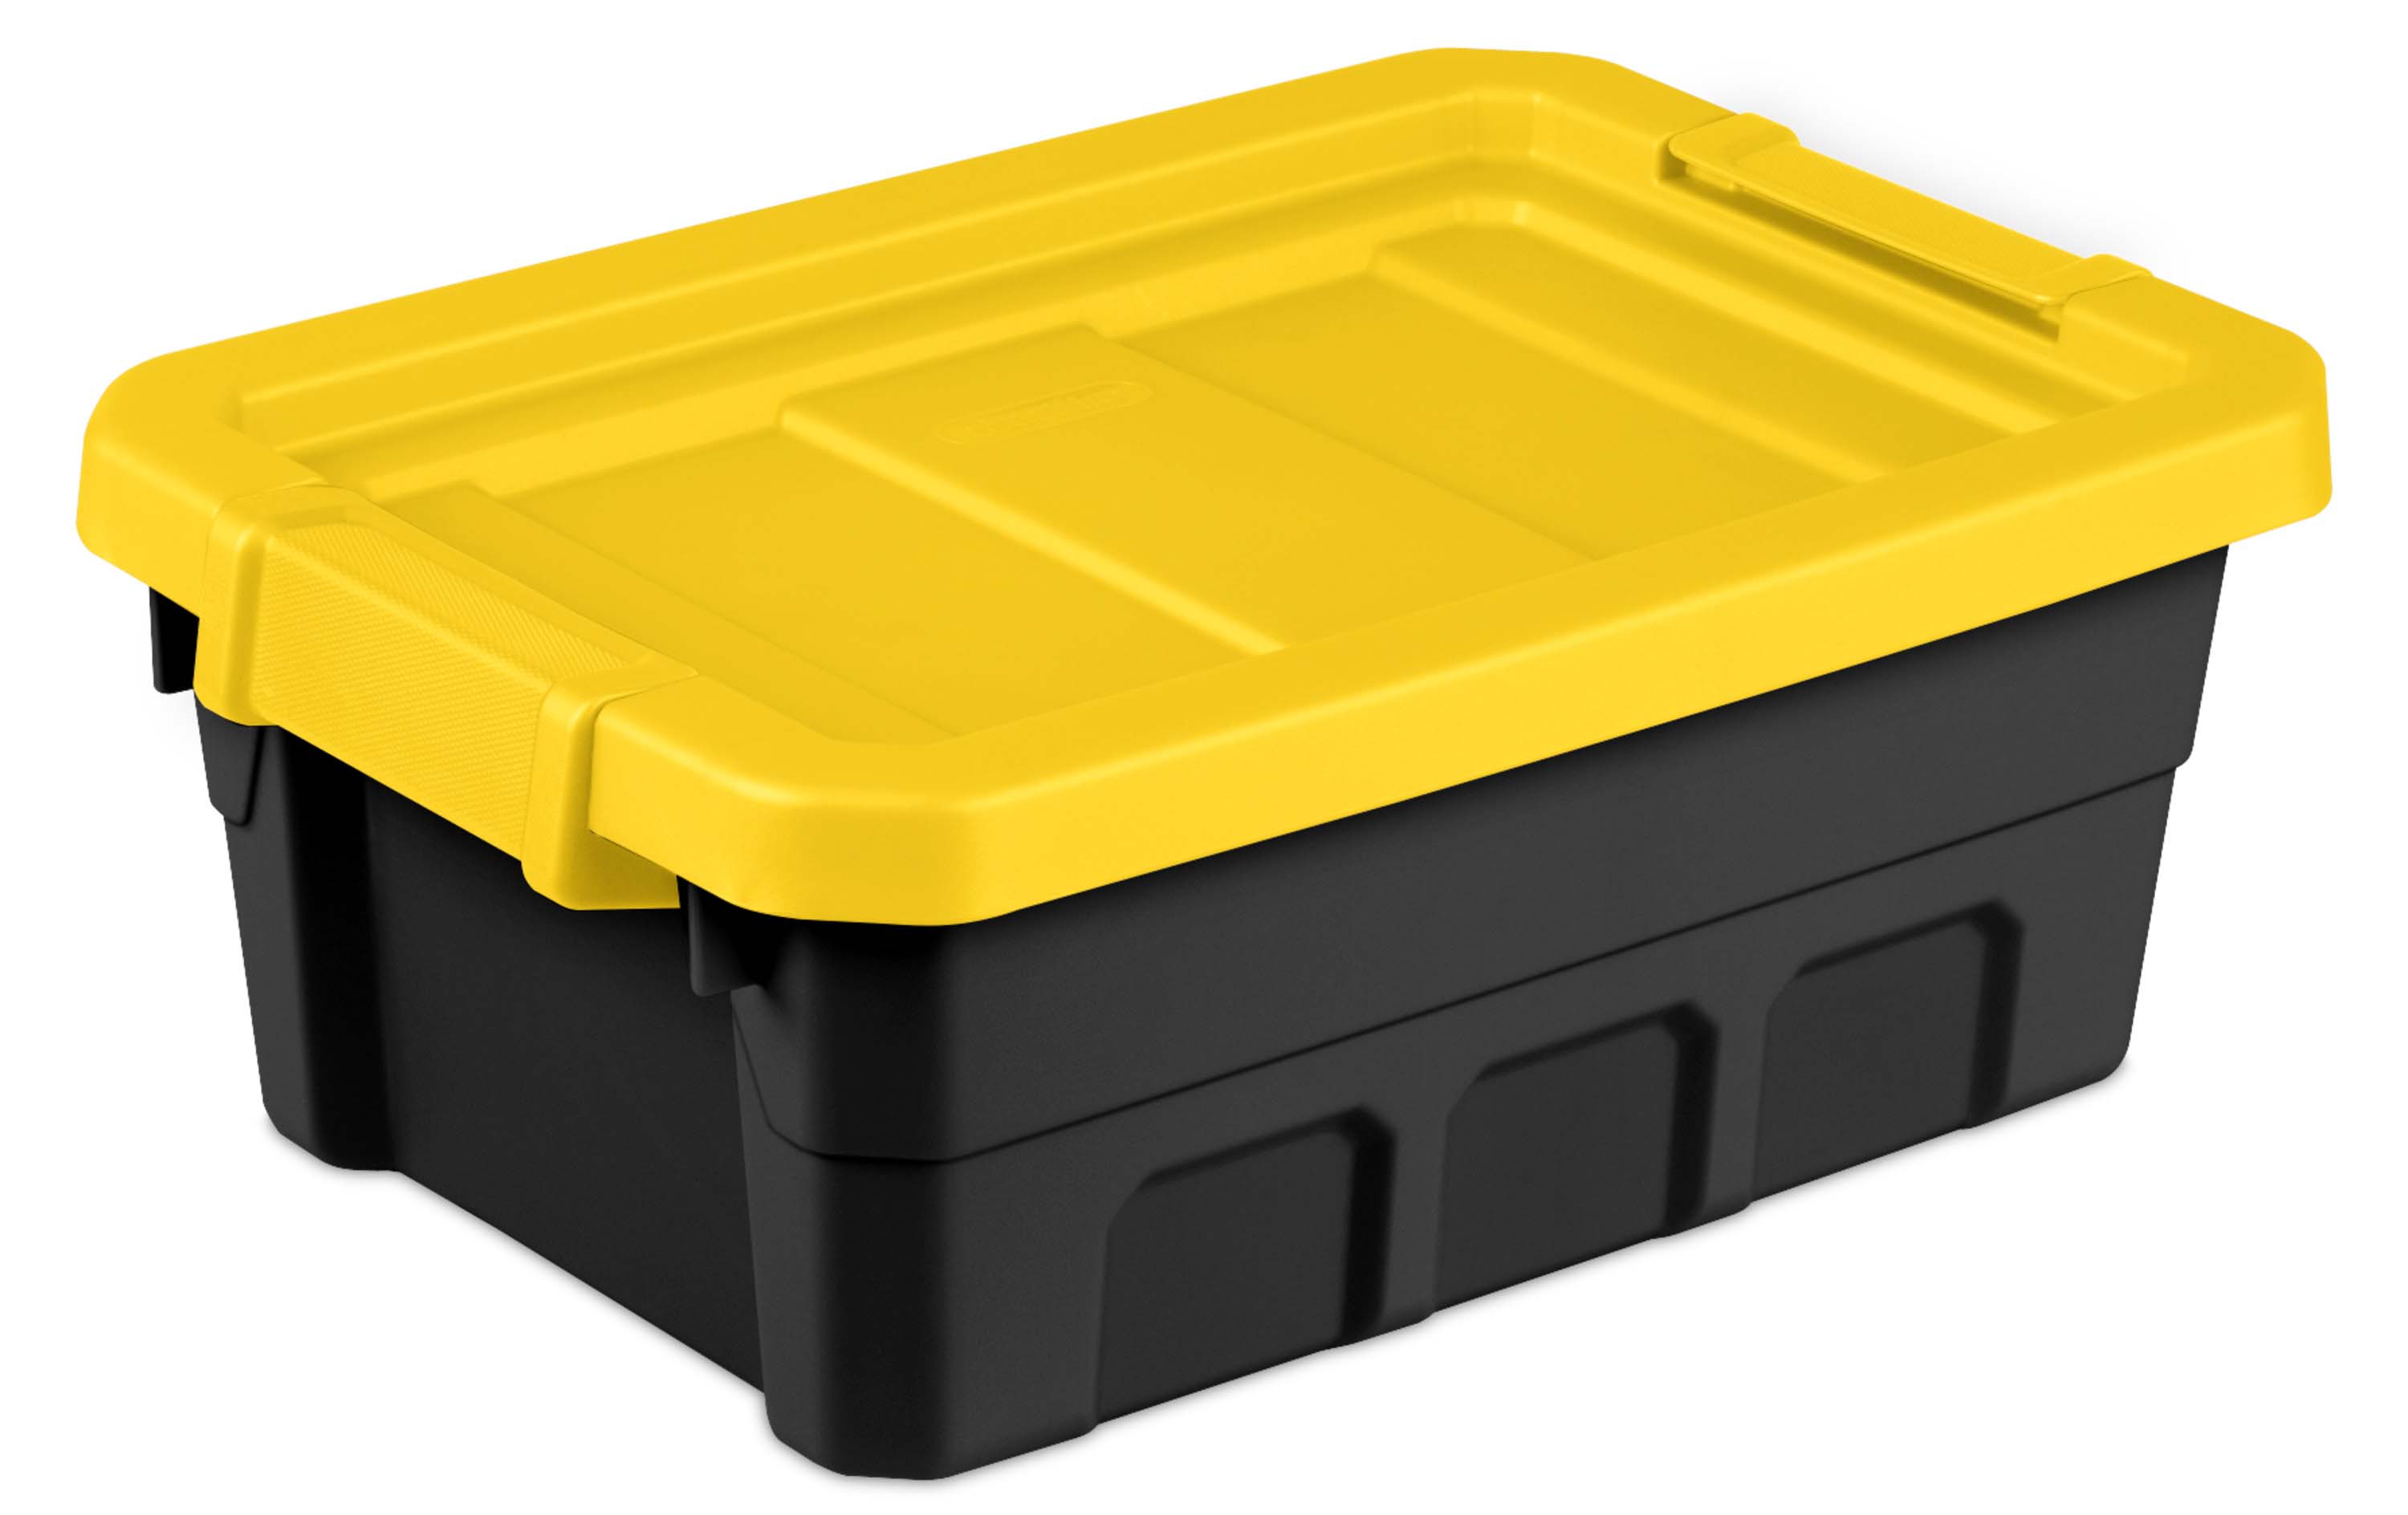
I bought a bunch of heavy black plastic storage boxes with yellow lids, very heavy duty, but very small, shoebox size. Those stack nicely in the lower storage for tools and other stuff.
I can say after using this thing for four months that it is a vast improvement. Jack has more room, and from time to time on driving days he just gets into the crate. He still lays on the console, but now most of him is on the platform, so he’s not crowding us. The hinged sections are great, because not only do they allow the jump seat to be used and the passenger seat to be reclined, an added unintended bonus is that they make nice little doors to put things into the lower storage and get things out. (We all like it and obviously this is not a change you would make lightly but in our case it really expanded our storage space and made things easier for Jack. Oh and shout out to Deb and Steve who we got the idea from and modified it for us. – Trace)
Supporting our Blog
We very much appreciate your support of our blog.
- You can purchase the ebook telling the story of how we became full-time RVers.
- You can purchase our recipe book filled with 80 recipes we have cooked in our RV and taste tested by Lee himself. You can purchase the kindle or paperback version on Amazon or buy the Apple version on Itunes.

Looks awesome! Jack will certainly love it for years to come! Thanks for the kudos too! Miss yous guys!
Miss you too!
Love the way you “imagineered” a solution for your particular need. Gotta love the creative mind. Use your mind or lose your mind, I always say. Jack will love the higher observation deck if our Josie is any indication, she always seems to need a better view when she is with us in the car or truck.
Looks great always nice to have things more functional. 😎 Happy New Year’s to you guys. Hope our paths sometime this year. Till then take care and safe travels to you guys. Rick
Love it!