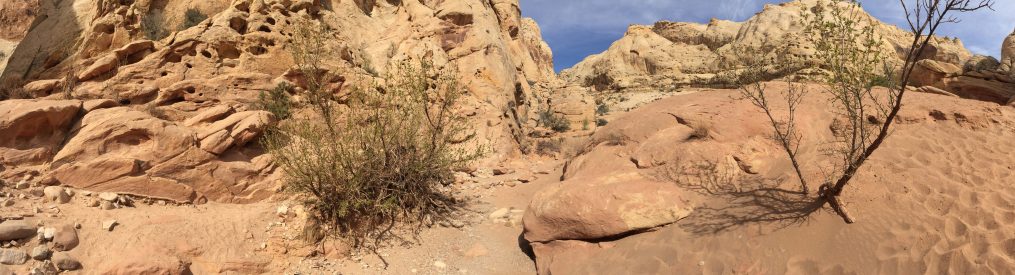
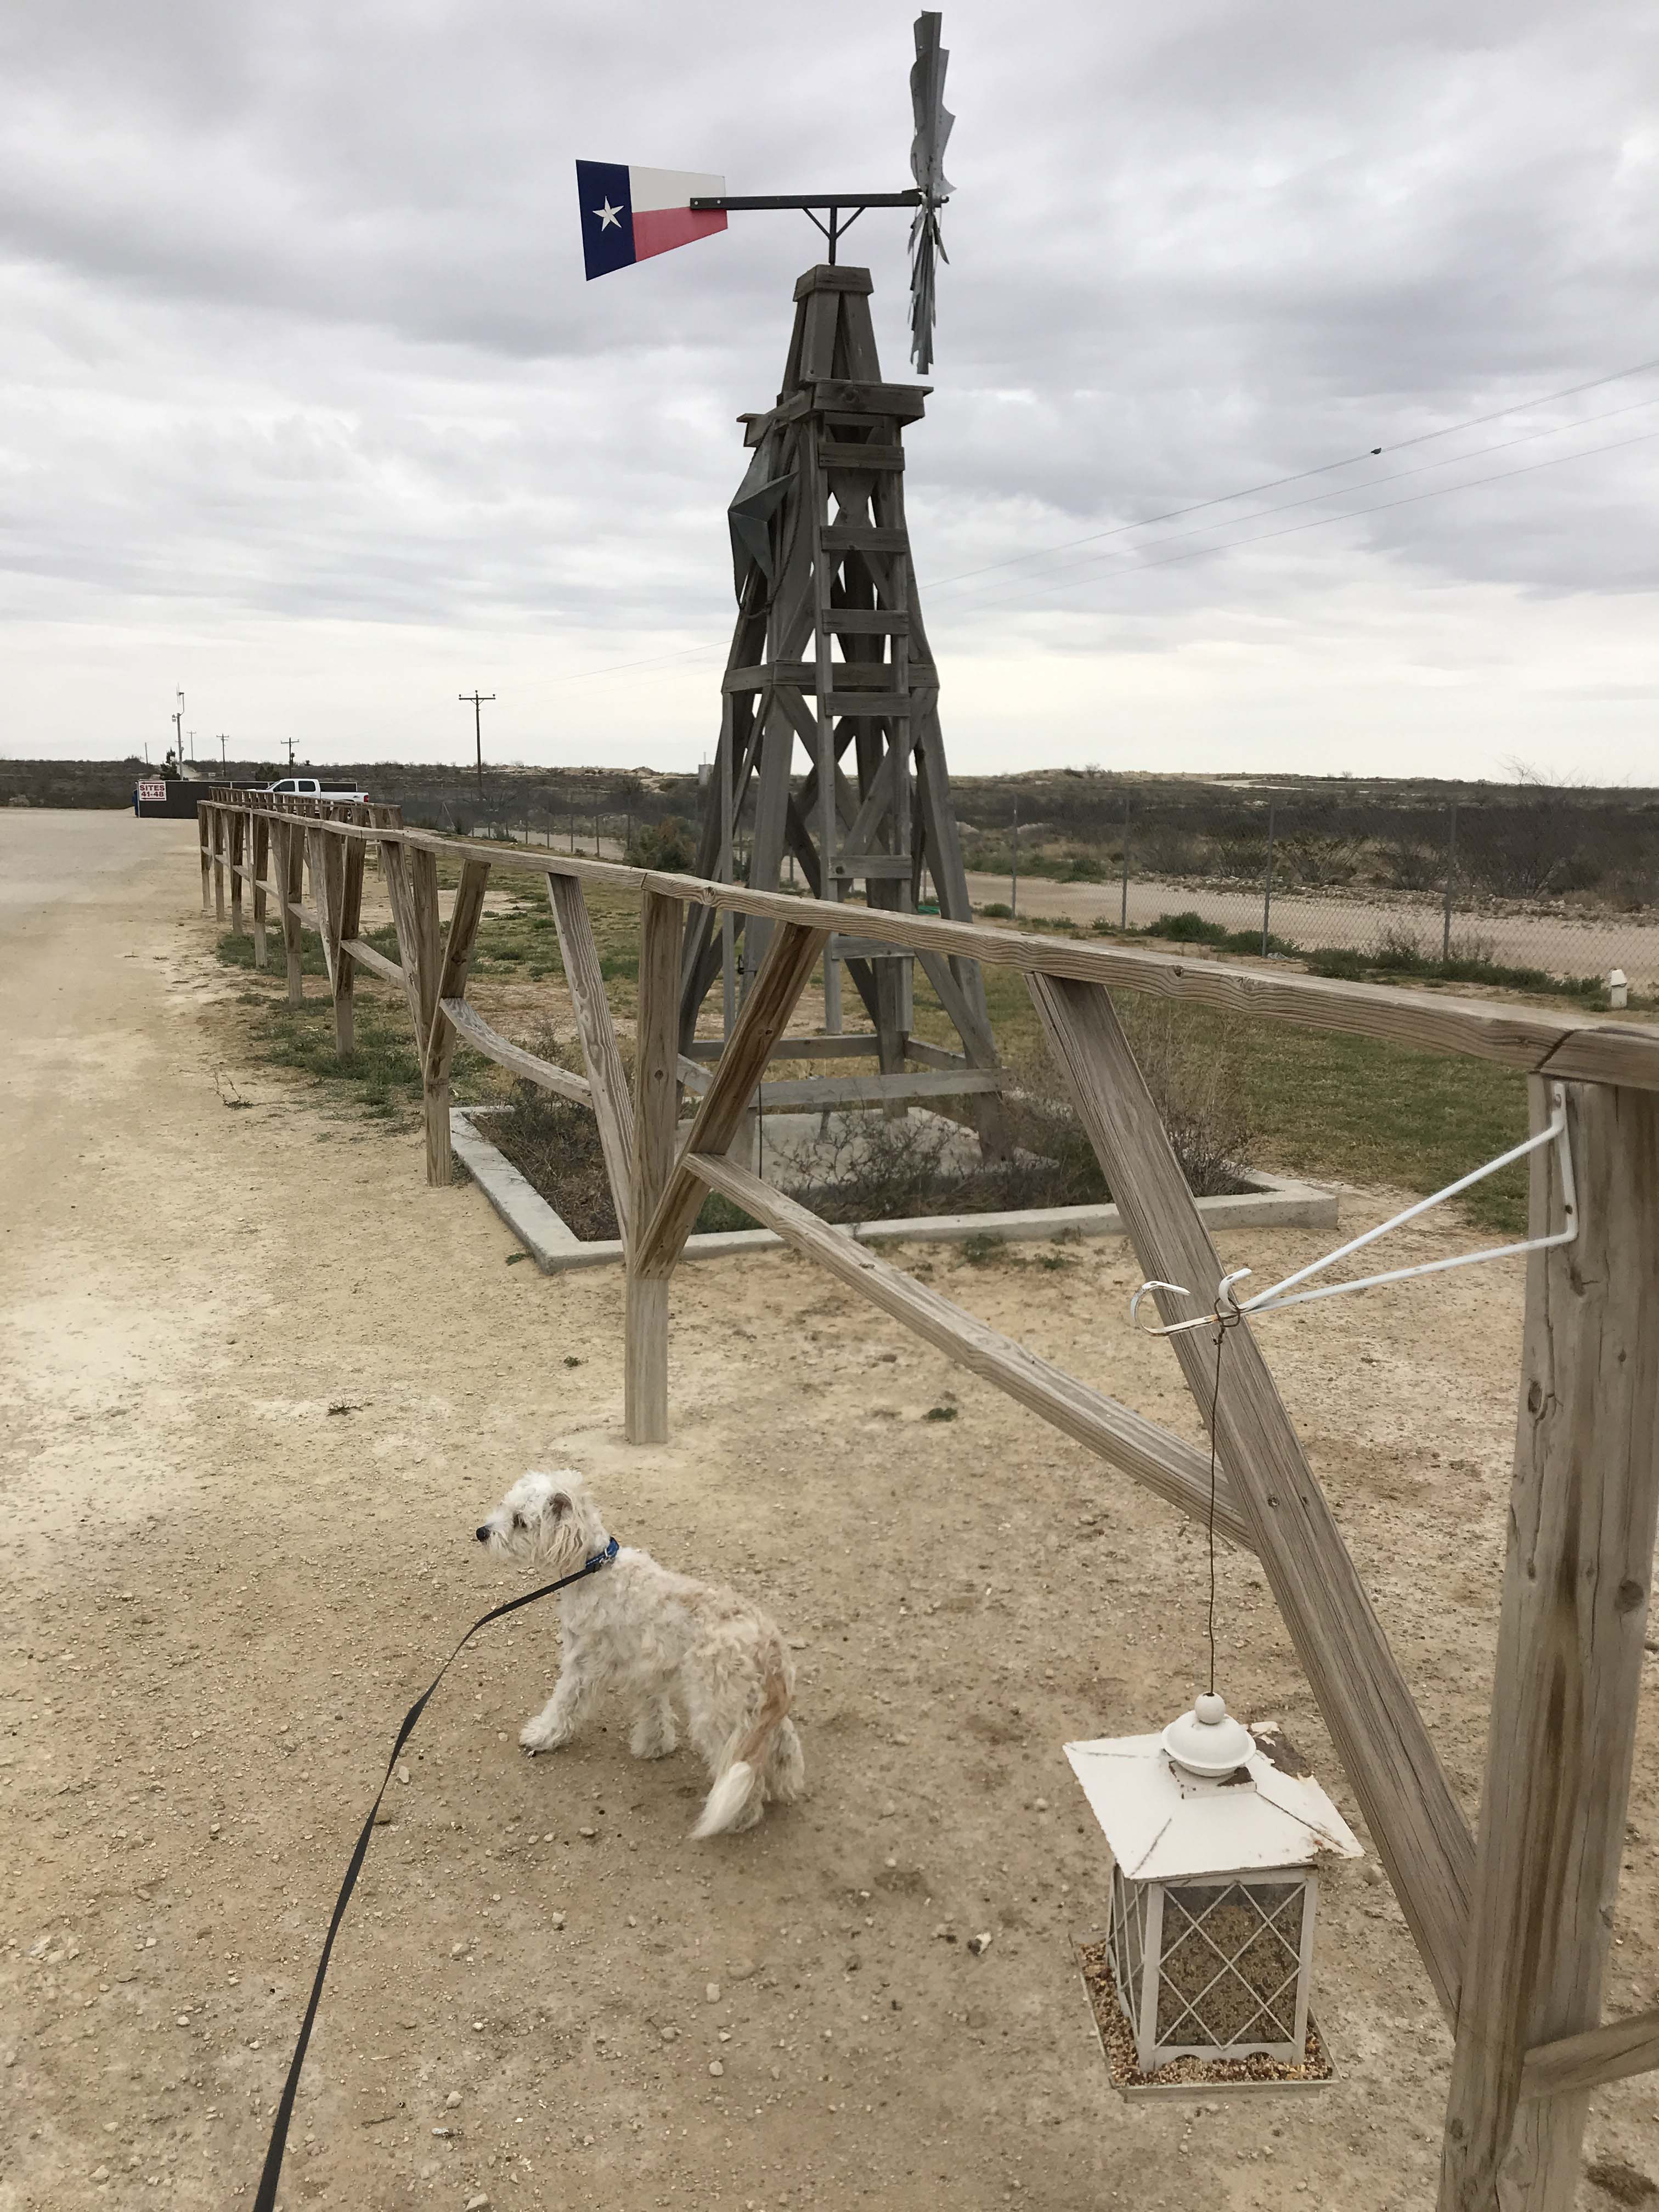
It feels like Jack has been with us for forever, but the reality is he has never made more than a few hours trip in the truck, between the Center For Mental Wellness and two gates, and has only stayed at one RV park for a few days between gates. He went from the farm he was born on to the Center For Mental Wellness (Cori and Greg’s), to a gate, to an RV park, to another gate, and back to the Center For Mental Wellness. None of those trips were more than an hour or so. He’s never made a multi-day road trip and I was a little worried about him as we started out. We knew getting him to pee as we traveled would be an issue from our day trips, so we stopped at a very nice picnic area to give it a try. Unfortunately there were just too many things to smell in that area and we were unable to get him to go at any rest stops along our drive. He has yet to ever pee at any stop.
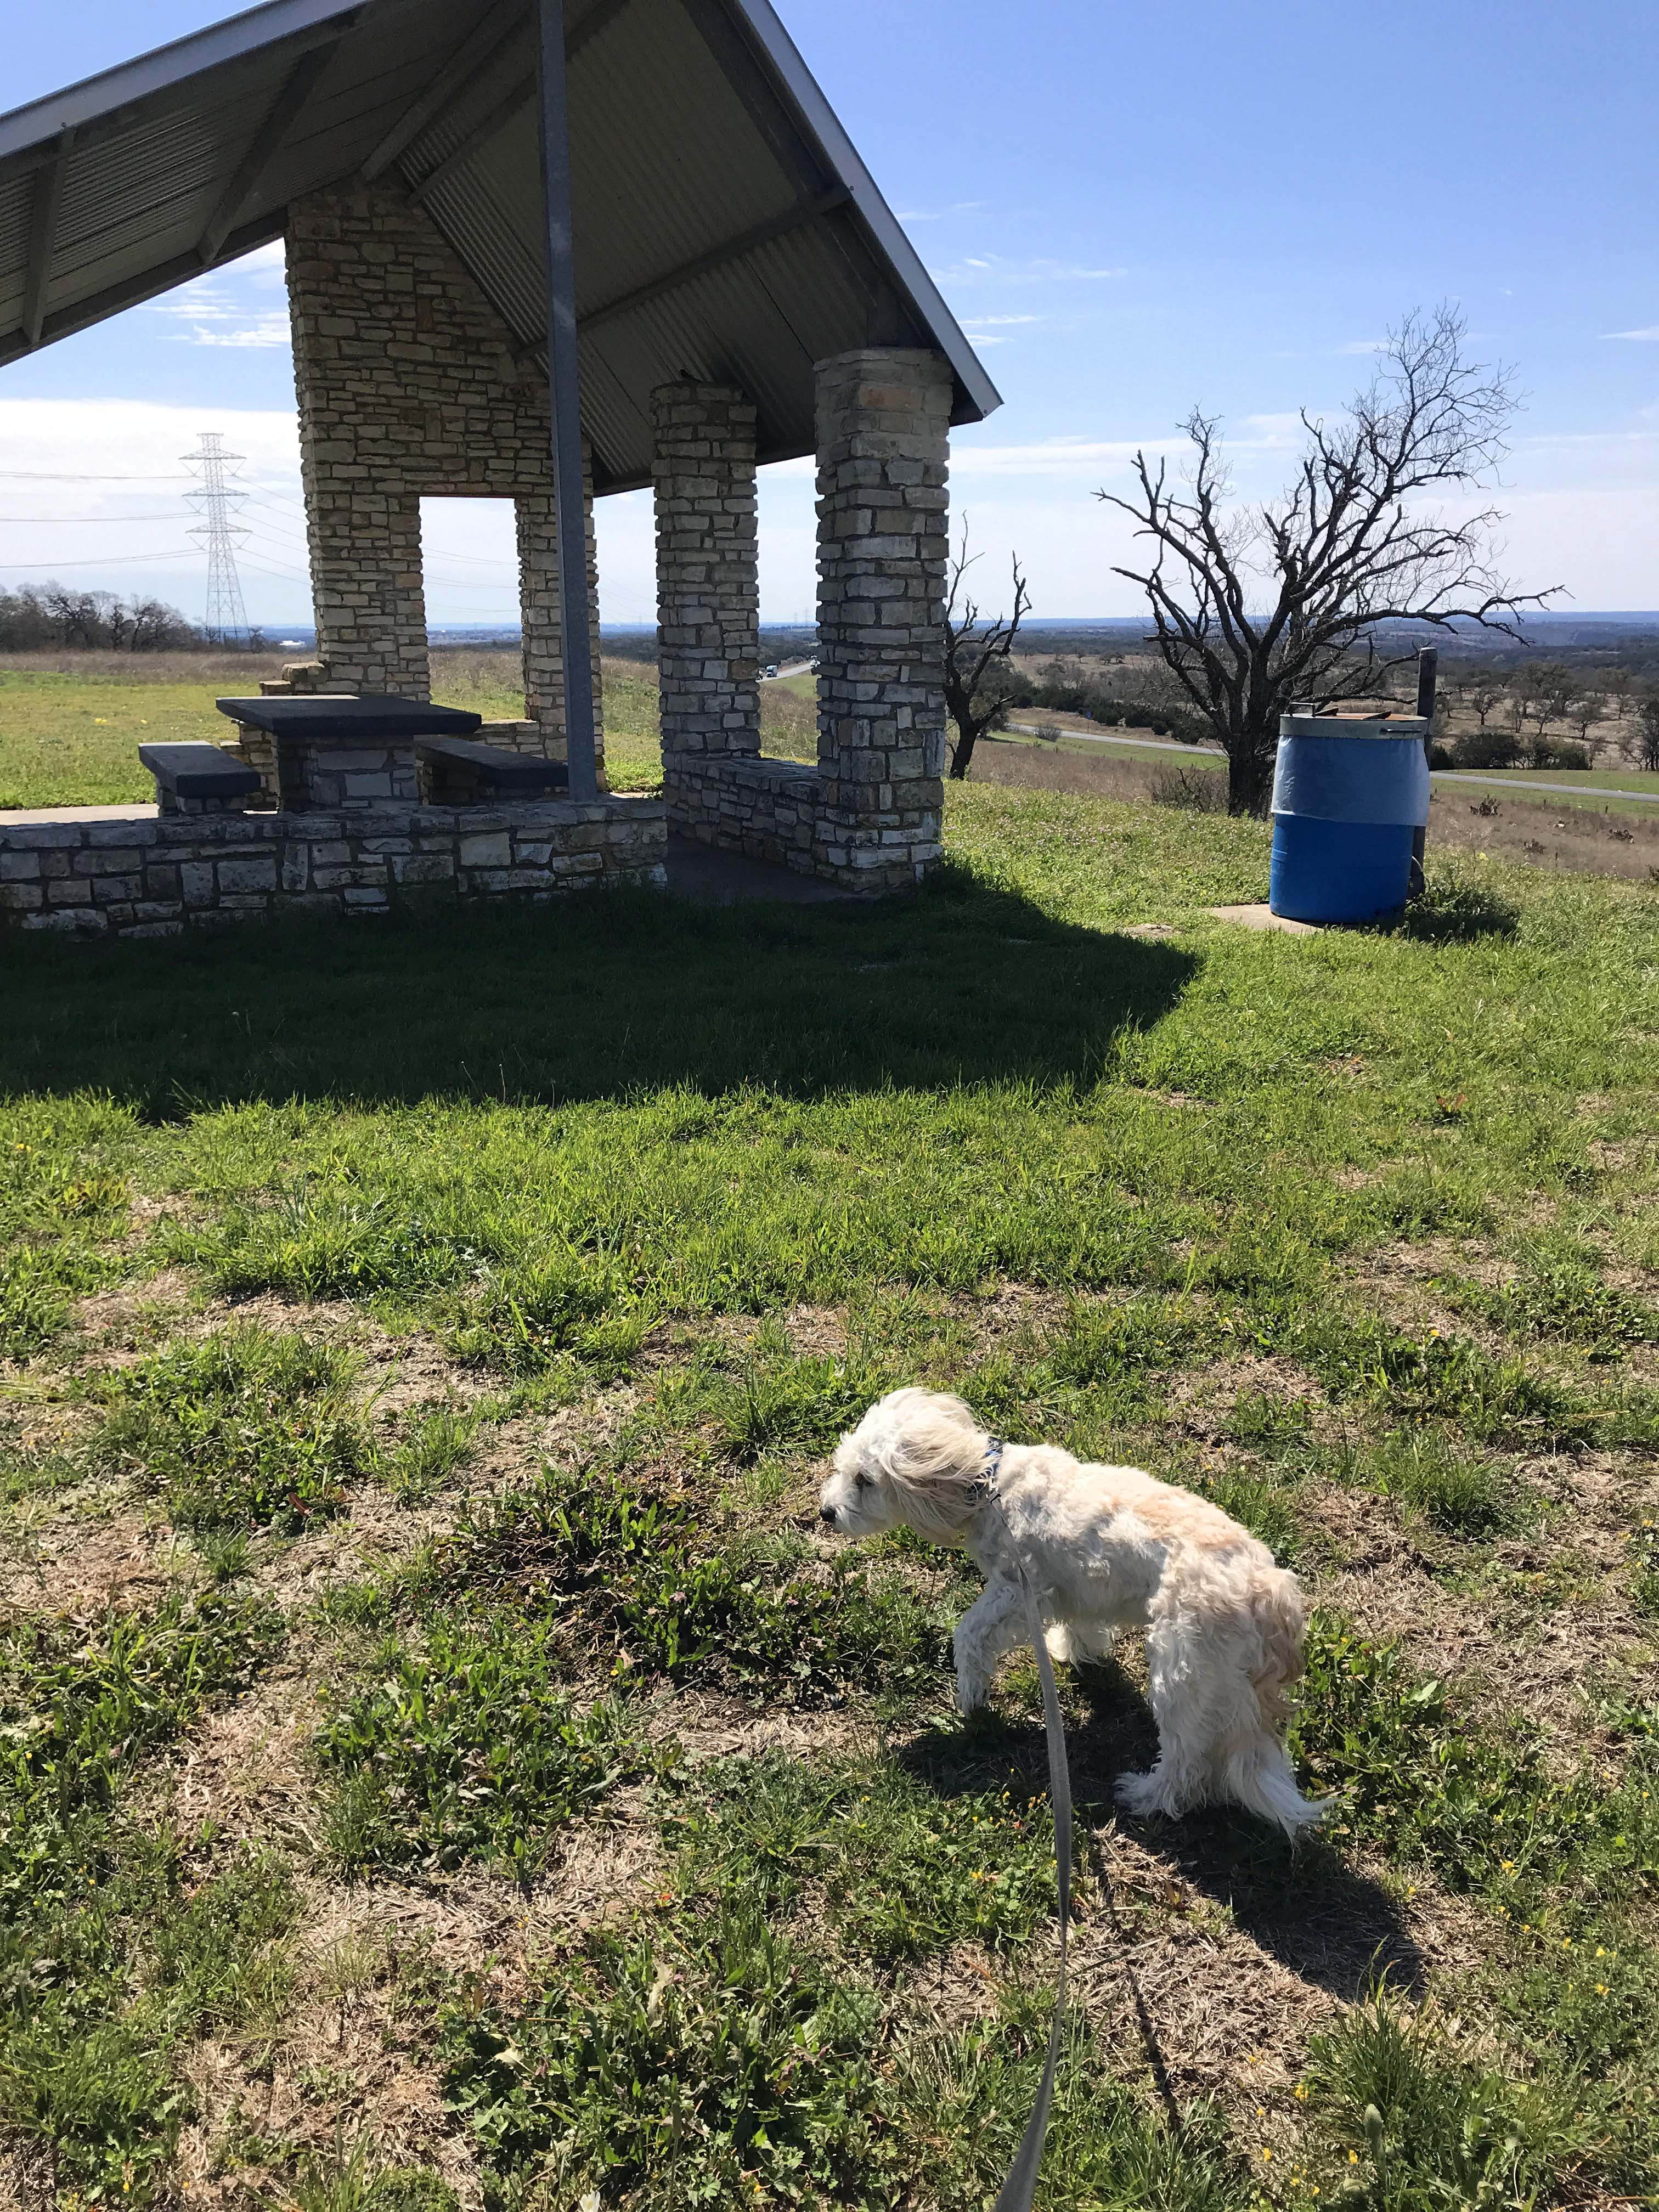
You can tell by his body language he was pretty tense.
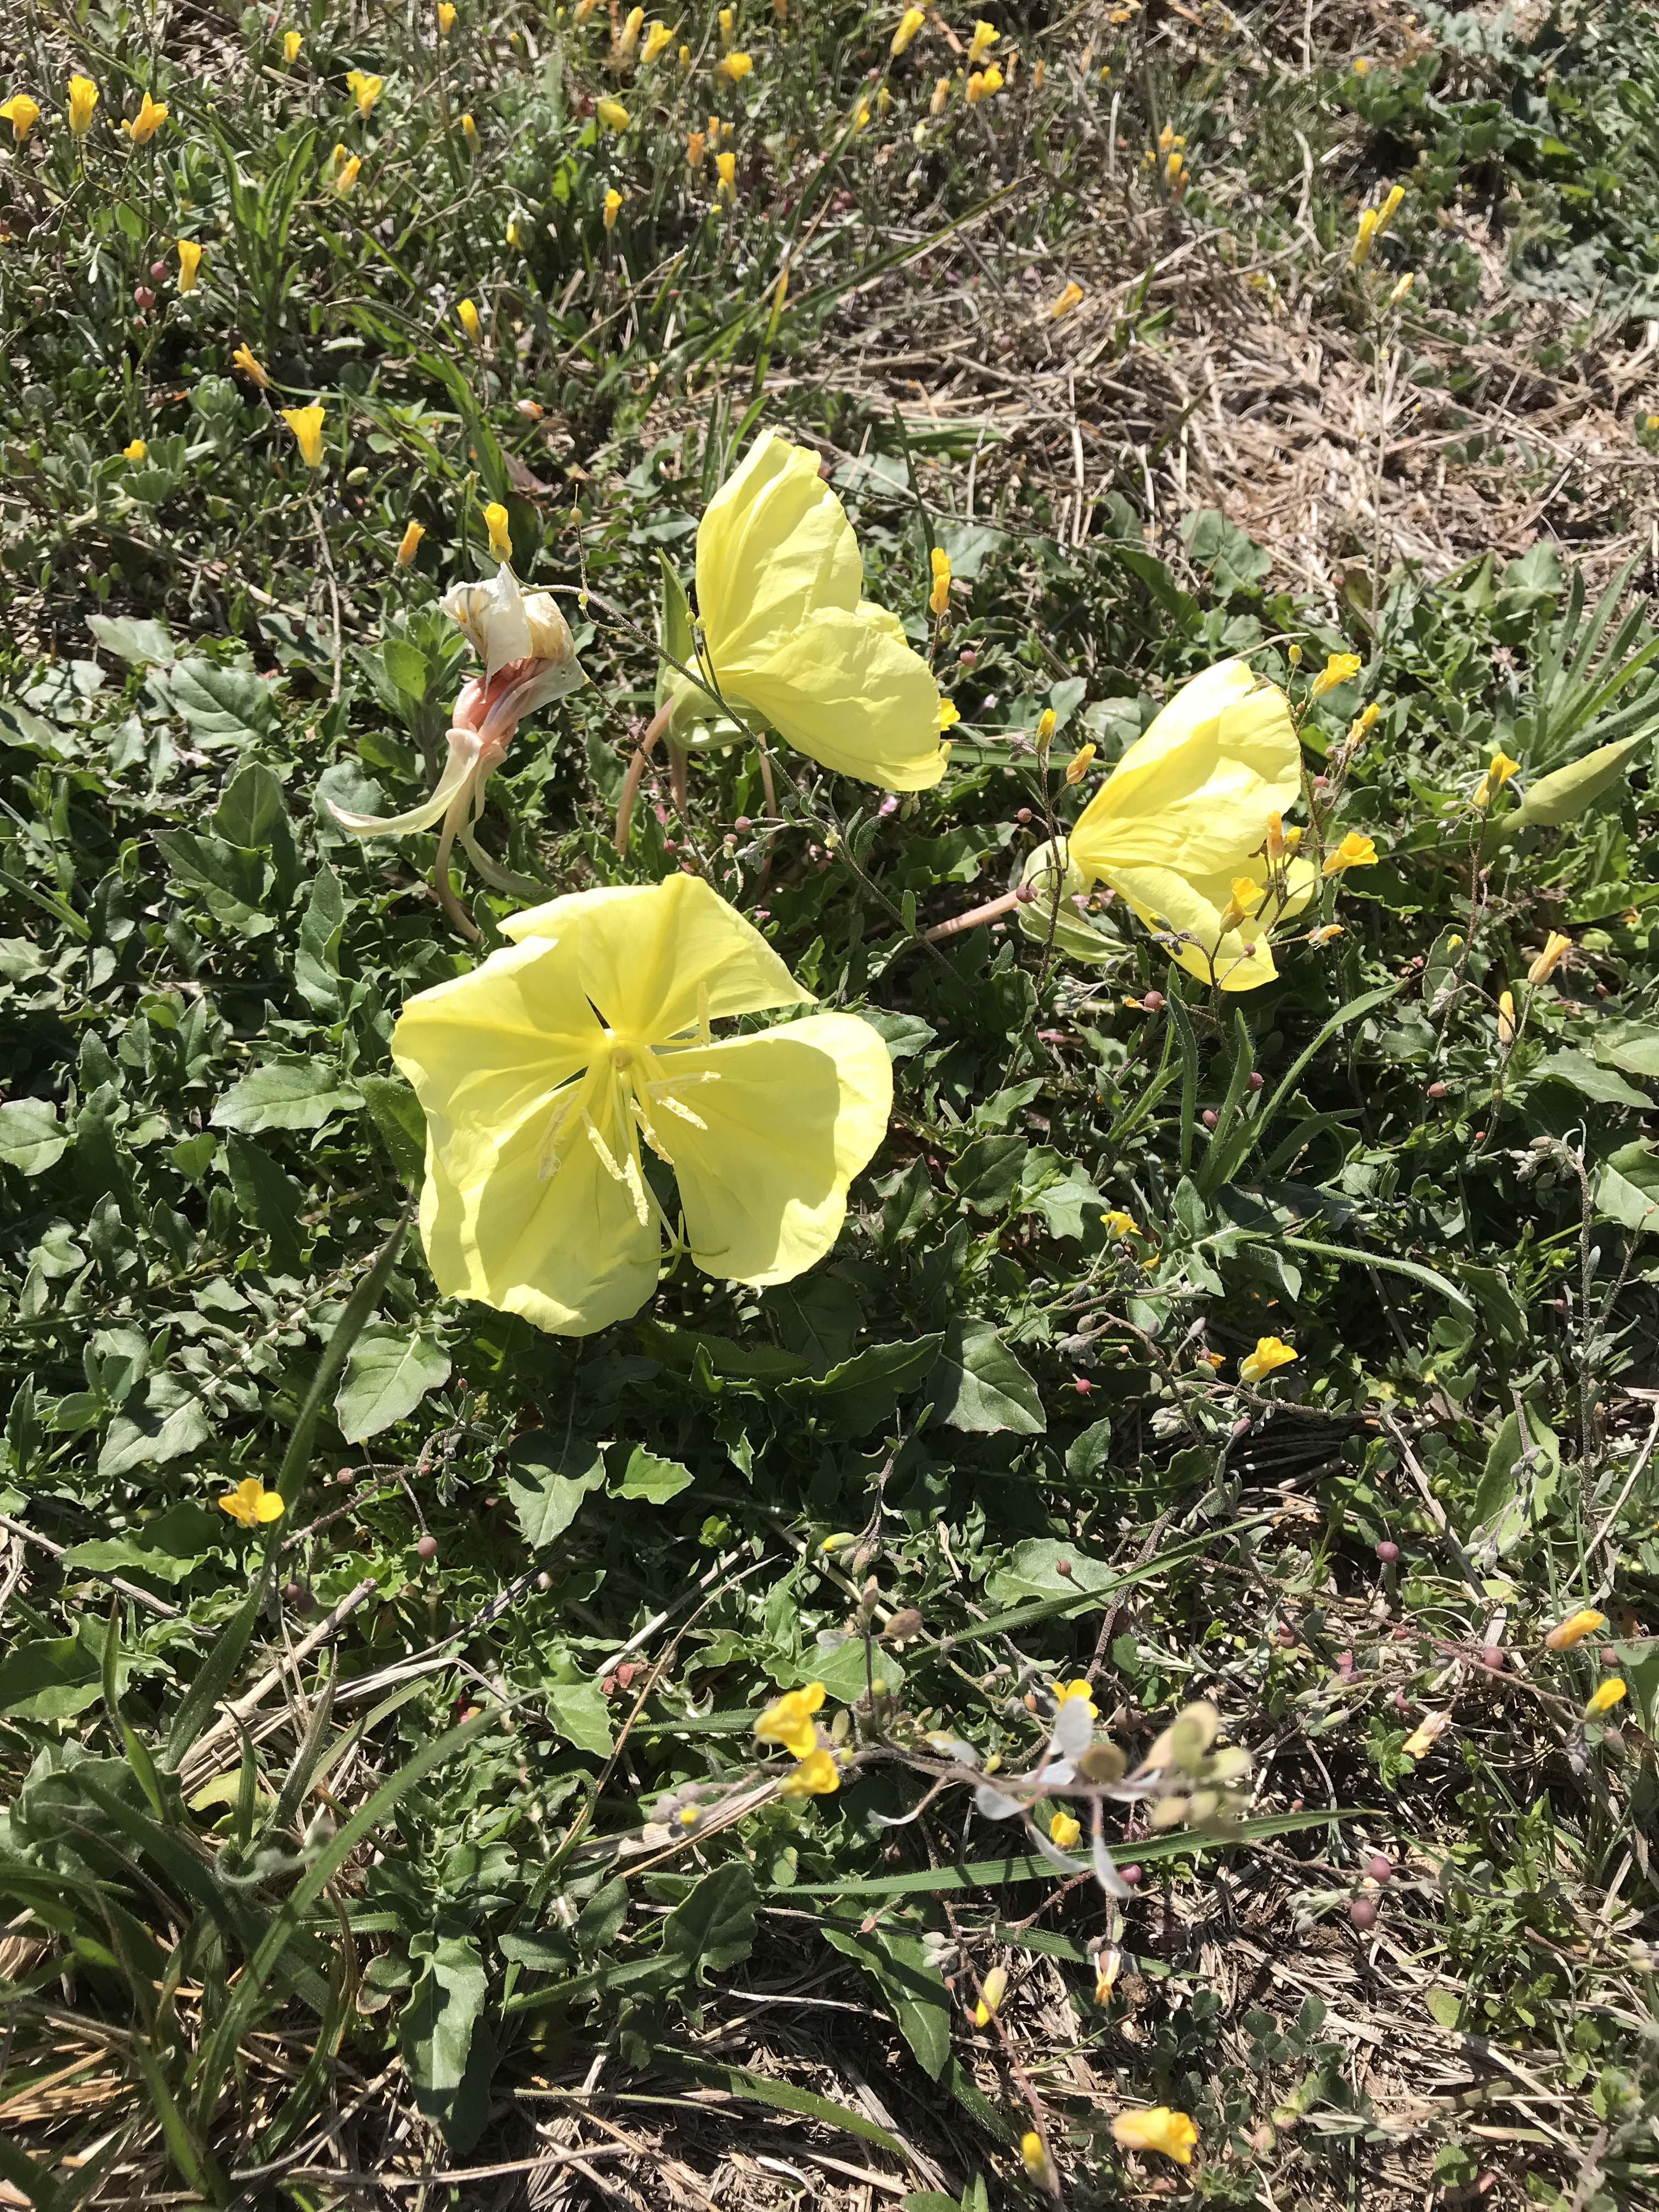
The flowers in bloom were really pretty.
Next up was Jack’s first ever truck stop, and that was pretty interesting as well. At first he didn’t understand where Lee went when he pumped gas. We both got a kick out of watching Jack as Lee washed the windows though. He was riveted by the wiper, his little head bobbing back and forth tracking the window squeegee like it was a tennis match. We didn’t even try to take him for a walk here, because we would have had to pull into a parking space and there weren’t good places. We actually found that picnic areas (without restrooms) were the best, and although he did walk around he wouldn’t go in any of them. Lee and I were stopping every 1-1/2 to 2 hours though for both bathroom and smoke breaks. For the first time in our marriage, neither one of us is smoking in the truck, and I found it much more difficult than I anticipated. It was fine while Lee was driving, but when I took my turn I found it hard. Lee did great though. and we both got through the day, although between worrying about the dog and not smoking it wasn’t my favorite travel day ever.
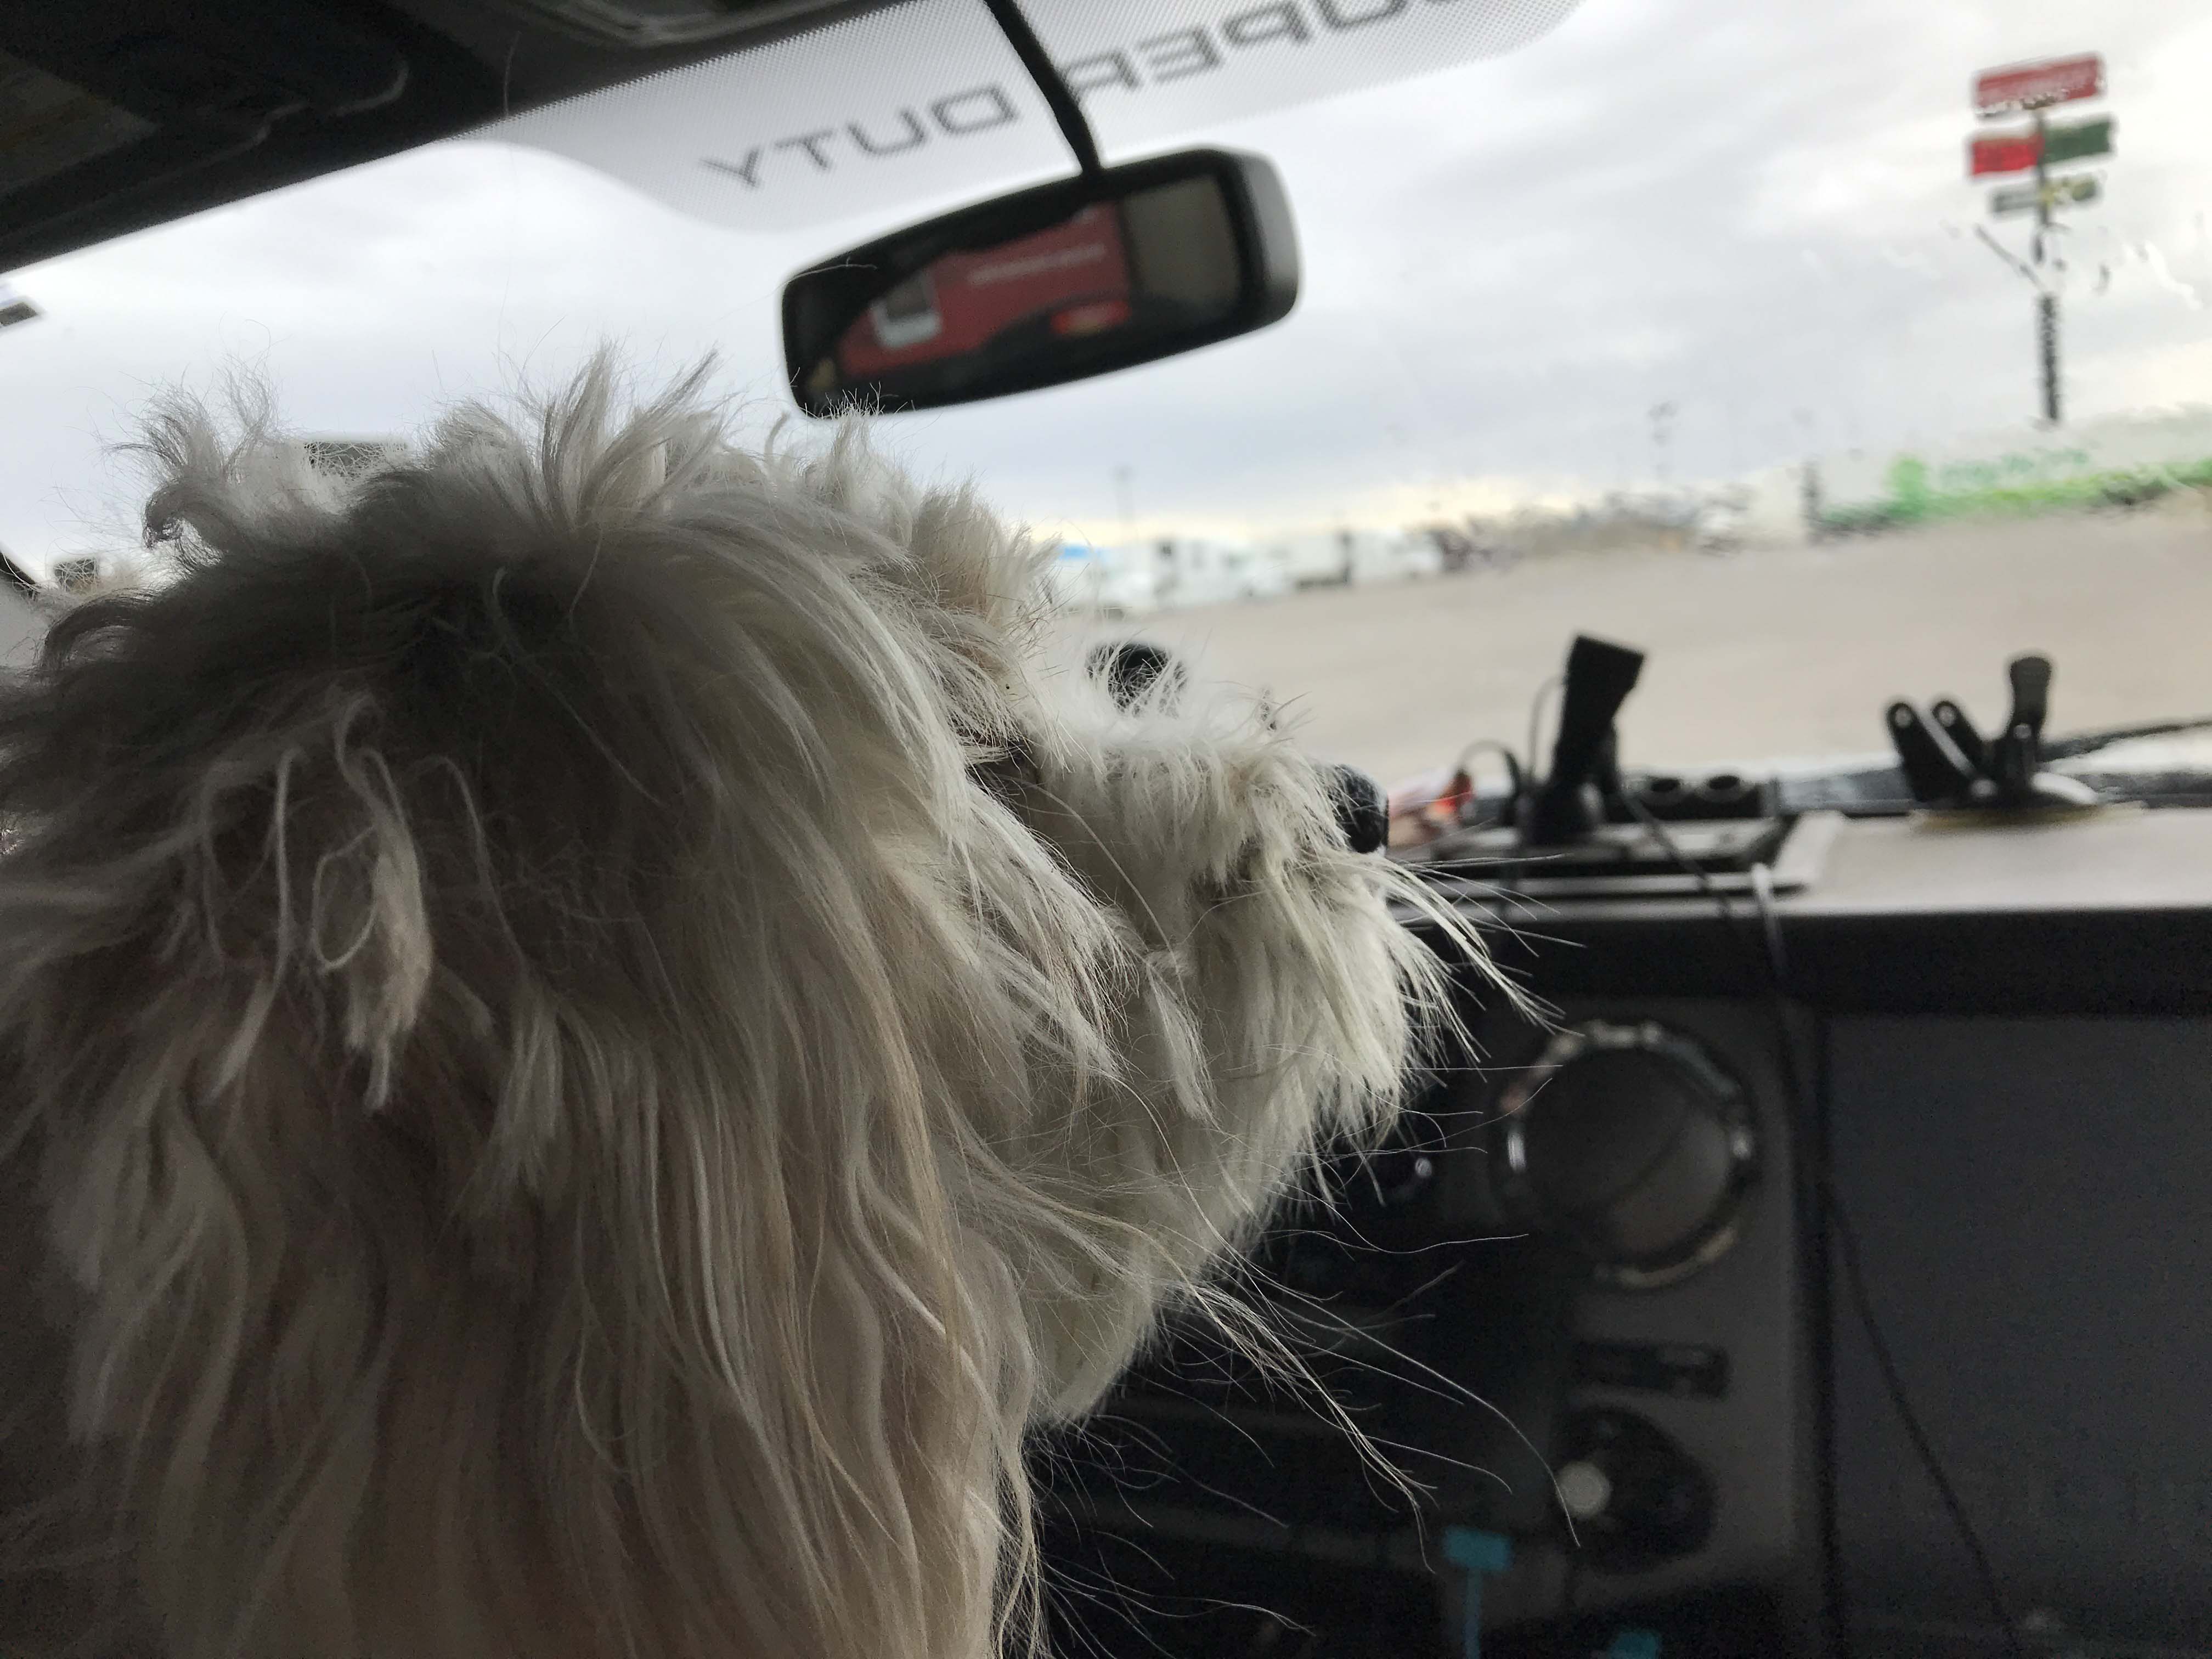
Jack watching Lee clean the windows. His head kept whipping back and forth.
Lee had intentionally scheduled a short travel day and we stopped at the Hilltop RV Park in Fort Stockton. There is a $20 a night Passport America in Fort Stockton, but we had stayed in it recently and were not fans. For $10 more a night, we could stay at what looked like a nice RV park with a dog run. I didn’t call ahead, which I should have, and when we pulled in we got the last spot. The sites were all pull-through, very level, and very clean, which was a good start.
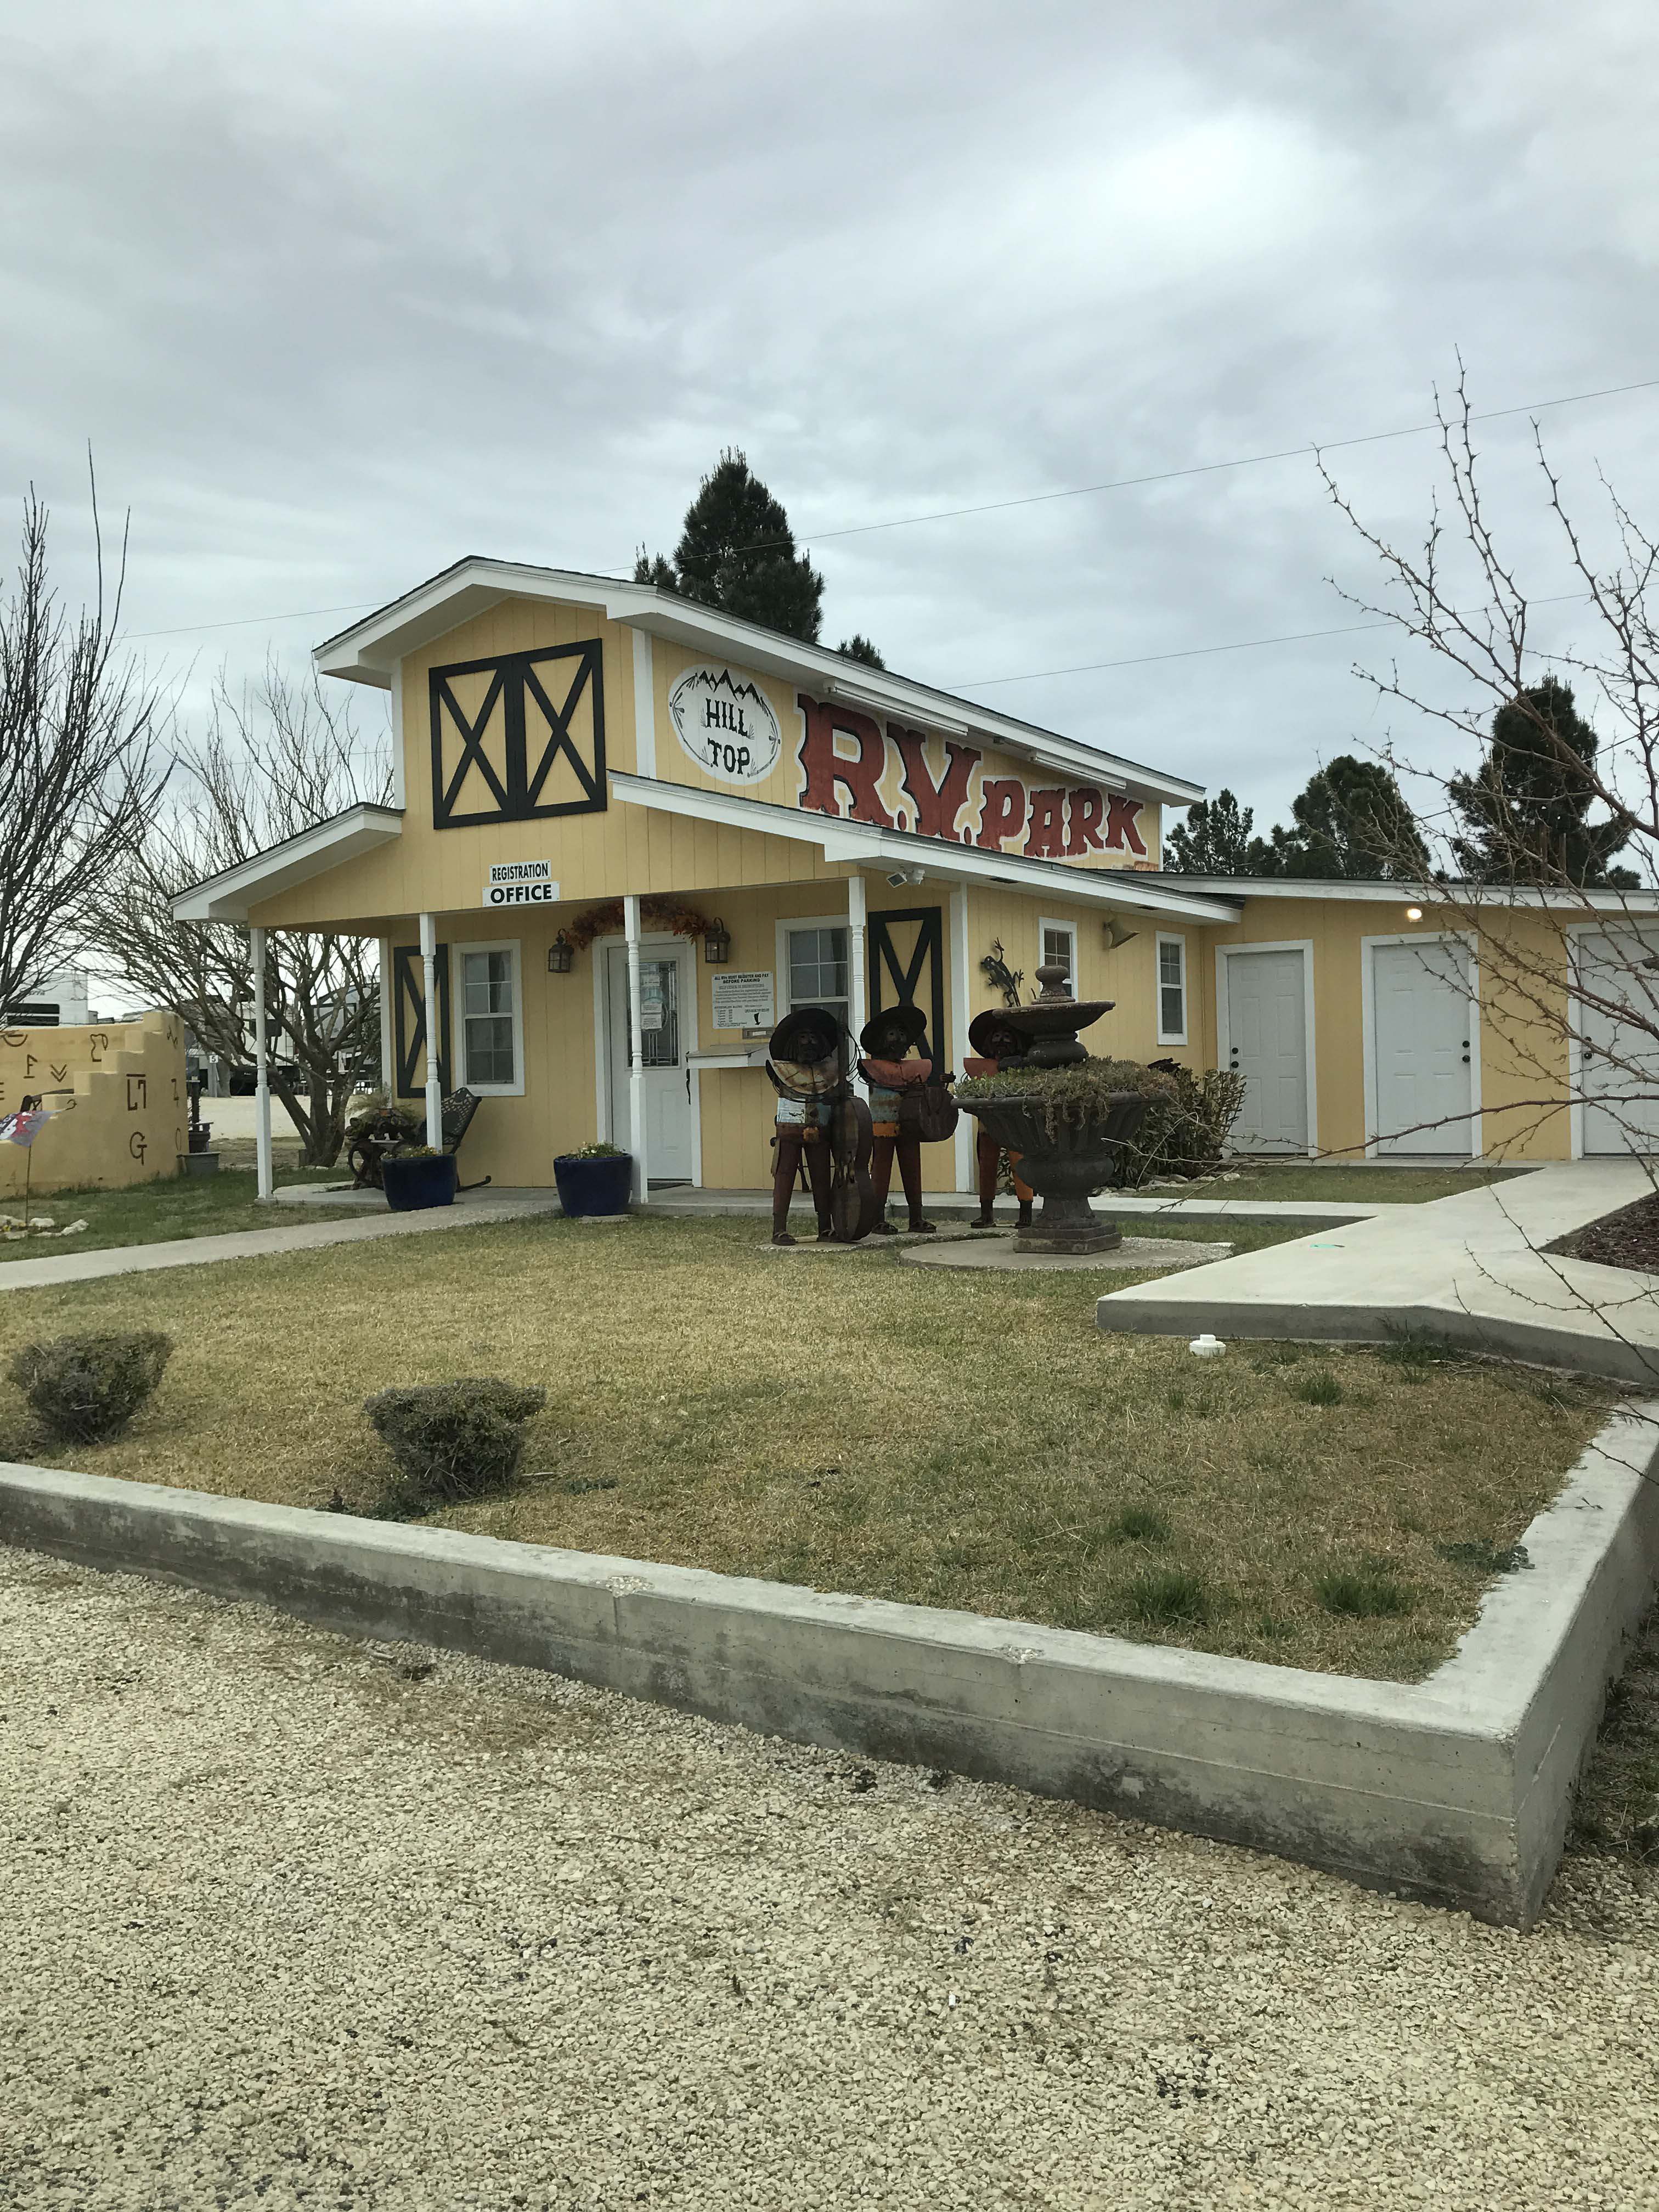
The owners had obviously tried to spruce the place up a bit.
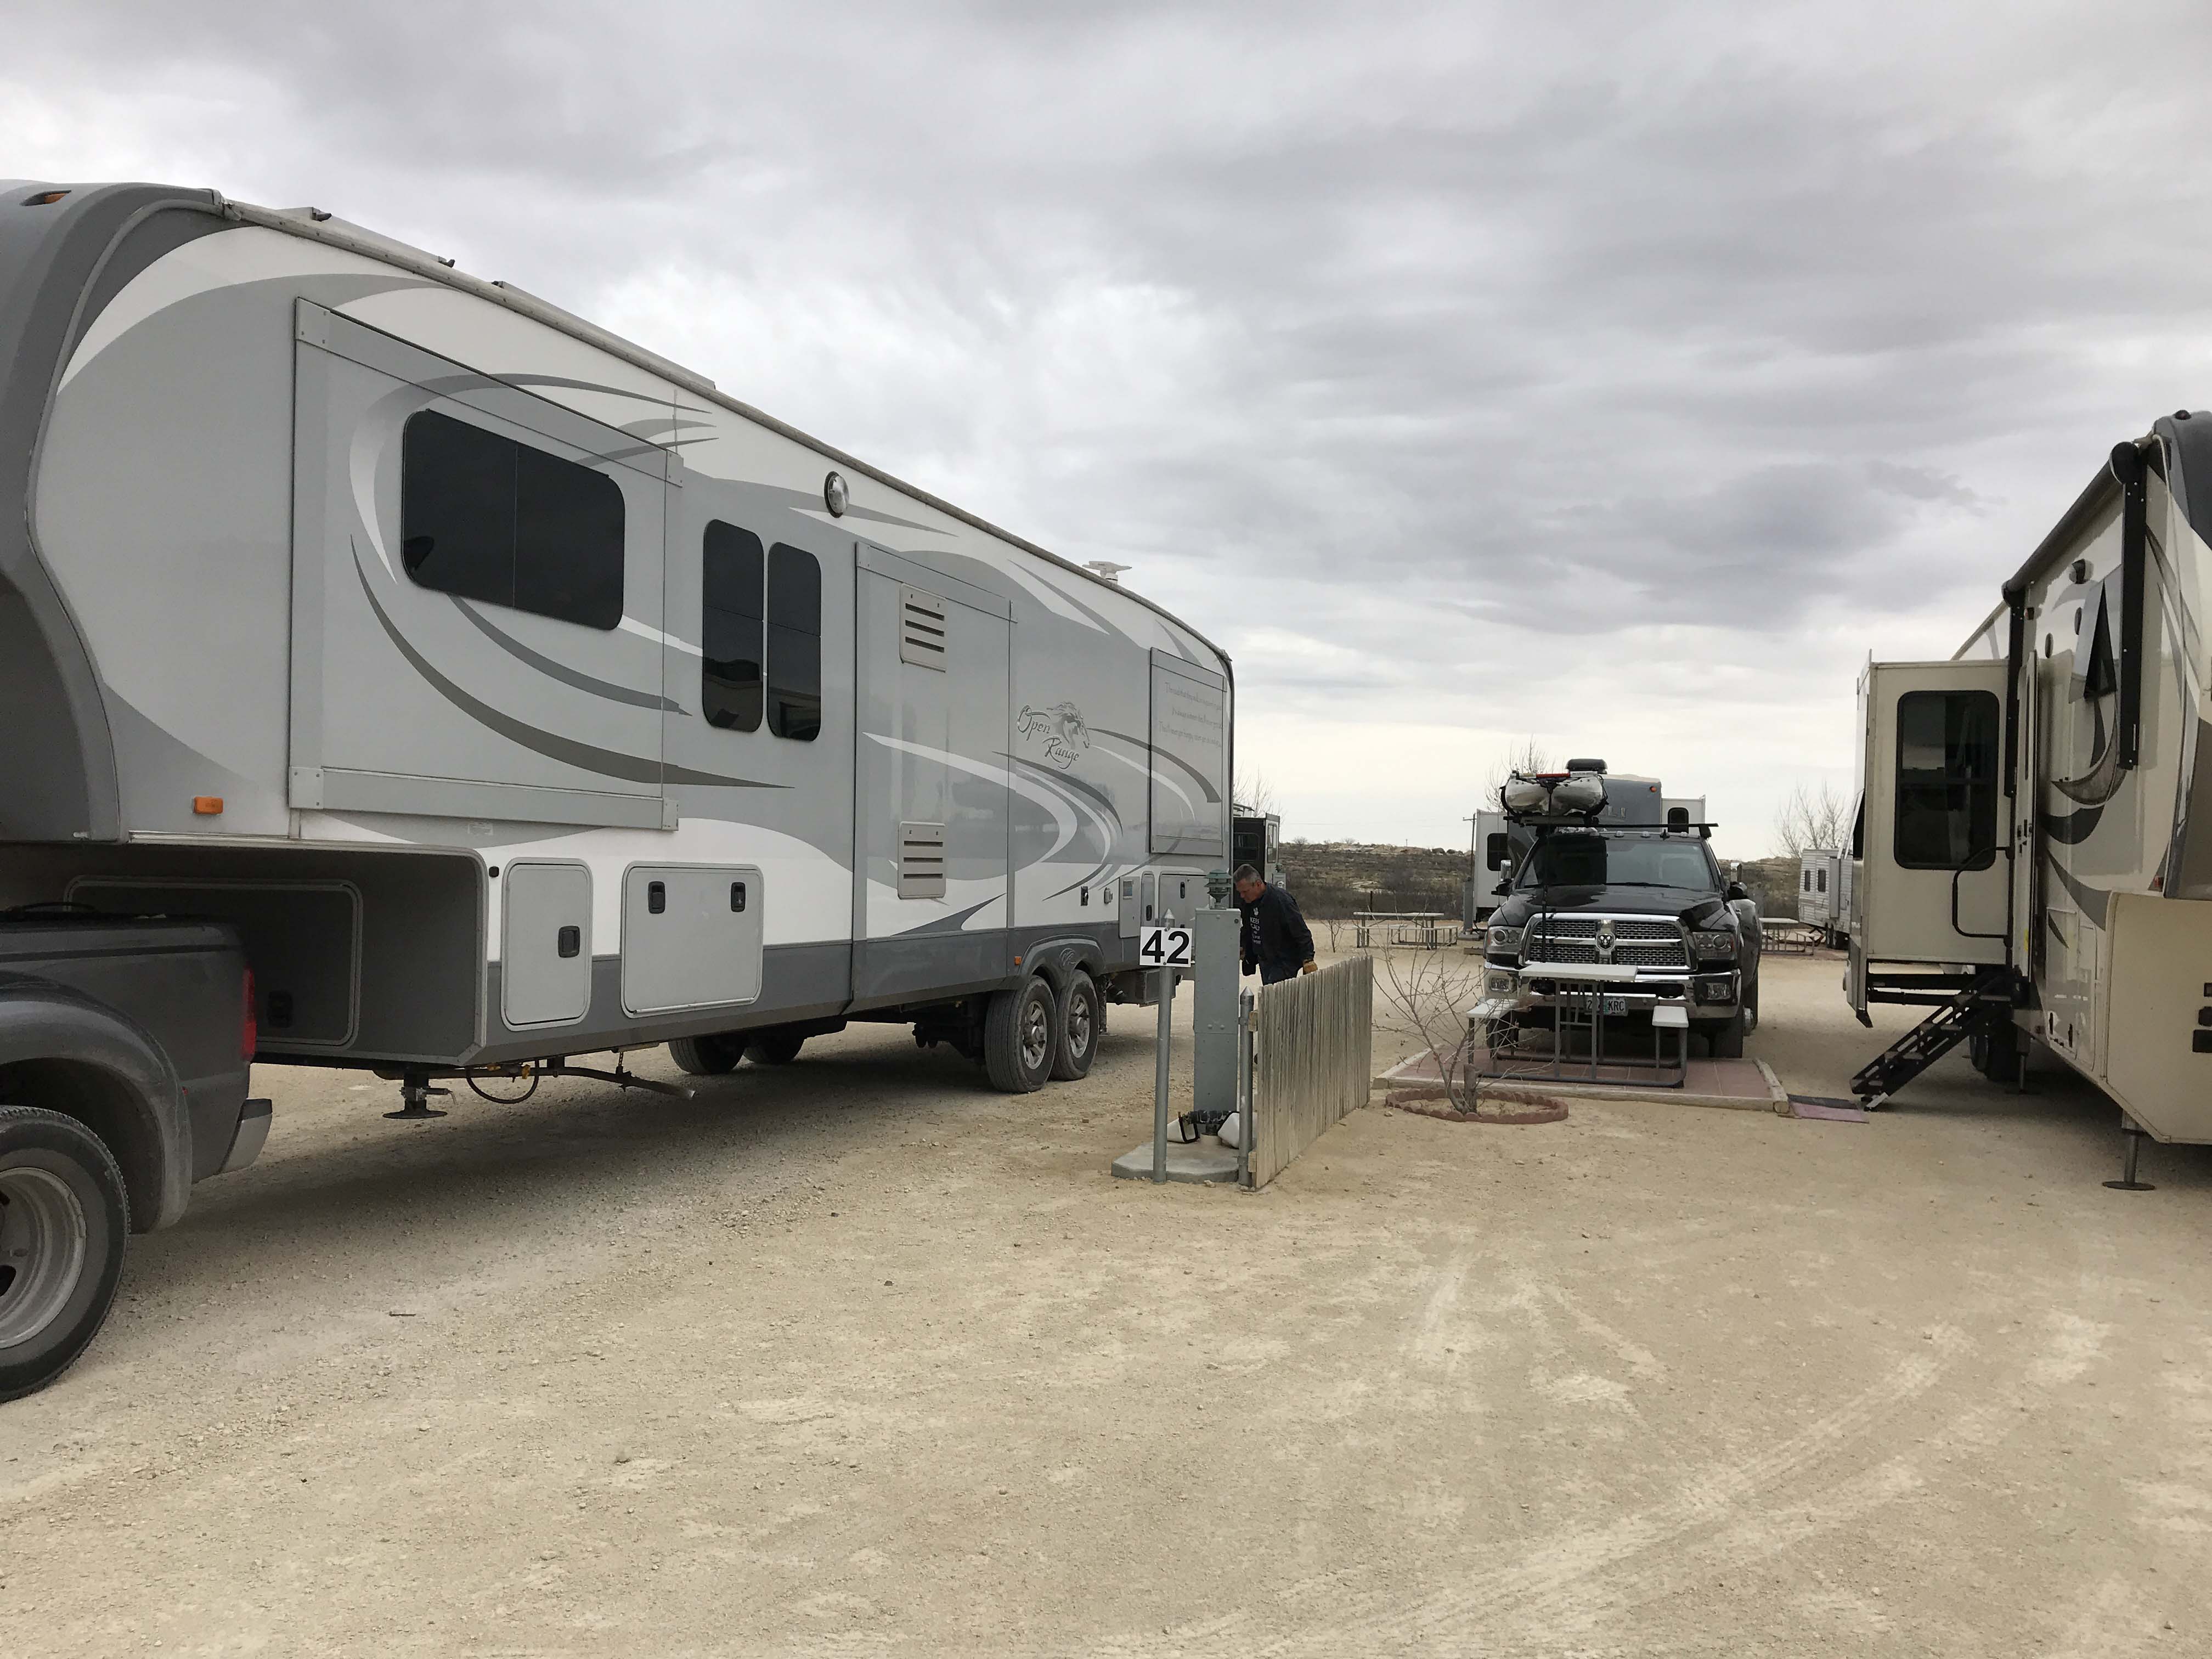
The sites were nice.
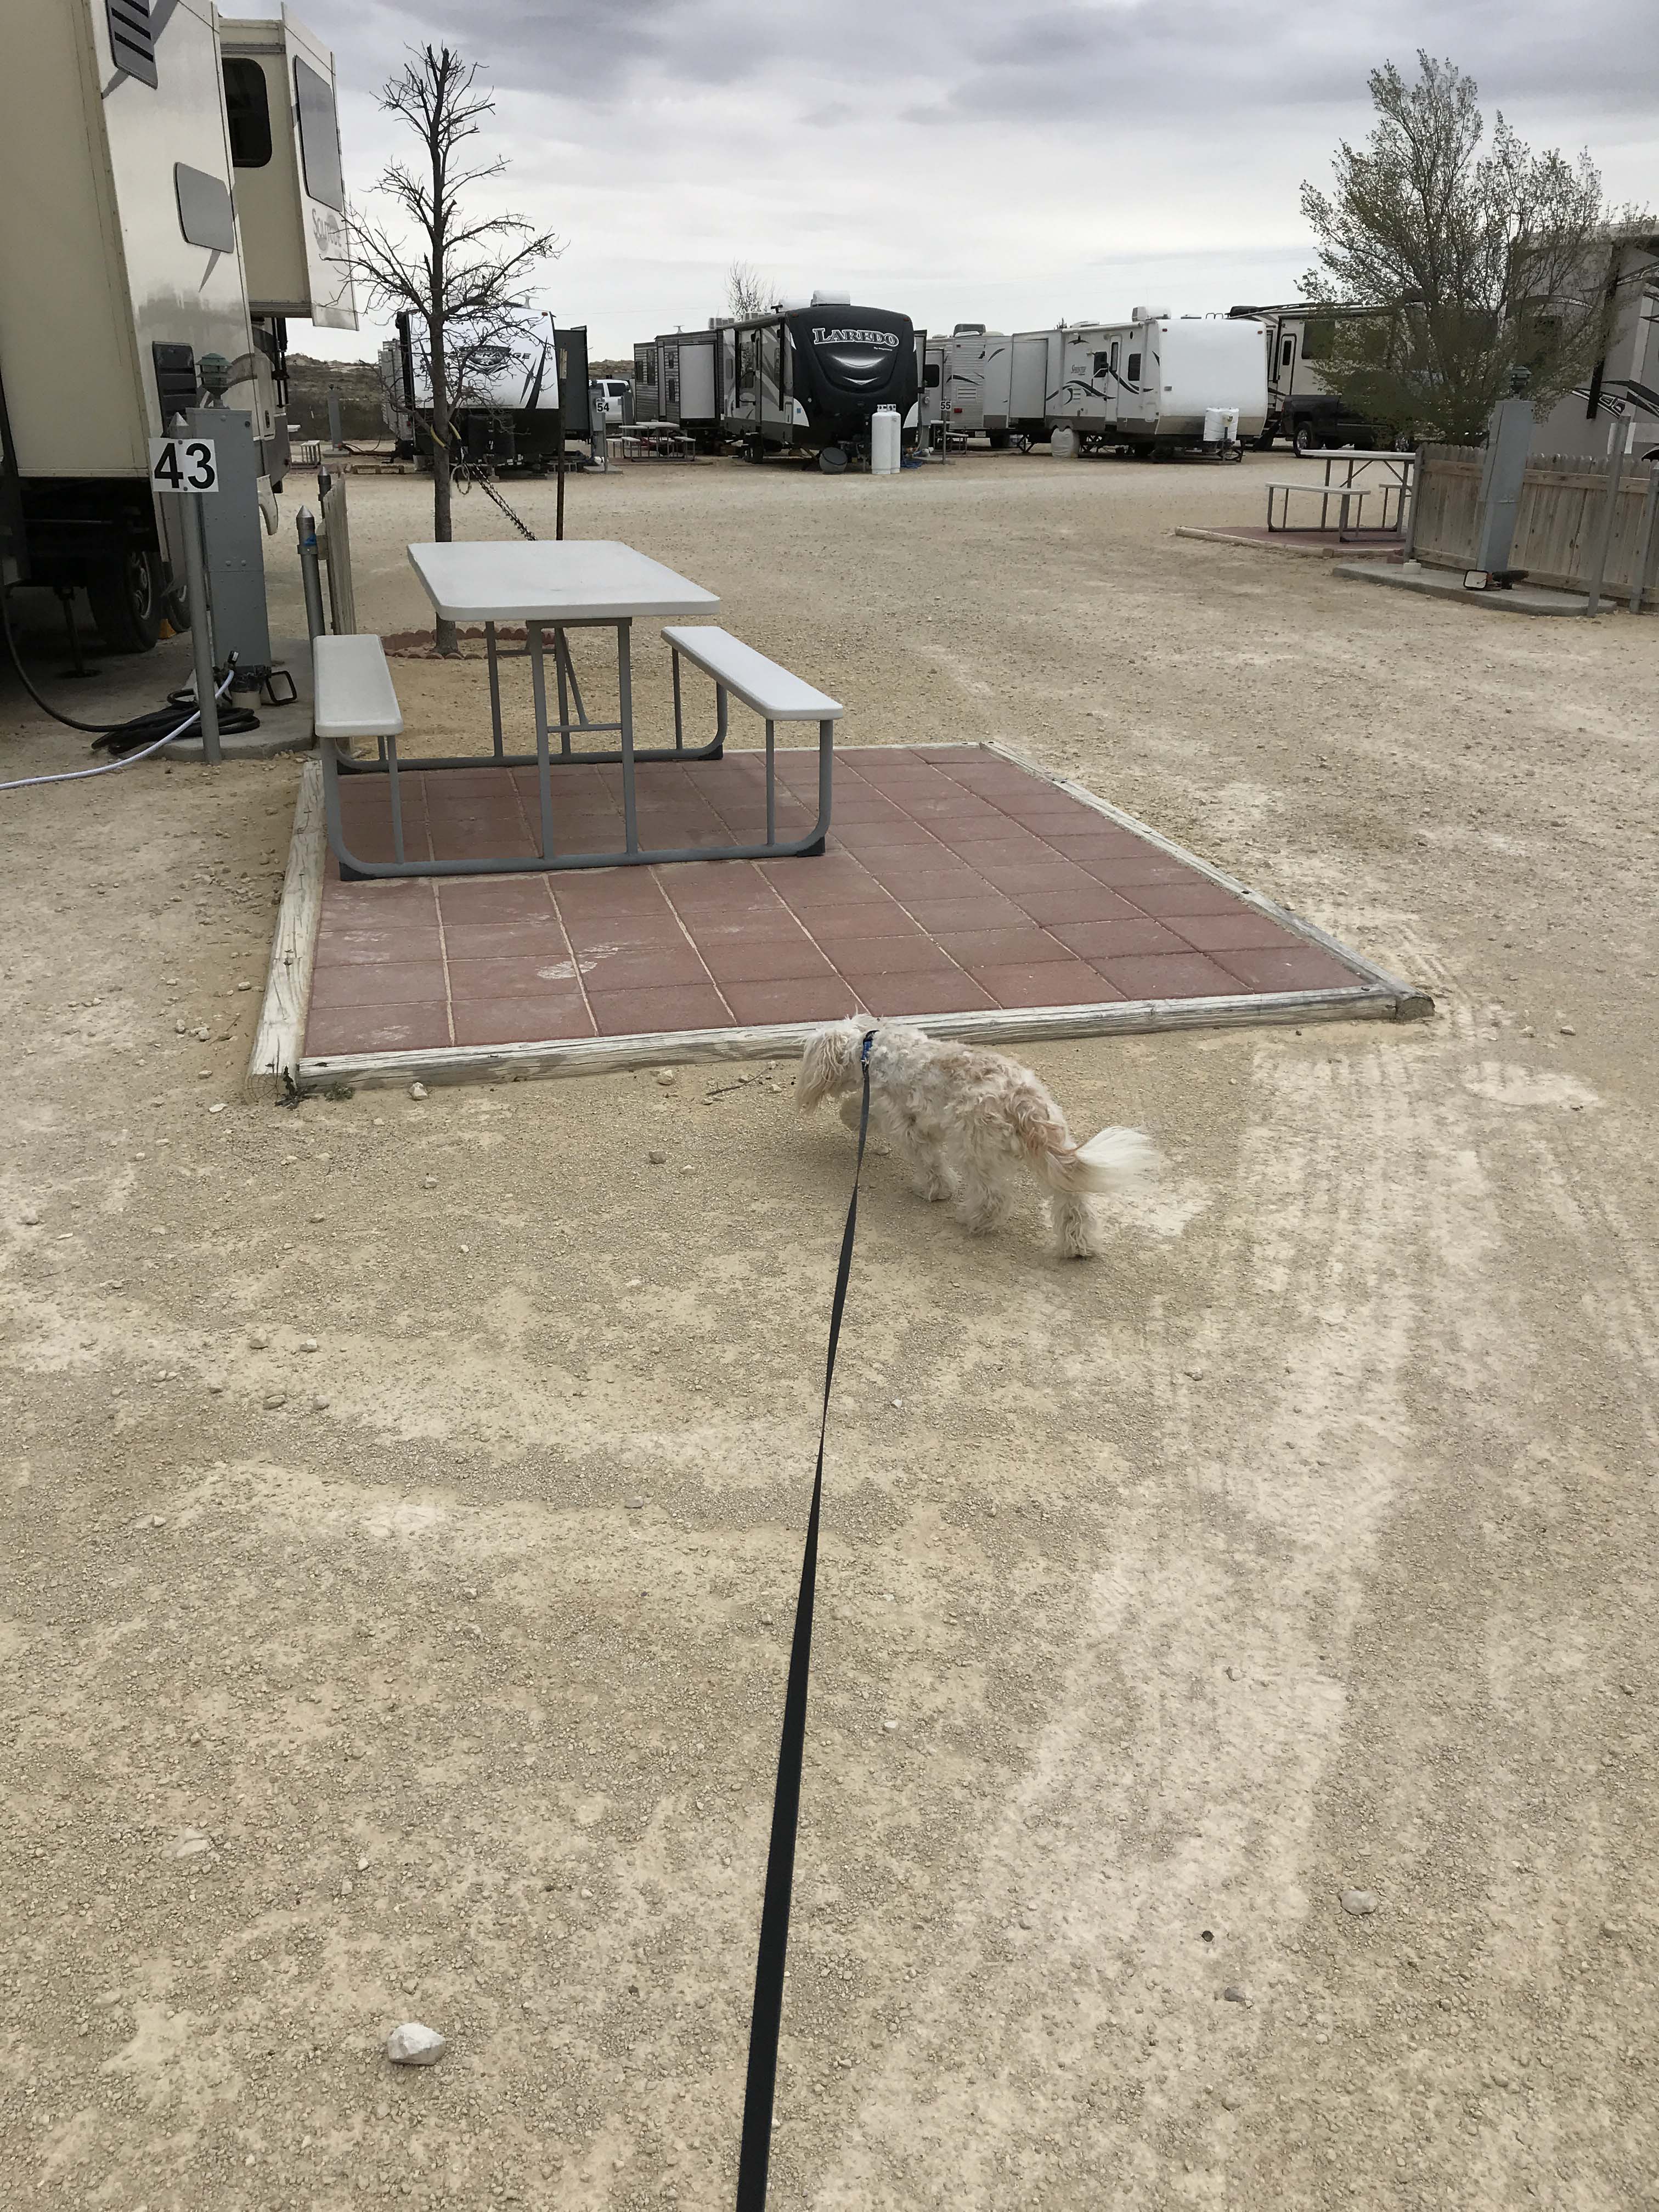
Every site had a little patio and nice table.
Unfortunately, when you looked a little closer, things weren’t so great. The very small dog park was full of poop and cigarette butts, so I had to take the dog along the edges of the park. That wasn’t easy either because there was tons of poop there as well. Finally I found a small spot with relatively nothing in it and he peed. He was super jumpy though, and every dog bark or car door would get him distracted. I could have lived with all of that, he is a dog after all, and hopefully will get used to it soon, but when I went inside and turned on the water it was brown. Not lightly tinted either, but pretty dark. Even after double filtering it with the Camco filter at the faucet and with my Brita pitcher inside, I still didn’t trust it to drink. Despite hearing stories about bad water in places we have been super lucky and never really experienced it much. I think this is only the third time in four years this has happened. Thankfully we always carry bottled water so I had enough to drink that night or I would have been really upset. It was just the last thing I wanted to deal with at the end of a travel day and for $30 a night I don’t expect frills, but I do expect the basics.
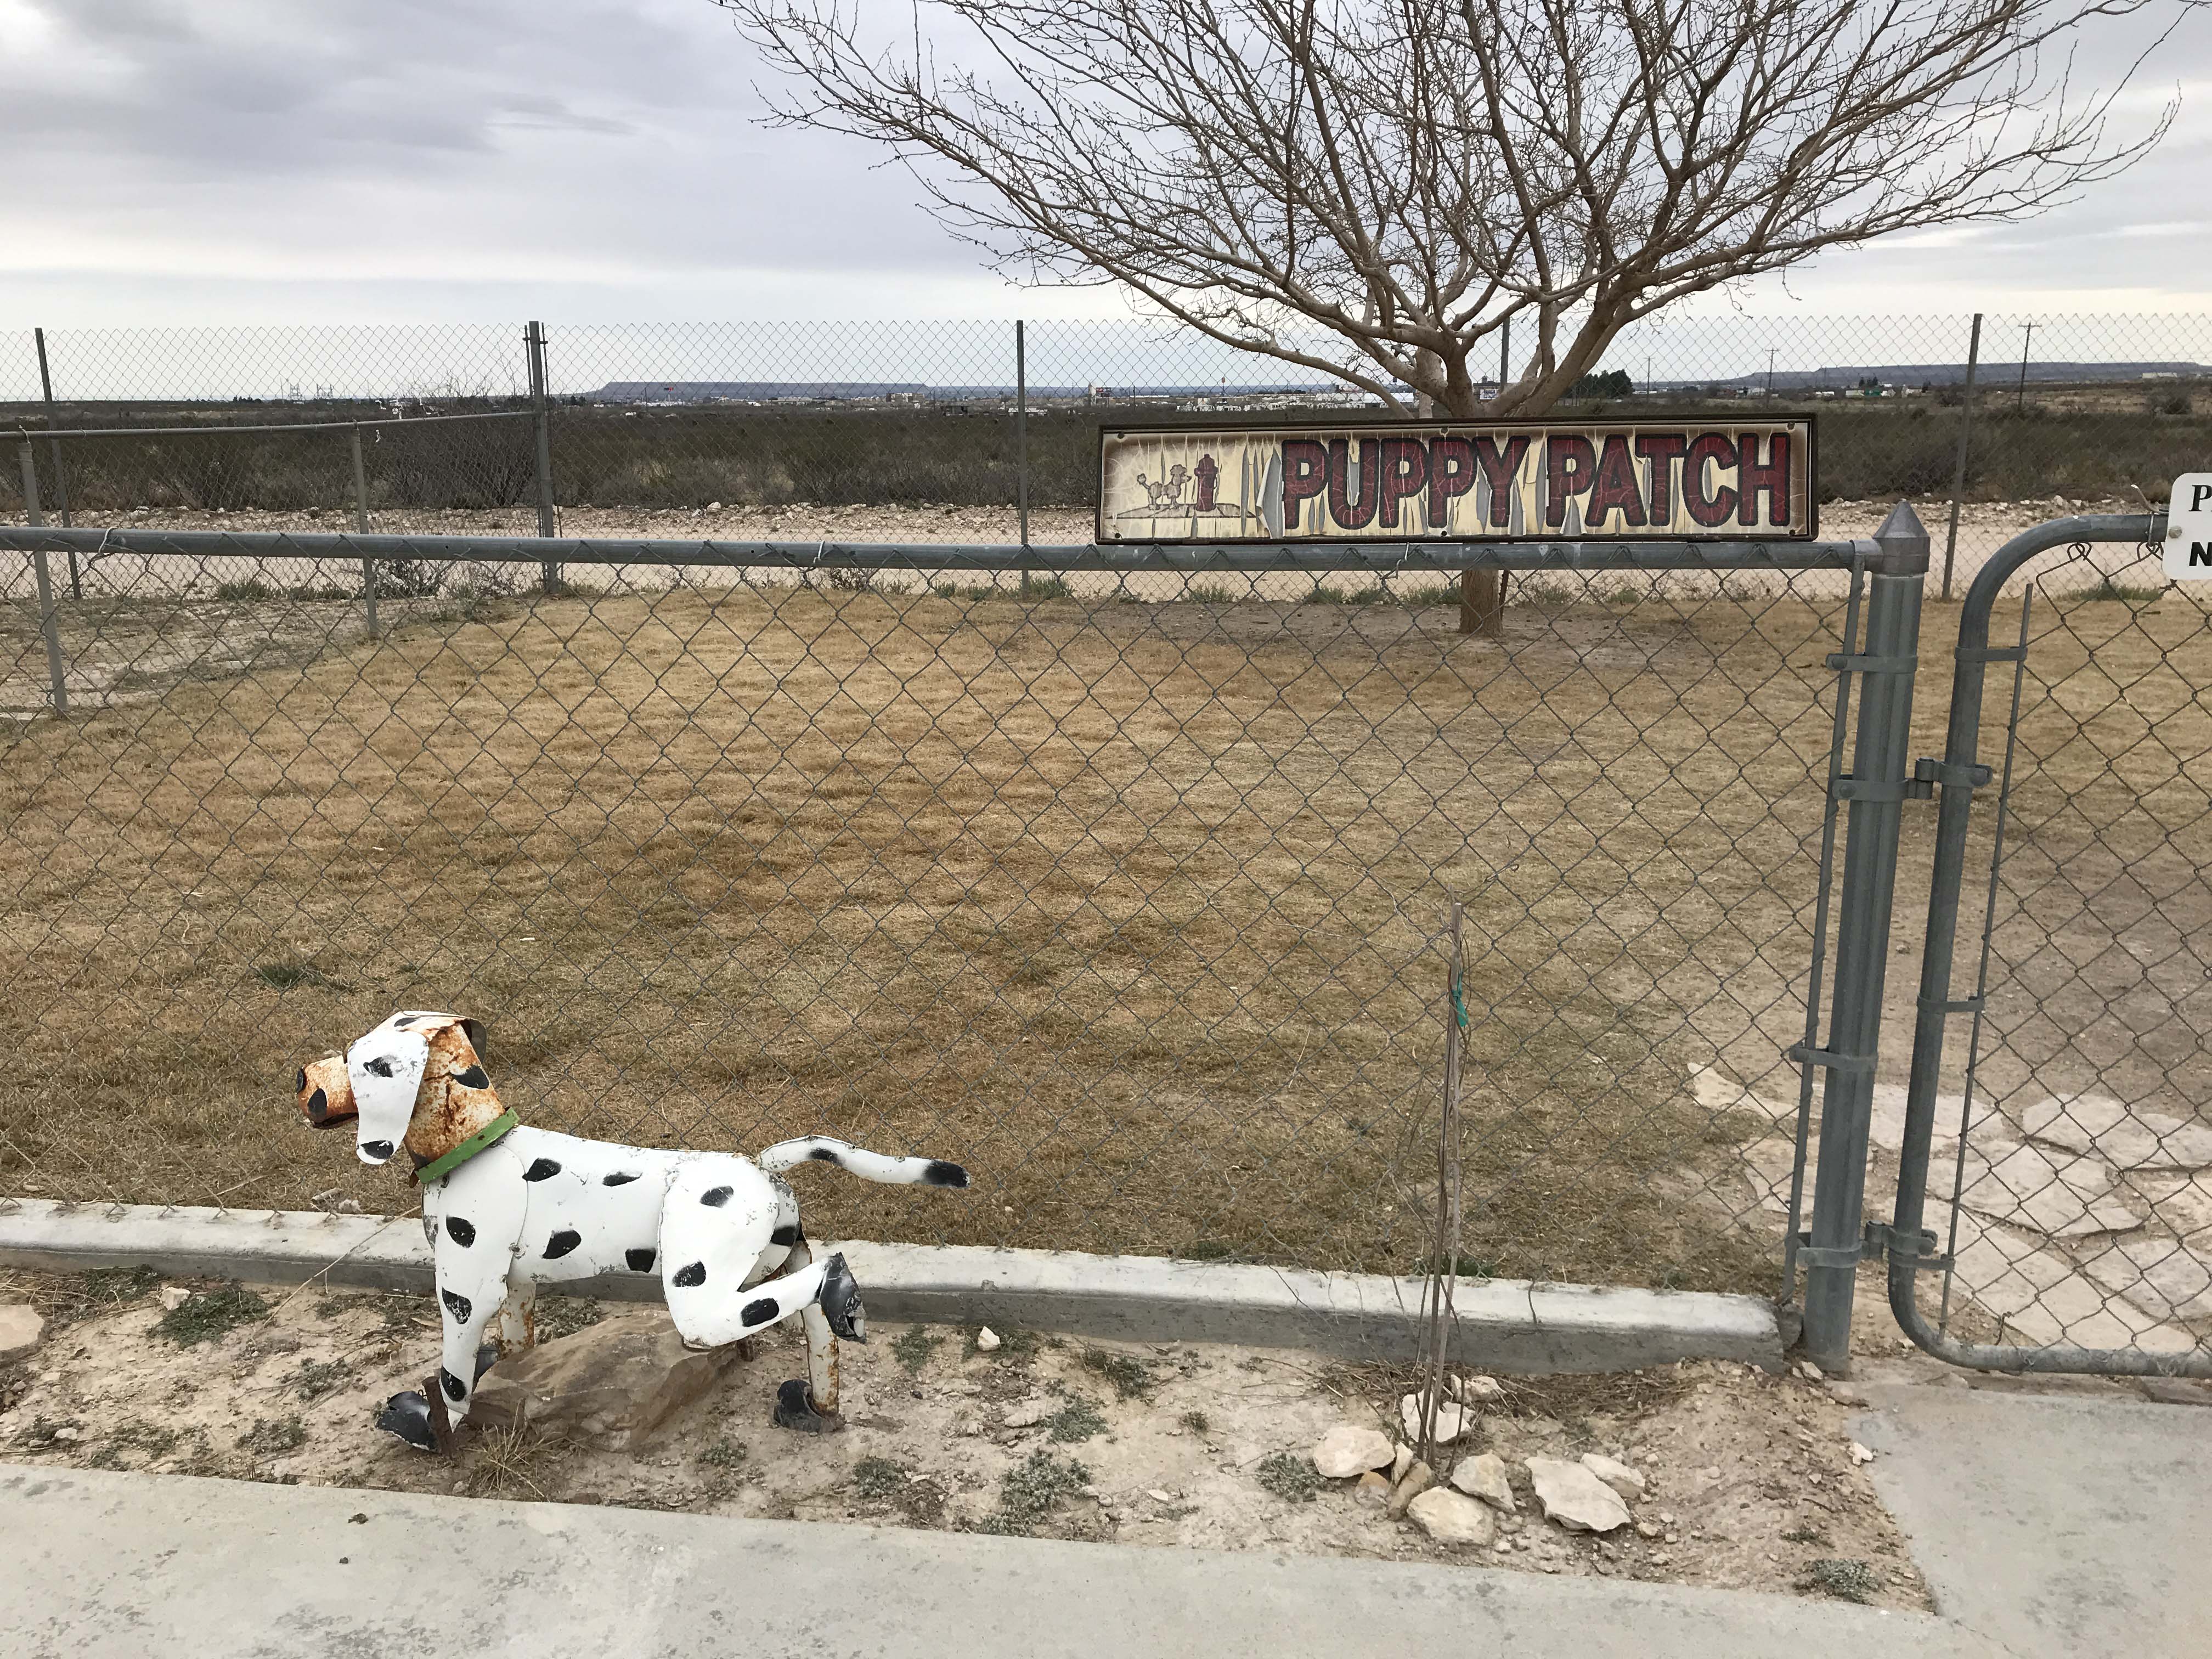
The puppy place would have been fine if people cleaned up after themselves.
I walked the edges but every time he heard a noise he would get distracted and go on alert. This was a dog barking.
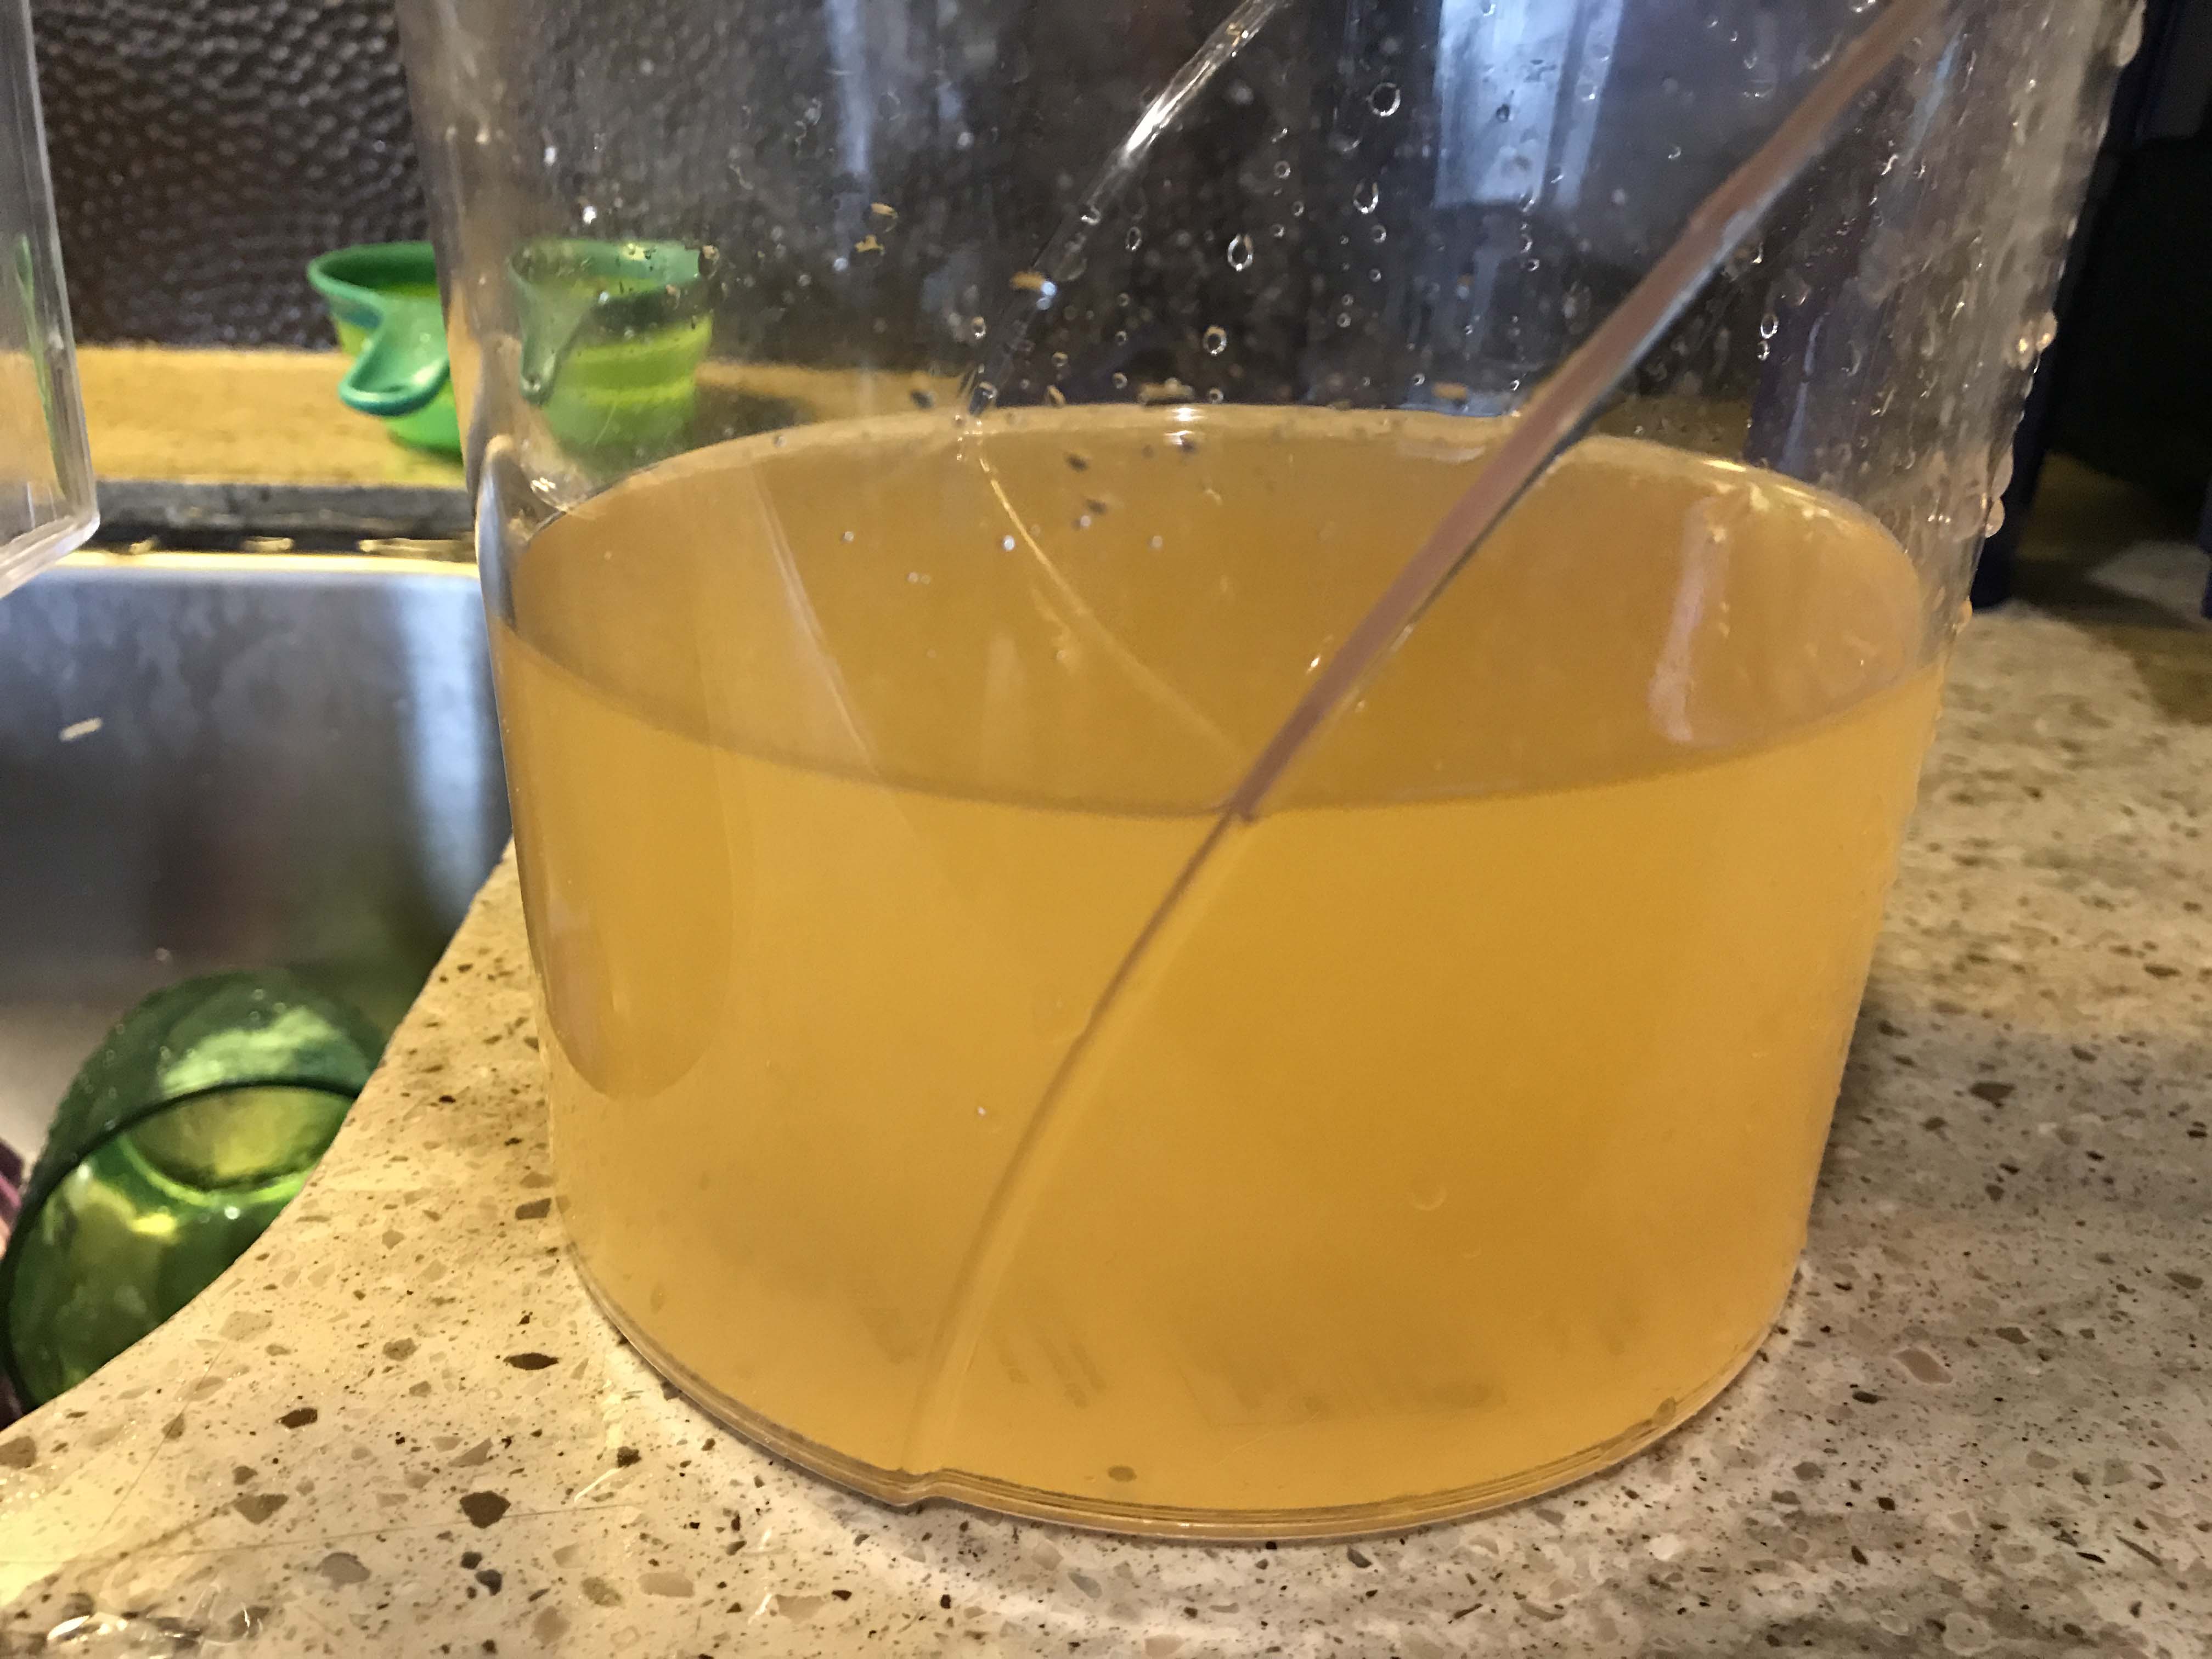
Told you the water was brown. The color was actually darker than this picture.
We called it a pretty early night after dinner and watching some TV and both got a good night’s sleep. We didn’t even wake up through the dog throwing up, which we discovered the next morning. Not to be too gross, but there wasn’t much left, and I hand washed that part of the quilt that was impacted. It was my Glacier Huckleberry shirt so I am glad the stain came out! Other than that he seemed fine, and actually was full of energy in the morning. He did his business right away for Lee first thing in the morning, and then walked around the campground like he owned the place, so much so that he really didn’t want to get in the truck to head out again. The second day he seemed to do much better and slept most of it in his doggy bed in a patch of sun in the truck. He still wouldn’t pee when we stopped, and I worried less about taking as many breaks.

This would have been a great scenic spot if it wasn’t for all the trash. Jack tries to eat everything, which makes it a pain to walk him.
Thing were going so well we even talked about taking scenic drive 375 around El Paso, but ultimately decided against it. Howard and Linda have done it, and Kelly and Bill, but it has some narrow roads and steep grades and Lee just didn’t want to deal with it. So we went straight through El Paso, which I know people complain about, but we have done several times and it’s never that bad. Yes, there is always construction of some kind,but as long as you don’t hit rush hour it’s fine.
In no time at all, we hit Las Cruces, and our stop for the night. The Coachlight Motor Inn and RV Resort offers Passport America, and is not usually someplace I would stay. Options were limited because Lee felt Deming was too far, and it was either this or a $41 per night “high end” resort. I hate spending that for just one night, so we decided to give it a try. It’s curb appeal is terrible with a very old hotel in front, but the RV park itself was actually pretty decent. Yes, there were lot of older motor homes, but the people were nice and the area was really clean. Plus there was a very nice place with trees for Jack to pee, and for once he went right away. He actually seemed to be enjoying himself quite a bit. He was prancing around zooming here and there and really liked the shaded areas.
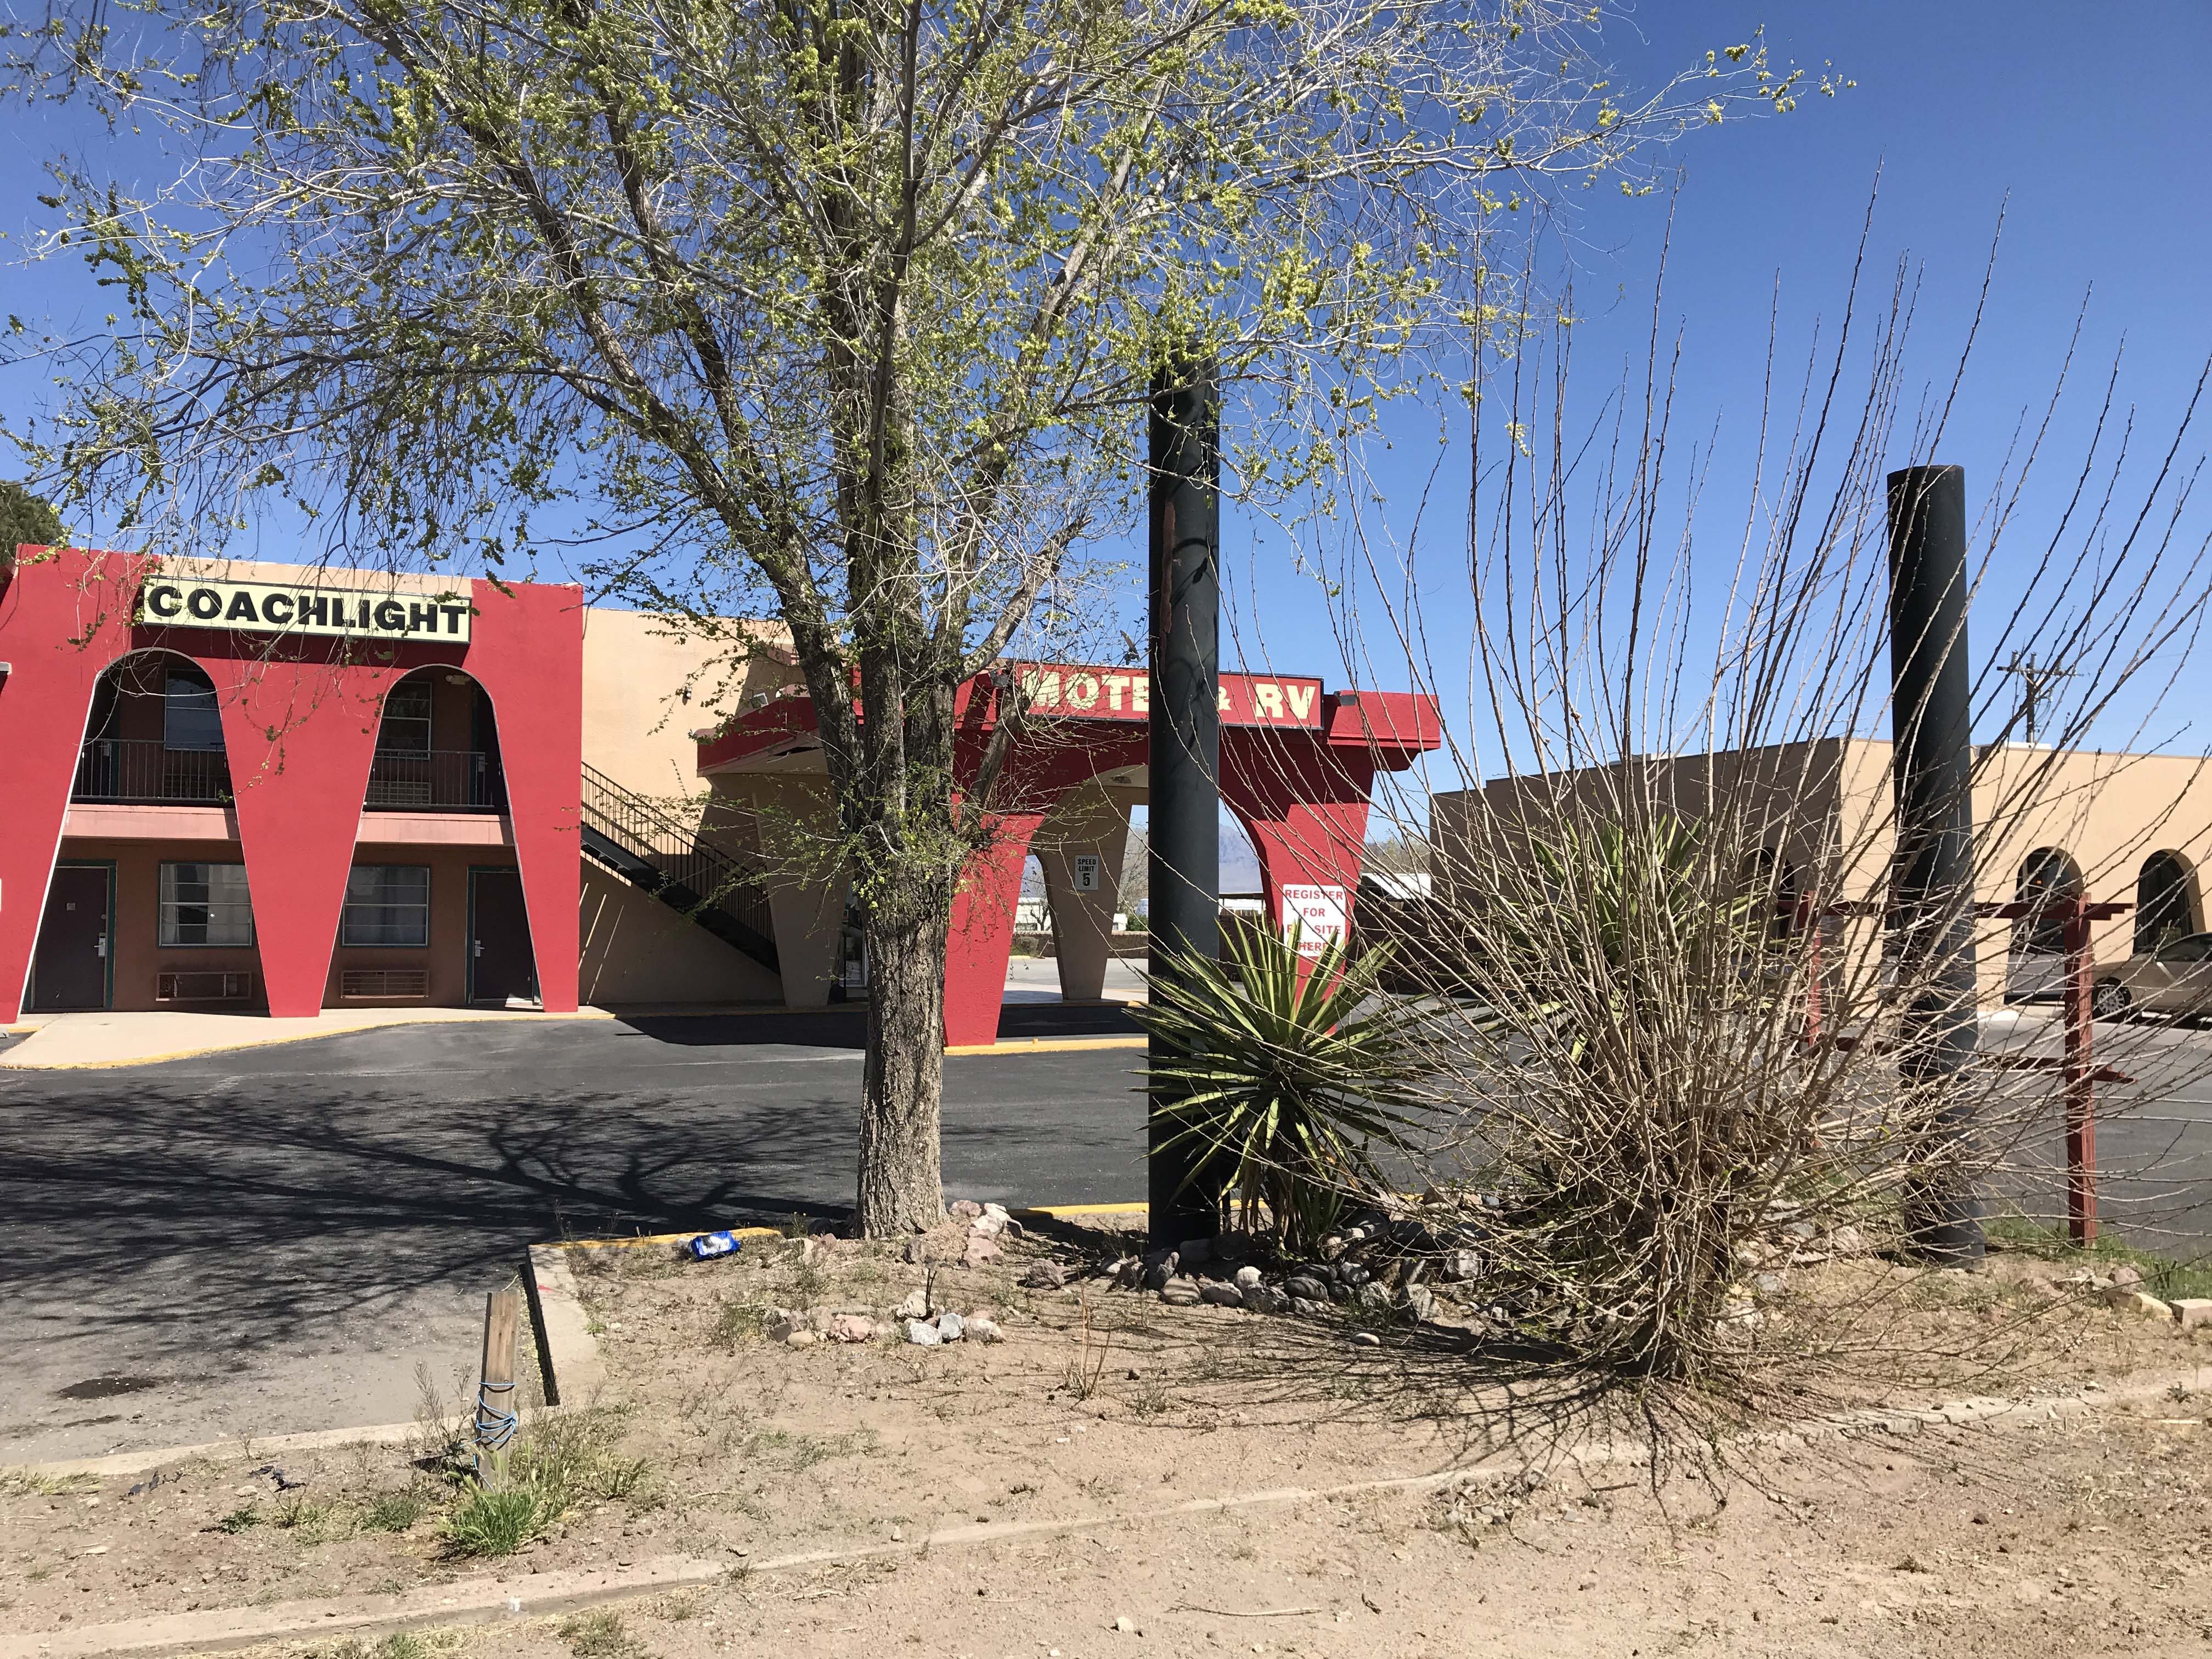
Not great from the road.
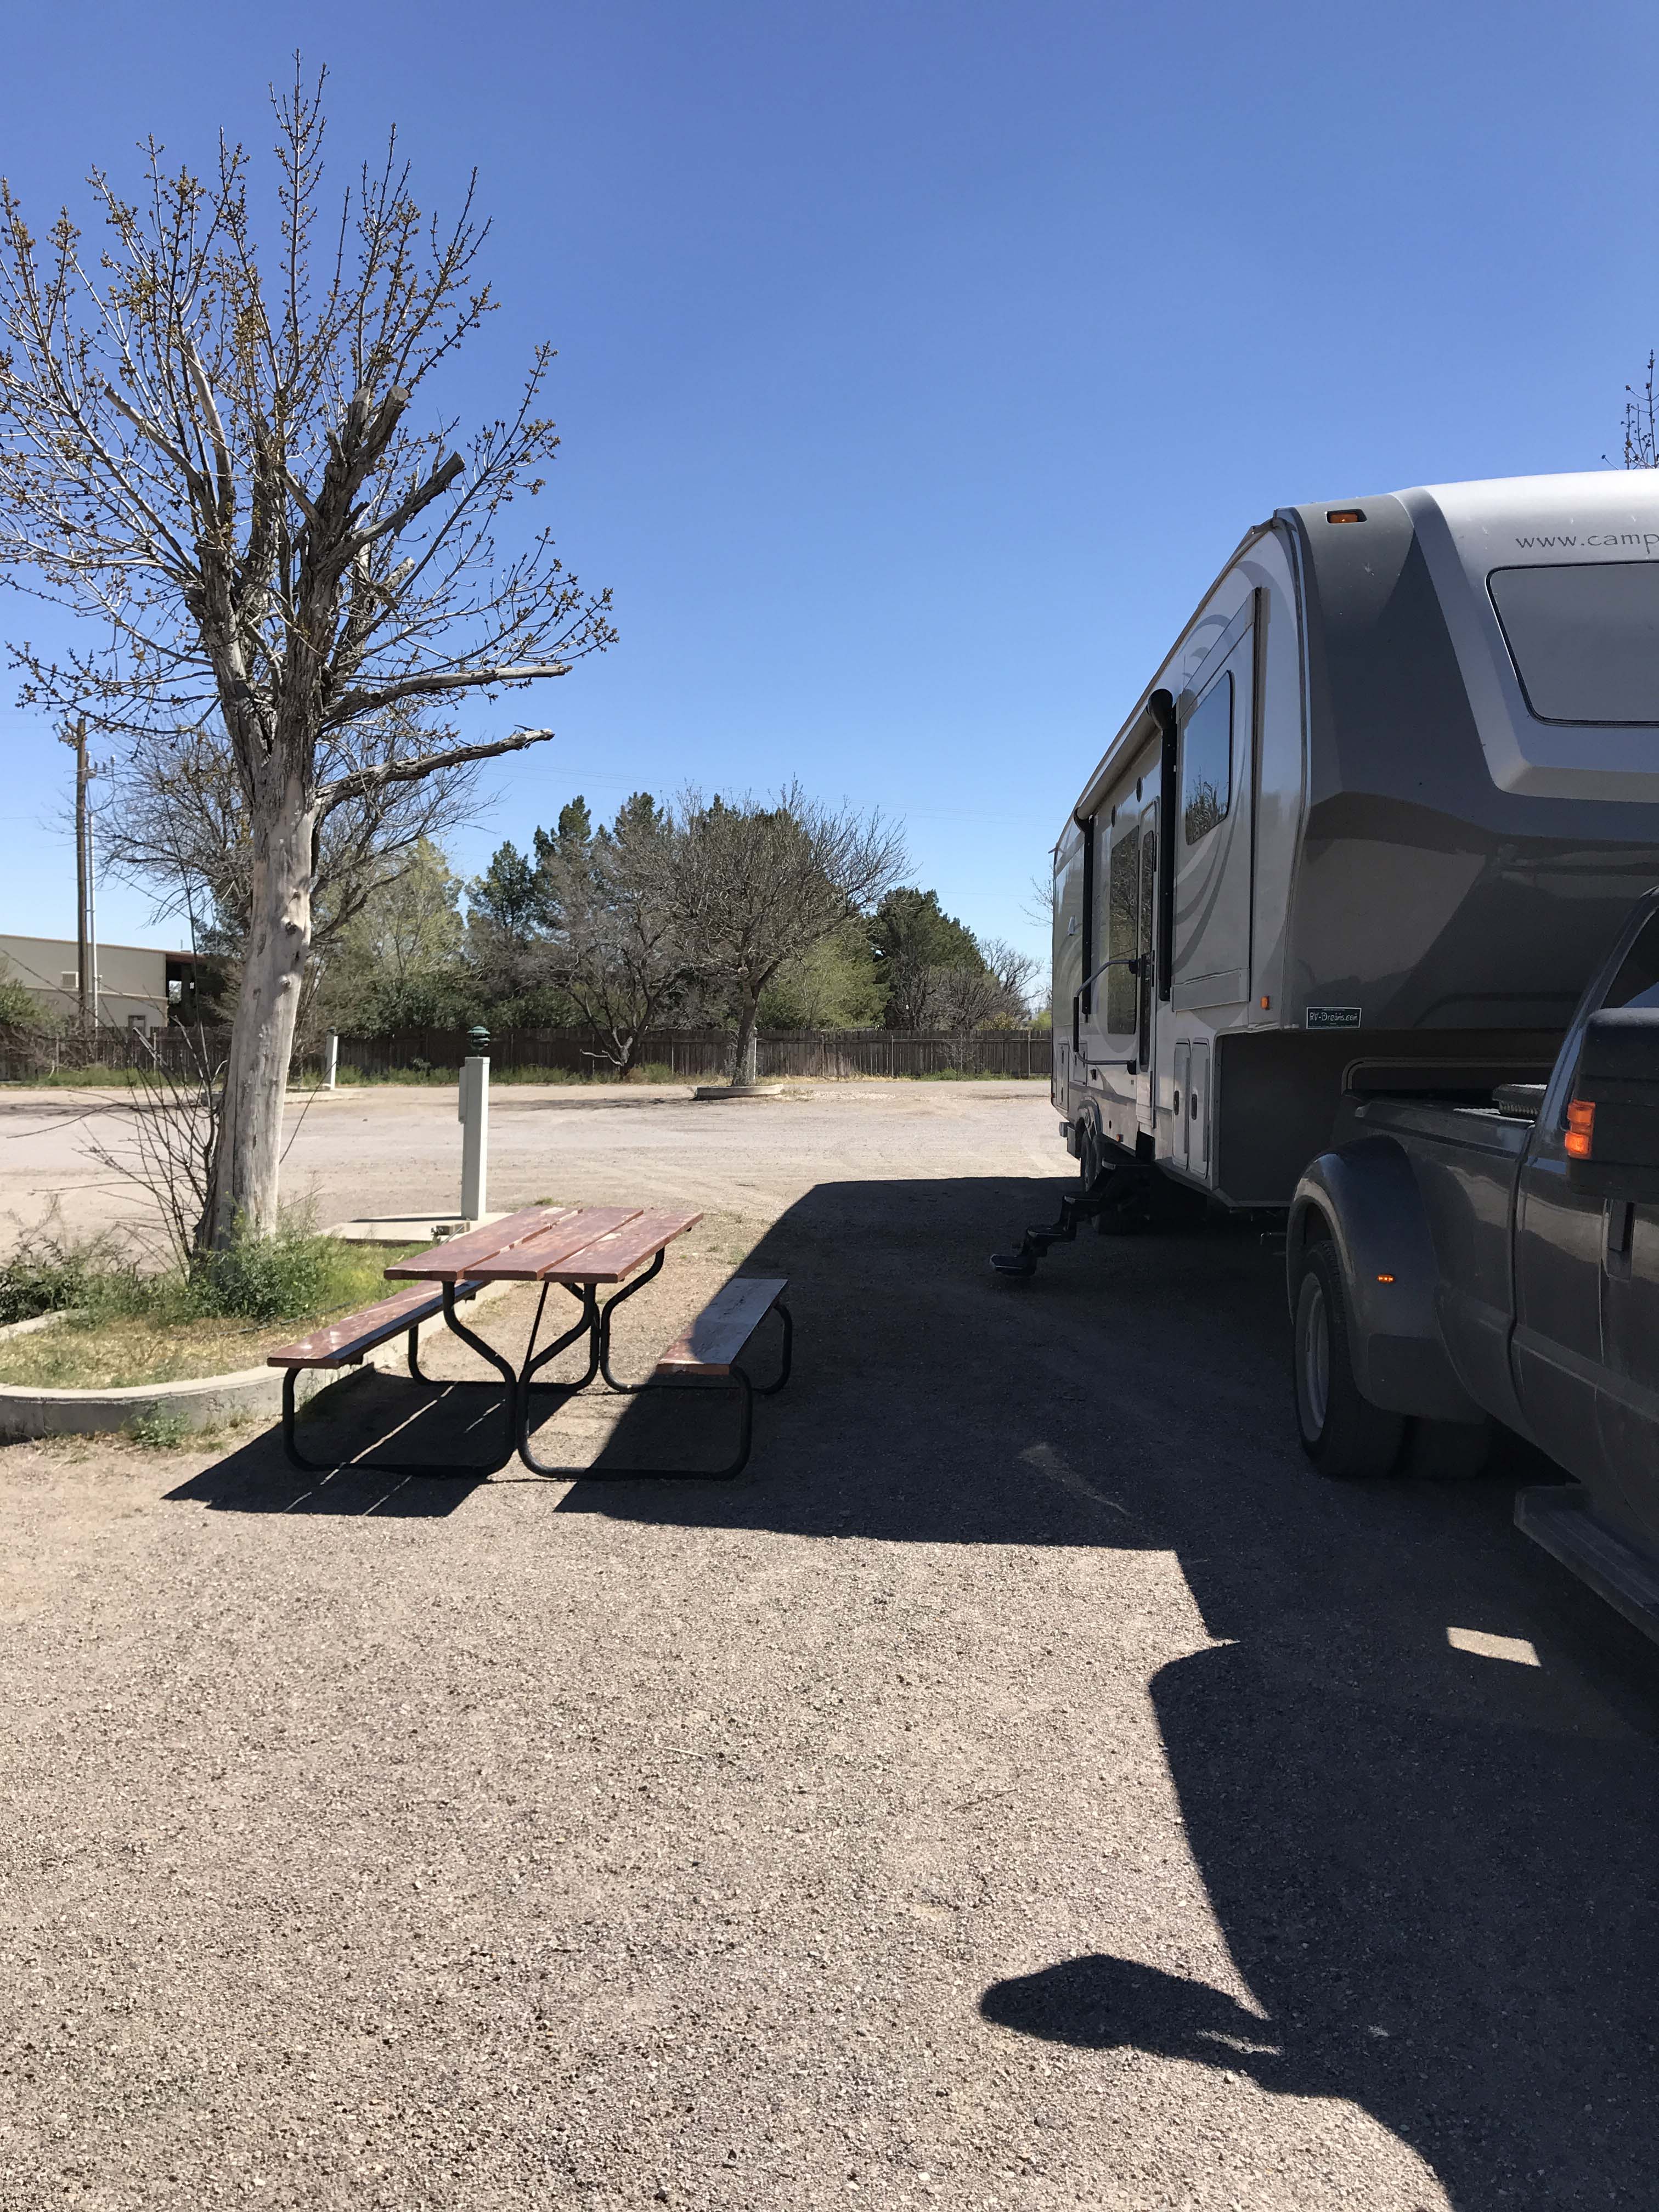
But the sites were fine for an overnight.
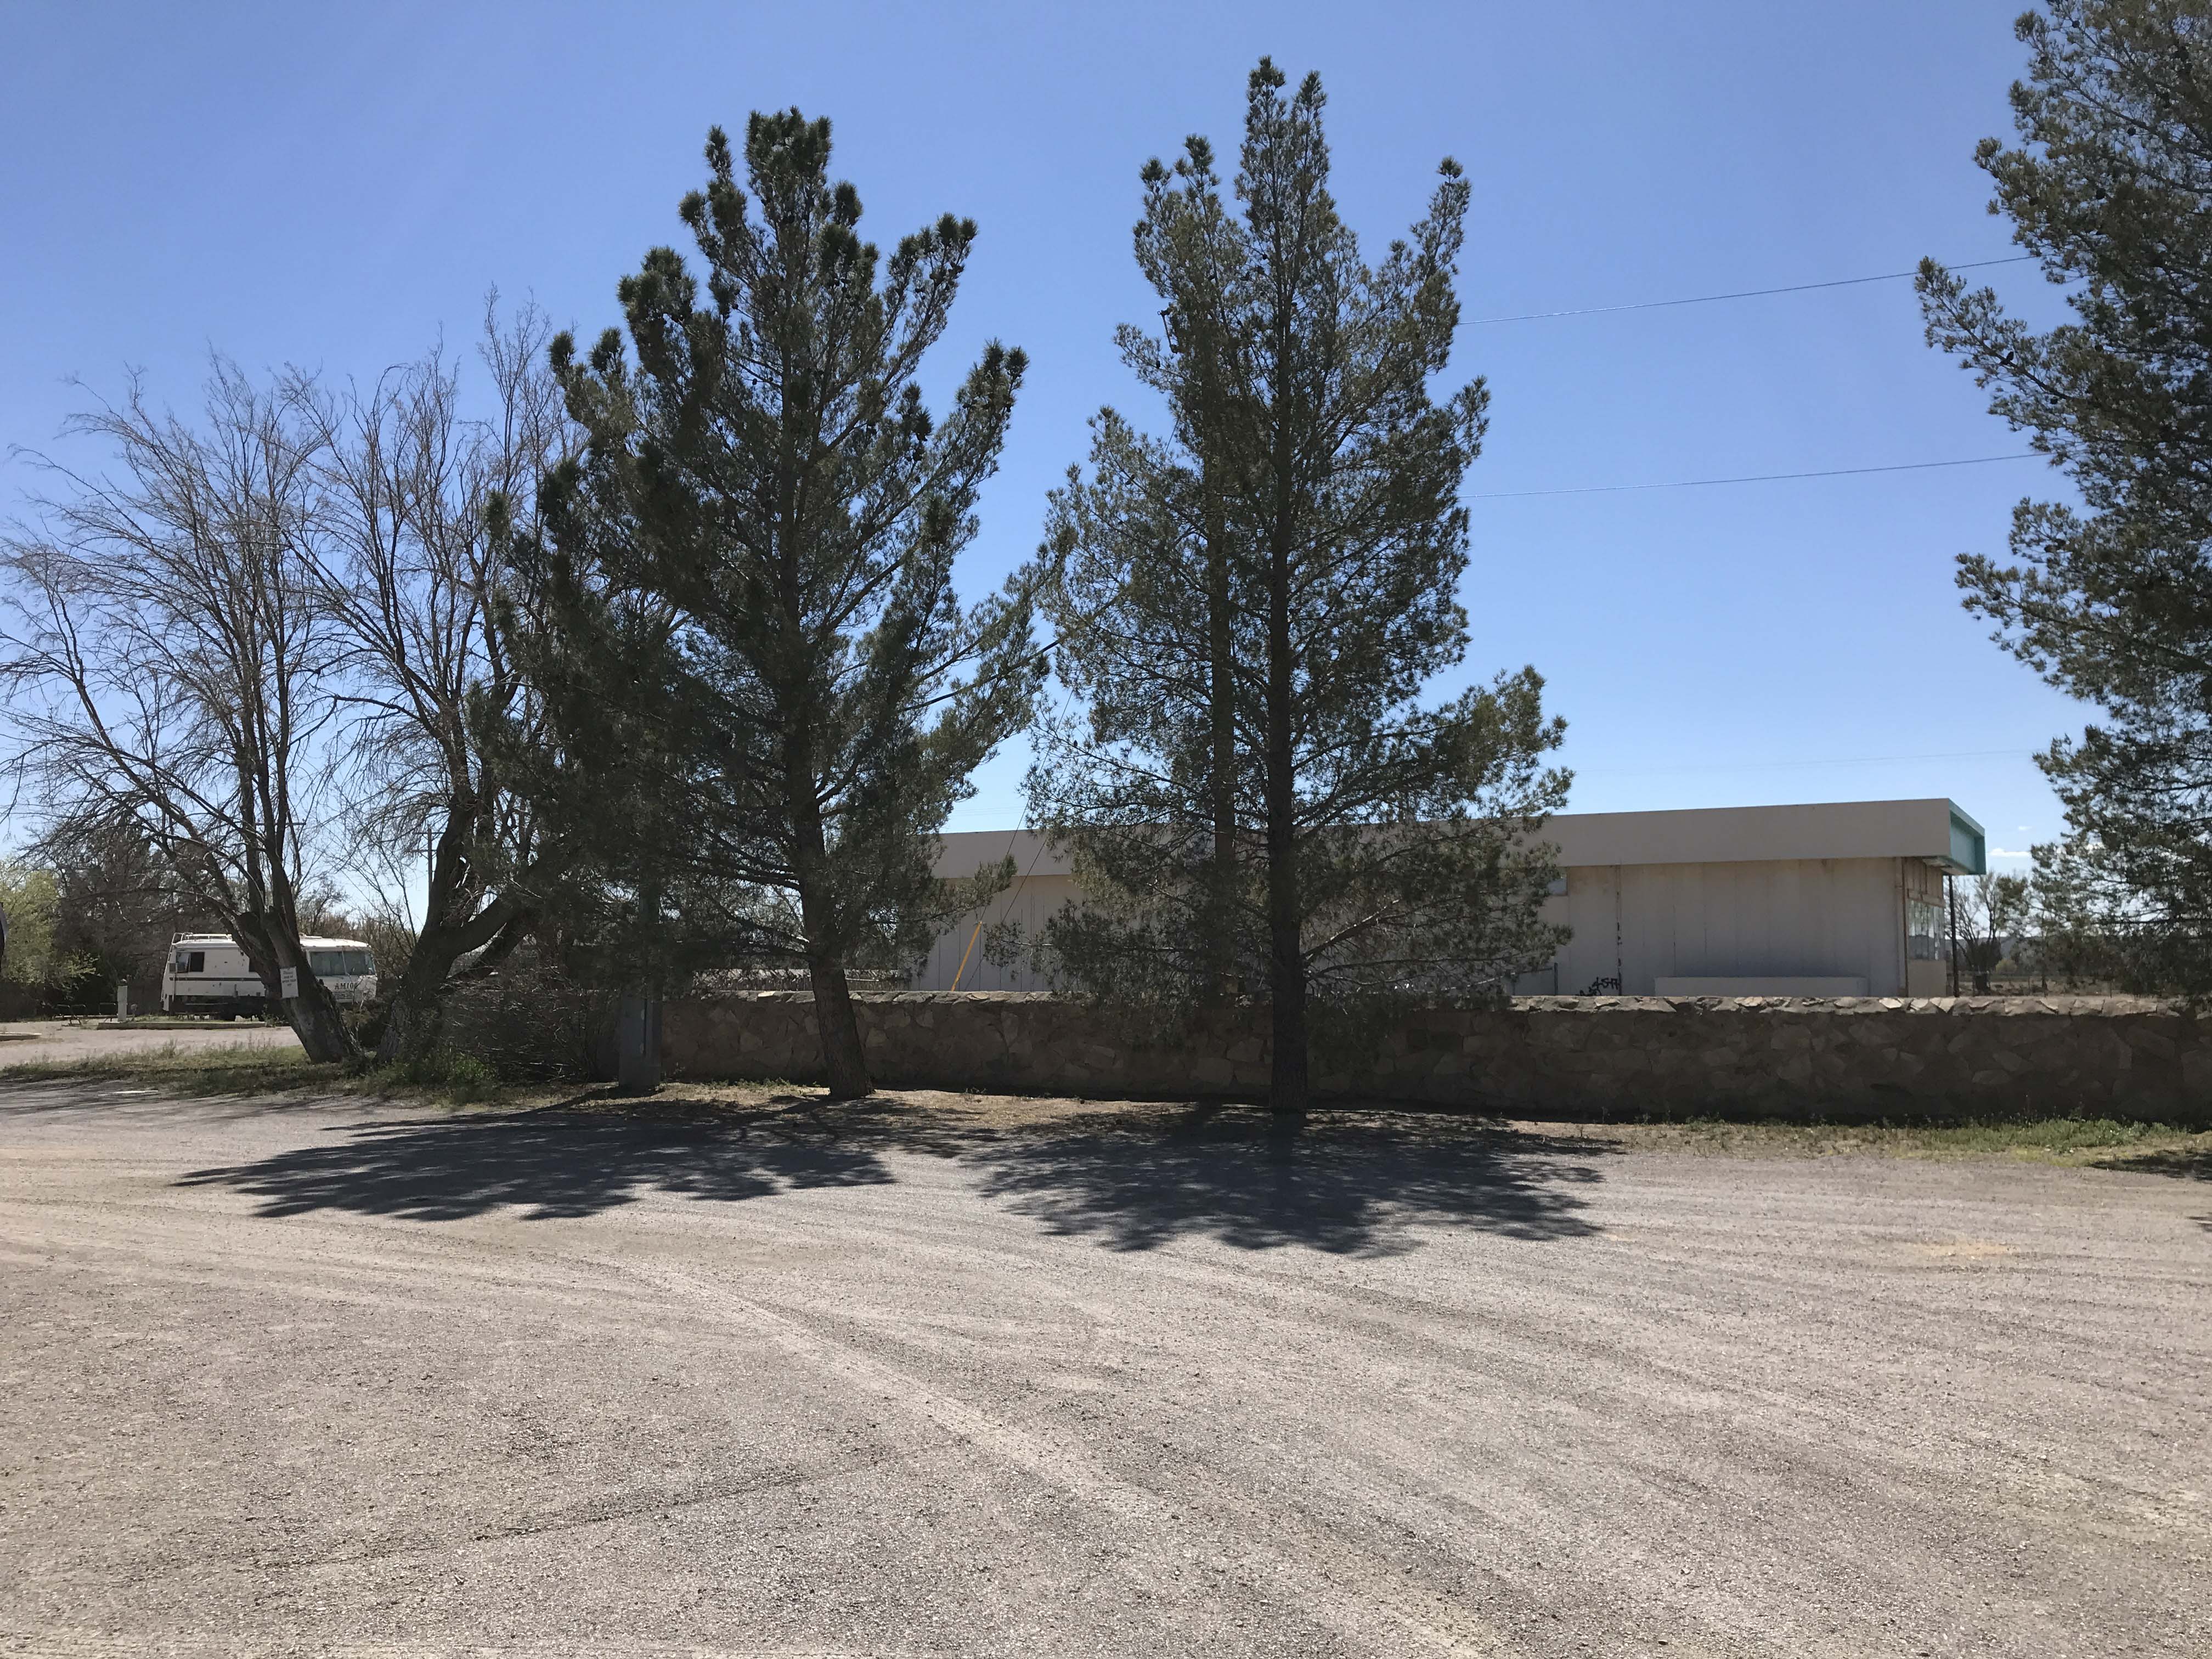
And this little area was really nice.
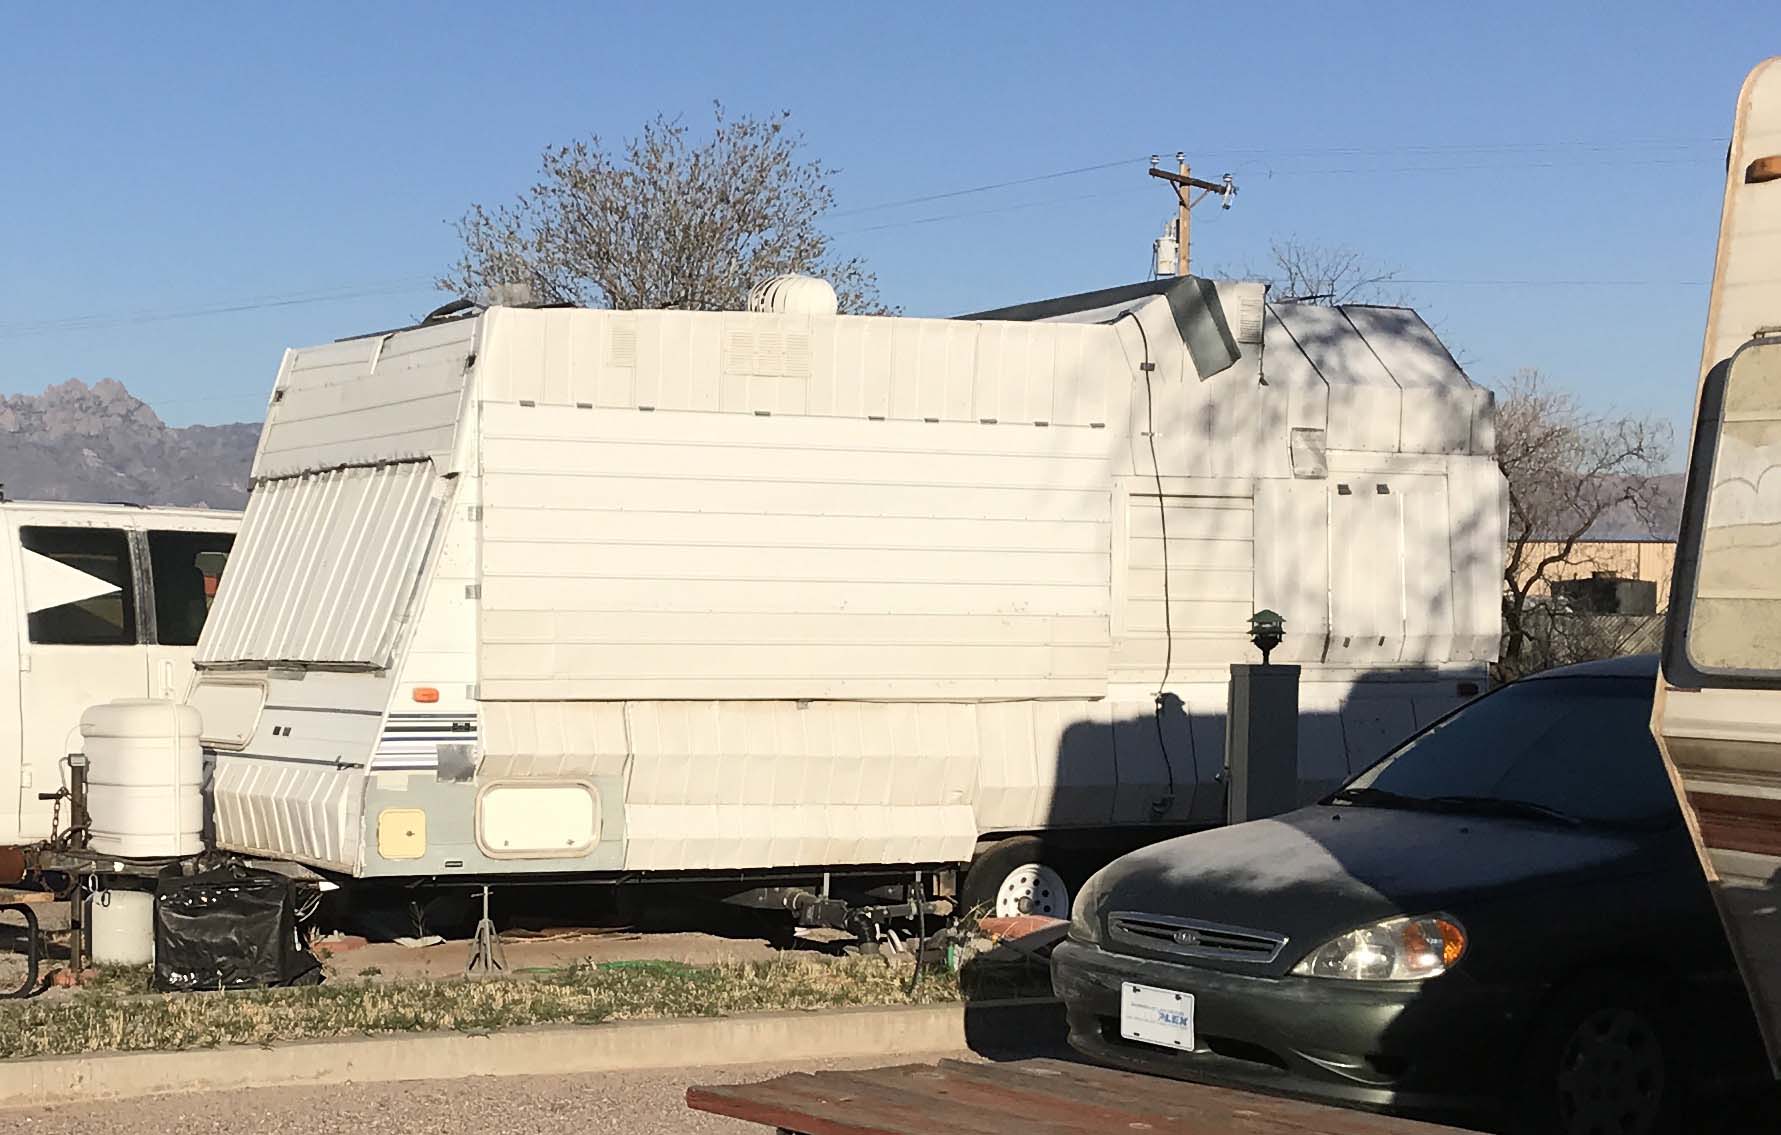
I’ve never seen an RV quite like this. Lee said it looked homemade from pieces and parts of a bunch of little trailers.
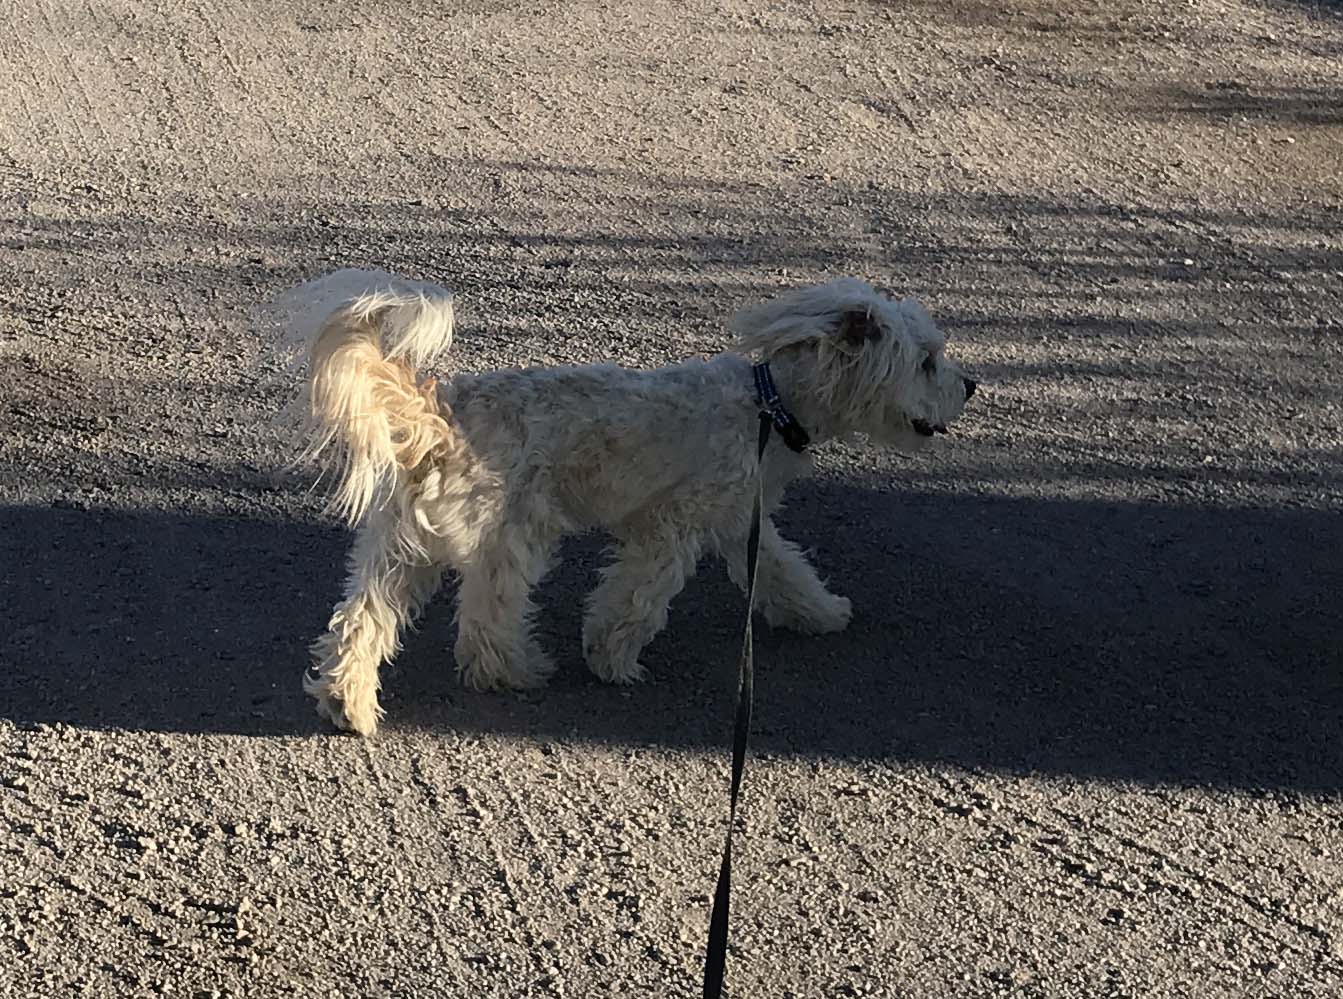
Told you he was strutting.
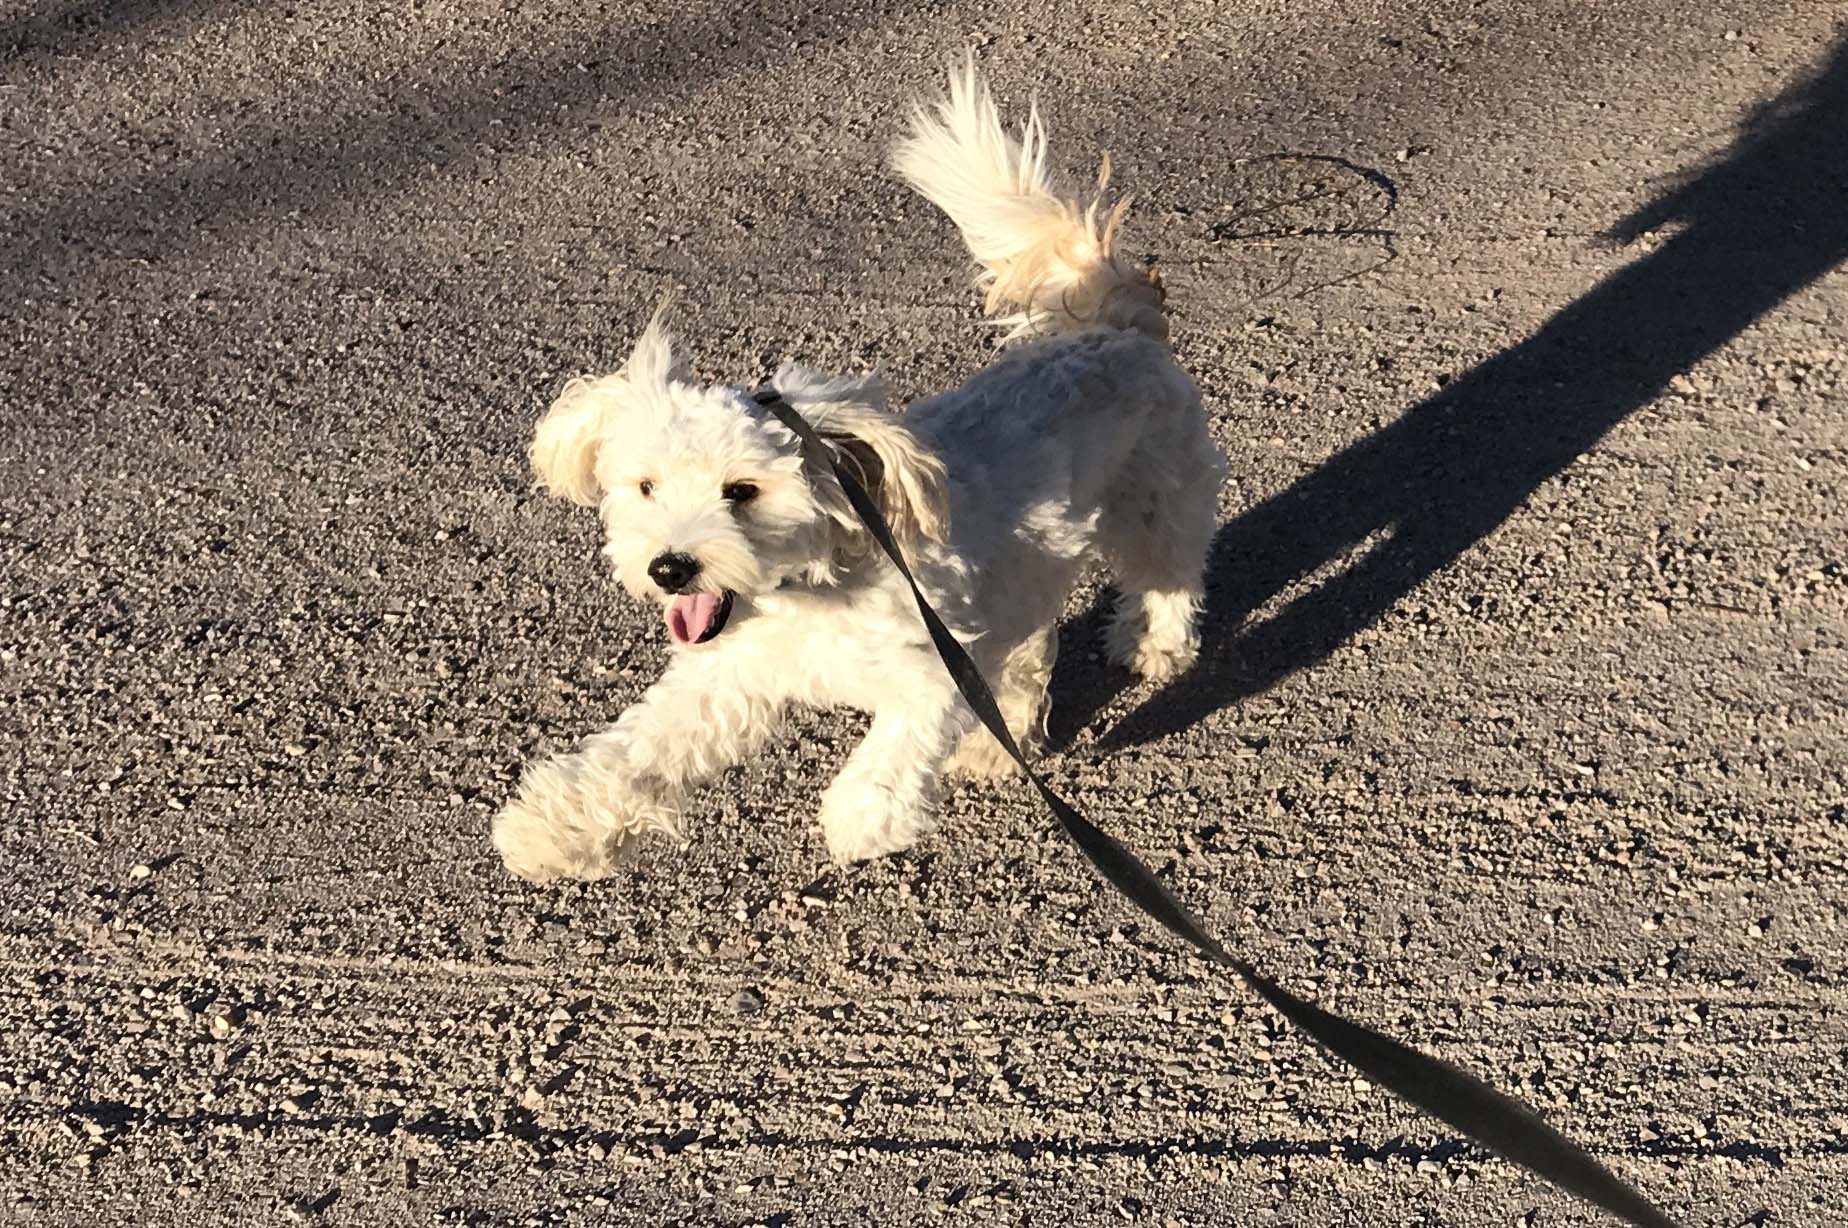
Glad to see his happy face!
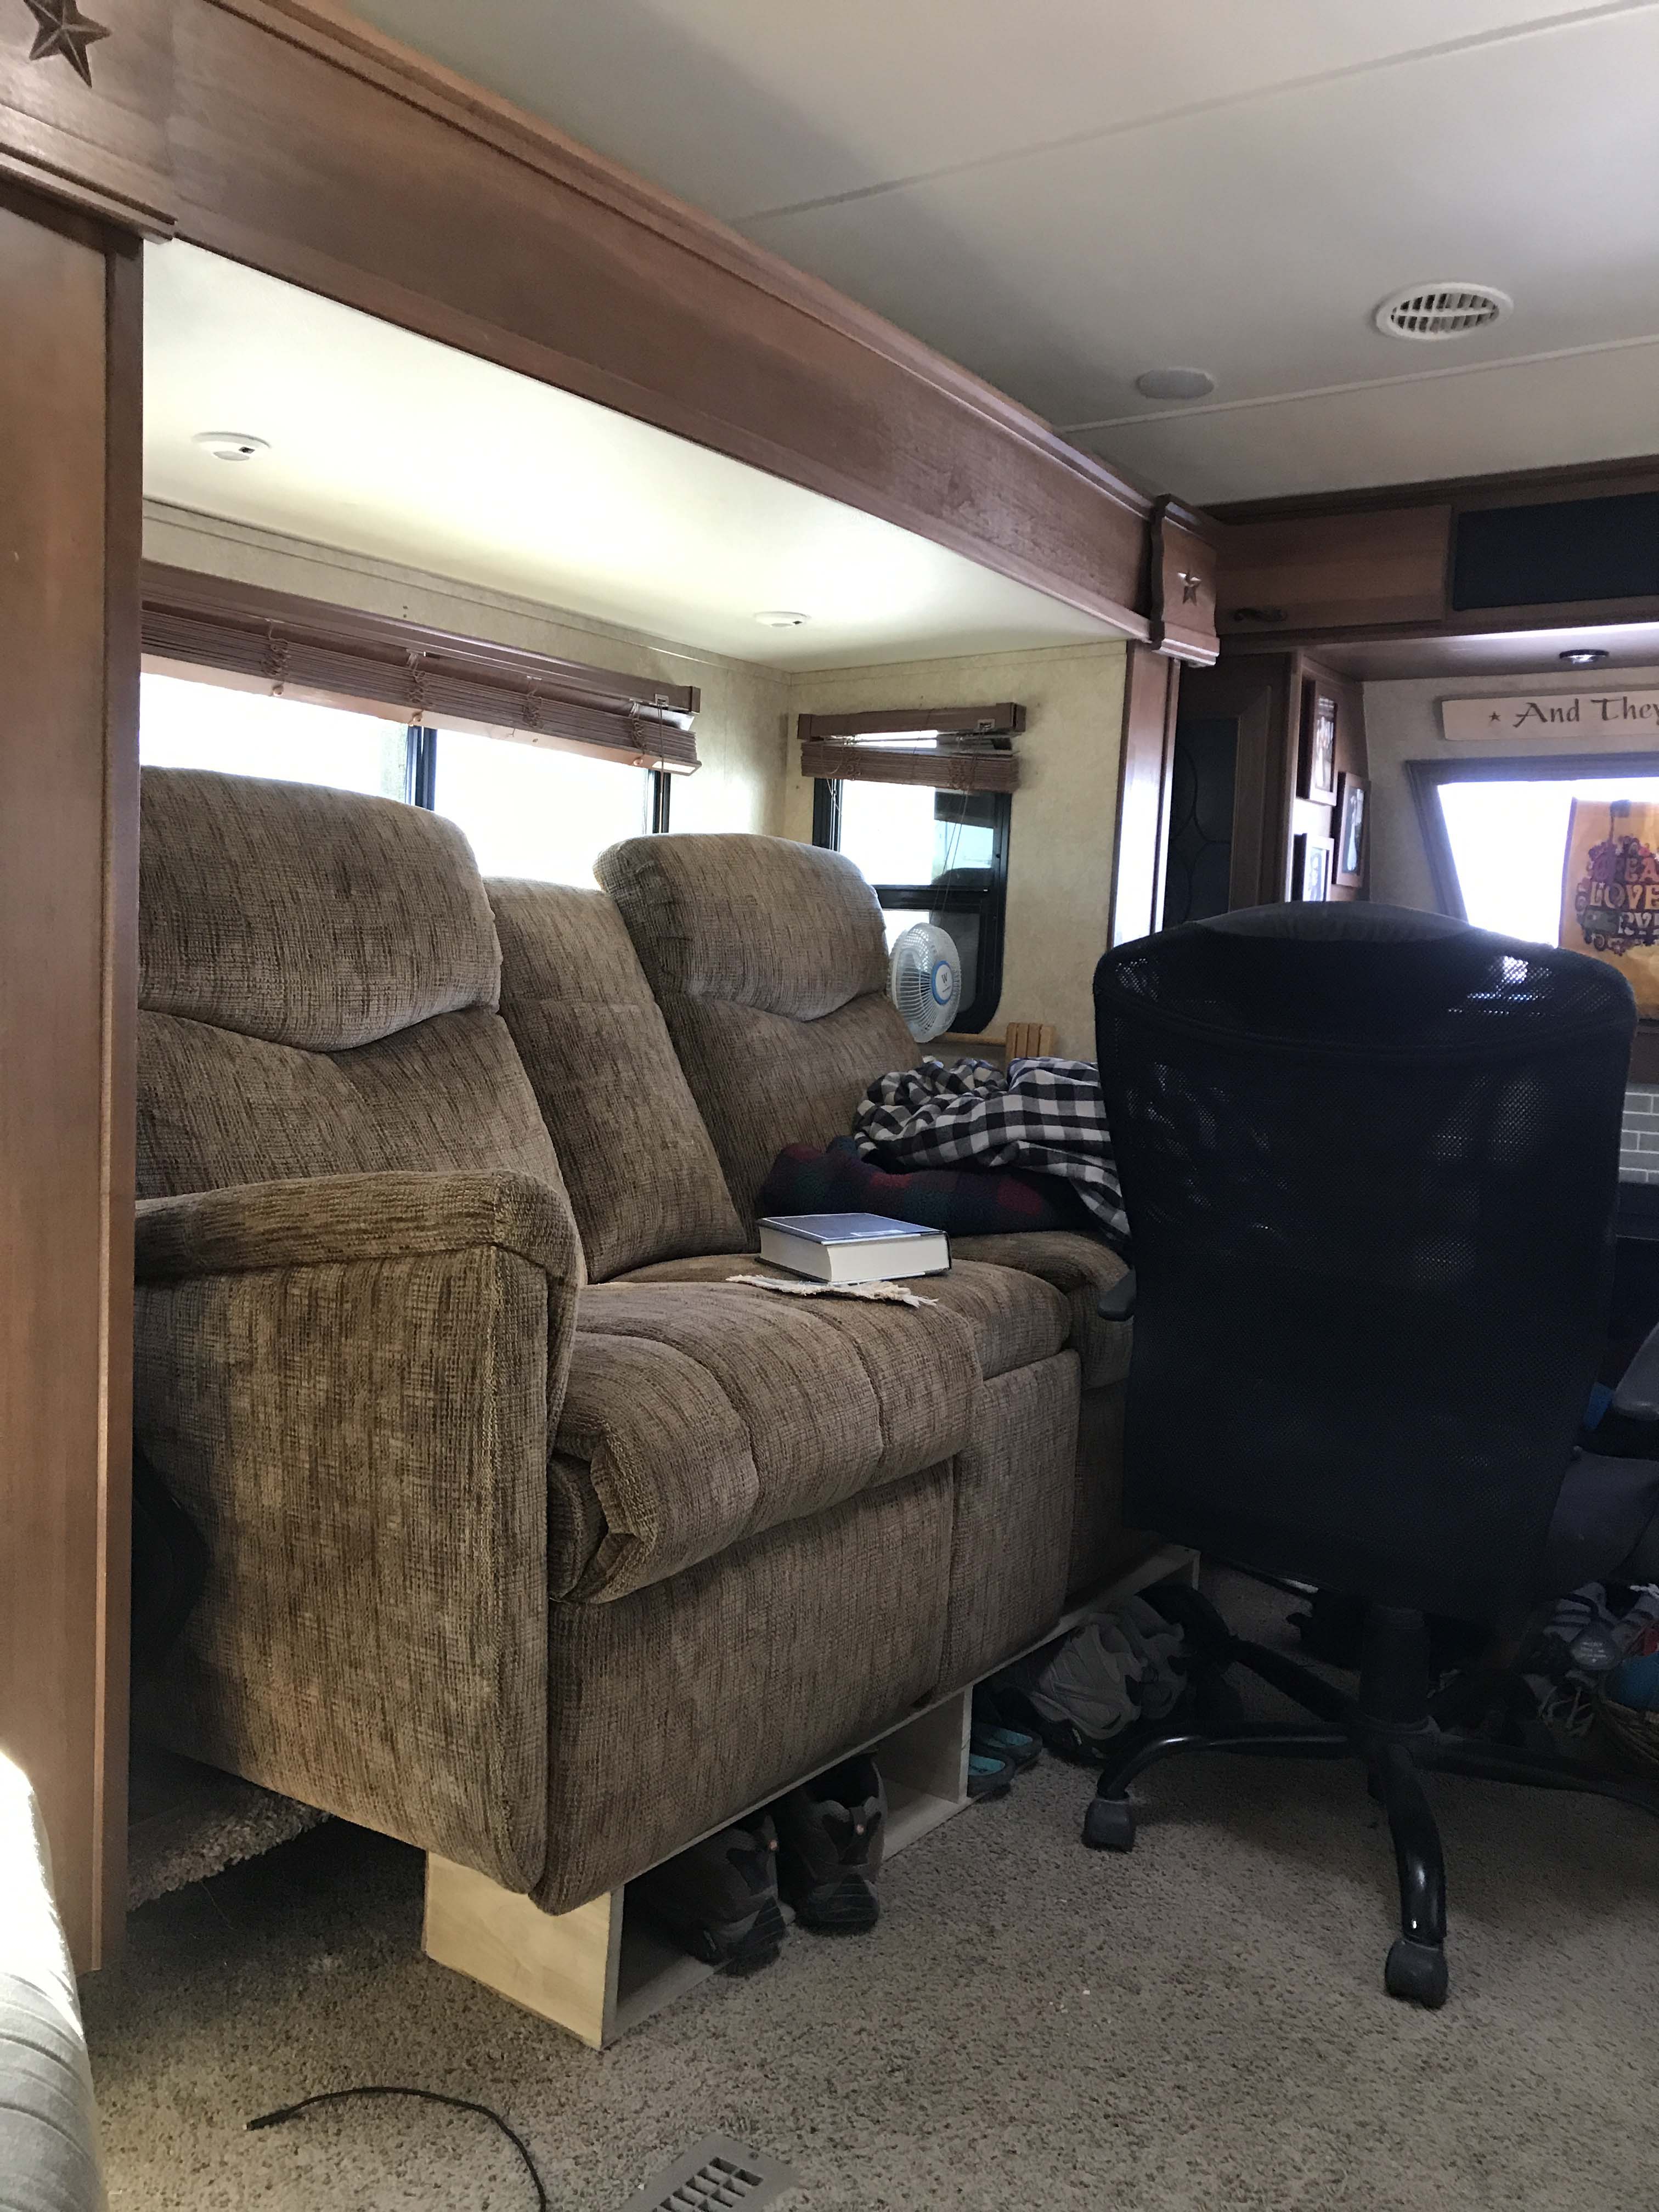
Unfortunately, things weren’t going to stay good because as soon as I came back from our walk and I started doing the inside I started having problems. First the computer was making a weird noise and when I tried to restart it I got a blue screen with lots of writing…never a good sign. Then I started to put the couch slide out and heard a “pop”, again, not a good sign, and it turned out the outside cable for the slide had snapped. Nothing I did, it just snapped from age and stress. Here’s the slide, half in and half out.
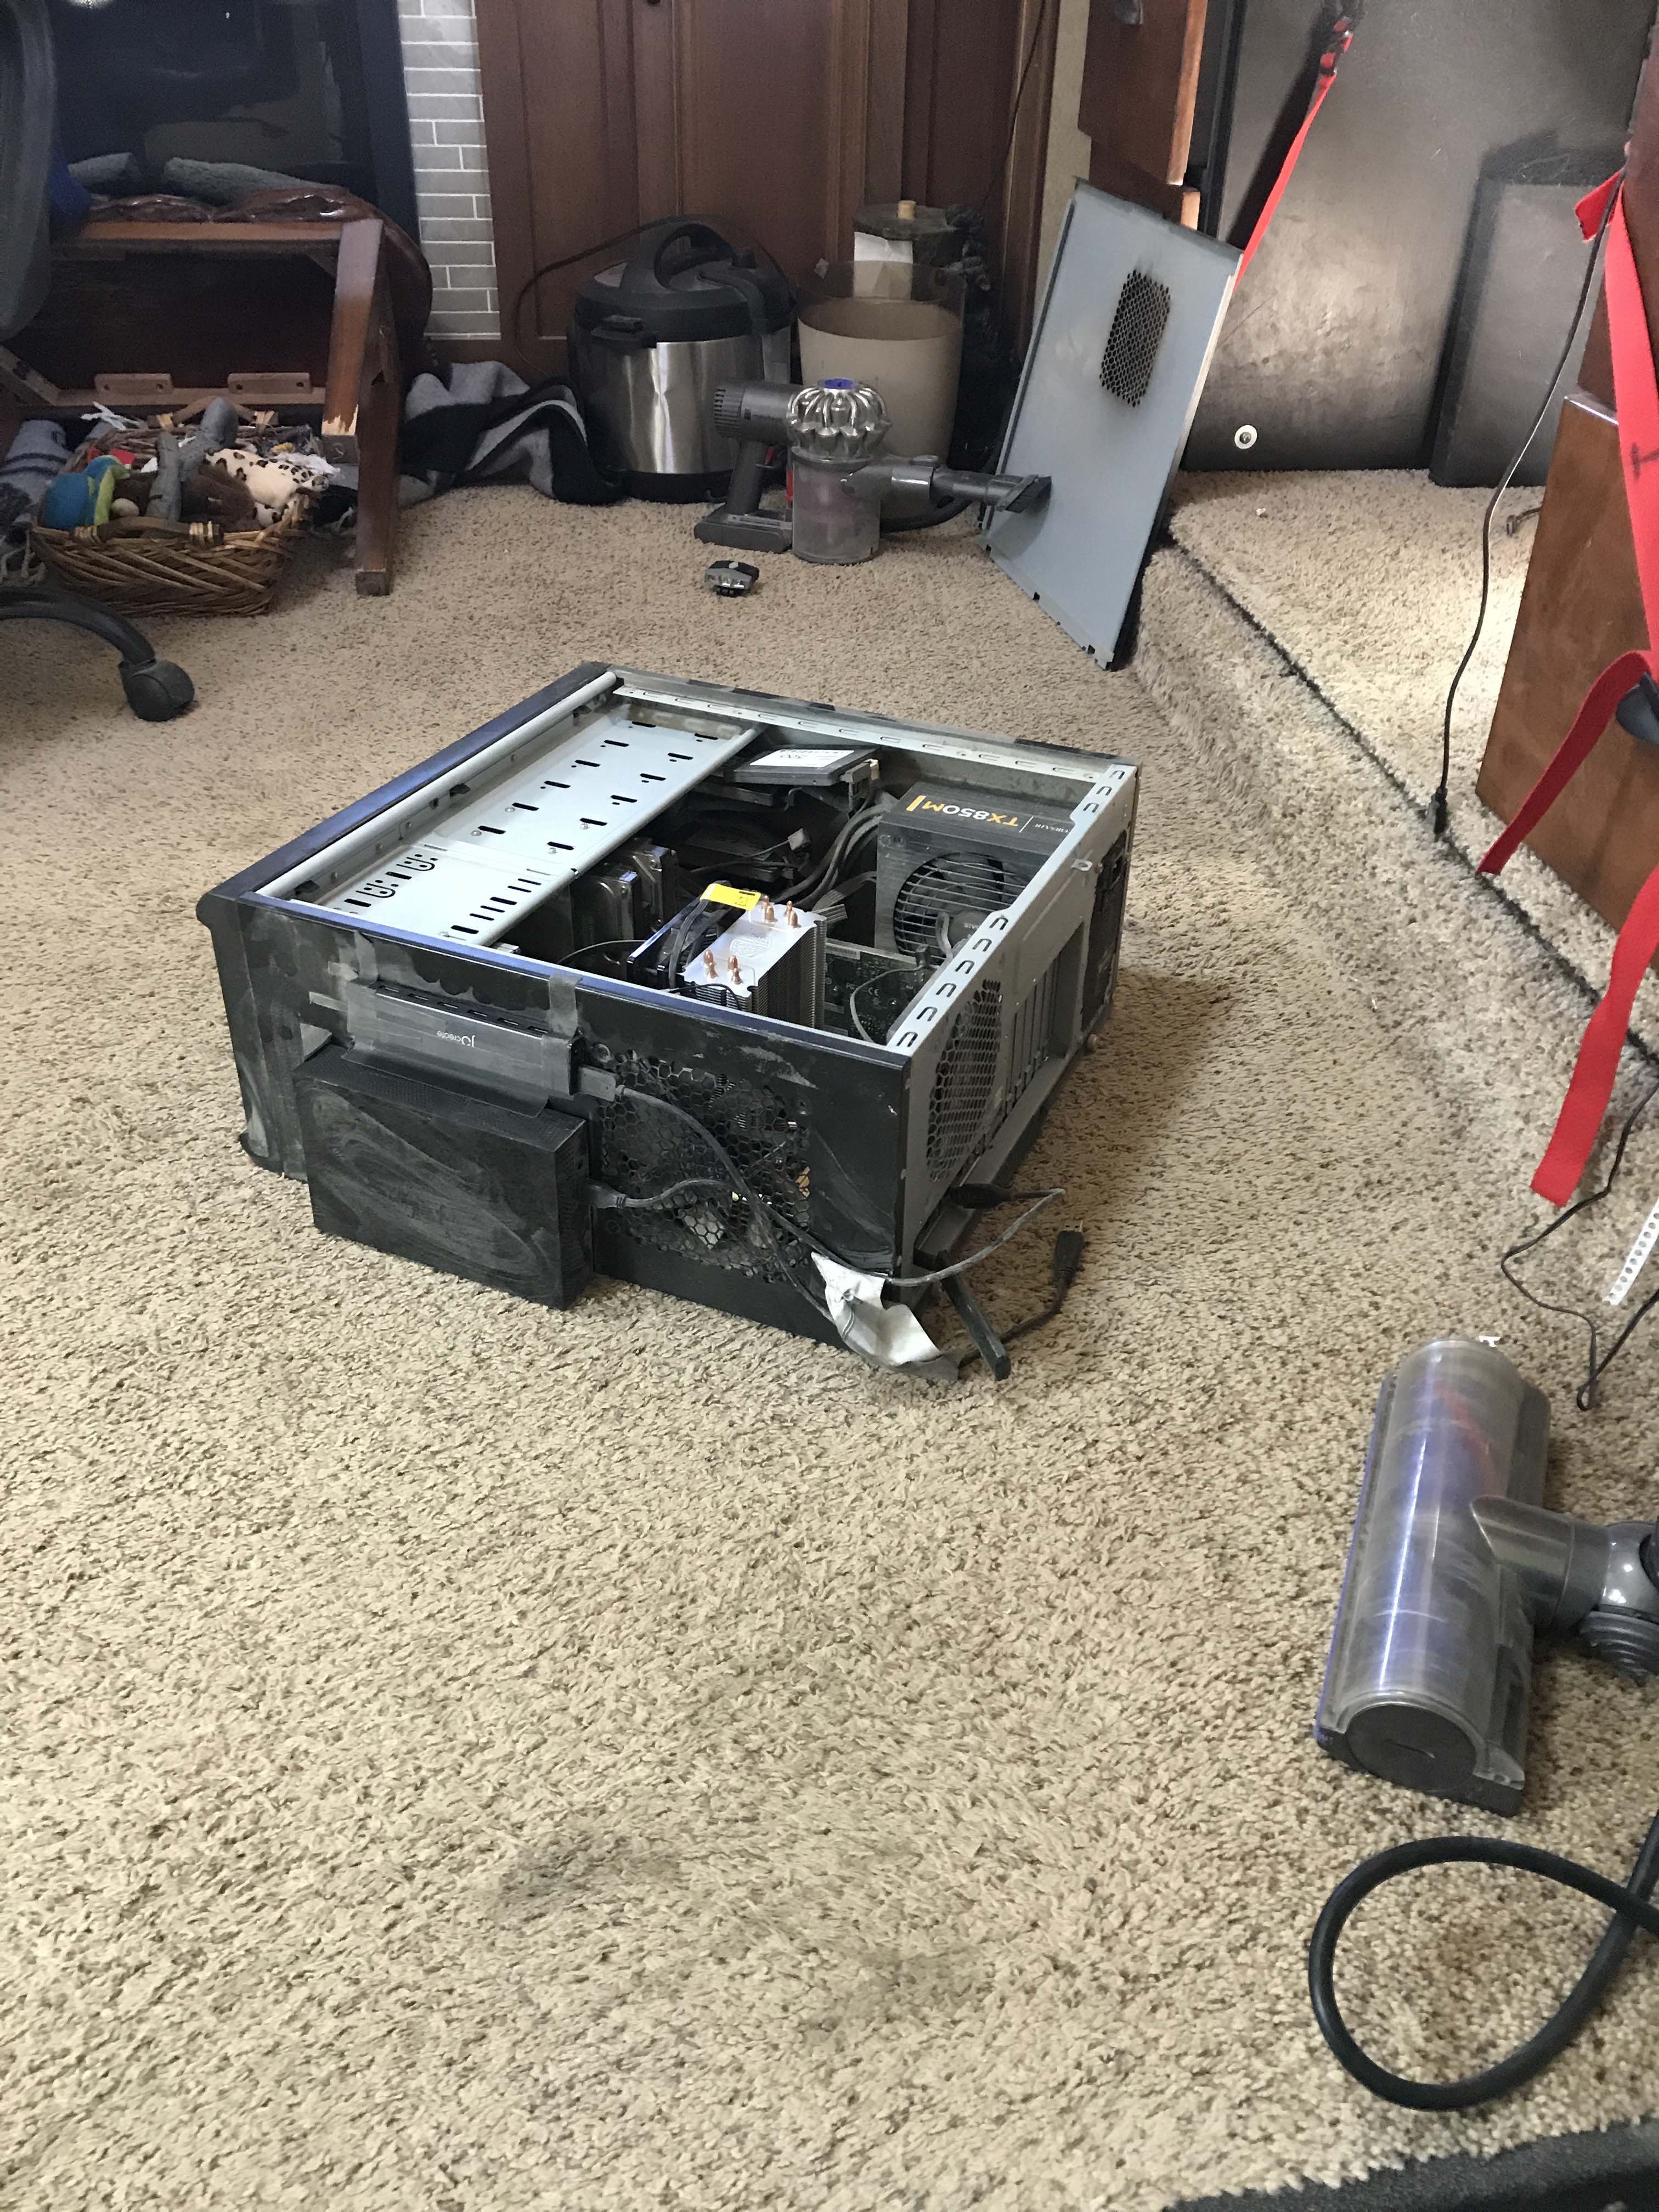
Lee came inside and I showed him what happened and then I just got really angry. I just walked out of the RV and sat in the truck for a while trying to sort through my emotions. I was angry because even though I know this sort of thing happens, it is not something I would ever want to deal with on my own. It brought back all my feelings from when he had his heart attack, but this time I didn’t have other stuff going on. When I walked back inside to talk to him, he was in the process of cleaning out the computer. It turned out it was just an auxiliary exhaust fan with a bearing that was going bad, and it booted up just fine. When he built that computer he definitely overbuilt it, because in addition to the fans for the power supply, the CPU and the video card, there are two fresh air intake fans, and two exhaust fans, so we can afford to lose one for a little while.
The slide was another story, but he contacted Danny who used to work for Open Range, and who fixed a slide for us last time, and also replaced our slide floor last spring. Lee had purchased two spares of the slide cable, and once he had chatted with Danny to make sure he was comfortable doing it he started to fix it. I’ll let him explain exactly what he did, but he was able to temporarily fix it.
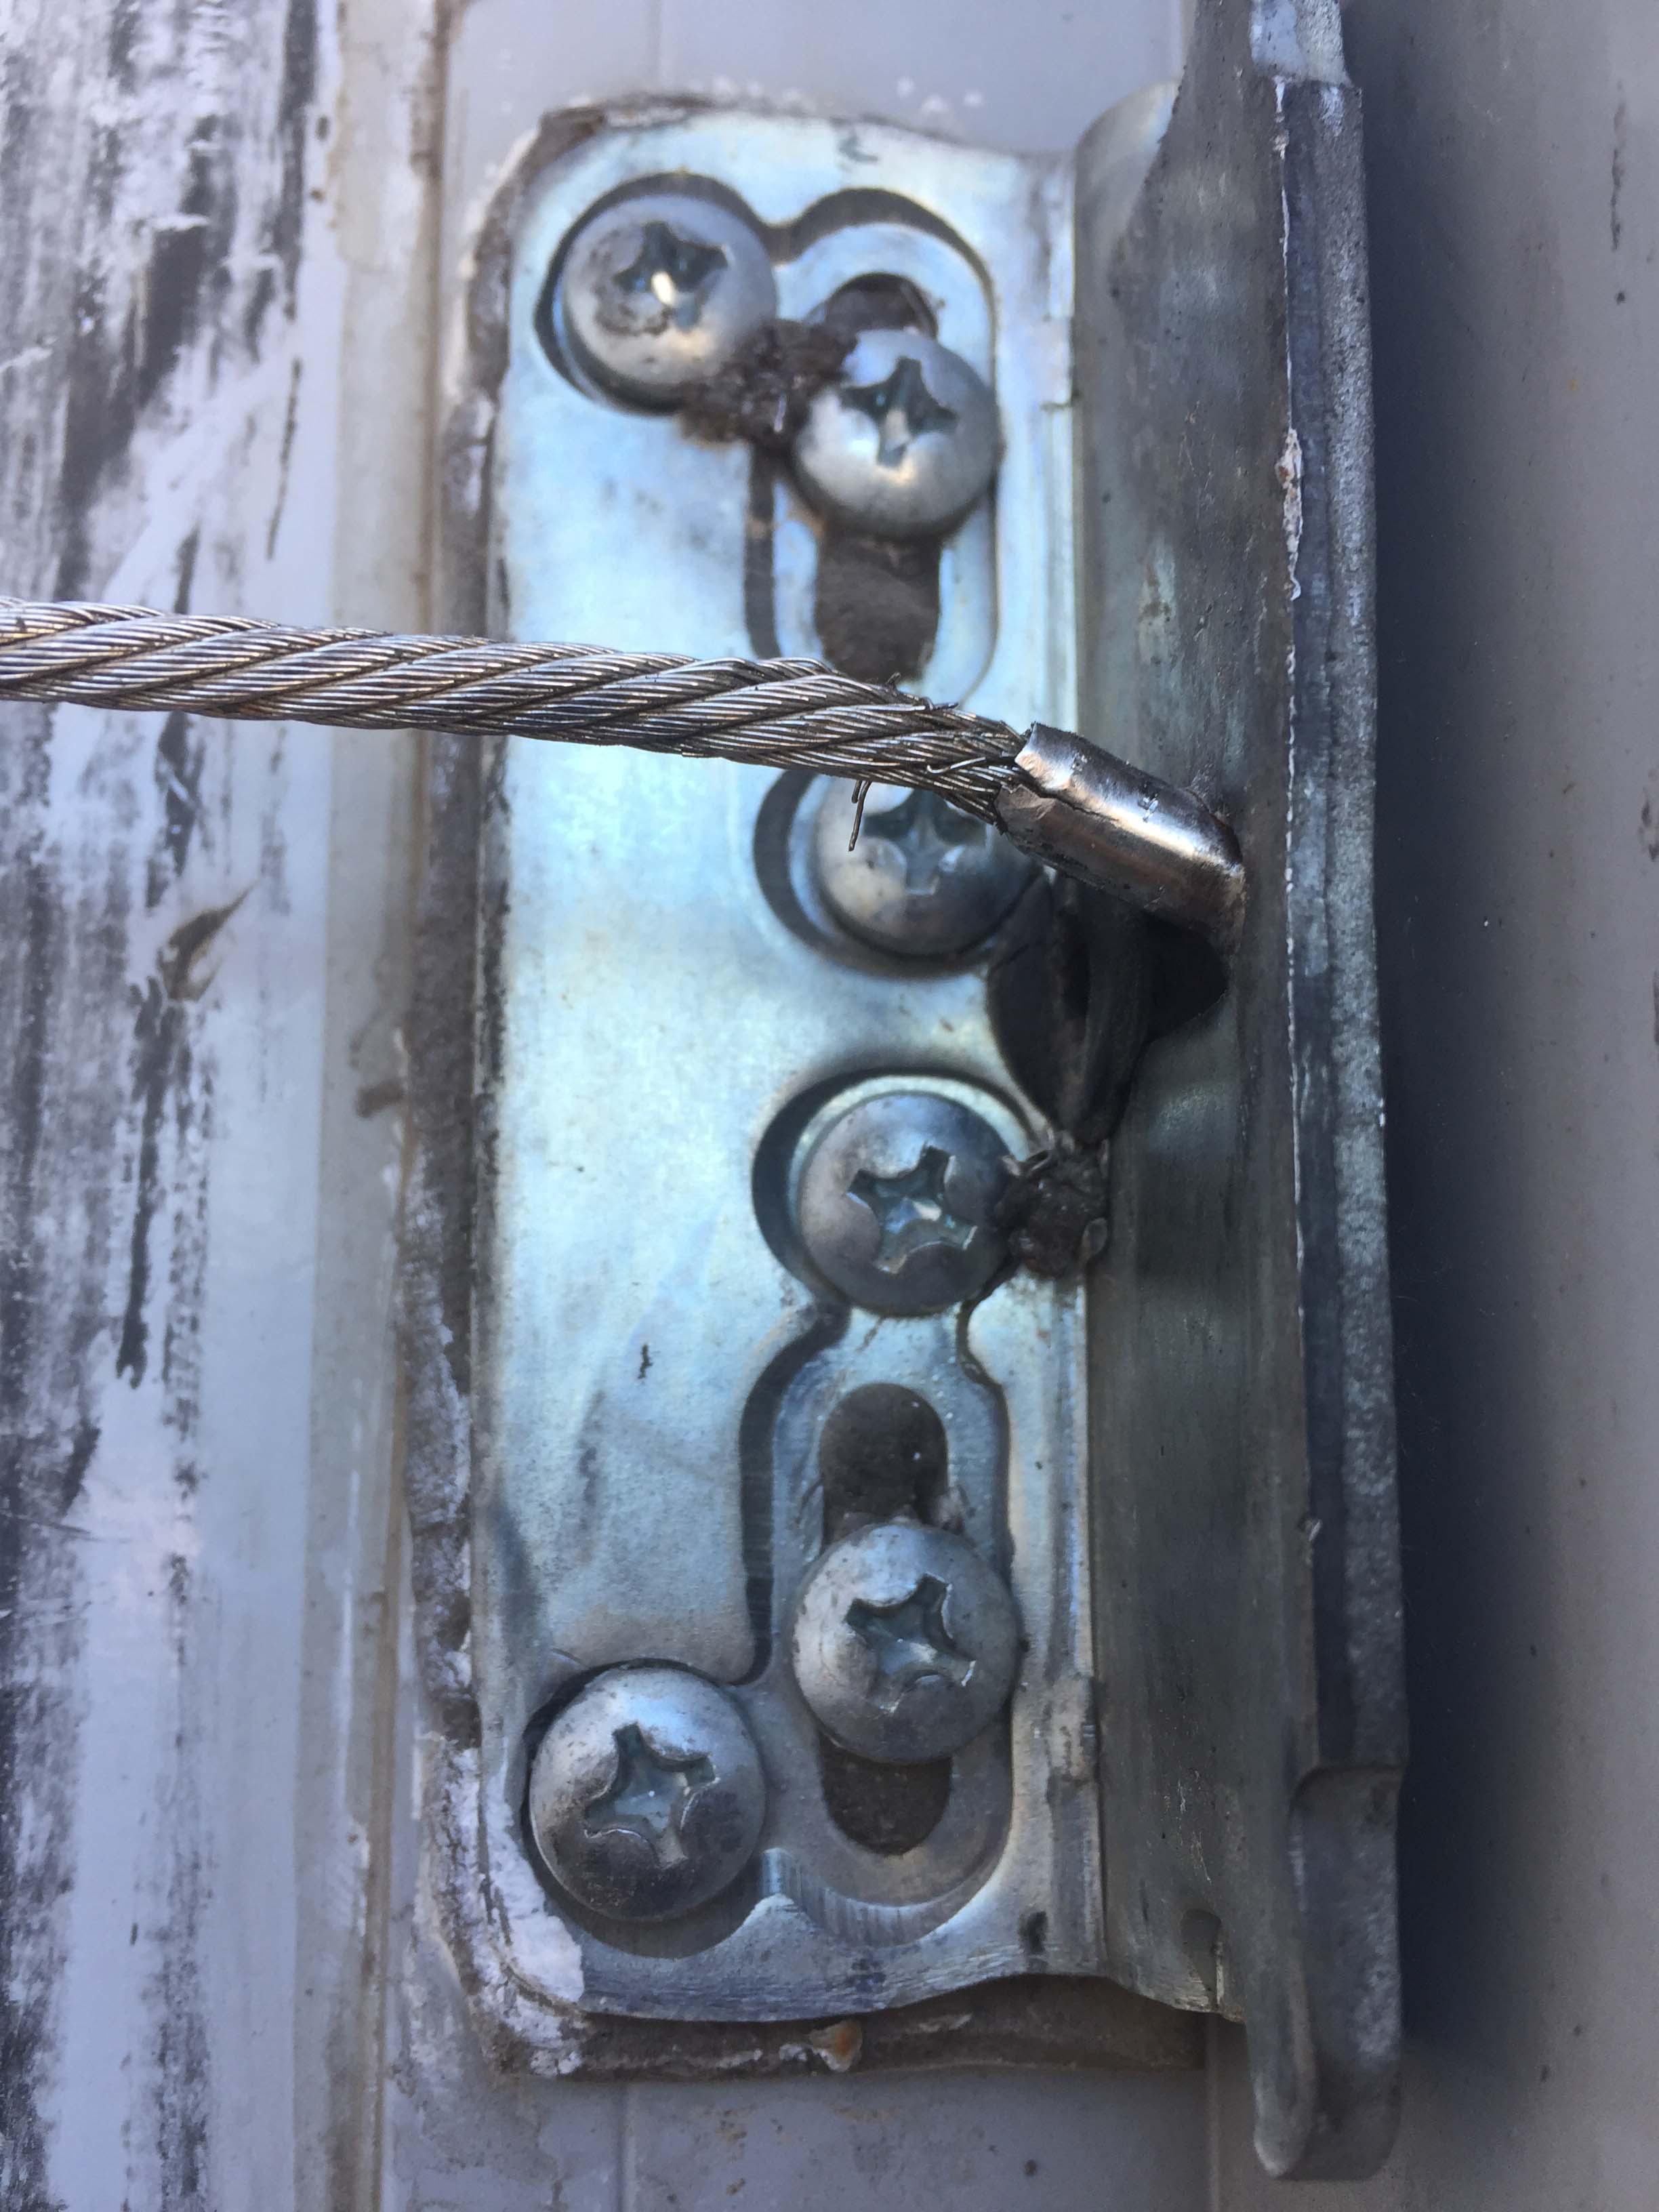
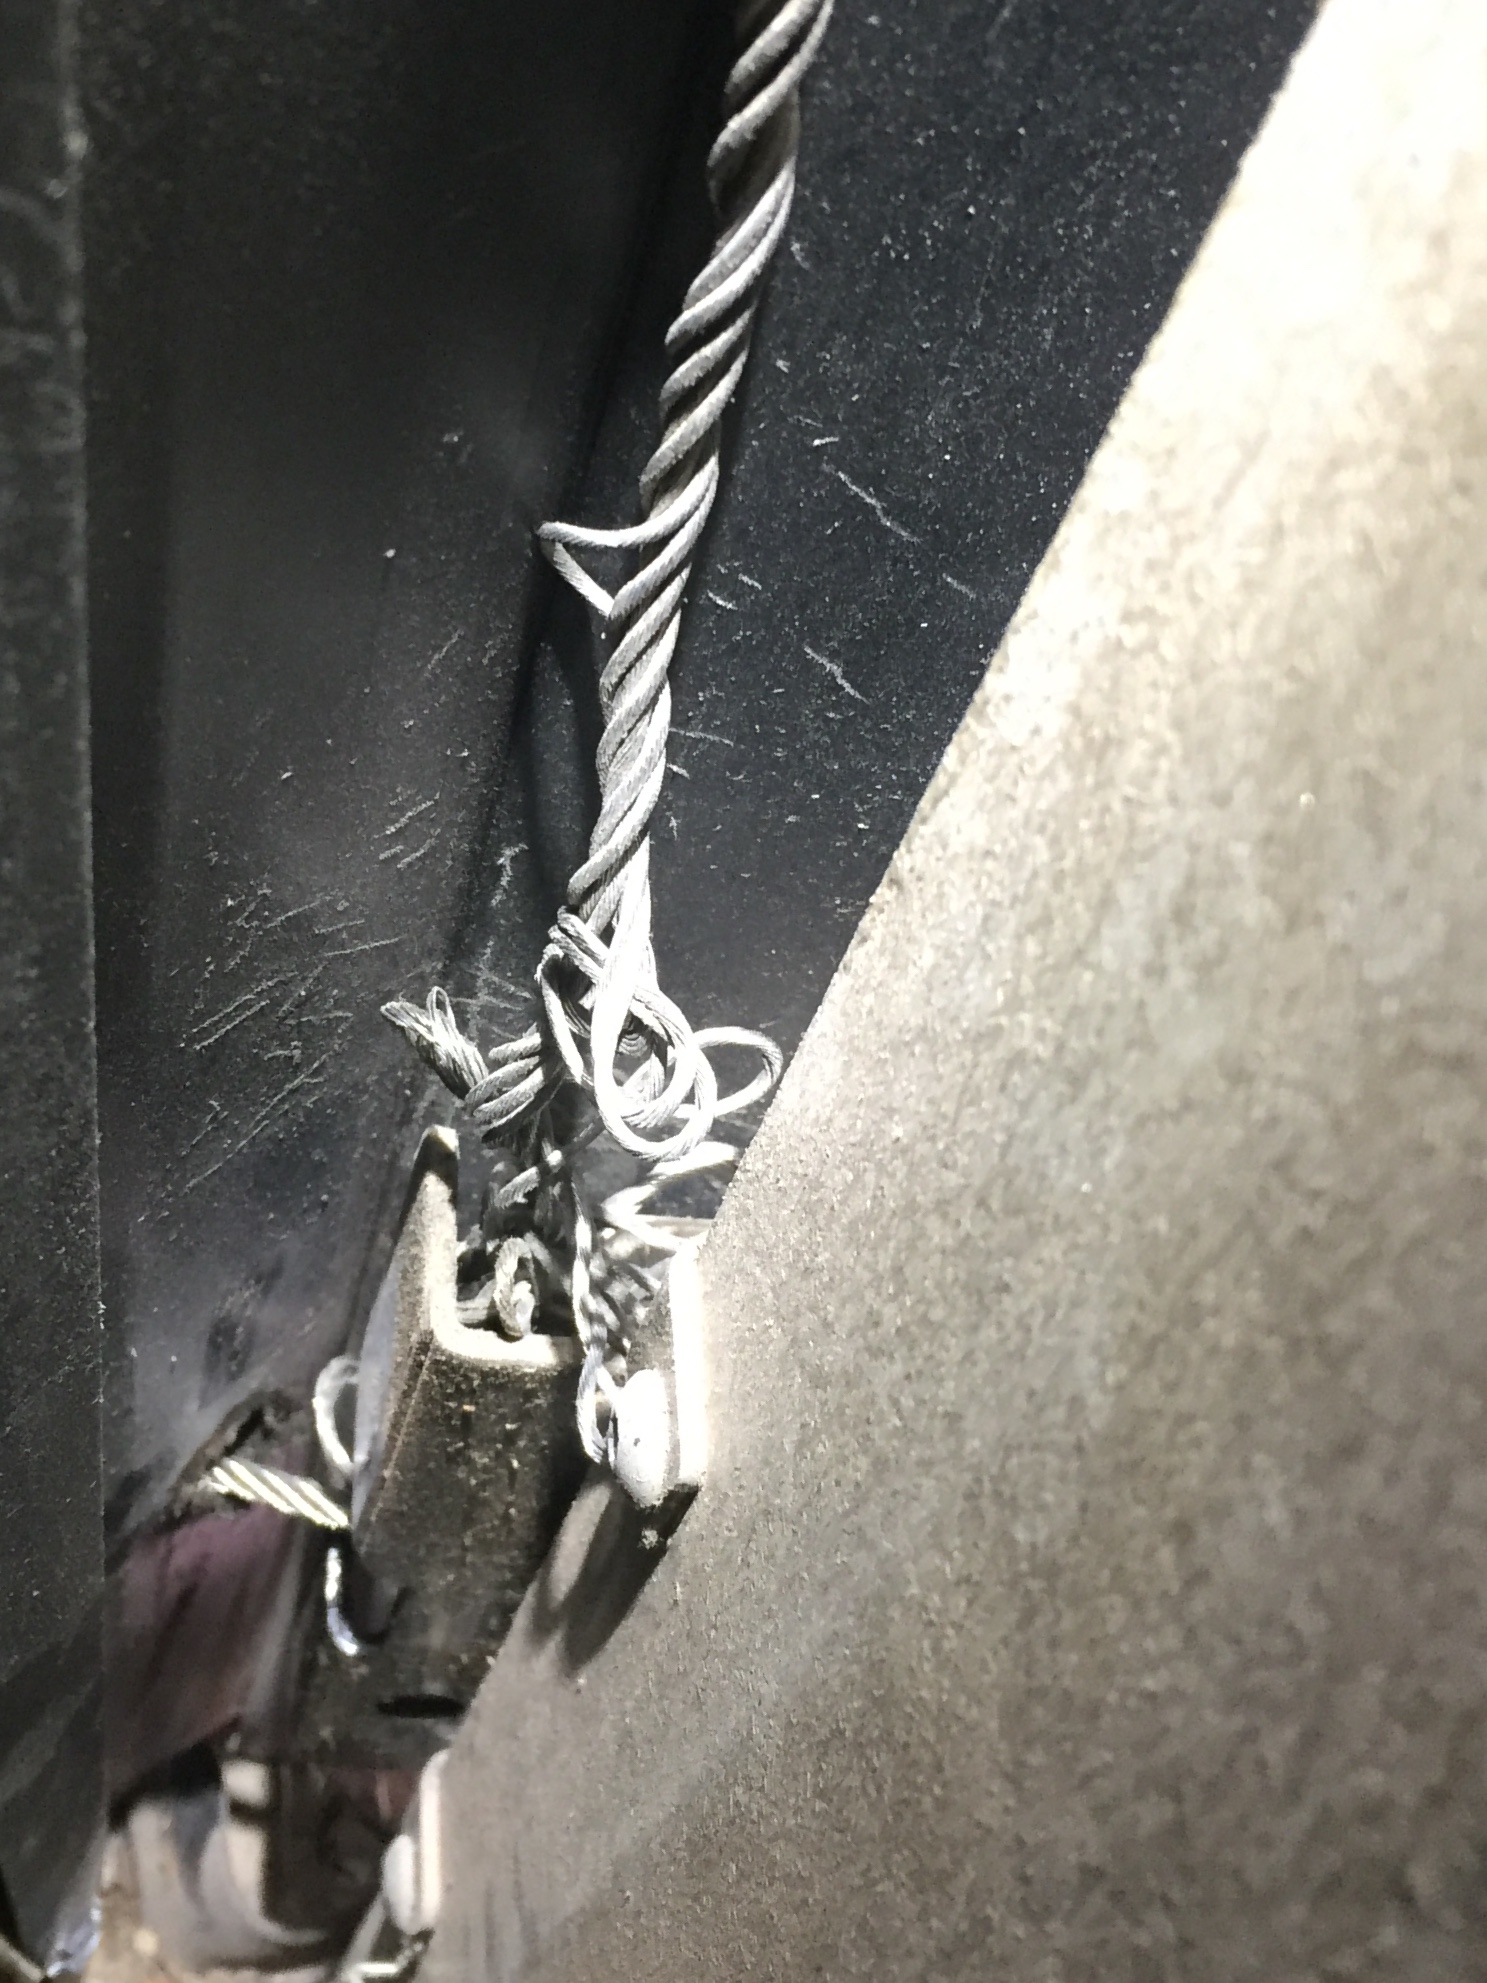
(The cables terminate at brackets on the slides, one in each corner for both in and out, so 8 brackets in all. Here’s an example of what one looks like when it’s stressing and “getting ready to break”. You can see the crack in the termination and the cable starting to let go. This happens because the cables stretch over time and use and if they get too loose, the end can sort of get cockeyed instead of being straight and true. Then when you bring the slide in the tension is at an angle, and over time it just beats up the termination and eventually it fails. There is an improved bracket which dealers are supposed to treat like a recall, but of course we were never contacted about that. If you have cable slides, check these terminations from time to time, and make sure they are seated properly, and the tension is right, or have it adjusted by a tech. Or replace the brackets with the new style that helps prevent this condition. – Lee)
Of course, when the cable breaks…..
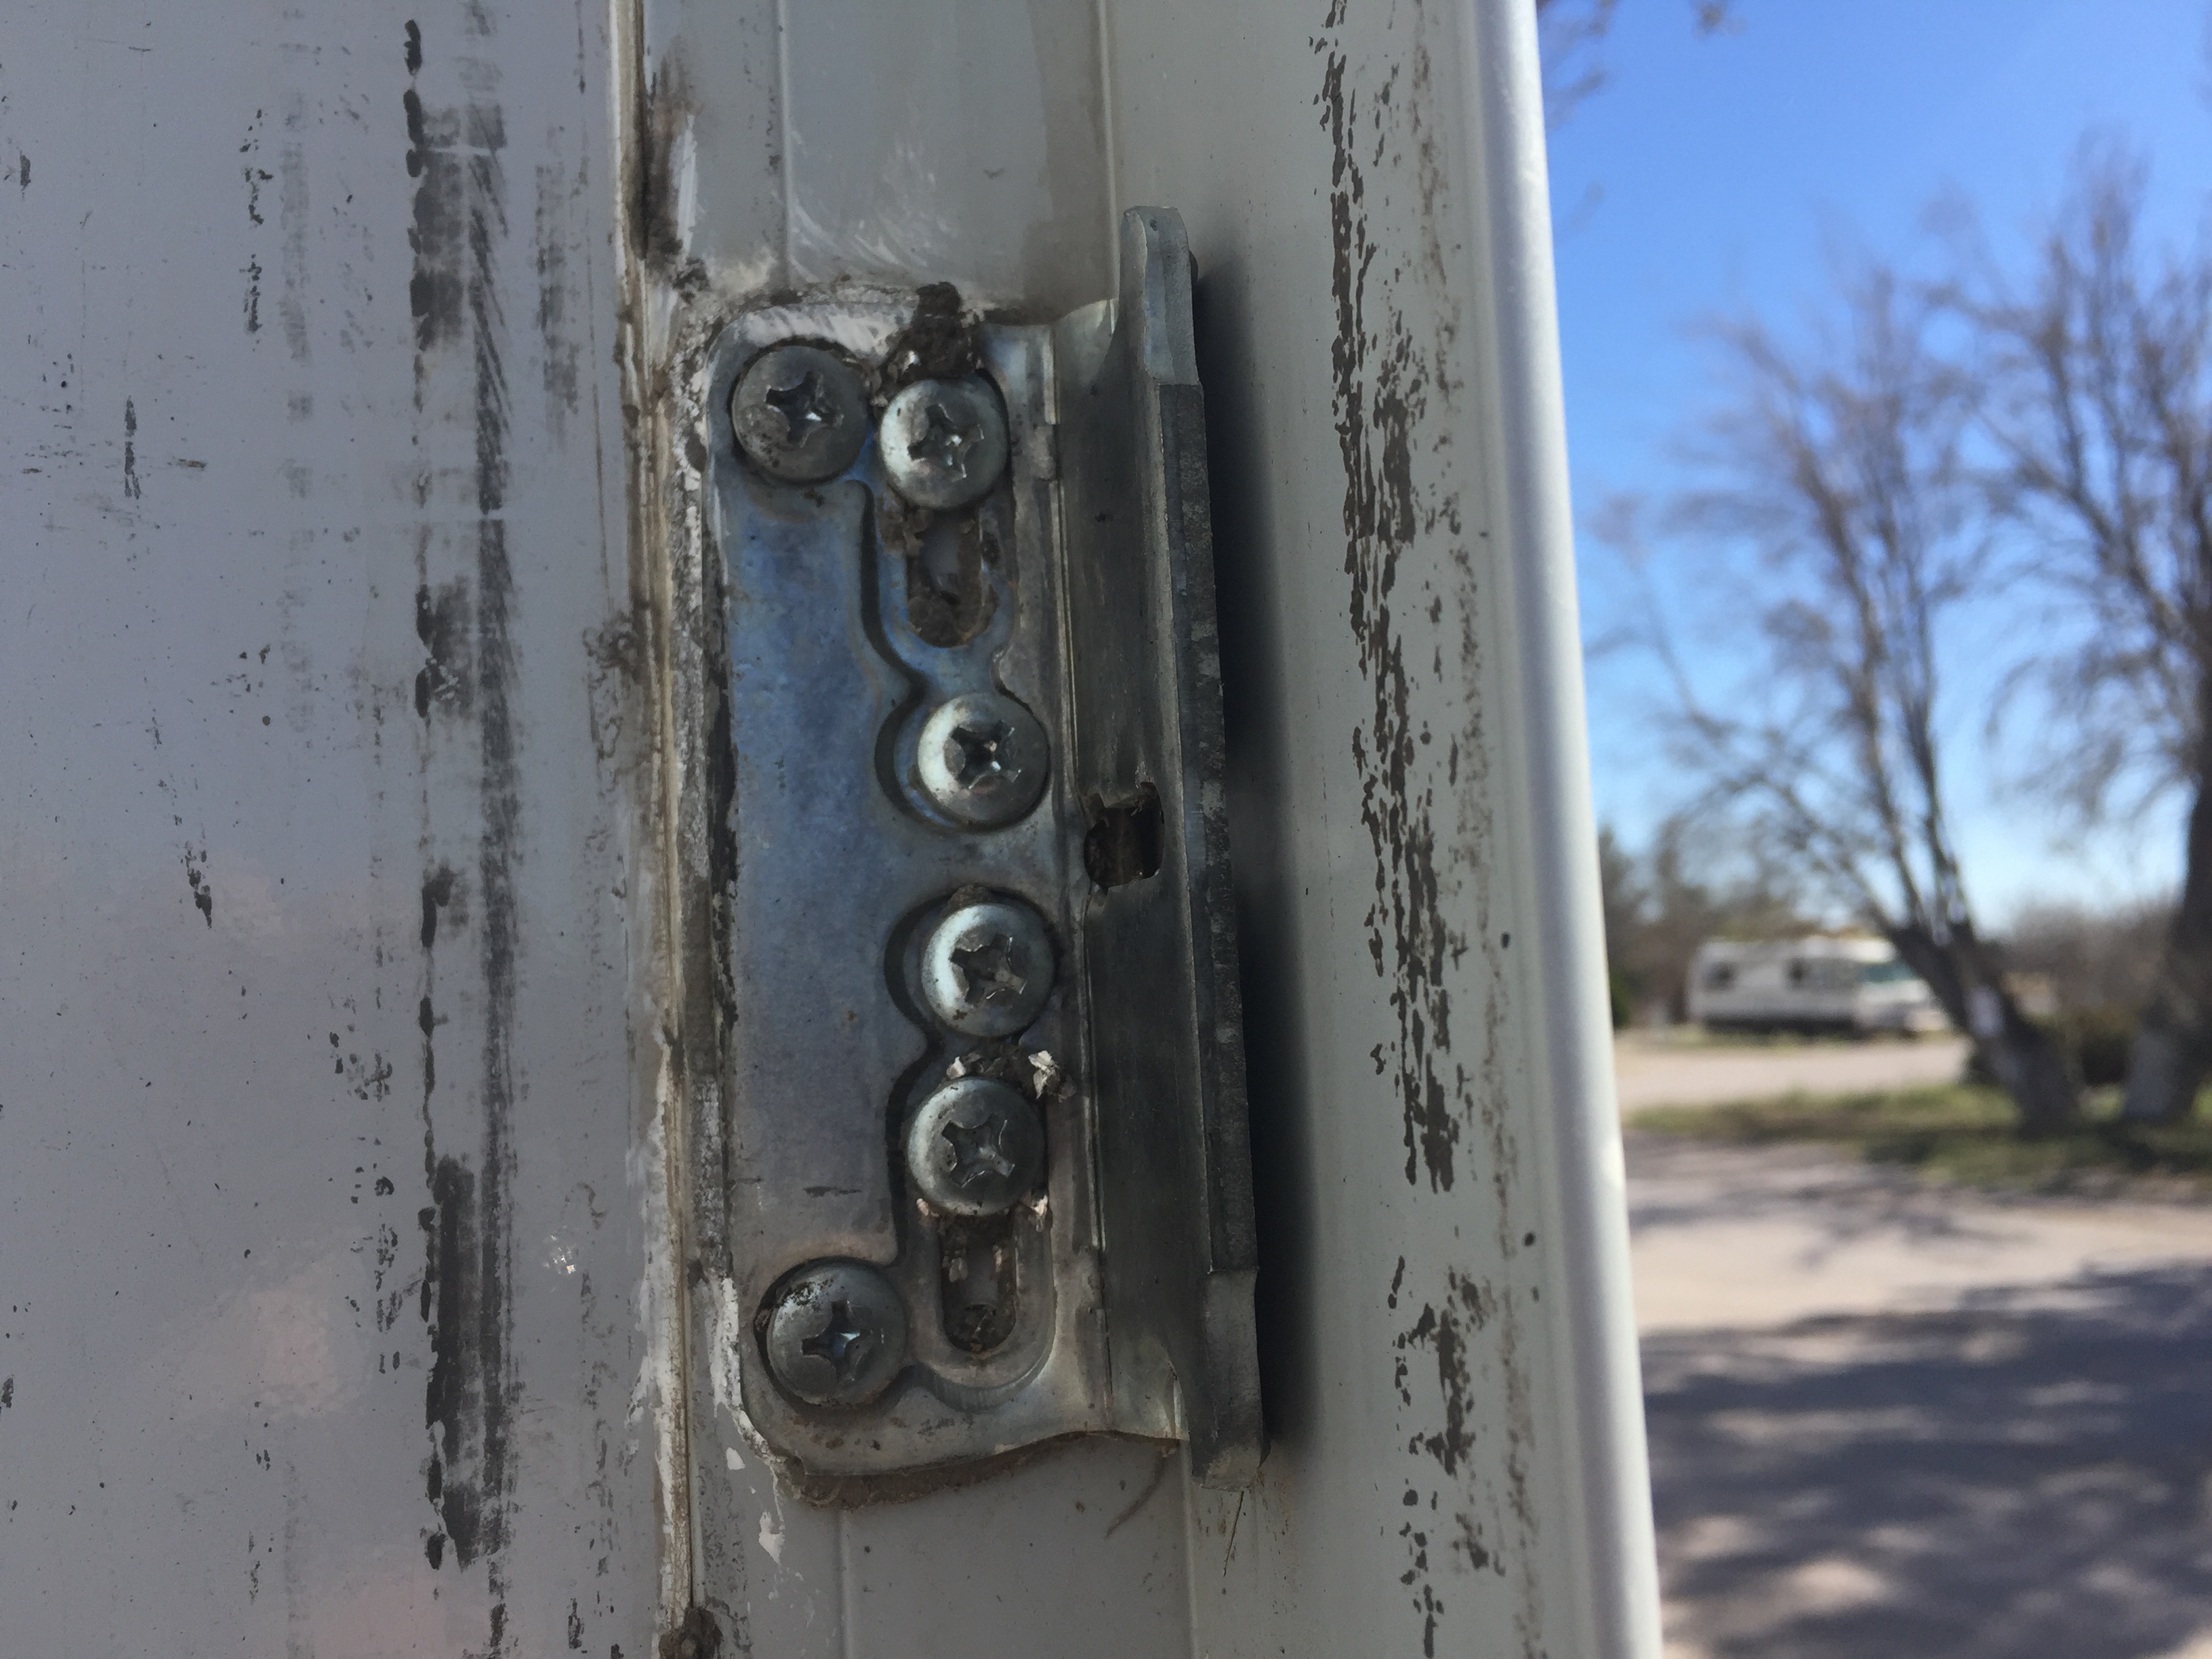
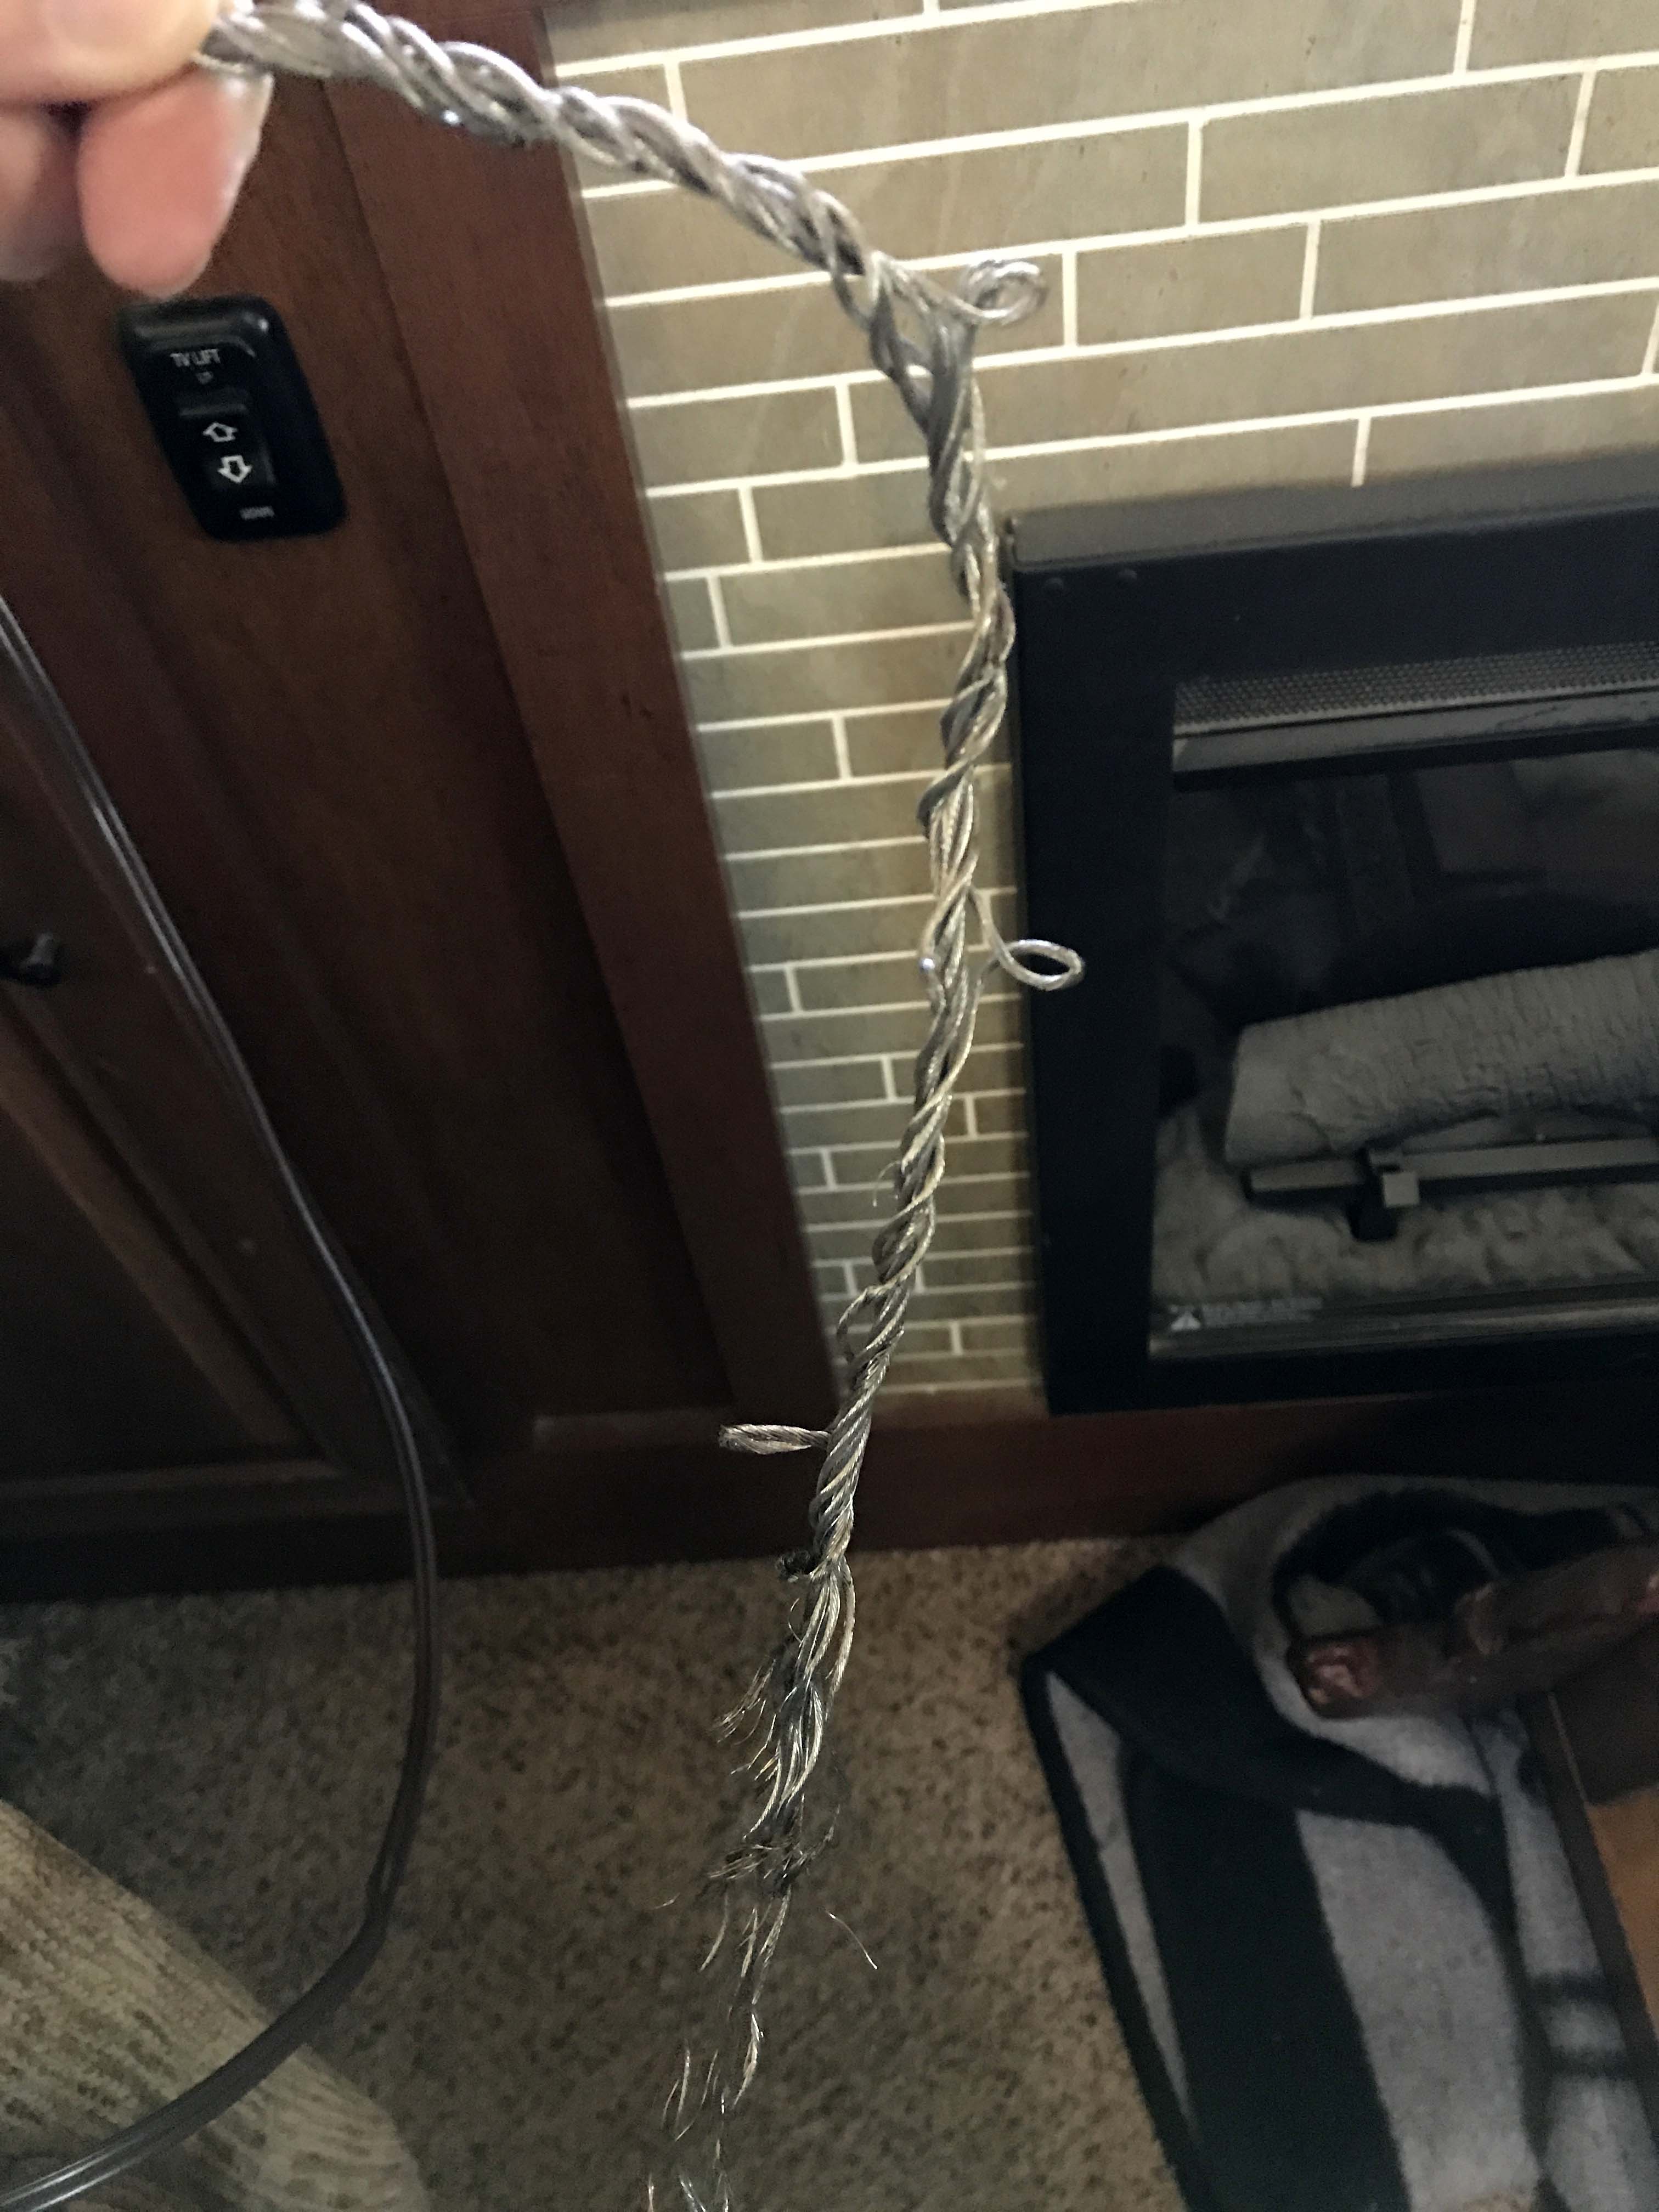
(This is what the cable looks like once it snaps. The good news is it is usually POSSIBLE to still run a slide in and out with just three cables, if you pull out the broken cable so it doesn’t get wrapped around the pulley. Just go slow and watch everything very carefully while running it in or out and STOP if you hear any unusual noise or see anything that looks wrong. The motor pulls the four corners in or out all at the same time, and unless another cable is seriously out of adjustment, it will work with three corners. If it starts to move at any angle it can bind up and get stuck and/or break the shear pin in the gear box, which is a MUCH more expensive and difficult fix. Ask me how I know. – Lee)
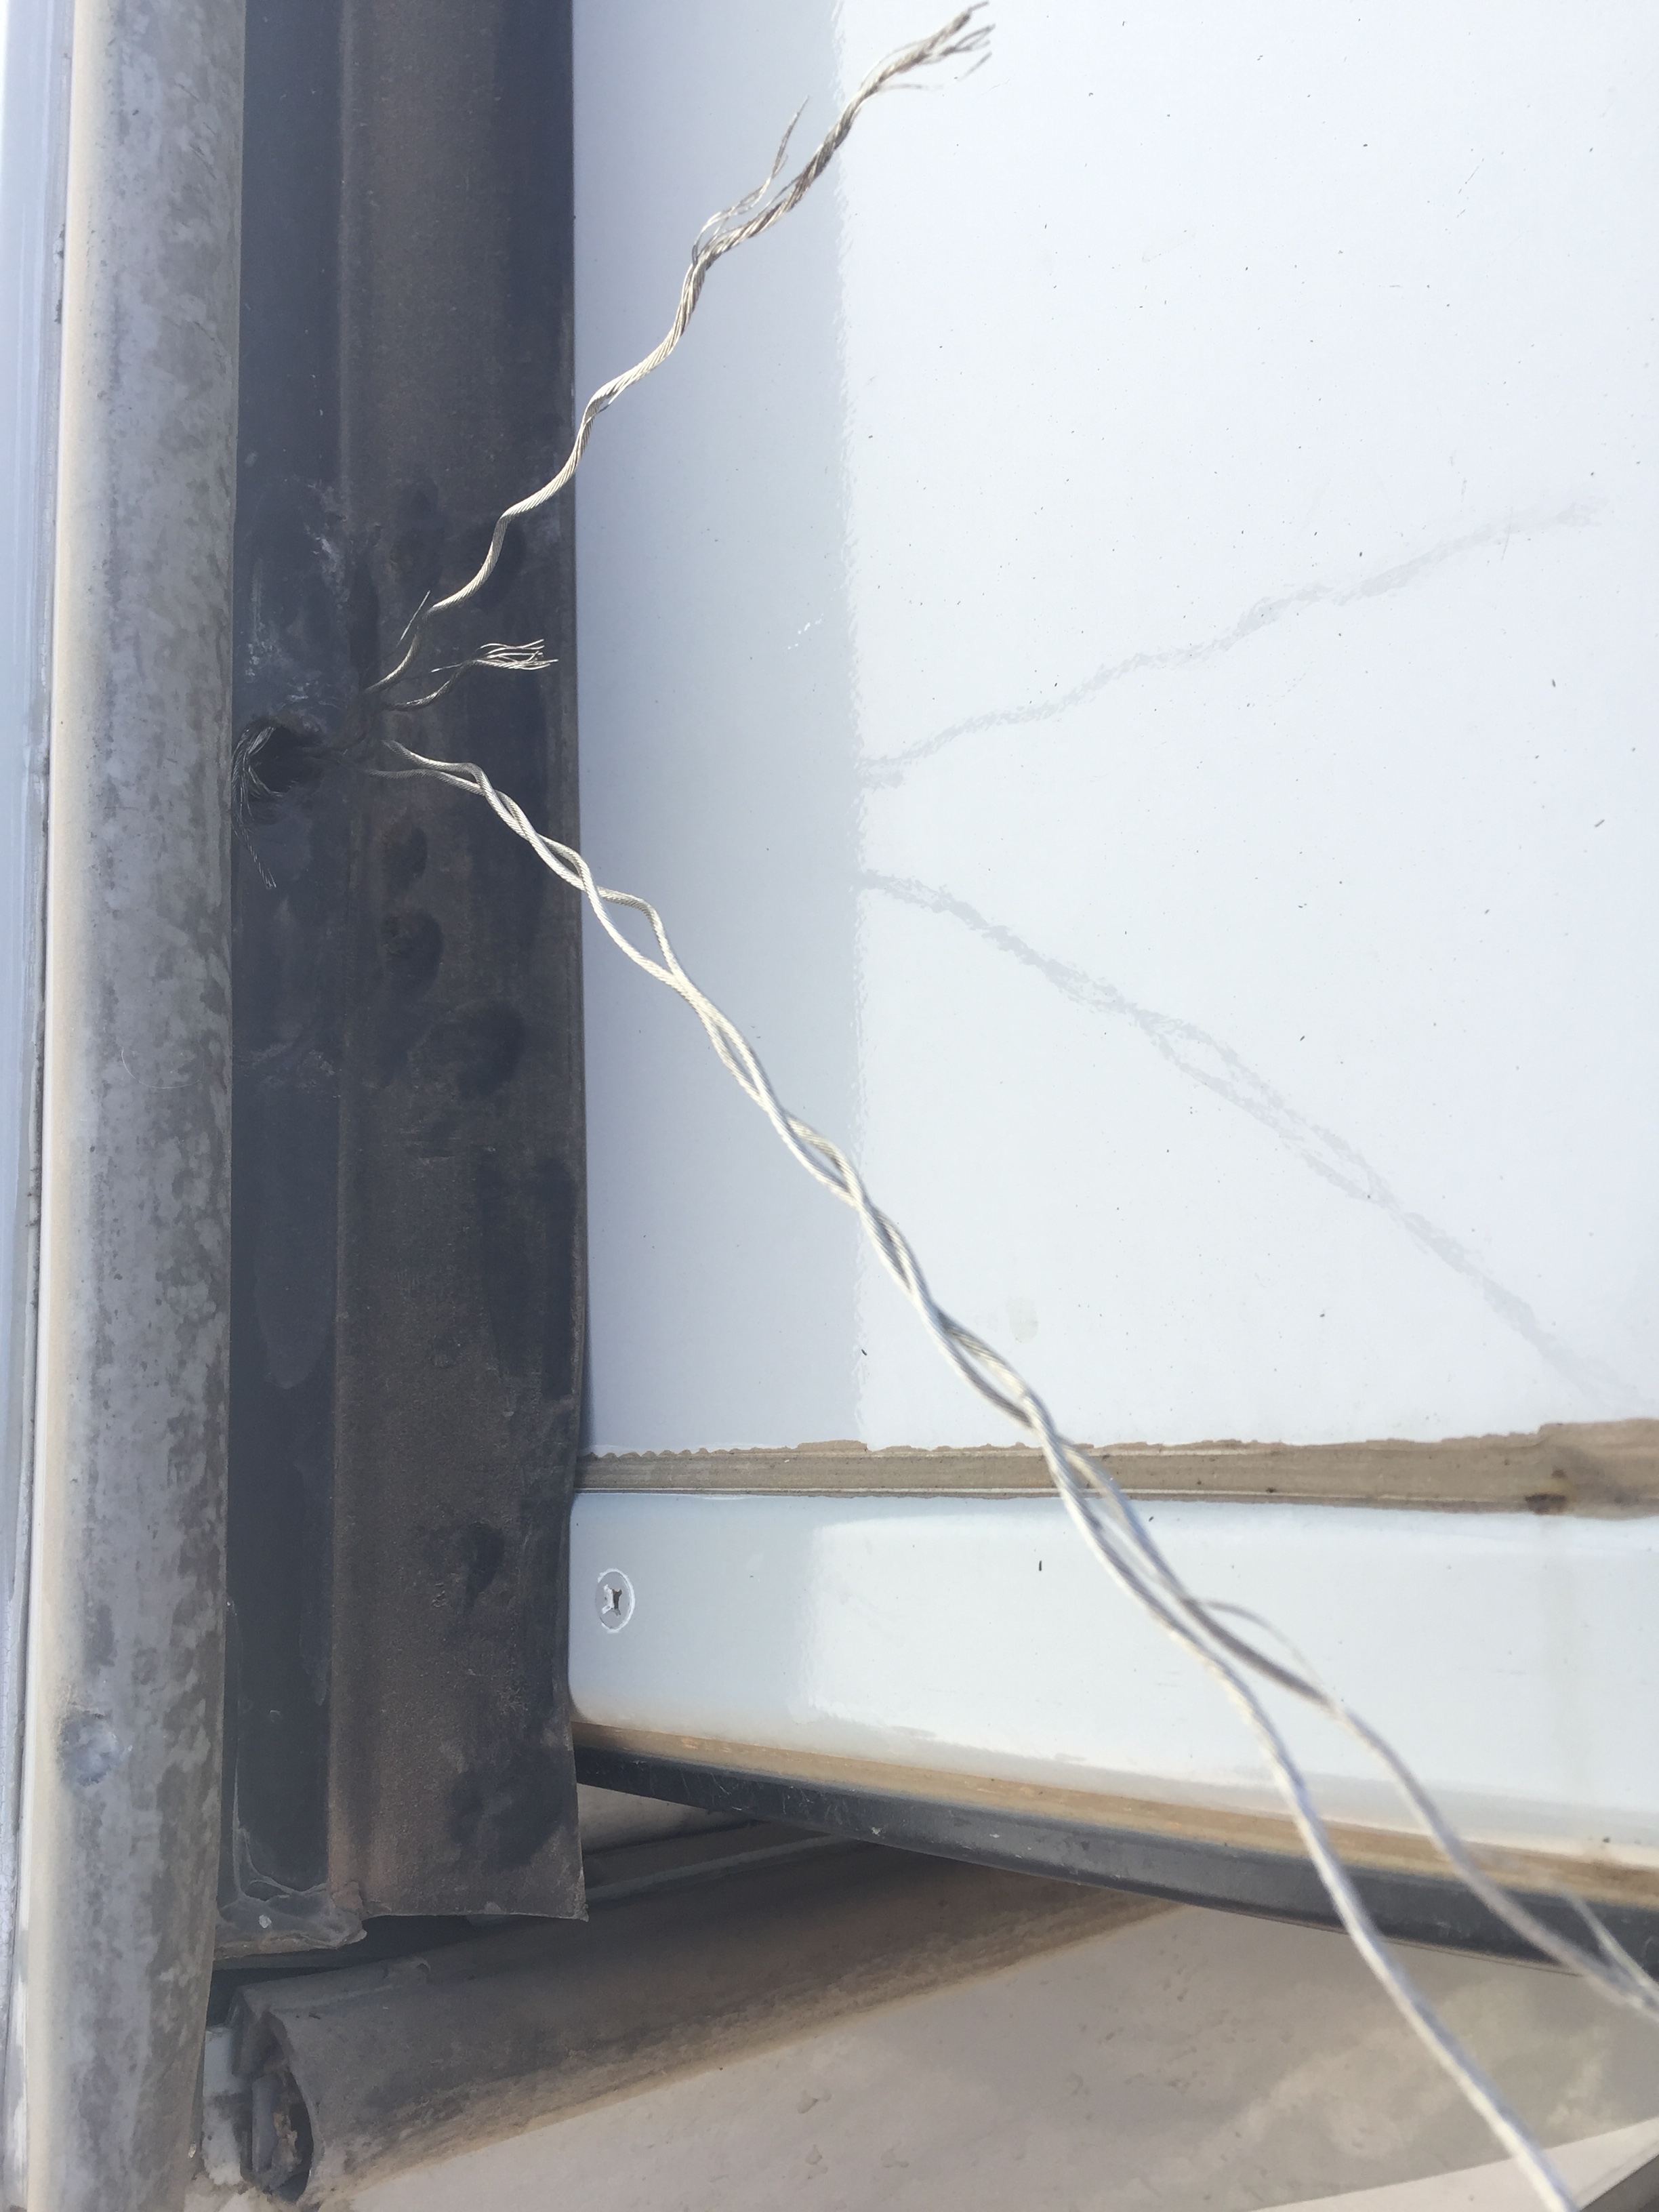
(And here’s what it looks like on the inside, where it comes through the wall, and wraps around the pulley. This is where it can get really ugly. The smaller strands can easily get wrapped around the small space between the pulley and the pulley housing, and can be very hard to remove. If you have a cable failure, STOP the motor IMMEDIATELY. That will almost guarantee you won’t have any wrapping. It’s MUCH easier to pull out the broken cable if it does’t wrap. Also, if the broken end is still accessible near the termination, it’s easier to trim away the loose strands to attach the new cable to “chase the old cable” back through the holes and pulleys. )
(This is what it looks like where the cables come together and bolt into the bracket for the chain. Each corner of the slide has a cable on the inside to pull it in, and a cable on the outside to pull it out. As you can see, each cable terminates in a threaded bolt that goes into the chain bracket, and allows for pretty fine adjustment on the tension. Each bracket also has adjustment where it bolts to the chain. )
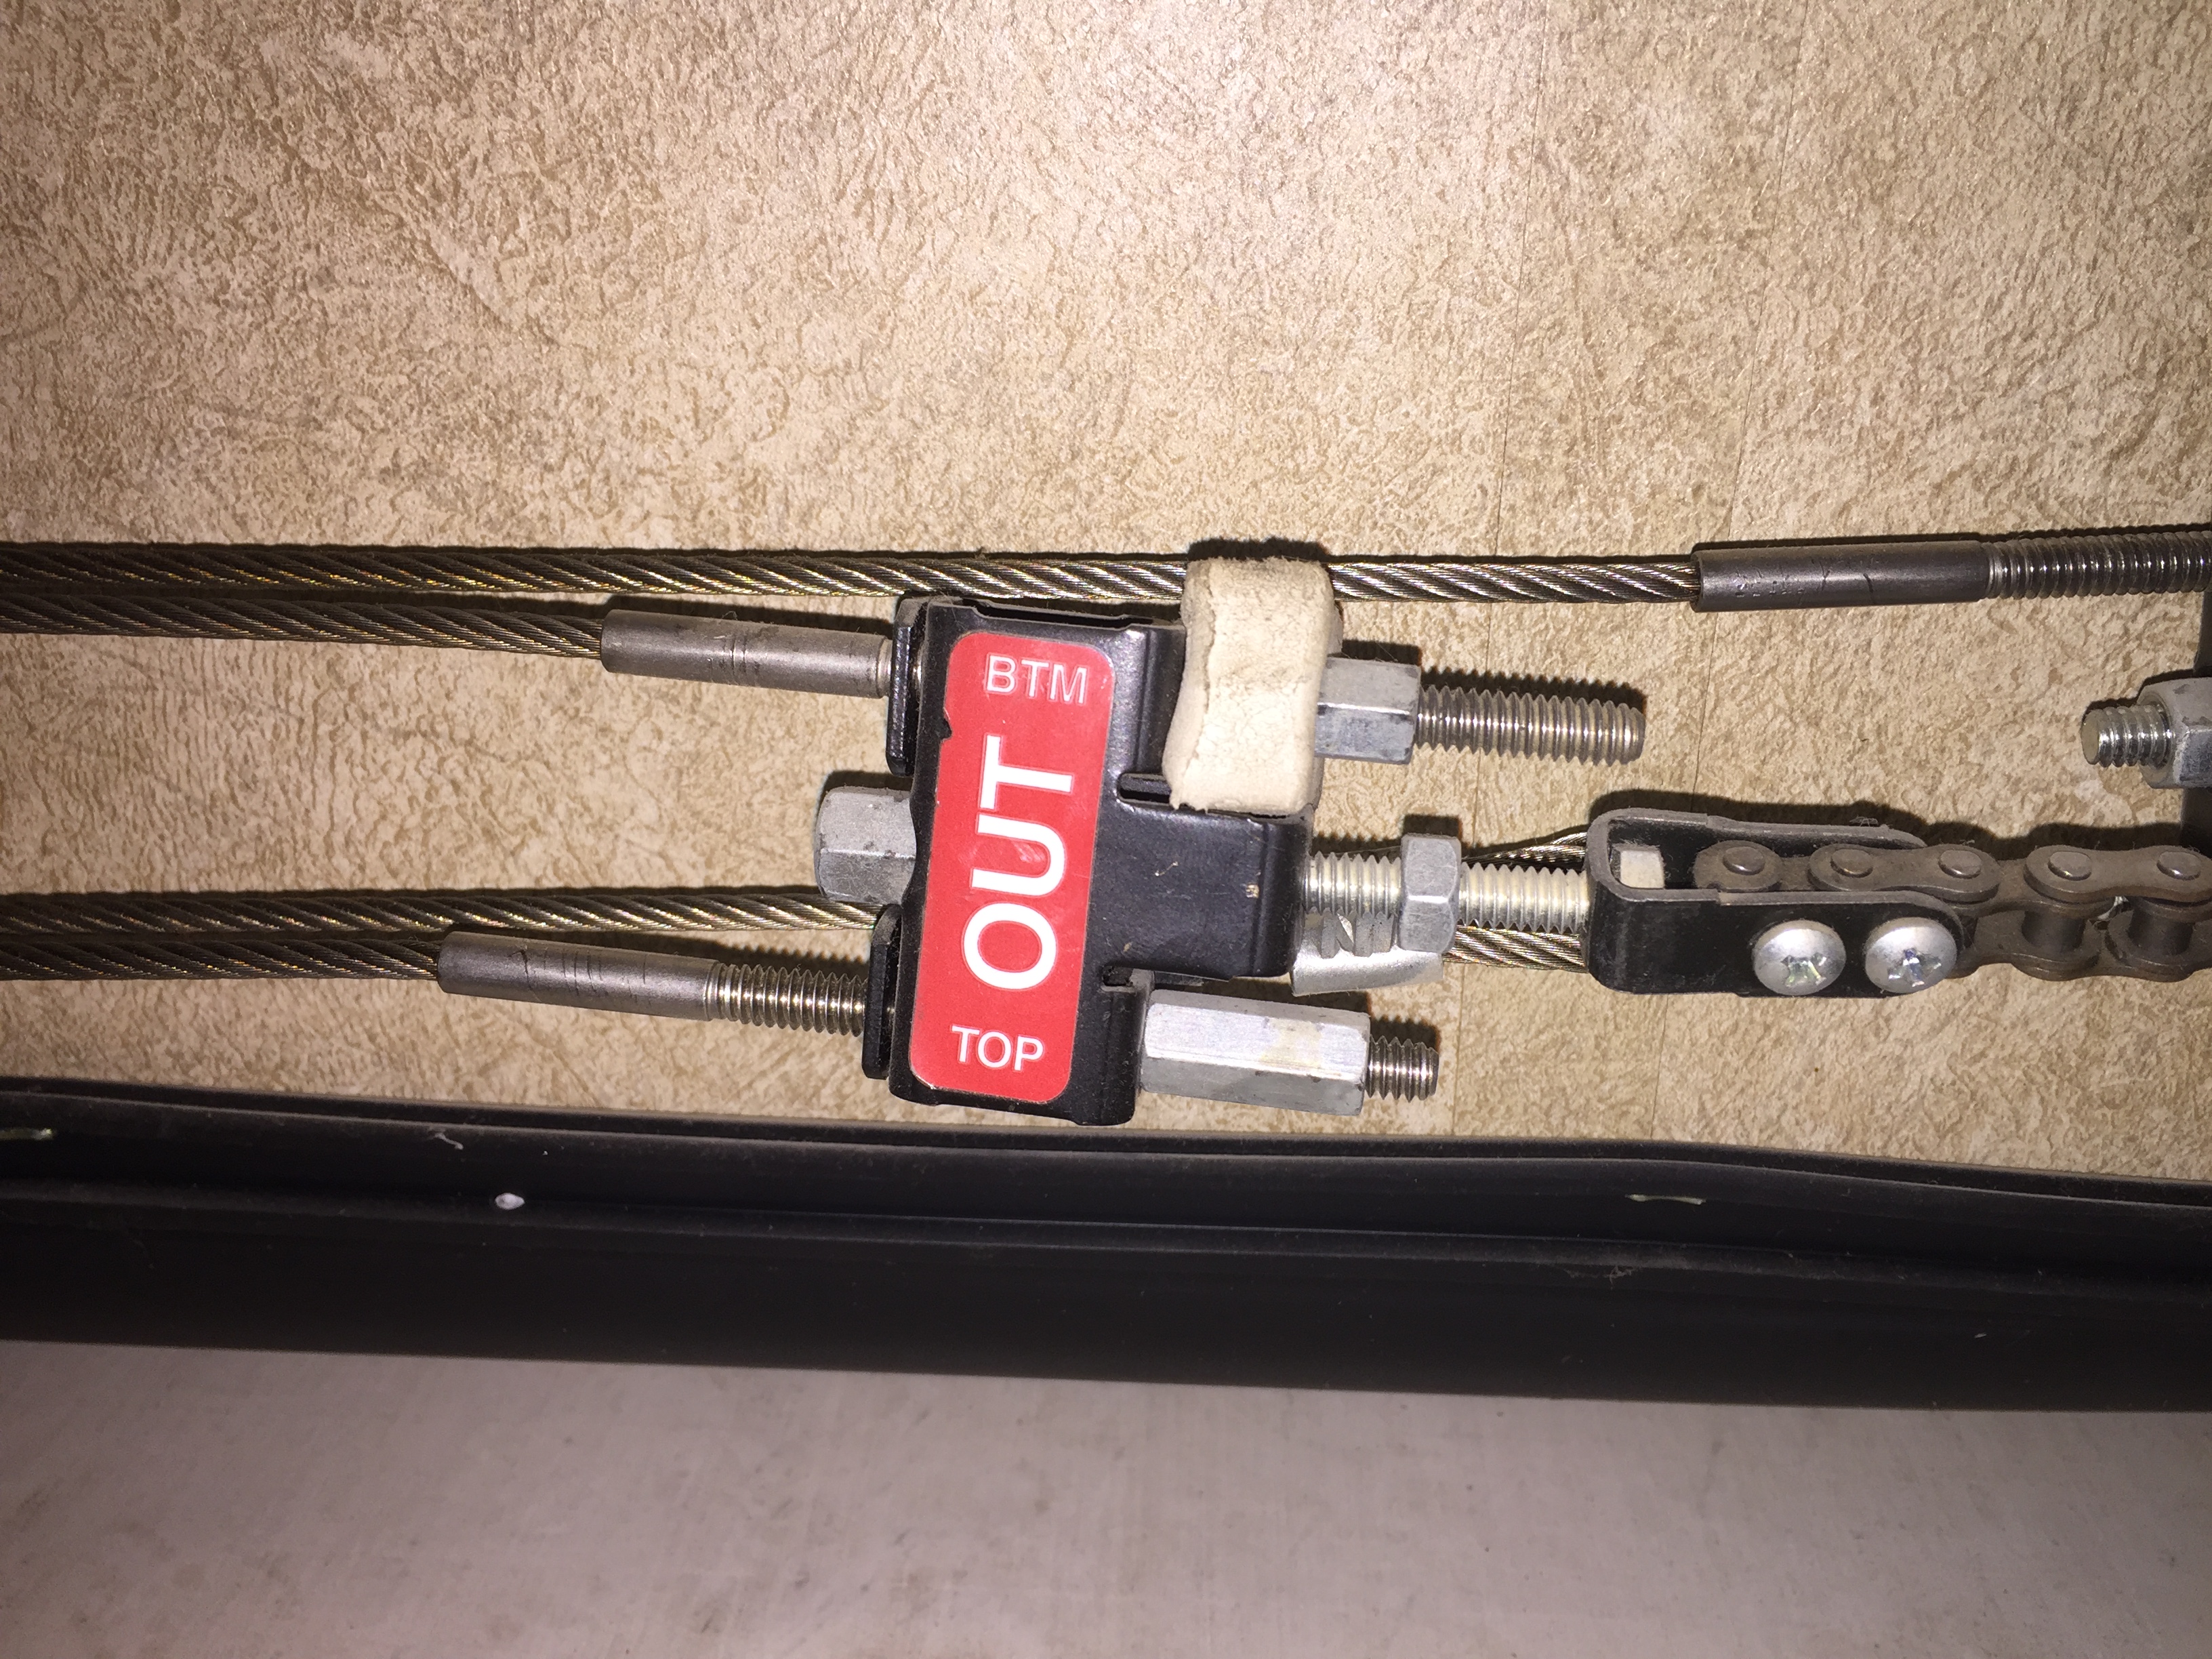
(There are two of these trolley brackets on either side of the motor/gearbox, one for in and one for out. )
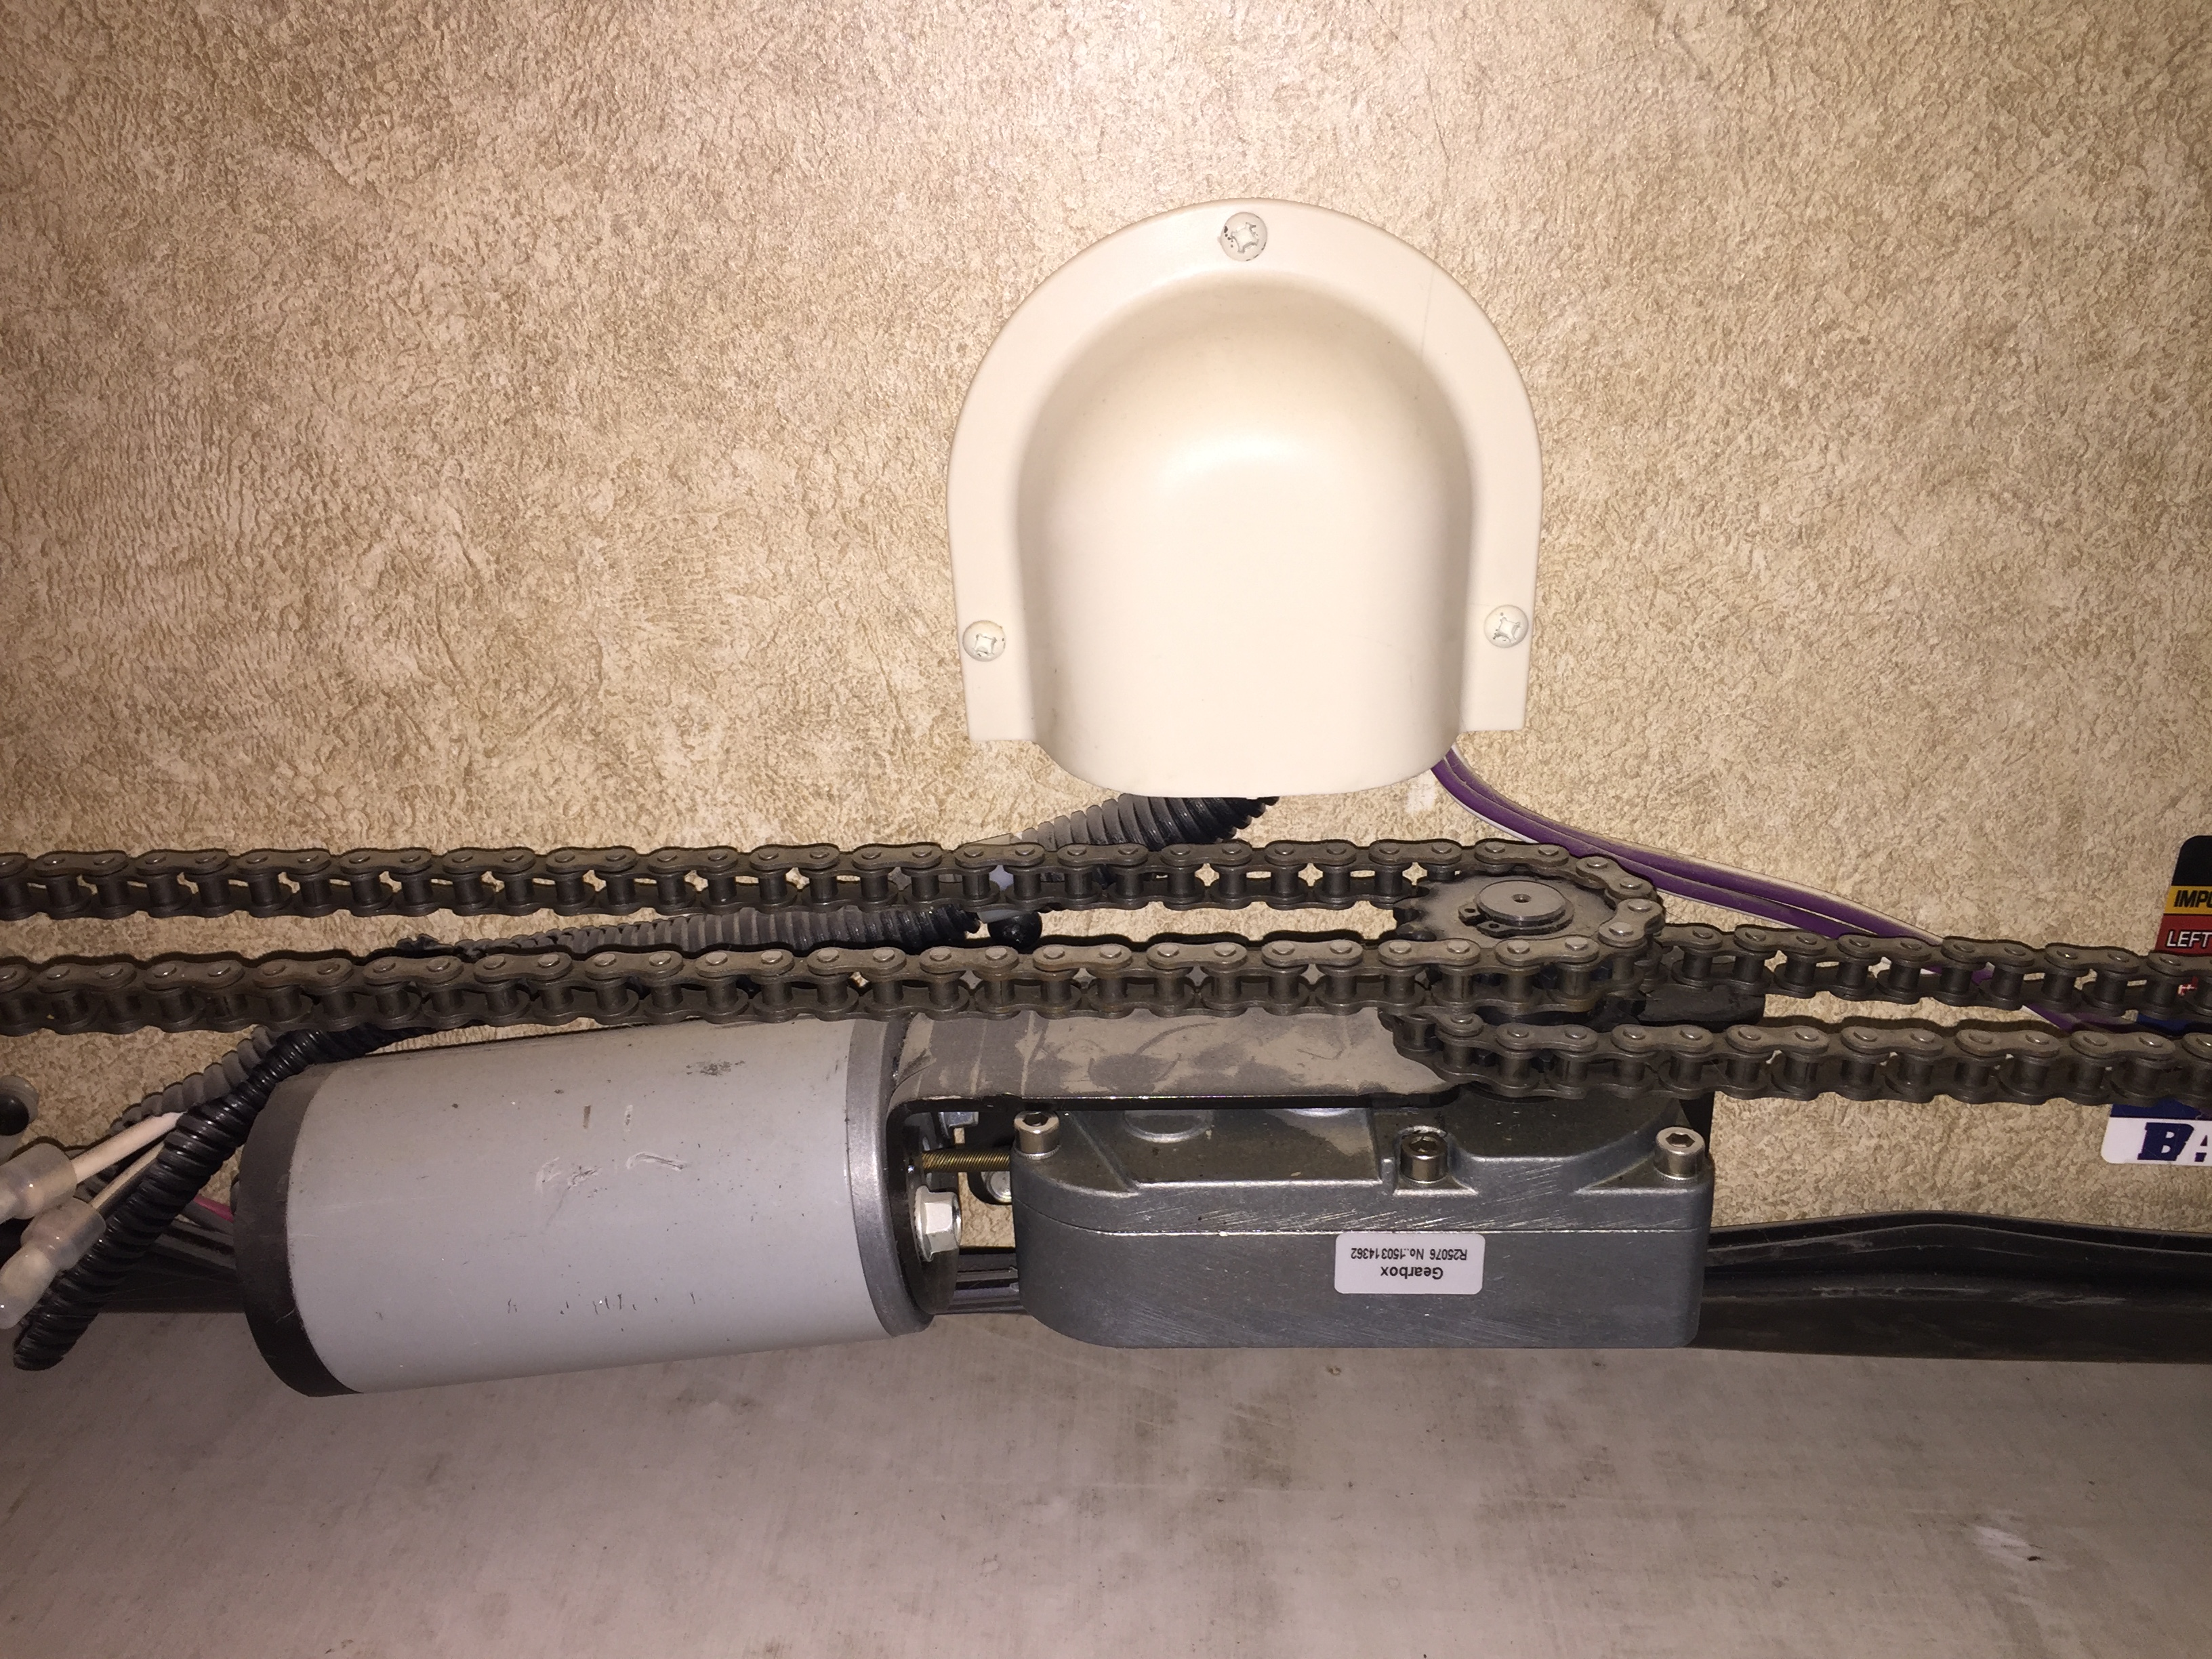
(So That’s eight cables total. Total of 40 cables for all of the slides in our rig! (At $27 per repair kit, that’s over $1000 to replace them all!!!) and at the motor there is a chain for each side, and it will either pull in or out depending on the direction the motor is turning. Everything is clearly labelled and color coded, and in the photo above just at the edge of the right frame there is a sticker with detailed instructions on how to adjust them.)
(Here’s the threaded trolley end of the broken cable, and the only thing I really don’t like about the repair kit is that in order to make one kit for all lengths, they’ve swapped out the threaded bolt for an eye bolt, which allows you to cut the cable, but it makes for a bulkier assembly and all of that stuff is pretty close together.)
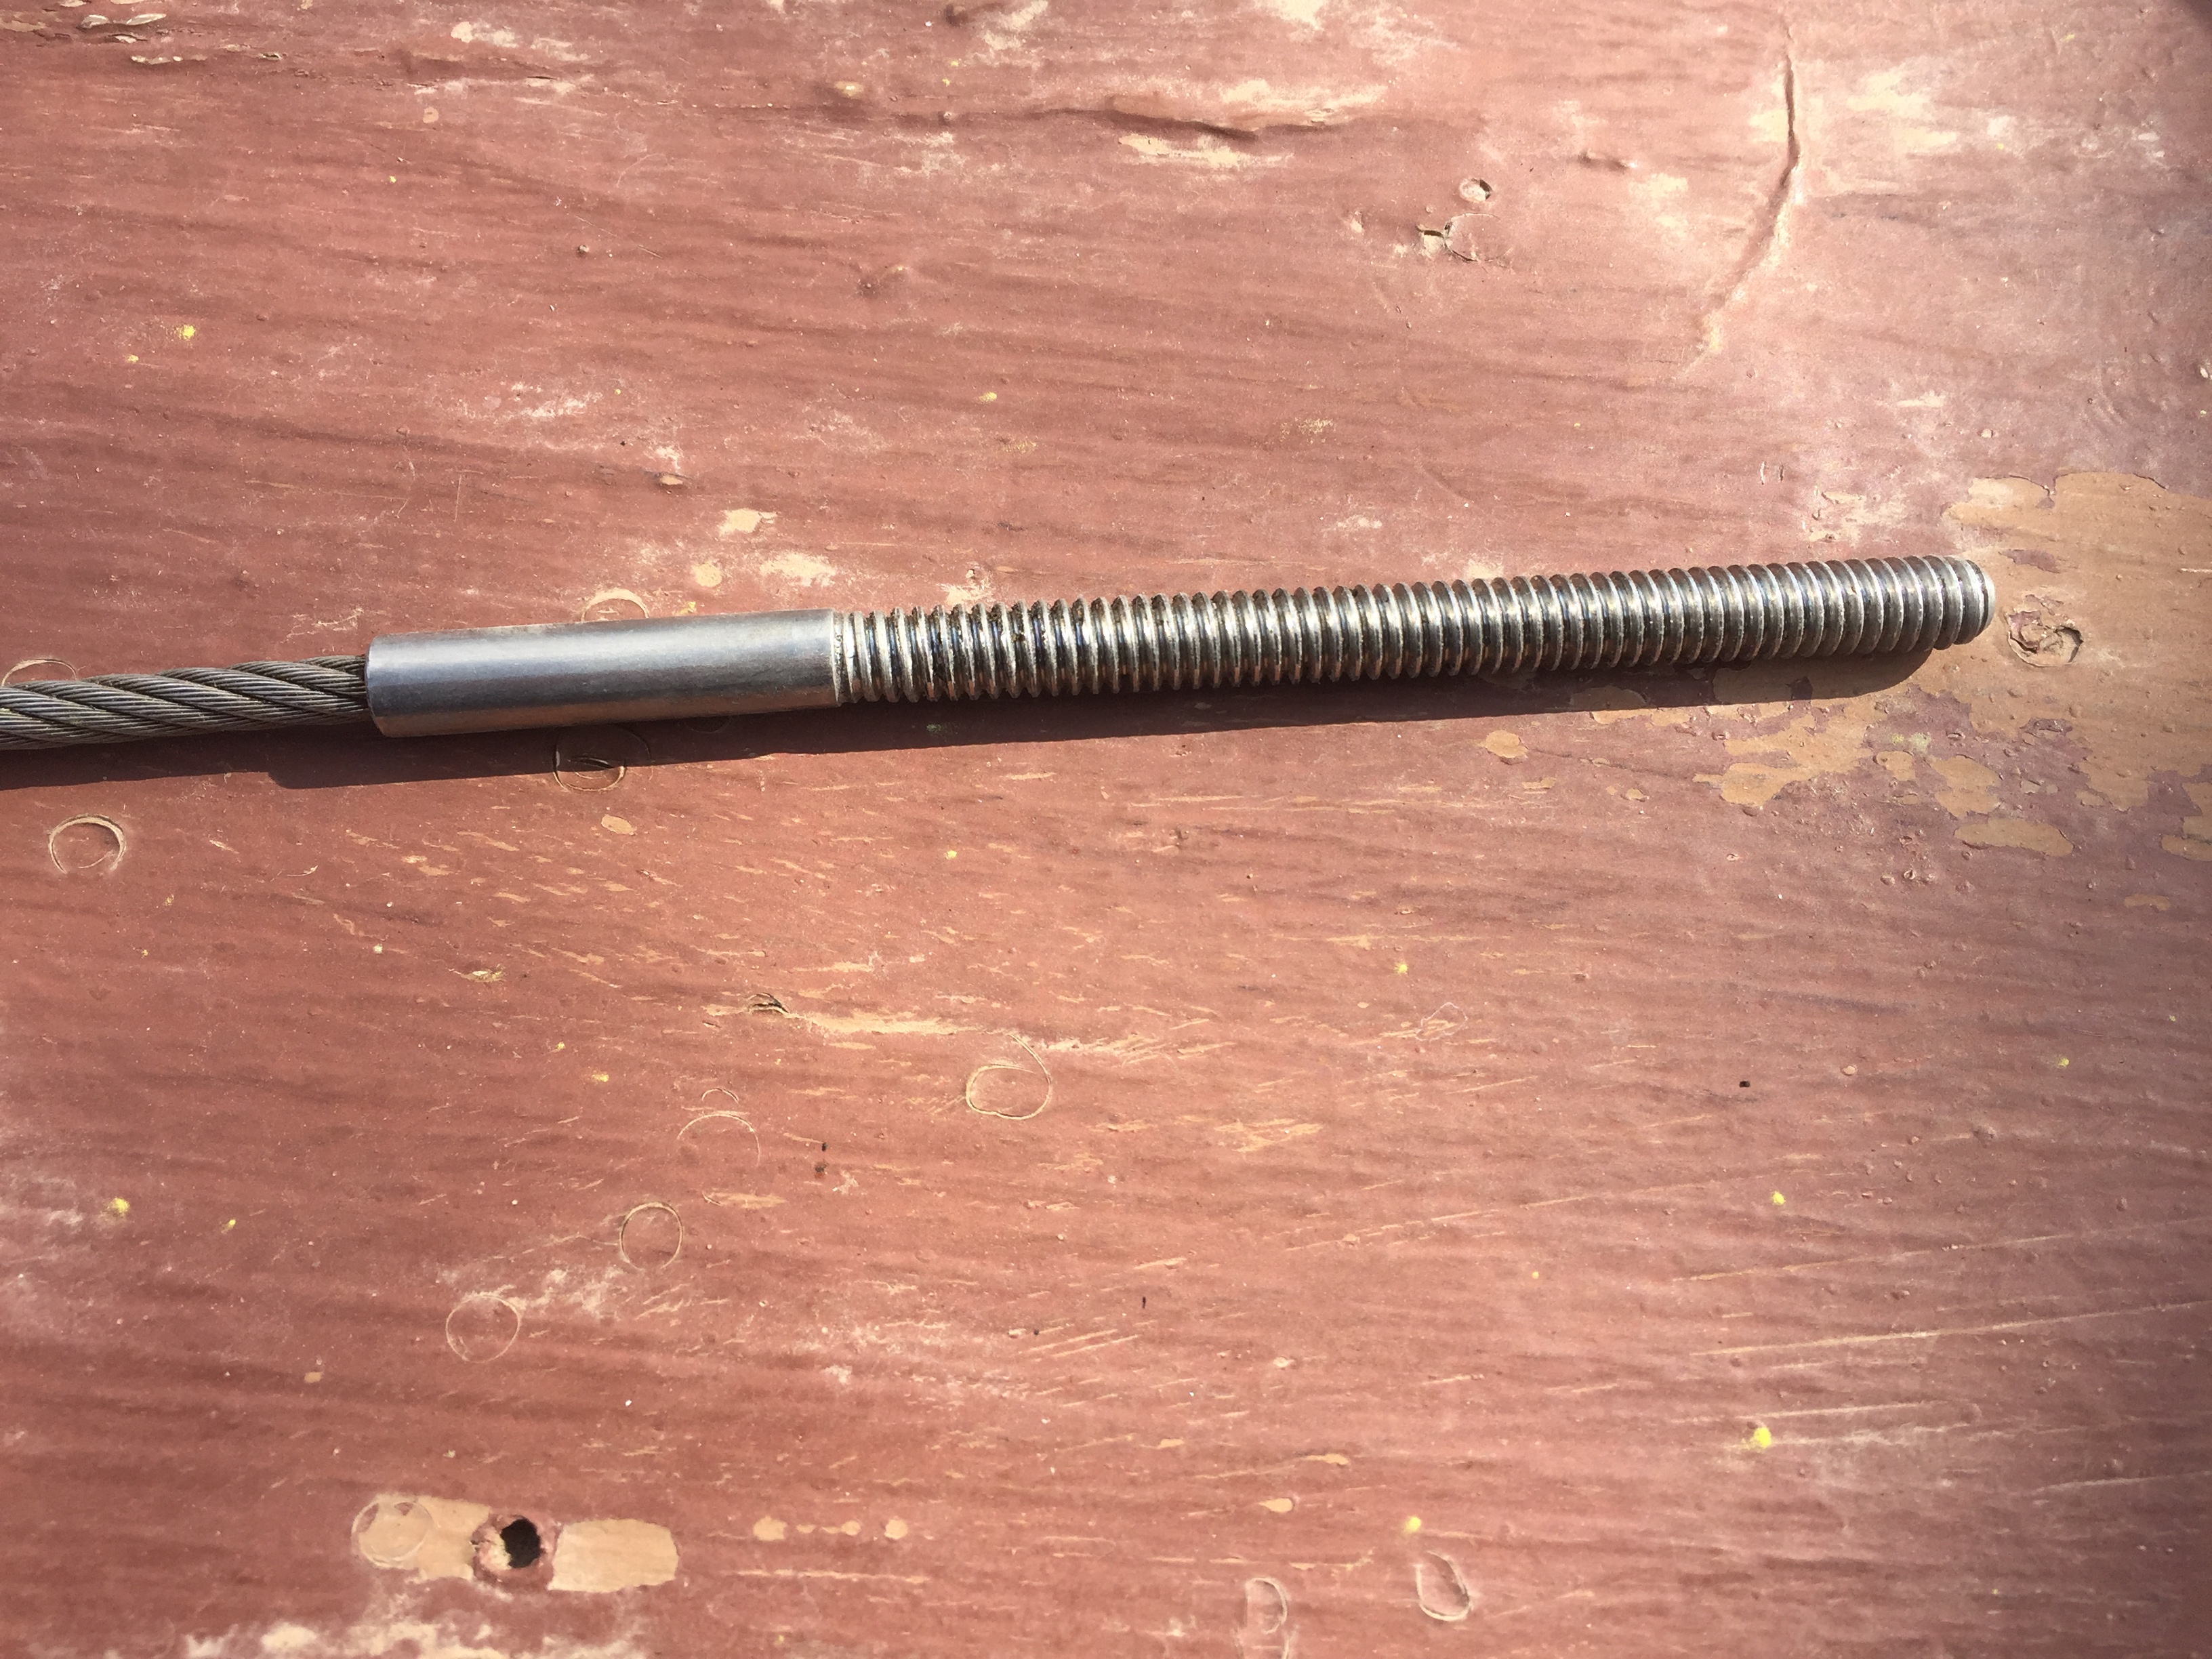
(When you are opening and closing slides, those trolleys pass each other with just millimeters to spare. If the eye gets rotated so that it’s horizontal instead of vertical, it can catch on the other trolley, and that would immediately break the shear pin in the gear box. I travel with three of those shear pins, but swapping out the pin requires removing the upper fascia, loosening all of the cables, un-threading the chain from the sprockets, removing the gear box, then putting in the new pin, and putting everything back together. Several hours of work. And getting the tensions correct on all those cables can be a real bear. When the tension is correct, you can “pluck” them and they make a musical note, but I don’t know exactly which one. If you know it, though, you can use a tuning app on an iPhone to dial in the tension on each cable, which is pretty cool. But…I digress….)
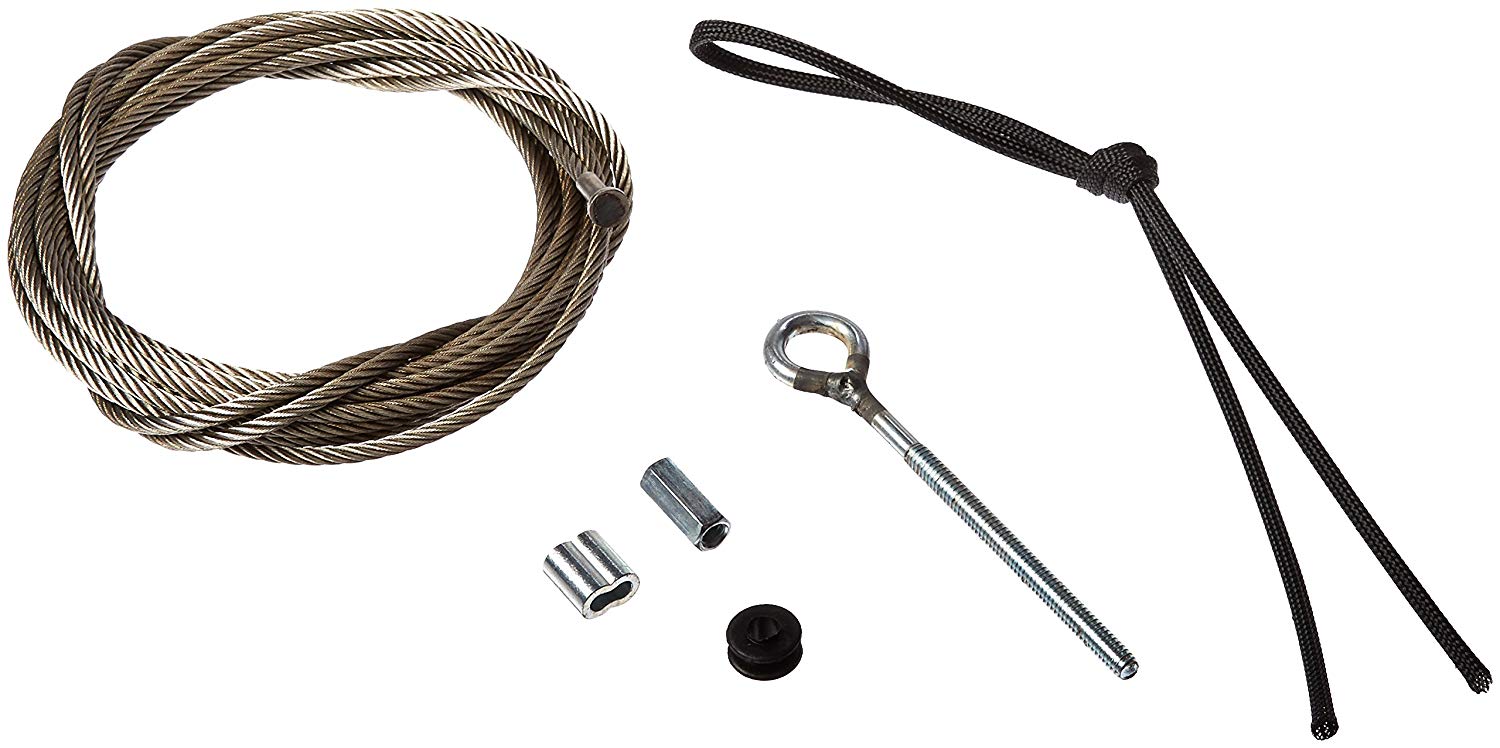
Replacing a cable is actually pretty straightforward on this model. The repair kit comes with a cable that is long enough for any slide, an eye bolt to attach the cable to the chain system, a ferrule to secure the cable once it’s fed through the eye. There’s also a “finger trap” piece to attach the old cable to the new to help feed it through the pulleys (that’s the long black piece), a rubber keeper that’s supposed to prevent the termination from coming loose in the bracket (but doesn’t) and an adjustment nut where the eye bolt attaches to the chain bracket at the motor.
 (Unfortunately, when one breaks you often end up with the broken ends unraveling, and in every case where we’ve had one break, the cable gets wound up and tangled up at the pulley, so there’s no way to pull it back out towards the bracket to attach the “finger trap”.
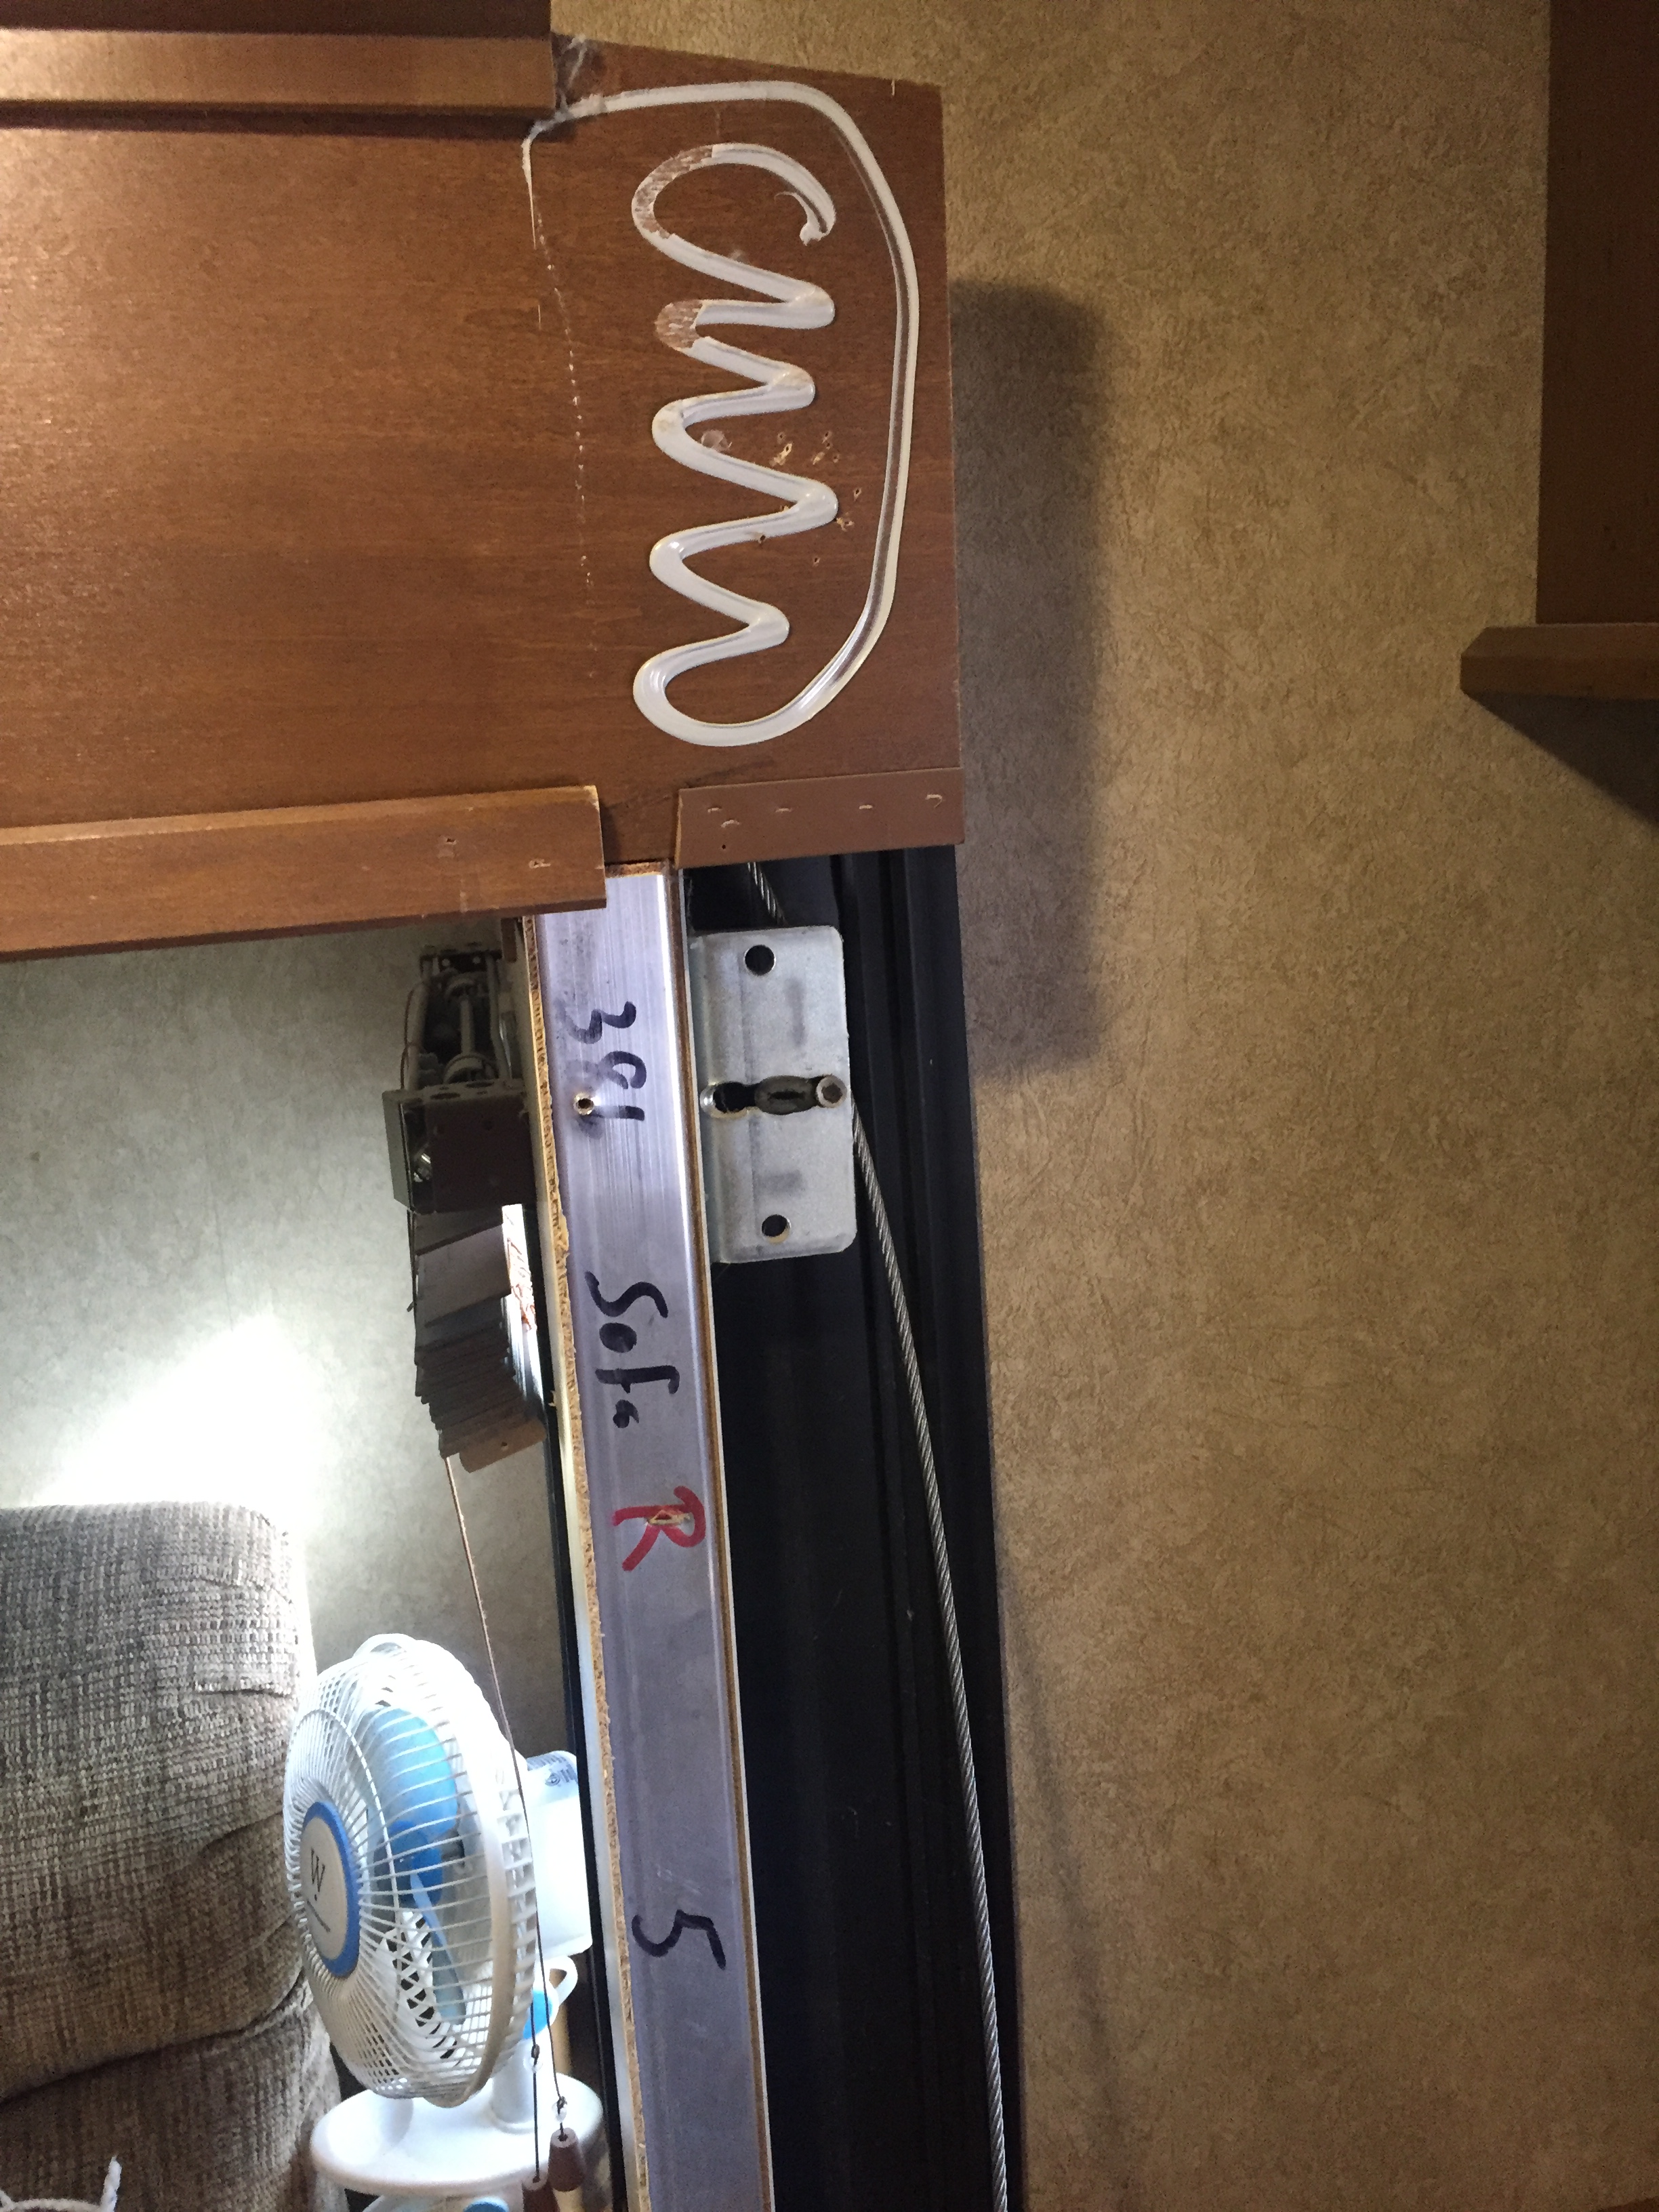
So I just pulled it out completely, and then removed the side fascia from interior slide wall so I could get to the pulley. Our slide fascia is held on the slide wall with screws, and the screw heads are covered by a small piece of trim molding which is just stapled on. Here’s one of the fascia pieces on the other slide, and you can see the trim pieces on the vertical fascia. Only the square piece with the star and the inside trim piece needs to come off. The star corner is also held in place with staples. )
And here’s the actual slide with the fascia removed. As you can see, by removing it I get that six inches or so of space between the slide and the cabinetry to work in. Without that this would be impossible.
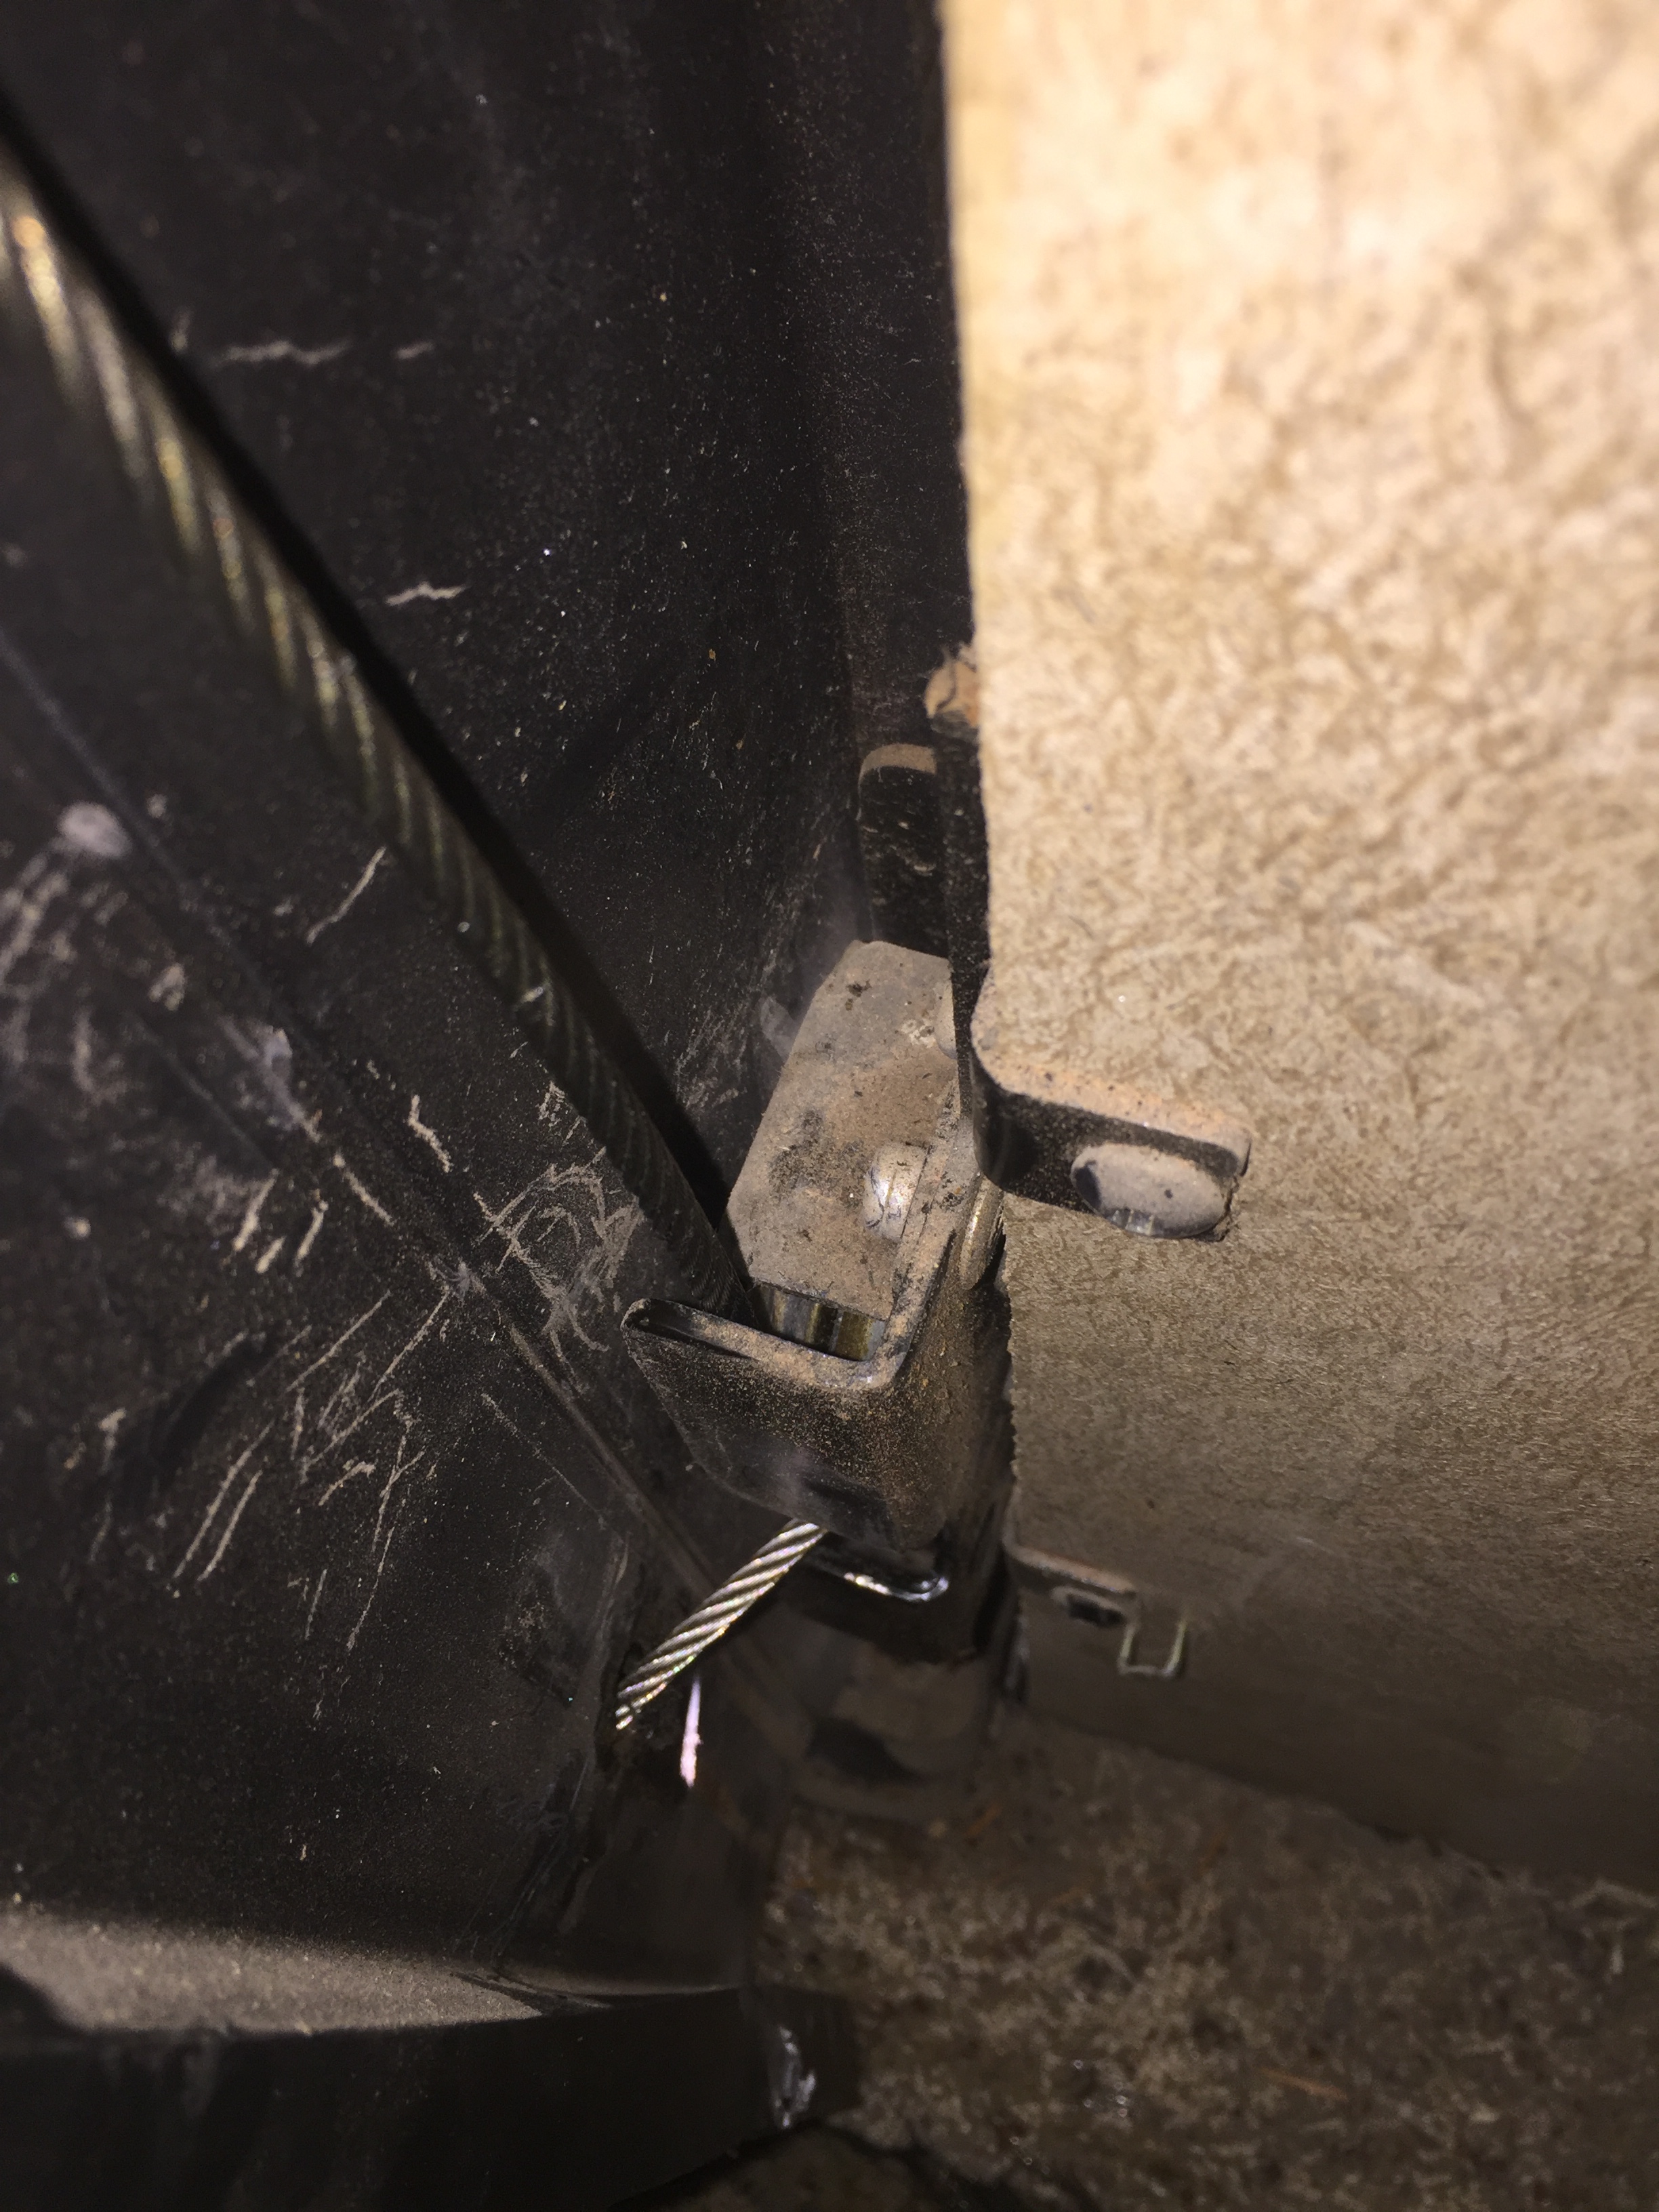
(Once I had access to the pulley and the hole in the wall, and had pulled out the old cable, I went outside. Outside, it’s just a matter of pushing the new cable through the hole in the wall and onto the pulley, then coming inside and pulling it a few inches farther and threading it up through the pulley and pulley bracket. If you look closely at the picture, just to the right of the cable, you can see the empty pulley. The cable you can see is the lower “OUT” cable, and the empty pulley is for the lower “IN” cable on that side of the slide. So I had to push the new cable in through the hole from the outside, and it came out through that small opening at the bottom of the housing next to the other cable. By pulling four or so inches of cable past the housing I was able to then push it back though the opening and up, and pull it tight.)
(Once you have it through the pulleys and up to the chain mechanism, you remove the old cable bolt, and put in the eye bolt. Then you crimp the ferrule and cut off the excess cable. A little bit of tightening and adjustment (think turnbuckles) to make sure the pull is balanced on all four corners, and you’re done.
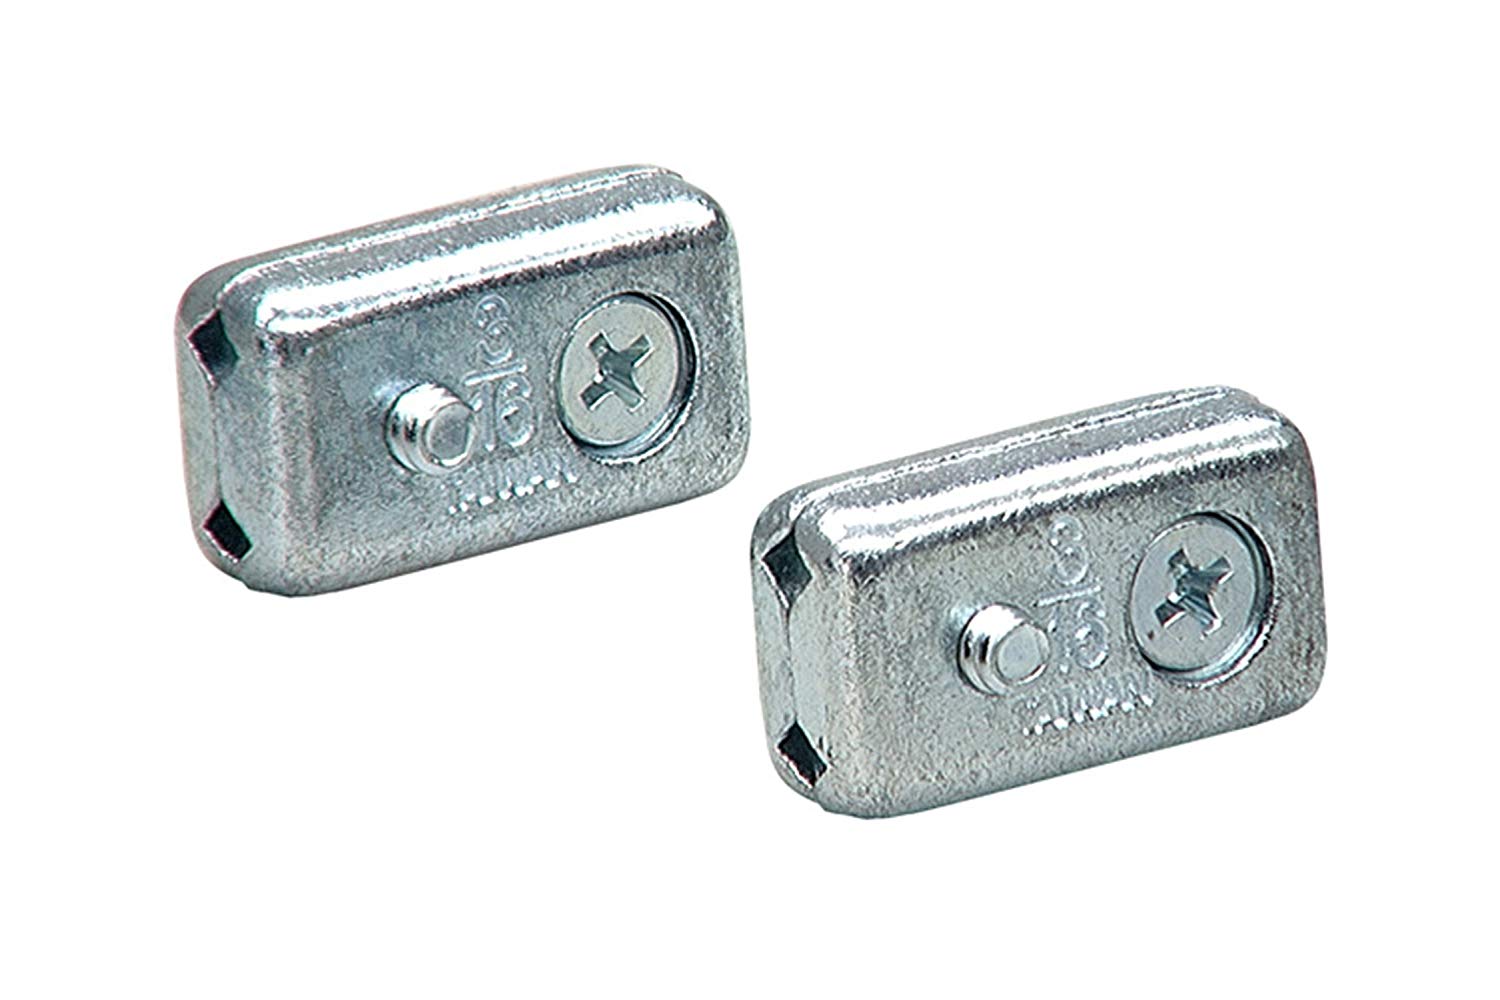
I had a couple of “backup” repair kits, mainly because they don’t take up a lot of room, and when you need one, they’re not always a stock item, and can be a pain to get. It’s better to just have a spare or two. However, I do NOT have a set of bolt cutters for the cable, or a ferrule crimp, which is what is needed to clamp the cable loop around the eye bolt, which you can see in this picture. I was trying to decide if I could just muscle and cajole the ferrule closed, and worrying what might happen if it failed, and looking through some miscellaneous hardware when I came across the solution. Back in December when I bought a bunch of pieces parts to make a dog run, I got some nylon coated cable and in case I needed to shorten it and make a new end loop, I bought a set of screw-down wire rope clamps. So, I was able to use those to temporarily secure the eye bolt until I can get a ferrule crimper to do the job properly.)
(Those worked just fine, and I was able to connect the new cable and eye bolt to the bracket, and run the slide in and out with no problem.
Here’s the finished repair at the chain connection. I used a little tape to hold the loop in place while I tightened down the cable clamps so it wouldn’t slide around. I probably could have used just one clamp, but since they’re not quite as solid as a ferrule I decided to use both. Better safe than sorry. )

(I left the excess cable, because it’s REALLY hard to cut it without bolt cutters, and I left the fascia off so I won’t have to remove it when I finish up the job in a few days in Phoenix.
(UPDATE 3/24/19: Finally, here’s my recommendation for anyone with cable drive slides: From time to time, inspect ALL of the cables and terminations. When all of the slides are OUT, walk around the outside of your rig and take a good close at where the cable goes into the bracket, same thing with the inside terminations when the slides are IN. Look at that termination and: A) make the rubber stopper is in place to keep the termination from sliding to the side and popping out. B) check to see if the termination is properly seated in the hole. If it’s at an angle, try to wiggle it loose and seat it properly. C) See if the cables are tensioned. The cables on the OUTSIDE of the rig are the ones that pull the slide IN, so when they slides are OUT there should be just a tiny bit of slack on the cables. If you push down on the cable in the middle between the bracket and the sidewall, it should only deflect about an inch or less. Any more than that and they are probably too loose. If you aren’t completely comfortable adjusting the tension, pay someone to do it. The cables/terminations/brackets on the INSIDE of the rig are the ones that pull the slide OUT, check them too. D) Check the terminations to see if they are splitting or cracking, or if the cables are deforming or fraying anywhere. And E) keep a few sets of the repair kits in your rig, even if you aren’t going to do the work yourself, it’s a lot faster to get it repaired if you can call a tech and tell him you already have the kit!)
Back to Tracy….)
So I calmed down, realizing that I wasn’t doing it alone. I’m still not crazy about how fragile these things are, but what are you going to do? It’s part of the cost of living in a home on wheels, and I can either complain about it or accept it. If things break and he can fix them…then I accept it.
One last thing. I finally had a moment to go through my emails and blog comments and the support of this community is beyond anything I have ever experienced. Someone reached out and offered us a place to stay while our rig was being worked on in Phoenix. Another person reached out and said they work in the insurance industry and could help navigate the medical bills when they start rolling in. A third researched RV dealerships and gave me information on car dealers in the Arizona area for some work we need to have done on the truck. I am literally crying while typing this. I am not a person who asks for help much, and to receive such an outpouring of love and support is humbling. Thank you all, it means more to me than I can say.
(Also, I wanted to thank everyone for all the kind comments, and generous thoughts about my heart attack and recovery. It’s genuinely nice to know there’s so much warmth and caring out there. -Lee)
Supporting our Blog
We very much appreciate your support of our blog. You can help by doing any or all the following:
- Make purchases via our Amazon website links. There is no additional cost to you, and a portion of the proceeds help support our blog. Search Amazon.com here
.
- Purchase the ebook telling the story of how we became full-time RVers.
- Purchase our recipe book filled with 80 recipes we have cooked in our RV and taste tested by Lee himself. You can purchase the kindle or paperback version on Amazon or buy the Apple version on Itunes.

Just a thought for Hobie’s potty stops. When our dogs were puppies, when they would go pee, we would say something like “get busy” and treat them immediately. Now they both know get busy when I say it. So it makes it easy when I need them to go. Not sure if this would work for Hobie, bit just a thought.
I usually treat him back at the RV but I think carrying them with us is a great idea!
Wow! I always wondered how those slide cables worked. Our bedroom slide cable broke the day before we were to take delivery of the rig in May 2015. Luckily for us the dealership had to fix it. Not so lucky was the fact that we needed to vacate our sold home but it all worked out in the long run as things always seem to do. I may just hire Lee to take care of it next time. 🙂
That “Center for Mental Wellness” sounds PRETTY SWEET. So glad they had an opening when you needed it the most! Enjoy your time in Phoenix. Love and hugs,
Julie and Casey
PS Jack is THE BOMB!
❤️
Center for mental Wellness, I love it. 🙂 Like Leslie above we got Max trained to go pee with a special command “go pee” it’s worked for years. It lets him know he’s out there to do his business and not a sniffing walk. Sometimes “go poop” actually works. I’ve heard someone use “find your spot” which I like, but Max was already trained on “go pee”.
How did you train him?? Did you say it before or after?.
Just as our dogs were squatting to go pee I would start saying the phrase while they were doing it) it can be whatever you choose) 😀. Then reward as soon as finished. It might take awhile now, but he will get it. I still say it occasionally to reinforce it.
Working on that and it seems to be working although he still likes to poop on the pavement
As soon as we got outside I would say Go Pee every once in a while, especially when I saw him starting to lift his leg. As soon as he peed I would say good boy and give him a treat. Even now I sometimes need to say it a couple of times. He knows what it means and what he’s supposed to do, but he likes to check his email and FB page first. 🙂
Like you, we’ve always driven right through El Paso, never had an issue. Also, we stayed at the same campground in Las Cruces, but there was a few inches of snow on the ground which covers a multitude of sins. 🙂 My parents have a dog, Luke, who has a bladder of steel. That dog will sleep all night and still refuse to go out to pee if it’s cold. Jack might be one of those, and if so, consider yourself lucky. You’ll get to sleep in! 🙂